Table of Contents
Advertisement
Quick Links
Attention: when installing the casing
•
Adjust screw position as bench cut out size.
•
If length of screw is not enough long (RHS/LHS screw) please change with longer
screw (M5x80) which included in packaging
•
Confirm that six screws are secured firmly into the casing. (Eight screws are included.)
The fixing Screw M5 x 30 / M5 x 80
Each 2 Pcs
•
Confirm that the four screws are secured firmly into the top plate pushing plate.
(Four screws are included.)
The fixing Screw M5 x 30
4 Pcs
The fixing Screw x 4 pcs.
RB3SS-31-2x01
INSTRUCTION MANUAL
THREE-BURNERS GAS COOKER
040113
GEN
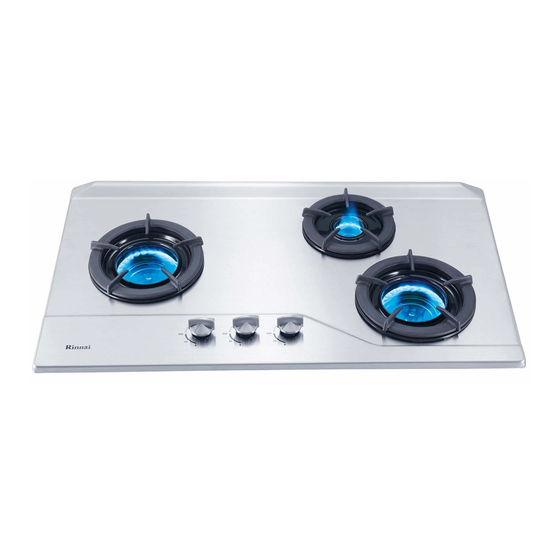
RB-3Si-C
Advertisement
Table of Contents

Related Manuals for Rinnai RB-3Si-C


Summary of Contents for Rinnai RB-3Si-C
- Page 1 The fixing Screw M5 x 30 / M5 x 80 Each 2 Pcs INSTRUCTION MANUAL • Confirm that the four screws are secured firmly into the top plate pushing plate. (Four screws are included.) RB-3Si-C The fixing Screw x 4 pcs. THREE-BURNERS GAS COOKER 040113 RB3SS-31-2x01...
- Page 2 In order to obtain the best results and to maintain your Rinnai Built-In Hob in the best condition, please Maintenance read the instruction carefully. • Wipe the tempered glass with a soft damp cloth and mild detergent Components and Features •...
- Page 3 2. Drip Pan Installation Fit drip pan into burner correctly, without any gap.(see Fig.3) • Install the built-in hob in well ventilated area and keep away from any combustible or inflammable object i.e. paper, oil, etc. • If the built-in hob is to be installed near any combustible surrounding i.e. wooden walls, wooden shelves, etc, there should be a distance of more than 15cm (6 in) away from the surrounding combustible.
- Page 4 3. Do not release the control knob for 2-5 seconds after the sparks have ignited the burner to activate the Features safety device. Otherwise, the ignition will fail. 1. The tempered glass and stainless top plate is beautiful and stylish. 4.
Need help?
Do you have a question about the RB-3Si-C and is the answer not in the manual?
Questions and answers