Table of Contents
Advertisement
Advertisement
Table of Contents

Subscribe to Our Youtube Channel
Related Manuals for Hobie Mirage Adventure Island


Summary of Contents for Hobie Mirage Adventure Island
- Page 1 Hobie Mirage Adventure Island Owners Manual...
- Page 2 HOBIE WAY OF LIFE Congratulations on the purchase of your new Hobie Mirage Adventure Island and welcome to the Hobie sailing family. The Hobie Adventure Island cannot be outgrown (how do you outgrow fun?) and will provide years of enjoyment for everyone, from children through senior citizens.
-
Page 3: Table Of Contents
HOBIE MIRAGE ADVENTURE ISLAND OWNERS MANUAL This assembly manual takes you step- by-step through the set-up and sailing of your new Adventure Island, and will help you understand each part in detail. Setting up your Adventure Island PAGE Hobie Island Terminology........3 Sailing Basics .........15-17... -
Page 4: Hobie Island Terminology
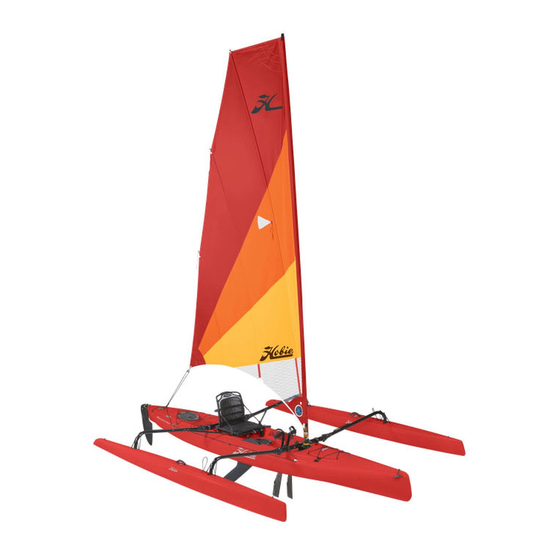
Adventure Island Specs SAIL Length= 16’ / 4.88m The sail is a “square-top” design, Main Hull Width= 27.5” / .70m utilizing the latest technology in sail design for optium performance. Width Amas Out= 112” / 2.84m Width Amas In= 42” / 1.06m Total Rigged Weight= 115lbs. -
Page 5: List Of Parts
List of Parts When opening your new Adventure Island, be sure to check that all parts are present and that the boat is in good order. Find a good clean spot, lay out all of your components and run through the checklist. Hull and Crossbars 1. -
Page 6: Assembly Instructions
Pre-Assembly Instructions 4. Tie a knot at the end of the line to prevent it from Mast and Sail Assembly falling off the batten. 1. Find a large clean area where you can lay the sail flat. 5. The Island’s composite mast is 2-piece, so simply slide the top of the mast into the lower end. - Page 7 8. Now rotate the base of the mast so that the hole on the mast collar aligns with the line. Feed the line through the hole and back up to the sail sleeve. Pull some tension in the line and cleat off the end of the line into the jam cleat on the sail sleeve.
-
Page 8: Island Assembly
Island Assembly Removing the Akas To remove the aka bars from the deck mounted The instructions below will help guide you through the bars, squeeze the two most efficient way to assemble your Adventure Island. b u t t o n s o n t h e d e c k Depending on how you transport your kayak (roof racks/ mounted crossbar and trailer), you may be able to eliminate some steps. - Page 9 I n s t a l l i n g t h e 4. Unwrap the furling line Mast from the mast and feed Note: Installing the it through the cleat as mast can make the shown. kayak a little tipsy when transporting on the wheels.
-
Page 10: Understanding The Working Features
Understanding the Working Furling and Unfurling the Sail Furling and unfurling the sail is the process of rolling and Features of your Adventure unrolling the sail around the mast. Island Before attempting to unroll the sail, make sure the furling line is uncleated. -
Page 11: Reefing The Sail
Reefing the Sail When a sail is reefed, it is in a semi-furled state to reduce the sail area. By doing this you reduce loads on the boat that could be dangerous in squall or high wind Rudder lift UP cords conditions. -
Page 12: Daggerboard
Daggerboard The daggerboard provides sideways resistance to keep the boat from sliding sideways on the water. To install it, simply slide the board into the small elongated hole near your mesh covered pockets. When it is all the way down, stretch the Bungee cord and feed it through the padeye behind the map pocket and loop it over the eyelet post near the right hand side of your seat. -
Page 13: Miragedrive
Squeeze the adjuster handles located on the pedal Maneuverability cranks. Hobie Islands come with a rudder system that is designed to flip up when beaching. While squeezing the adjuster handle, move the Scupper Hole(s) pedal crank to the most Drain holes (scuppers) in the cockpit or cargo area allow comfortable position. -
Page 14: Basic Kayak Features
Pedaling First, adjust the pedals to accommodate your size as After using in salt water or dirty water, wash the Hobie shown on page 12. Adjustments can be made for a MirageDrive with fresh water. Allow to dry, then spray variety of leg lengths. -
Page 15: Seatback
Hobie will recycle your boat when you are done with it. To Hobie Mirage seatbacks recycle a Hobie, it must be cut up so it fits in a box with an adjustable plug-in method of the following dimensions (for UPS): may not exceed 130” attaching to the hull. -
Page 16: Sailing Basics
Sailing Basics There are short ribbons (tell tails) hanging on either side of the sail. Follow the diagram below to get optimum You are now ready to go. Please review the following performance out of the sail for all angles of sailing. pages for sailing and maintenance tips. -
Page 17: Righting
DOCKING Properly docking the Hobie Adventure Island will prevent damage. Always furl the sail and approach the dock under power of the MirageDrive. As you... -
Page 18: Transporting The Adventure Island
Transport: Now remove one of the extra pins and install it through the hole on the end of the crossbar brace and feed the Here are two choices of rudder position during transport. ring pin through the hole in the spare pin. Make sure Depending on the mode of transport and user’s prefer- that you go through the aluminum tube and the plastic ence;... -
Page 19: Launching
LAUNCHING AND RETRIEVING Caution Prepare your boat for launching at the top of the ramp Boat and mast should be securely attached to the or parking facility. When backing up to the water, avoid trailer with adequate tie-down straps. Failure to dunking wheel bearings whenever possible. - Page 20 • Be aware of your physical and skill limitations. hobiecat.com Do not take the Hobie Mirage Adventure Island out in the surf or head out in the ocean unlesss you are an For your nearest Hobie Dealer extremely experienced sailor.
Need help?
Do you have a question about the Mirage Adventure Island and is the answer not in the manual?
Questions and answers