Table of Contents
Advertisement
Advertisement
Table of Contents

Related Manuals for Hobie Mirage Tandem Island


Summary of Contents for Hobie Mirage Tandem Island
- Page 1 Hobie Mirage ® ® Tandem Island Manual...
- Page 3 In 1950, Hobie’s dream was born in his parents’ garage when he decided to apply his love of woodworking to the sport of surfing. Dad backed out the Buick... Hobie carved out his very first surfboard... Hobie’s business of fun had begun.
-
Page 5: Table Of Contents
Safety ........................42 Warranty ........................50 The Hobie Island Club is a place to meet other Hobie Mirage Adventure Island and Hobie Mirage Tandem Island owners to share passions for the waterways and oceans of our world. Hobie Dealers are organizing local Island Clubs worldwide. -
Page 6: Anatomy
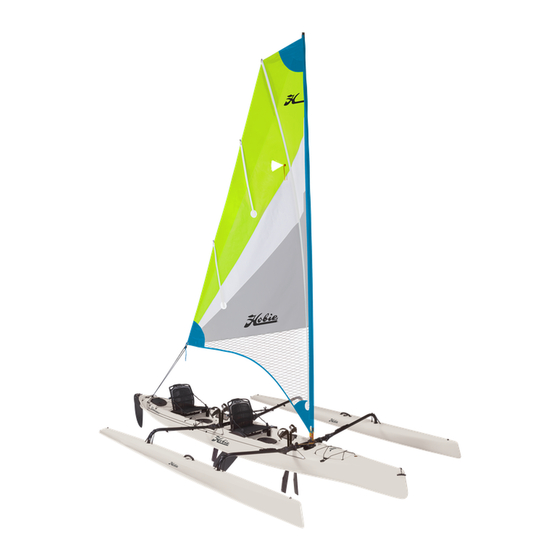
6 | Anatomy 1. Hull 2. Vantage CT Seat (x2) 3. MirageDrive GT Turbo (x2) 4. Paddle and T-Handle (x2) 5. Lowrance-Ready Components 6. Cassette Plug (x2) 7. Akas (4) 8. Aka Carry Bag 9. Mast (2 piece) 10. Sail 11. - Page 7 Anatomy | 7 hobiecat.com Island Terminology Sail Battens The sail is a “square -top” design that utilizes the current Battens are long fiberglass trend in sail design for better rods that are inserted into the performance. sail to give it stiffness and help maintain sail shape.
- Page 8 8 | Assembly Required Mast/ Sail Assembly Slide the two halves of the mast together Insert the assembled mast into the sail sleeve Insert the webbing at the top of the sail into the mast Feed the downhaul line through the loop on the mast collar.
- Page 9 Assembly Required | 9 hobiecat.com Feed the battens into the batten pockets (note they are different lengths per the different length pockets) Slide the batten cap over the ends of the battens and lace the line through the cap. Make sure to pull tension on the line and cleat it off to hold on the cap and retain batten pressure into the pocket.
-
Page 10: Rudder Installation
10 | Assembly Required Rudder Installation Place rudder over rudder gudgeon and insert pin Place the ring through the hole in the end of the rudder pin Lift rudder up/down control lines and make sure they are running through the middle of the rudder pin. - Page 11 Assembly Required | 11 hobiecat.com Aka Installation Slide the akas into the deck mounted crossbars until they click into place. CLICK Once the akas are inserted, pull out on them to make sure they are locked in place. Aka Removal To remove the akas, depress both buttons at the same time on the...
- Page 12 12 | Assembly Required Diagonal Crossbrace Lock Push in and hold the diagonal crossbrace end Place end cap over ball fitting on boat Release end cap and check to make sure it is locked onto the boat...
- Page 13 Assembly Required | 13 hobiecat.com Ama Installation Slide the ama onto the aka tubes Stretch both Bungee® cords over the buttons on the corners of the akas.
- Page 14 14 | Assembly Required Mast Installation Watch for overhead power lines when handling the sail and mast. NEVER rig, trailer or sail the boat near overhead power lines. Mast contact with power lines could be fatal. Insert the mast through the forward crossbar bearing and into the hull until it goes all the way down...
- Page 15 Assembly Required | 15 hobiecat.com Feed the furling line attached to the mast collar throught the cleat Mast Removal Pull back on the mast lock lever and pull the mast up out of the boat...
- Page 16 16 | Assembly Required Mainsheet Attachment Making sure that there are no twists in the line, attach the mainsheet hook to the grommet in the sail. Sail Storage To store the sail in the rolled position, wrap the line around the sail and hook the knot into the hook sewn to the sail.
- Page 17 Vantage CT | 17 hobiecat.com Anatomy Vantage CT Video Kickstand Activate Handle Molded-In Kickstand Shelves Front Up/Down Adjust Recline Adjust Front Up/Down “Key” Seat Bottom Frame “Shoe” Lumbar Adjust ® Leash Kickstand Items not shown to scale...
-
Page 18: Seat Installation
18 | Vantage CT Seat Installation Line up the front of the seat bottom frame over key and slide the back of the frame to the back wall in the cockpit. Put pressure on the front of the seat mesh and lift the back of the seat bottom frame to set the seat into the key. - Page 19 Vantage CT | 19 hobiecat.com Locate leash clip on seat bottom frame & eyepost on kayak firewall behind the seat. Line up the hole in the leash clip and the eyepost on the boat. Hook the leash clip over eyepost. Pull up on leash clip to lock onto eyepost.
- Page 20 20 | Vantage CT Front Up/Down Adjustment Pull lever out to activate front up/down adjustment. Lean back into seatback to raise the front up/ down adjustment. Use body weight in seat bottom to drop into a lower positon. Release lever to lock the desired position of the front up/down adjustment.
- Page 21 Vantage CT | 21 hobiecat.com Rear Up/Down Adjustment The seat is set to a default low position. LOW POSITION Move weight toward the front of the seat bottom mesh to raise the back of the seat. Pull “T” handle to activate kickstand. Set kickstand on the boat hull for mid- level seating.
- Page 22 22 | Vantage CT Recline Adjustment Pull lever out to activate seatback recline. While holding the lever out, push back into the seat to recline. Release lever to lock seat into position.
- Page 23 Vantage CT | 23 hobiecat.com Lumbar Adjustment Pull knob to release lumbar. Press knob to lock lumbar. Rotate knob to tension lumbar.
- Page 24 24 | MirageDrive Instruction Installation Lower MirageDrive straight down making sure the spine is level Level CLICK Press down evenly and CLICK lock drive into Click and Go’s Removal Pull back each Click and Go lever Level Lift drive straight...
- Page 25 MirageDrive Instruction | 25 hobiecat.com Pedal Adjustment Squeeze adjuster handle Squeeze Adjust cranks by rotating and clicking them into the desired position. Make sure both cranks are in the same position number. With both feet on the pedals together (fins straight down), your knees should be comfortably bent and not over-crunched or...
-
Page 26: On The Water
26 | On the Water MirageDrive Operation Shallow Water To raise fins in shallow water or when beaching, PUSH either pedal forward. - Page 27 On the Water | 27 hobiecat.com Rudder Down Uncleat and release the UP control line Pull the DOWN control line so it is tight and cleat the line. RUDDER MUST BE CLEATED TO WORK PROPERLY! Rudder Up Uncleat and release the DOWN control line Pull the UP control ine and cleat...
- Page 28 28 | On the Water Lower Centerboard Pull UP on the control knob to unlock Slide the knob back to lower the centerboard Raise Centerboard Pull UP on the control knob to unlock Push the knob forward to raise the centerboard...
- Page 29 On the Water | 29 hobiecat.com Folding Amas Out Pivot the amas out one at a time. Lock diagonal the crossbraces as outlined earlier in this manual. Folding Amas In Unlock diagonal crossbrace and fold the amas in. Stretch the Bungee underneath the rear aka over the eyelet post near the map pocket.
-
Page 30: Furling The Sail
30 | On the Water Unfurling the Sail Uncleat the furling line Pull on the sail or pull in the mainsheet to unfurl the sail Furling the Sail Making sure the mainsheet line is uncleated, pull on the furling line until the sail if fully wrapped... - Page 31 On the Water | 31 hobiecat.com Seat Speed Drain Pull “T” Handle to open drain. PULL TO OPEN CLEAT TO LOCK Cleat to keep drain open. Note: Pedal/sail at a brisk pace to evacuate water from seat well. Uncleat and release to close drain.
-
Page 32: Lowrance Ready Option
32 | Lowrance Ready Option Transducer Installation Metal clips Transducer is an optional 1/8” / 3mm fishing accessory and is not included with boat... - Page 33 Lowrance Ready Option | 33 hobiecat.com Thru-Hull Plugs Locate the thru-hull plug and unscrew the nut on the inside of the boat Remove the solid rubber plug Choose the correct plug for your wire size and insert wire by opening the plug along the slit Press the new plug with the wire installed into...
- Page 34 34 | Lowrance Ready Option Wire Installation Run the cable into the plug just behind the transducer scupper Lead the cable through the inside of the boat and exit the cable through the thru-hull fitting in the map pocket. If you prefer a right/left side screen location, there are plugs for the wire to exit on either side of the boat...
- Page 35 Storage and Transport | 35 hobiecat.com Storage Recommendations Storing your boat Hull cradles OK upright with properly fitting cradles is highly recommended. Storing your boat upside down on crossbars or hanging (main hull only) from wide strapping are other great ways to store the boat.
-
Page 36: Storage And Transport
36 | Storage and Transport Store out of Weather Additional Storage Key Points • Always open drain plugs and remove all water from boat • Don’t leave tie-down straps tight over a long period of time • Storing in non-recommended configurations can result in hull damage and can void your warranty •... - Page 37 Storage and Transport | 37 hobiecat.com Transportation The best way to transport your boat is to purchase a trailer or roof rack from your dealer. Using proper cradles that support the hull, the boat can be transported right side up. Straps can then be laid across the boat and tied to the bars. Straps should be tight, but not so tight that they distort the shape of the boat.
-
Page 38: Launching And Retrieving
38 | Storage and Transport Loading your Trailer The weight of the boat, equipment and additional gear should never exceed the trailer manufacturer’s rated weight capacity. Proper distribution of the load is of vital importance. Too much weight on the hitch will cause “tail dragging” of the towing vehicle, impairing steering and raising headlights into the eyes of oncoming traffic. - Page 39 Storage and Transport | 39 hobiecat.com Trailer Maintenance Lights: Most state laws require two red taillights on the rear that may be combined with the stop and turn signals. Vehicles over 80 inches in width require clearance lights. If lights are dunked, waterproof light fixtures should be used. If water is allowed to enter, the lamp may crack and short out the entire system.
-
Page 40: Maintenance And Care
40 | Maintenance and Care MirageDrive Regular Maintenance The most effective maintenance tool on your MirageDrive is a fresh water rinse after every use. Periodically spraying WD-40 on the chains will help keep the operation smooth. Checking Cable Tension Cables should be tight enough so they can only be slightly squeezed... -
Page 41: Rudder Tuning
Maintenance and Care | 41 hobiecat.com Rudder Tuning Loosen screw clamping the rudder line Pull the slack out of the rudder line making sure the steering handle is still straight. If they are not straight, adjust the lines accordingly. Wrap the line around the screw and tighten it to clamp the line and hold it in place. -
Page 42: Safety
Never: • Wear an approved personal flotation • Never go in flooded and/or fast device moving water conditions. Hobie kayaks are not designed for fast • Check your equipment prior to each moving water use for signs of wear or failure •... -
Page 43: Shakedown Cruise
Mirage Cassette Plug Your Hobie is shipped with a Mirage Cassette Plug. The plug is provided as standard equipment in the Mirage Kayak package. Insert the plug into the Mirage well when the MirageDrive is removed to provide added safety to prevent limbs or other items from slipping into the well and to “fair”... -
Page 44: Righting The Boat
44 | Safety RIGHTING THE BOAT The trimaran setup of the Hobie Island makes it extremely stable and nearly impossible to capsize under most conditions. However, unexpected events do occur, so it is important to know how to “right” the boat if it were to turn upsidedown. -
Page 45: Sailing Basics
5. Point the boat into the wind, unroll the sail and trim the mainsheet accordingly. Docking Properly docking the Hobie Island will prevent damage. Always furl the sail and approach the dock under power of the MirageDrive. As you approach the dock, release the locking crossbrace on the outrigger closest to the dock and pull it in next to the main hull. -
Page 46: Sail Power
46 | Sailing Basics Sail Power It is important to study the sail and become familiar with its characteristics in order to trim or make adjustments. When the front of the sail just behind the mast luffs, or flutters, in the breeze, you lose power. To start moving, pull the sail in just enough to stop the luffing. - Page 47 Sailing Basics | 47 hobiecat.com Fine Tuning Sail Trim There are short ribbons (telltales) hanging on either side of the sail. Follow the diagram below to get optimum performance out of the sail for all angles of sailing. The telltales react to air flowing over the sail and will help you see if the sail is pulled in too tight or not enough.
- Page 48 48 | Sailing Basics sailing terms, “falling off”) to the opposite point of sail rather than into the wind as when tacking. Care must be taken when attempting a jibe in high winds as the boat will be at full power and you cannot easily de-power it without turning back into the wind.
- Page 49 Sailing Basics | 49 hobiecat.com Changing Mainsheet Purchase The mainsheet system on the Tandem Island is designed to give you a 2:1 advantage over the force on the sail. If you want to make the easier on your hands, you can switch it to a 3:1 system. By doing this, you will ONLY be able to sheet in the rope from the front OR the rear seating position (not both).
-
Page 50: Warranty
Scan this QR code with your smart phone If you have a problem or question with your Hobie product, please see your Authorized Hobie Dealer. They will be able to assess the problem, assist with a repair and file a warranty claim with Hobie Cat Company if needed. All warranty claims must go through your Authorized Hobie Dealer. - Page 52 Hobie Cat Company Holding Company Oceanside, California, USA 1-800-HOBIE-49 hobiecat.com Hobie Cat Australasia Subsidiary Huskisson, New South Wales, Australia 1-800-4-HOBIE hobiecat.com.au Hobie Cat Europe Subsidiary Toulon, France +33 (0) 494 08 78 78 hobie-cat.net Hobie Kayak Europe Independent Distributor Stellendam, The Netherlands +31 (0) 187 499 440 hobie-kayak.com...
Need help?
Do you have a question about the Mirage Tandem Island and is the answer not in the manual?
Questions and answers