Table of Contents
Advertisement
Quick Links
Advertisement
Table of Contents

Related Manuals for Hobie Mirage Compass


Summary of Contents for Hobie Mirage Compass
- Page 1 Hobie Mirage ® ® Compass/Compass Duo...
- Page 3 In 1950, Hobie’s dream was born in his parents’ garage when he decided to apply his love of woodworking to the sport of surfing. Dad backed out the Buick... Hobie carved out his very first surfboard... Hobie’s business of fun had begun.
-
Page 4: Table Of Contents
Table of Contents Anatomy ............................ .5 Seating............................6 ® MirageDrive Instructions ......................8 On the Water ..........................11 Lowrance ® Ready Option ......................13 Storage and Transport ......................16 Maintenance and Care ......................19 Kick Up Adjustment.........................21 Safety ............................22 Warranty ...........................24 Please read through the instruction manual before using this product... -
Page 5: Anatomy
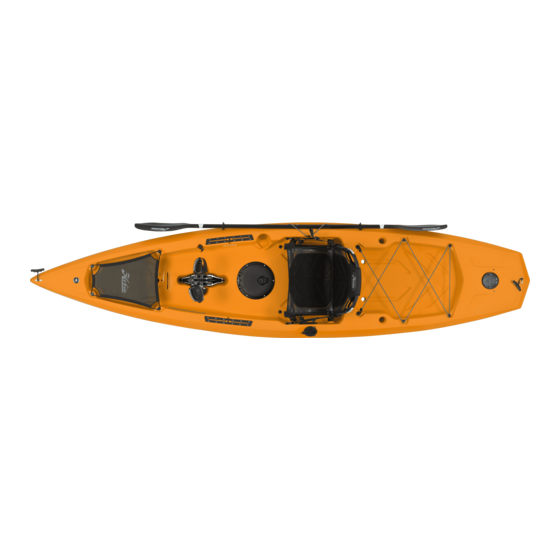
(DUO 1x MD180 KU and 1x MDGT KU) Seat - (x2 Duo) Cassette Plug - (x2 Duo) Lowrance Ready Kit Mirage Drive 180 Kick Mirage Drive GT Kick Up Fins Up Fins (Duo Only) Items not shown to scale hobie.com... -
Page 6: Seating
Seating Seat Installation Swing the under-seat kickstand fully forward. Snap the bottom seat frame into the two seat mounts. Stretch the Bungee over the seat frame tube and loop it over the seat mount hooks. - Page 7 Bungees to detach the seat from the boat. Clip the two seat back straps to the seat retention loops on the sides of the seat frame. Adjust the strap length so that the seat is in a comfortable upright position. hobie.com...
-
Page 8: Miragedrive ® Instructions
MirageDrive 180 Instructions Installation Lower drive straight down making sure the Level spine is level. Press down and lock drive into Click and Go’s. The drive locks CLICK automatically when installed. Removal Pull back each Click and Go lever Lift drive straight up... - Page 9 Make sure both cranks are in the same position number. With both feet on the pedals and together (fins straight down), your knees should be comfortably bent and not crunched or over extended. hobie.com...
- Page 10 MirageDrive 180 Instructions Reverse (MD180 only) Shifting with the fins too far apart can cause inter- ference with the shift. Pull with firm pressure while cranks are close together. From the forward position, pull the right handle to shift the drive into reverse.
-
Page 11: On The Water
Pressing retract backwards when coming in one pedal fully forward will orient contact with any object and resume the fins with the kayak underside. their normal position when clear of obstruction and you pedal. hobie.com... - Page 12 On the Water The ‘Rudder’ T-Handle is located on the right/ starboard side near the front of the kayak. Rudder DOWN Rudder UP Uncleat ‘Rudder’ T-Handle Pull ‘Rudder’ T-Handle line to deploy rudder. through cleat to retract rudder. Steering The steering handle is located in the middle on the left/port side of the kayak.
-
Page 13: Lowrance Ready Option
Lowrance Ready Option Transducer Install The transducer is an optional accessory and is not included with boat. Metal clips 1/8” or 3mm gap hobie.com... - Page 14 Lowrance Ready Option Thru-Hull Plugs: 3-way Wire System Locate the thru-hull plug assembly in the small parts kit. Remove the solid rubber plug. Choose the correct plug for your wire size and insert the wire by opening the plug along the slit.
- Page 15 Run cable through the plug and into the hole drilled on the firewall behind the seat. Lead the cable through the inside of the hull and exit the cable through the 3-way Thru-Hull Plug. Hand tighten screws to avoid stripping threads. hobie.com...
-
Page 16: Storage And Transport
Storage and Transportation Storage Do’s Storing your boat upside down on crossbars or hang- ing from wide strap- ping are two ways to keep the boat stored. Storage Don’ts Storing your boat cockpit side up on crossbars can dent the bottom. Storing your boat on its side over a long period of time... - Page 17 The cart should be used for transportation purposes only and not as a storage platform. Do not leave your boat on the cart for more than one hour (less time in warmer temperatures or direct sunlight). 1hr. Store out of the Weather hobie.com...
- Page 18 Storage and Transportation Roof Topping The best way to transport your boat is to purchase a trailer or roof rack from your dealer. Using proper cradles that support the hull, the boat can be transported right side up. Straps can then be laid across the boat and tied to the rack bars.
-
Page 19: Maintenance And Care
After tensioning the cables, the fins should be able to fall freely under their own weight to a vertically position when holding the drive by one crank. Visit hobie.com/support for information on the MirageDrive. hobie.com... - Page 20 Maintenance and Care Rudder Tuning If the steering feels loose: Pull the rudder into the up position. This makes sure the rudder runs central. Loosen the screw clamping the rudder line. Pull the slack out of the rudder line making sure the steering handle is straight.
-
Page 21: Kick Up Adjustment
Flat Head Screwdriver) 1/4 turn at a time until the set screw just touches the fin. Test the fin by moving it in and out of the kick-up position to determine if it needs to be tightened or loosened. hobie.com... -
Page 22: Safety
Always make sure that your hatches are secure and closed. • Carry a pump and/or bailing device. • Always carry the spare paddle provided with the boat. For your safety, Hobie kayak hulls contain foam blocks for positive flotation. Please do not remove them. - Page 23 To do this, reach across the bottom of the kayak and grab the scupper hole or the Hobie MirageDrive and pull the boat upright. Position yourself so your head is near the cockpit area of the kayak and you are facing the kayak.
-
Page 24: Warranty
If you have a question or issue with your Hobie product, please see your Authorized Hobie Kayak Dealer. They will assess the problem, assist with a repair and file a warranty claim with Hobie Cat Company if needed. All warranty claims must go through your Authorized Hobie Kayak Dealer. The Warranty Registration Card and Warranty Policies are included with each model in the Owner’s Packet. - Page 25 Accessories For more accessories see: http://www.hobie.com/catalogs-brochures/ hobie.com...
- Page 28 Corporate Headquarters Oceanside, CA USA www.hobie.com PN 81701017 REV 211011...
Need help?
Do you have a question about the Mirage Compass and is the answer not in the manual?
Questions and answers