Table of Contents
Advertisement
Quick Links
CATEYE
STEALTH 50
CYCLOCOMPUTER CC-GL50
ENG
Instruction manual
Before using the computer, please thoroughly read this manual
and keep it for future reference.
* This PDF contains a link to YouTube.
When you click on the button "Watch a video", a message regarding secu-
rity appears.
Click the "Allow" to open a browser and play the video.
* YouTube videos and instruction manuals related to this product are subject
to change without notice.
For the latest edition of the instruction manual (PDF), visit the offi cial Cat-
Eye website.
* This manual has been prepared on the assumption that the user has suffi -
cient basic knowledge, including operation and terminology of PCs (Win-
dows / Mac).
066601241 4
Features of this unit
Measurement method
This unit is a multifunctional cyclocomputer, having a GPS and an acceleration sensor built-
in, which can perform measurement by receiving only the GPS signal. It can also measure
up to 4 types of data (Speed, Cadence, Heart rate and Power) by receiving the signal of sen-
sors compatible with ANT+ communication standards.
* This product does not contain an ANT+ sensor. Purchase the optional or commercial ANT+
sensor in accordance with your intended use.
Recording and viewing the trip route
Position information from GPS is recorded with measurement data during measurement.
The measurement data such as your route and altitude can be viewed as a trip on a map on
the site, by loading them into the dedicated software application "CATEYE Sync™" on your
PC, and then uploading to the special website "CATEYE Atlas™". "CATEYE Atlas™" can be
used as a database for your cycling life, where you can store the trips measured using this
unit or CATEYE INOU, a trip recorder with camera.
This device complies with Part 15 of the FCC Rules and Industry Canada licence-exempt RSS
standard(s). Operation is subject to the following two conditions: (1) this device may not cause
harmful interference, and (2) this device must accept any interference received, including interfer-
ence that may cause undesired operation.
L'appareil est conforme à la réglementation FCC, section 15 et Industrie Canada RSS standard
exempts de licence (s). Son utilisation est soumise à deux conditions :
1. L'appareil ne doit pas provoquer d'interférences nuisibles, et
2. L'appareil doit supporter les interférences reçues, y compris les interférences empêchant son
fonctionnement correct.
Modifi cations
The FCC requires the user to be notifi ed that any changes or modifi cations made to this device that are
not expressly approved by CatEye Co., Ltd. may void the user 's authority to operate the equipment.
NOTE: This equipment has been tested and found to comply with the limits for a Class B digital
device, pursuant to Part 15 of the FCC Rules. These limits are designed to provide reasonable
protection against harmful interference in a residential installation. This equipment generates, uses
and can radiate radio frequency energy and, if not installed and used in accordance with the instruc-
tions, may cause harmful interference to radio communications. However, there is no guarantee that
interference will not occur in a particular installation. If this equipment does cause harmful interfer-
ence to radio or television reception, which can be determined by turning the equipment off and on,
the user is encouraged to try to correct the interference by one or more of the following measures:
Reorient or relocate the receiving antenna. Increase the separation between the equipment and
receiver. Connect the equipment into an outlet on a circuit different from that to which the receiver
is connected. Consult the dealer or an experienced radio/TV technician for help.
This Class B digital apparatus complies with Canadian ICES-003.
Cet appareil numérique de la classe B est conforme à la norme NMB-003 du Canada.
1
Advertisement
Table of Contents

Subscribe to Our Youtube Channel
Related Manuals for Cateye stealth 50 cyclocomputer CC-GL50


Summary of Contents for Cateye stealth 50 cyclocomputer CC-GL50
- Page 1 The FCC requires the user to be notifi ed that any changes or modifi cations made to this device that are rity appears. not expressly approved by CatEye Co., Ltd. may void the user ’s authority to operate the equipment. Click the “Allow” to open a browser and play the video.
-
Page 2: Cautions When Measuring
Proper use of the CatEye STEALTH 50 Warning / Caution Measurement using the ANT+ speed sensor and the GPS signal For speed measurement, the speed can be calculated from the GPS signal, even if you do • Do not concentrate on the computer while riding. Ride safely! not have the ANT+ speed sensor. -
Page 3: Receiving The Gps Signal
Speed/cadence (ISC) sensor Where the GPS signal cannot be received * When using the CATEYE speed/ca- Move the magnet close to the sensor zone dence sensor (ISC-11), select [ISC] (at a distance of less than 3 mm) The unit may stop measurement or may not display appropriate measurements when the to perform paring. -
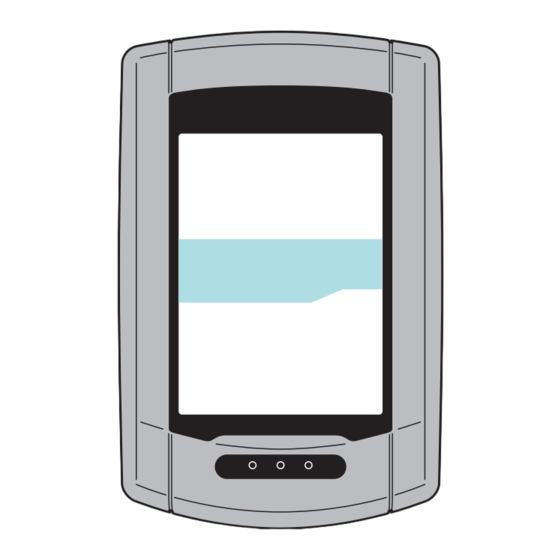
Page 4: Description Of Computer And Its Parts
Description of computer and its parts Battery Computer Follow these instructions to maximize the lithium-ion battery performance. Front Back Recharge the battery for first time use or after long period of storage Power button Each battery has a rate of self-discharge and the voltage of the battery may drop during long period of storage. -
Page 5: Screen Display
Screen display Icon Description Current speed 0.0 (3.0) – 105.9 km/h Pace arrow [0.0 (2.0) – 65.9 m/h] Indicates if the current speed is faster or slower than the average speed. ( Faster, Slower) GPS signal receiving icon Dot display Indicates the GPS signal receiving status Displays the clock. -
Page 6: How To Install The Unit On Your Bicycle
How to install the unit on your bicycle Watch video Click the button, then a browser will open and a Cut the excess length of the band using scissors. (YouTube) video will be played back. Caution: Round off the cut edge of the bracket strap to prevent injury. -
Page 7: Setting Up The Computer
(*1) with any sensor while setting up the computer. You can change the following instructions. the setting later, from the dedicated application “CATEYE Sync™” or from the menu screen of the computer. How to charge For details, see “Changing the computer configuration”... - Page 8 Display the sensor for pairing, on the display Pairing (Searching the sensor ID) Pressing the MENU button changes the sensor for pairing. Display your sensor. When you do not have the ANT+ sensor “Pairing” is not required. Press the MENU button 5 times to jump to Step 5 “Select SP:1 (Speed sensor) the time zone”...
- Page 9 Pairing is started In the case of automatic search In the case of manual ID number entry Press and hold the MODE button, then the lower display Press and hold the MODE button to start automatic search, will be changed and automatic search will be started. and then press the MODE button within 3 seconds.
-
Page 10: Tire Circumference
Check the ID number, and then press the MENU button Tire circumference Sensor pairing is completed. You can find the tire circumference (L) of your tire size in the chart below, or actually measure the tire circumference (L) of your bicycle. Register the setting How to measure the tire circumference (L) (Back) -
Page 11: Select The Time Zone
Time zone list Select the time zone City code City name Time difference City code City name Time difference London Darwin +9.5 In reference to the following “Time zone list”, select the code Paris Sydney for the city nearest from your current location. Athens Noumea Moscow... - Page 12 Select the daylight saving time You can set the daylight saving time when you are on Daylight Saving Time. Select ON or OFF. Setting Description Moves the clock 1 hour ahead Displays in regular clock Daylight saving time icon Register the setting ON ↔...
-
Page 13: How To Use The Computer
How to use the computer This unit is a cyclocomputer, having a GPS and an ANT+ signal receiver built-in. When the GPS search screen (when the power is turned on) ANT+ speed sensor is not used, it can be used as a cyclocomputer using only the GPS sig- When the power is turned on, the GPS search screen will appear, and the GPS signal non- nal;... -
Page 14: Standby Screen
Changed by operating buttons about resetting operation, see “Functions available on the measurement screen” (page 15). * The recorded trip route can be viewed by uploading the trip to CATEYE Atlas™. For details, see “Uploading the measurement data (trip data)” (page 20). -
Page 15: Functions Available On The Measurement Screen
Functions available on the measurement screen * The night-time can be set to your needs. For information on how to set the night-time, see “Changing the computer configuration” (page 27). Current speed Speed sensor receiving icon 0.0 (3.0) – 105.9 km/h * As default, it is set to 7:00 PM to 6:00 AM. -
Page 16: Resetting The Measurement Data And Generating The Trip Data
“Resetting the trip distance-2” below. * The total distance (Odo) cannot be reset. * For information on how to upload to the CATEYE Atlas™, see “Uploading the measurement data (trip data)” (page 20). * The unit has a limited memory capacity. When the data volume exceeds the memory ca- pacity, any new data can no longer be stored. -
Page 17: Power Measurement
Power measurement Calibration of the power sensor Continuous use of the power sensor may cause a slight drift in unloaded condition. This measurement is possible when you have the ANT+ power sensor. Calibrate it periodically to correct the drift. Especially for critical measurements, we recommend you perform calibration in advance. When the power signal is received, the middle display in the measurement screen changes from clock to power. -
Page 18: Setup Of Your Pc
Setup of your PC At first, access the special website CATEYE Atlas™ to register as a member. Then, install CATEYE Sync™ to your PC (Windows/Mac). You can upload the trip data measured with this unit to CATEYE Atlas™, STRAVA™, TrainingPeaks™ and others, or change the computer configuration using your PC. -
Page 19: Setting Cateye Sync
(page 27). The setting screen appears. * When using CATEYE INOU, click on [INOU] to start INOU Sync. When you use CATEYE INOU for the first time, download CATEYE Sync™ INOU from CATEYE Atlas™ to install it. -
Page 20: Uploading The Measurement Data (Trip Data)
The menu screen appears. Uploading trip data Save the trip data in the computer to your PC, and upload desired trip data to CATEYE Atlas™, STRAVA™, or TrainingPeaks™. * The trip data without the resetting operation cannot be recognized with CATEYE Sync™. -
Page 21: Syncing All Activities
Clear the check box for unnecessary trip data * You can check the upload destination by the color of the button. (Green: CATEYE Atlas™, Orange: STRAVA™, Blue: TrainingPeaks™) * To upload specific trip data only or upload trip data to a service site other than the last one used, upload using the [Download All Activities &... -
Page 22: Exporting The Trip Data
Importing the data of such as e-Train Data™ to CATEYE Sync™ The measurement data loaded into e-Train Data™ can be used with CATEYE Atlas™ and other services (STRAVA™ etc.) by importing it to CATEYE Sync™. * Selecting data for multiple trips lets you export several files at once. -
Page 23: Data Contained In The Trip Data
FULL” appears flashing on the screen, and no new data can be recorded. Transfer the trip data to CATEYE Sync™ to secure the stor- age volume of the computer. Only when exceeding the maximum time for one trip, the reset-... -
Page 24: Reviewing, Editing And Sharing The Trip (What You Can Do With Cateye Atlas™)
You can share the trip with your friends and other users, by editing the trip information up- loaded to CATEYE Atlas™. Access CATEYE Atlas™ Access the website “CATEYE Atlas™” from your browser (http://www.cateyeatlas.com). Click on [Login here] Ride data * When you have not registered your membership, see “Mem- bership registration to CATEYE Atlas™”... -
Page 25: Deleting The Gps Point
Now, editing the trip information is completed. 1 Click on [Delete trip] on the trip information editing screen. 2 Click on [Delete]. * The CATEYE Sync™ trip data on your PC is not affected. * The deleted trip can be restored by re-uploading from CATEYE Sync™. - Page 26 Exporting to a GPX file Export a general-purpose GPS data file from the trip. This can be used with other services, including Google Earth™. 1 Click on [GPX export] on the trip information editing screen. A confirmation message appears. 2 Click on [Export]. A GPX file is downloaded.
-
Page 27: Changing The Computer Configuration
You can change the computer configuration in two ways. Click on [Q Series / STEALTH]. • Changing the setting with CATEYE Sync™ (below on this page) The menu screen appears. You can change the configuration easily from your PC application, with the computer connected to your PC with the cradle. - Page 28 Setting items Description This setting is required when you pair the ANT+ speed sensor Click on [STEALTH] to change the settings. or speed/cadence (ISC) sensor. Before changing the settings, click on [Read] to load the settings of the computer. Assign the tire circumference to the speed sensor or speed/cadence sensor whichever you pair.
-
Page 29: Changing The Settings Of The Computer Alone
Changing the settings of the computer alone From “Selecting the speed unit” (page 35) Pressing the MENU button with the measurement screen displayed changes to the menu Clock setting screen. Various settings can be changed on the menu screen. * After you change the setting, be sure to press the MENU button to register it. Change the settings of the time zone, daylight saving time, and the * Leaving the menu screen without any operation for 1 minute returns to the measurement clock display format. -
Page 30: Changing The Time Zone (Shortcut)
Changing the time zone (shortcut) Time zone list Holding down the MODE button for 4 seconds with the menu top screen displayed returns Time Time City code City name City code City name the time zone to the previous one. Holding down it again returns to the original time zone. difference difference London... -
Page 31: Setting The Tire Circumference
From “Clock setting” (page 29) Setting the tire circumference This setting is required when you performed pairing with the Tire circumference ANT+ speed sensor or speed/cadence (ISC) sensor. You can find the tire circumference (L) of your tire size in the chart below, or actually mea- sure the tire circumference (L) of your bicycle. -
Page 32: Pairing The Sensor (Searching The Sensor Id)
* Use this method for pairing, when there are two or more ANT+ sen- (Power sensor) sors, such as at a race site, and automatic search cannot be done. * When using the CATEYE speed/cadence sen- sor (ISC-11), select [ISC] to perform paring. Selecting the sensor number 2 sensor IDs per sensor type can be regis- tered into the computer. - Page 33 Pairing In the case of automatic search the sensor (continued) Press and hold the MODE button, then the lower display will be changed, and automatic search will be started. Send the sensor signal with the automatic search screen displayed. * When another ANT+ sensor is nearby, send the sensor signal of the sensor to be searched, and then press and hold the MODE button.
-
Page 34: Night-Time Setting
From “Pairing the sensor” (page 32) From “Night-time setting” Night-time setting Setting the record interval Set the time when the backlight lights up. Set the second-scale interval to record the measurement data. * When you do not want to turn on the backlight throughout the * The maximum recording time / maximum time for one trip that can be recorded in the computer depends on the selected interval. -
Page 35: When The Operation Is Unstable
When the operation is unstable From “Entering the total distance” (page 34) Selecting the speed unit When the computer displays incorrectly, perform the restarting operation to stabilize the Select the speed unit (km/h or m/h). operation. * Performing the restarting operation deletes any records under measurement. Changing the settings * We recommend that you perform the resetting operation to generate the trip data, before... -
Page 36: Troubleshooting
Troubleshooting The following troubles are not due to failure. See also “FAQ” in CATEYE Atlas™ (web) (http://www.cateyeatlas.com/qa/). Troubles related to the computer Trouble Check Items Remedy Measurement cannot When the ANT+ speed sensor or speed/cadence (ISC) sensor is Trouble Check Items... -
Page 37: Troubles Related To The Ant+ Sensor
Troubles related to the ANT+ sensor Trouble Check Items Remedy Refer to the following information when the optional or commercial ANT+ sensor is used. MEM FULL flashes. Does the maximum re- Connect the computer to your PC cording time or the num- to upload the trip data (page 20). -
Page 38: Maintenance
Calibrate it When the operating time decreases significantly, the battery life is close to an end. periodically to correct the drift. Please contact CatEye local distributor listed on our website www.cateye.com or CatEye for replacing battery. Caution: This computer is a precision device. Never disassemble it. -
Page 39: Optional Accessories
Optional accessories Standard accessories How to install the speed/cadence sensor (ISC-11) 1600280N 1602193 Cadence magnet Bracket band Bracket Wheel magnet Speed sensor 1603790 Cradle (IF-CC01) Watch video Click the button, then a browser will open and a (YouTube) video will be played back. Temporarily secure the speed sensor Speed sensor CADENCE side... - Page 40 How to install the heart rate sensor (HR-11) Temporarily secure the magnet Cadence magnet Heart rate is measured when the heart rate sensor is worn on the chest. 1 Temporarily secure the cadence magnet inside the crank Nylon ties with nylon ties, so that it faces the sensor zone on the Warning!!! : This product must NOT be used by those who have a pacemaker.
-
Page 41: Specification
If the product fails to work due to normal use, CatEye will repair or replace the defect at no charge. Service must be performed Current power (*1) 0 – 9999 watt by CatEye or an authorized retailer.
Need help?
Do you have a question about the stealth 50 cyclocomputer CC-GL50 and is the answer not in the manual?
Questions and answers