Saeco Energica HD8851 User Manual
Coffee machine saeco energica hd8851
Hide thumbs
Also See for Energica HD8851:
- User manual (72 pages) ,
- Instructions manual (68 pages) ,
- Instructions manual (64 pages)
Advertisement
Quick Links
Download this manual
See also:
Instruction Manual
Advertisement
Chapters

Related Manuals for Saeco Energica HD8851


Summary of Contents for Saeco Energica HD8851
- Page 1 Register your product and get support at www.philips.com/welcome Type HD8851 USER MANUAL PLEASE READ THIS USER MANUAL CAREFULLY BEFORE USING THE MACHINE.
-
Page 2: Save These Instructions
IMPORTANT SAFEGUARDS When using electrical appliances, basic safety precautions should always be followed, including the following: 1. Read all instructions. 2. Do not touch hot surfaces. Use handles or knobs. 3. To protect against fire, electric shock and injury to persons do not immerse cord, plugs, or appliance in water or other liquid. - Page 3 CAUTION This appliance is for household use only. Any servicing, other than cleaning and user maintenance, should be performed by an authorized service center. Do not immerse machine in water. To reduce the risk of fire or electric shock, do not disassemble the machine. There are no parts inside the machine serviceable by the user.
-
Page 4: Table Of Contents
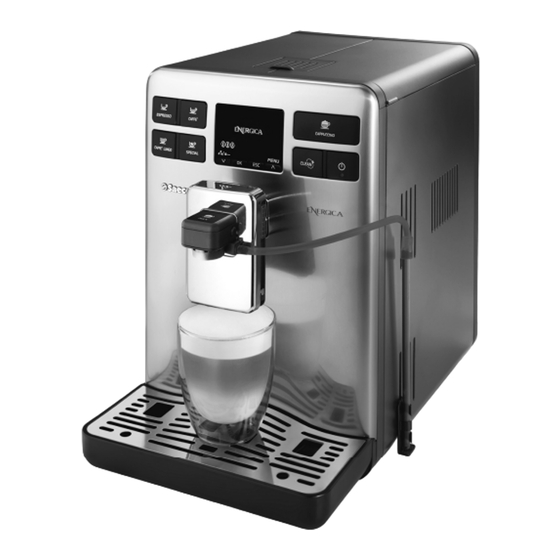
ENGLISH Congratulations on your purchase of a Saeco Energica Pure full automatic espresso machine! To fully benefi t from the support that Saeco off ers, please register your product at www.philips.com/welcome. This user manual applies to HD8851. The machine is suitable for preparing espresso coff ee using whole beans and is equipped with a Cappuccinatore to pre- pare the perfect cappuccino in a fast and easy way. - Page 5 ENGLISH Latte Macchiato............................32 Hot milk ..............................32 Hot water dispensing ..........................33 BEVERAGE PROGRAMMING ................34 Cappuccino programming ........................35 Hot water programming .........................36 MACHINE PROGRAMMING ................37 General menu ............................38 Display menu ............................38 Water menu ............................39 Maintenance menu ..........................40 Factory Setting ............................40 CLEANING AND MAINTENANCE ................41 Daily cleaning of the machine .........................41 Daily cleaning of water tank ........................42 Daily cleaning of the Cappuccinatore: “CLEAN”...
-
Page 6: Important
ENGLISH IMPORTANT Safety instructions This machine is equipped with safety features. Nevertheless read the safety instructions carefully and only use the machine as described in these instructions to avoid accidental injury or damage. Keep this user manual for future reference. The term WARNING and this sign warn against possible severe injuries, danger to life and/or damage to the machine. -
Page 7: Caution
ENGLISH • Children should be supervised to ensure that they do not play with the machine. • Never insert fi ngers or other objects into the coff ee grinder. Caution • The machine is for household use only. It is not intended for use in en- vironments such as staff kitchens of shops, offi ces, farms or other work environments. -
Page 8: Installation
INSTALLATION Product overview 12 13... -
Page 9: General Description
ENGLISH General description 1. Water tank 2. Pre-ground coff ee compartment 3. Service door 4. Dispensing spout 5. Full drip tray indicator 6. Coff ee bean hopper with lid 7. Grinder adjustment 8. Control panel 9. Seat for hot water dispenser/ Cappuccinatore 10. -
Page 10: Preparing For Use
ENGLISH PREPARING FOR USE Machine packaging The original packaging has been designed and constructed to protect the machine during transport. We recommend keeping the packaging material for possible future transport. Machine installation Remove the drip tray with grill from the packaging. Remove the machine from the packaging. - Page 11 ENGLISH Fit the Cappuccinatore suction tube holder into the fi rst lower slot of the machine. Note: only use the fi rst lower slot since it allows for a better handling of the suction tube. Rotate the support by 90°, then push it downwards until it locks. Note: the support is designed to hold the Cappuccinatore suction tube during use, allowing for a better hygiene and user comfort level.
- Page 12 ENGLISH Rinse the water tank under fresh water. Fill the tank with fresh water up to the MAX level and re-insert it into the machine. Make sure it is fully inserted. Caution: Never fi ll the water tank with warm, hot, sparkling water or any other liquid, as this may cause damage to the water tank and the machine.
- Page 13 ENGLISH Switch the power button to “I” to turn on the machine. This page will be displayed. Select the desired language by pressing the scrolling buttons “ ” or “ ” . LINGUA ITALIANO ENGLISH DEUTSCH Press the “ ” button to confi rm. LANGUAGE ITALIANO ENGLISH...
-
Page 14: Using The Machine For The First Time
ENGLISH USING THE MACHINE FOR THE FIRST TIME Automatic rinse/self-cleaning cycle When warm-up is completed, the machine automatically performs a rinse/ self-cleaning cycle of the internal circuit with fresh water. This takes less than a minute. Place a container under the dispensing spout to catch the small amount of water which will be dispensed. - Page 15 ENGLISH Place a container under the coff ee and the hot water dispenser. Select the pre-ground coff ee brewing function by pressing the “ ” button. The machine shows this icon. Press the “ ” button. Press the “ ” button. The machine starts dispensing water. INSERT GROUND COFFEE Note:...
-
Page 16: Measuring And Programming Water Hardness
ENGLISH Once the water has been dispensed, remove and empty the container. Repeat the process from step 5 to step 8 until the water tank is empty. Then, continue with step 10. At the end, fi ll the water tank again up to the MAX level. Now the machine is ready for brewing coff ee. - Page 17 ENGLISH Check how many squares have changed the colour to red and then consult the table. Note: The numbers on the water hardness test strip correspond to the water hardness adjustment settings. More precisely: 1 = 1 (very soft water) 2 = 2 (soft water) 3 = 3 (hard water) 4 = 4 (very hard water)
-
Page 18: Intenza+" Water Fi Lter Installation
ENGLISH “INTENZA+” water fi lter installation We recommend you to install the “INTENZA+” water fi lter as this prevents lime scale to build up in your machine and preserves a more intense aroma to your espresso coff ee. You can purchase separately the INTENZA+ water fi lter. Please refer to the ordering maintenance products chapter in this user manual for further details. - Page 19 ENGLISH Fill the water tank with fresh water up to the MAX level and put it back in the machine. Place a large container (1,5 lt) under the water dispenser. Press the “ ” button to access the machine main menu. MENU BEVERAGE MENU Press the “...
-
Page 20: Replacing The "Intenza+" Water Fi Lter
ENGLISH Press the“ ” button to confi rm that you have inserted the water fi lter and fi lled the water tank. INSERT FILTER. FILL THE TANK The machine reminds you to install the hot water dispenser. Check that it is correctly installed. Press“ ”... -
Page 21: Adjustments
The machine allows for certain adjustments so that you can brew the best tasting coff ee possible. Saeco Adapting System Coff ee is a natural product and its characteristics may change according to its origin, blend and roast. The machine is equipped with a self-adjusting system that allows the use of all types of coff ee beans available on the market (not for caramelized beans). -
Page 22: Adjusting The Aroma (Coff Ee Strength)
ENGLISH Press and turn the grinder adjustment knob one notch at a time. You will taste the diff erence after brewing 2-3 cups of espresso. The reference marks on the coff ee bean hopper lid indicate the grind setting. There are 8 diff erent grind settings to choose from: Very coarse grind ( ) : Lighter taste, for dark roasted coff ee blends Very fi ne grind ( ) : bolder taste, for light roasted coff ee blends When you adjust the ceramic coff ee grinder to a fi ner setting, your coff ee... -
Page 23: Adjusting The Dispensing Spout
ENGLISH To temporarily change the amount of coff ee ground, press the “ ” button on the control panel. The aroma changes by one degree, according to the selected amount: = mild dose = medium dose = strong dose = The beverage is brewed by using the pre-ground coff ee Adjusting the dispensing spout The height of the dispensing spout can be adjusted to better fi t the dimensions of the cups that you wish to use. -
Page 24: Adjusting The Coff Ee Length
ENGLISH For the use of latte macchiato cups. Note: The dispensing spout can also be removed to allow the use of very large containers. Two cups can be placed under the dispensing spout to brew two cups of coff ee at the same time. Adjusting the coff ee length The machine allows you to adjust the amount of brewed coff ee or milk according to your taste and the size of your cups. -
Page 25: Espresso, Coffee And Long Coffee Brewing
ENGLISH When the icon is displayed, press the“ ” button as soon as the ESPRESSO desired amount of coff ee is reached. MEMO Now the button is programmed; each time it is pressed, the machine will STOP brew the same amount of espresso that was just programmed. Note: To program the “... -
Page 26: Espresso, Coff Ee And Long Coff Ee Brewing Using Pre-Ground Coff Ee
ENGLISH To brew 2 cups of espresso, coff ee or long coff ee, press the desired 2 x ESPRESSO button twice consecutively. This page will be displayed. Note: In this operating mode, the machine automatically grinds and doses the correct amount of coff ee. Brewing two espressos requires two grinding and brewing cycles, automatically carried out by the machine. - Page 27 ENGLISH Press the “ ” button for an espresso, the “ ” button for a coff ee, the “ ” button for a long coff ee. The brewing cycle starts. This page will be displayed. INSERT GROUND COFFEE AND PRESS OK Lift the pre-ground coff ee compartment lid and add one scoop of pre-ground coff ee to the compartment.
-
Page 28: Cappuccino Brewing
ENGLISH Note: If the OK button to start brewing is not pressed within 30 seconds the machine will return to the main menu and discharge any inserted coff ee into the coff ee grounds drawer. If no pre-ground coff ee is poured into the compartment, only water will be dispensed. - Page 29 ENGLISH Insert the Cappuccinatore into its seat until it locks into place. Check that it cannot slide away. Fill 1/3 of a container with cold milk. Note: Use cold (~5°C / 41°F) milk with a protein content of at least 3% to ensure optimum results when preparing a cappuccino.
- Page 30 ENGLISH The machine is heating up. CAPPUCCINO PLEASE WAIT … When the machine shows the following page, the machine pours CAPPUCCINO frothed milk. The pouring can be stopped earlier by pressing the “ ” button. STOP Once the milk froth has been poured, the machine brews coff ee. The CAPPUCCINO pouring can be stopped earlier by pressing the “...
-
Page 31: Adjusting The Cappuccino Length
ENGLISH For preparing a latte macchiato or a hot milk, see chapter SPECIAL BEVE- RAGES. Note: The “WARNING CLEANING” function can be activated, if desired; this function reminds you when the Cappuccinatore needs to be cleaned. To activate this function, refer to the machine programming section. Adjusting the cappuccino length Each time the “... - Page 32 ENGLISH Press and hold the “ ” button until the “MEMO” notice appears on the display. Then release the button. The machine is now program- ming. The machine is heating up. CAPPUCCINO MEMO PLEASE WAIT … When the machine shows the following icon, the machine starts to CAPPUCCINO pour milk froth into the cup.
-
Page 33: Special Beverages
ENGLISH SPECIAL BEVERAGES The machine is designed to brew more coff ee products than the ones described before. For this follow the steps below. Press the“ ” button to enter the SPECIAL BEVERAGES menu. Select the desired beverage by pressing the “ ” or “ ” scrolling but- SPECIAL BEVERAGES ton. -
Page 34: Latte Macchiato
ENGLISH Latte Macchiato Warning: Danger of scalding! Dispensing may be preceded by short sprays of milk and steam. Risk of burning. Never touch the Cappuccinatore while brewing: risk of scalding! Wait until the brewing is over before removing the Cappuccinatore. Insert the suction tube in the milk container. -
Page 35: Hot Water Dispensing
ENGLISH Press the “ ” button to enter the SPECIAL BEVERAGES menu After selecting “HOT MILK” by pressing the “ ” or “ ”.scrolling button, confi rm with “ ”. SPECIAL BEVERAGES LATTE MACCHIATO The machine starts brewing hot milk. The brewing can be stopped HOT MILK HOT WATER earlier by pressing the “STOP”... -
Page 36: Beverage Programming
ENGLISH Hot water is dispensed. The dispensing can be stopped earlier by pres- HOT WATER sing the ”STOP” button. STOP At the end, remove the container with the desired quantity of water. BEVERAGE PROGRAMMING You can program the machine to optimize the coff ee taste to your personal preferences. -
Page 37: Cappuccino Programming
ENGLISH Cappuccino programming The following procedure describes the programming of a cappuccino. Below the settings of the each submenu are explained. You can select BEVERAGE MENU these by pressing the “ ” or “ ” scrolling button. Confi rm your settings CAFFE’... -
Page 38: Hot Water Programming
ENGLISH By adjusting the bar on the display by pressing the “ ” or “ ” scrolling COFFEE LENGTH button, you can choose the quantity of water used for coff ee brewing. Press “ ” to confi rm. COFFEE LENGHT By adjusting the bar on the display by pressing the “... -
Page 39: Machine Programming
ENGLISH SPECIAL BEVERAGES HOT MILK HOT WATER Select HOT WATER by pressing the “ ” or “ ” scrolling button. Press “ ” to confi rm. HOT WATER WATER QUANTITY DEFAULT WATER QUANTITY By adjusting the bar on the display by pressing the “ ” or “ ” scrolling button, you can choose the quantity of hot water to be dispensed. -
Page 40: General Menu
ENGLISH General menu The general menu allows you to change the operation settings. GENERAL MENU The TONE function de-/activates the sound feedback. TONE The STAND-BY SETTINGS set the time interval for the machine to go into STAND-BY SETTINGS stand-by mode after the last brewing. The stand-by time varies from 15, 30, 60 and 180 minutes. -
Page 41: Water Menu
ENGLISH Water menu The WATER MENU allows adjusting water parameters for optimal coff ee. WATER MENU Under HARDNESS, you can set the level of water hardness. HARDNESS To measure water hardness, refer to chapter “MEASURING AND PROGRAM- MING WATER HARDNESS” By enabling the fi lter, the machine notifi es the user when the water fi lter ENABLE FILTER needs to be replaced. -
Page 42: Maintenance Menu
ENGLISH Maintenance menu The MAINTENANCE MENU allows setting all the functions for correct ma- MAINTENANCE chine maintenance. The COUNTERS function shows how many products have been brewed for COUNTERS every single type of coff ee since the last reset. The BREW GROUP CLEAN function enables the monthly cleaning of the BREW GROUP CLEAN brew group (please see chapter “Monthly Cleaning of the Brew Group”). -
Page 43: Cleaning And Maintenance
ENGLISH CLEANING AND MAINTENANCE Daily cleaning of the machine Caution: Timely cleaning and maintenance of your machine is very important as it prolongs the life of your machine. Your machine gets exposed to moist, coff ee and lime scale continuously! In this chapter it is described in detail which activities you need to perform at which frequency. -
Page 44: Daily Cleaning Of Water Tank
ENGLISH Empty the coff ee grounds drawer and wash it with fresh water. Empty and wash the (internal) drip tray and the cover with fresh water. Correctly reinstall all the components. Insert the tray and the coff ee grounds drawer and close the service door. -
Page 45: Daily Cleaning Of The Cappuccinatore: "Clean" Cycle (After Each Use)
ENGLISH Daily cleaning of the Cappuccinatore: “CLEAN” cycle (after each use) After each brewing of a milk beverage the Cappuccinatore must be wa- shed and cleaned. It is important that you clean the Cappuccinatore daily or after each use as it preserves hygiene and ensures perfect milk froth consistency. - Page 46 ENGLISH Only once the cycle is complete press the side buttons and remove the Cappuccinatore. Remove the suction tube from the Cappuccinatore. Lift the cover to detach it from the Cappuccinatore. Remove the valve from the Cappuccinatore. Remove the ring from the Cappuccinatore.
-
Page 47: Weekly Cleaning Of The Machine
ENGLISH Remove the suction tube joint from the Cappuccinatore. Wash the parts under running water. Make sure any possible milk deposits/residues are removed. After washing, reassemble the parts following the same procedure used for disassembly, but in reverse order. Note: the “WARNING CLEANING” function can be activated, if desired; this fun- ction reminds you when the Cappuccinatore needs to be cleaned. - Page 48 ENGLISH Remove the grill and wash it thoroughly. Dry, reassemble and reinsert it in the machine. Remove the dispensing spout and wash it with water. Clean the pre-ground coff ee compartment with a brush or a dry cloth. Wash the hot water dispenser under running water.
-
Page 49: Weekly Cleaning Of The Brew Group
ENGLISH Weekly cleaning of the brew group The brew group should be cleaned every time the coff ee bean hopper is fi lled or at least once a week. Press the button and open the service door. Remove the (internal) drip tray and coff ee grounds drawer. To remove the brew group, press the «PUSH»... - Page 50 ENGLISH Gently pull down the lever until it is in contact with the brew group base and the two reference signs on the side of the brew group do match. Make sure the hook to lock the brew group is in the correct position by fi rmly pressing the “PUSH”...
-
Page 51: Monthly Cleaning Of The Cappuccinatore
ENGLISH Monthly cleaning of the Cappuccinatore In the monthly cleaning cycle we use the Saeco Milk Circuit Cleaner to keep the entire circuit clean of milk residues. You can purchase separately the Milk Circuit Cleaner. Please refer to the maintenance products page for further details. - Page 52 ENGLISH Pour the milk cleaner bag into a container. Add ½ lt of lukewarm water and let it dissolve completely. Insert the suction tube in the container. Press the “ ” button to confi rm. INSERT CAPPUCC. HOSE IN A CONTAINER WITH DETERGENT Place a large container (1,5 lt ) under the Cappuccinatore.
- Page 53 ENGLISH Warning: Never drink the solution dispensed during the procedure. Fill the tank with fresh water up to the MAX level. Press the “ ” button. REFILL WATER TANK Carefully wash the container used for the solution and fi ll it with 1/2 (a INSERT CAPPUCC.
-
Page 54: Monthly Lubrication Of The Brew Group
Lubricate the brew group after approximately 500 cups of coff ee or once a month. You can purchase separately the Saeco grease to lubricate the brew group. Please refer to the maintenance products page in this user manual for further details. -
Page 55: Monthly Cleaning Of The Brew Group With "Coff Ee Oil Remover
The “Coff ee Oil Remover” tablets are to be used for cleaning only and do not have a descaling function. For the descaling procedure use the Saeco descaling solution and follow the procedure described in the “Descaling” chapter. Select the “MAINTENANCE” option in the machine menu. - Page 56 ENGLISH Put a “Coff ee Oil Remover” tablet in the pre-ground coff ee com- partment. Press the “ ” button. INSERT GROUP CLEAN TAB Place a container (1,5 lt) under the coff ee dispensing spout. Press the “ ” button to start the cleaning cycle. PLACE A CONTAINER UNDER THE DISPENSING SPOUT...
-
Page 57: Monthly Cleaning Of The Coff Ee Bean Hopper
Not doing this will ultimately make your machine stop working pro- perly, and in this case repair is NOT covered by your warranty. Use the Saeco decalcifi er only. Its formula has been designed to ensure better machine performance. You can purchase separately the Saeco decalcifi er. Please refer to chapter “Ordering Maintenance Products”... - Page 58 ” button to confi rm. START DESCALING? Remove the water tank, and if installed, remove the INTENZA+ water fi lter. Pour the entire content of the Saeco decalcifi er. FILL TANK WITH DESCALING SOLUTION Then fi ll the water tank with fresh water up to the MAX level. Press the “...
- Page 59 ENGLISH Place a large container (1.5 l) under the coff ee and the hot water dispensing spout. Press the “ ” button. PLACE A CONTAINER UNDER DISPENSING SPOUTS The machine will start dispensing the descaling solution at intervals. The bar on the display shows the cycle progress. STEP 1/2 DESCALING PAUSE Note:...
- Page 60 ENGLISH Empty the container and place it back under the dispensing spout. Press the “ ” button. The rinsing cycle is activated. The bar shows the cycle progress. STEP 2/2 RINSING PAUSE When the amount of water needed for the rinse cycle has been completely dispensed, the machine automatically ends the descaling process by showing this display after a short heating up phase.
-
Page 61: Meaning Of The Display
ENGLISH MEANING OF THE DISPLAY Help Message Displayed How to Reset the Message Close the bean hopper inner cover. CLOSE HOPPER DOOR Fill the coff ee beans hopper. ADD COFFEE The brew group must be inserted into the machine. INSERT BREW GROUP Insert the coff ee grounds drawer and the internal drip tray. - Page 62 RESTART TO SOLVE times. If the machine does not start, contact the Philips SAECO hotline in your country and tell them the code shown in the display. You can fi nd its contact details in the warranty booklet by-packed separately or on...
-
Page 63: Troubleshooting
If you are unable to solve the problem with the information below, visit www.philips.com/support for a list of frequently asked questions or contact the Philips Saeco hotline in your country. You fi nd its contact details in the warranty booklet by-packed separately or on www.philips.com/support. - Page 64 ENGLISH Machine actions Causes Solutions The machine takes a The machine circuit is clogged by Descale the machine. long time to warm up or limescale. the amount of water dis- pensed from the wand is too little. The brew group cannot The brew group is out of place.
- Page 65 Brew Group”). This might occur when the machi- Brew a few coff ees as described in ne is automatically adjusting the chapter “Saeco Adapting System”. dose. The dispensing spout is dirty. Clean the dispensing spout. Coff ee is too weak (see...
-
Page 66: Energy Saving
ENGLISH ENERGY SAVING Stand-by The Saeco full automatic espresso machine is designed for energy saving- proven by the Class A energy label. After a certain time of inactivity that can be programmed individually (see chapter “Machine Programming”), the machine turns off automatically. If a product has been brewed, the machine performs a rinsing cycle. -
Page 67: Disposal
ENGLISH Disposal Do not throw away the machine with the normal household waste at the end of its life, but hand it in at an offi cial collection point for recycling. By doing this, you help to preserve the environment. The packing materials can be recycled. -
Page 68: Technical Specification
If you need service or support, please visit the Philips website at www.philips.com/support or contact the Philips Saeco hotline in your country. You fi nd its phone number in the warranty booklet by packed separately or on www.philips.com/support. -
Page 69: Service
If you have any diffi culties obtaining maintenance products for your machi- ne, please contact the Philips Saeco hotline in your country. You fi nd its contact details in the warranty booklet by-packed separately or on www.philips.com/support. - Page 70 ENGLISH Milk Circuit Cleaner CA6705 Maintenance Kit CA 6706...
- Page 72 The manufacturer reserves the right to make changes without prior notice. www.philips.com/saeco...
- Page 73 Register your product and get support at www.philips.com/welcome Type HD8851 INSTRUCTIONS READ THESE INSTRUCTIONS CAREFULLY BEFORE USING THE MACHINE. CHECK ON WWW.PHILIPS.COM/SUPPORT TO DOWNLOAD THE LATEST USER MANUAL...
- Page 74 Welcome to Philips Saeco! Register on WWW.PHILIPS.COM/WELCOME and you will receive tips and updates on how to take care of your machine. This booklet contains quick instructions on how to operate your machine properly. The machine package includes a CD with the entire manual in your language.
- Page 75 This home barista is your gateway to a world of professionally prepared Italian coffee specialties. Treat your senses to perfect espresso by Philips Saeco – certifi ed by Italian Tasters – Centro Studi Assaggiatori, Italy’s #1 center for sensory analysis. Get more info on the certifi cation and learn about your new machine’s specifi c settings at www.philips.com/saeco...
- Page 76 EN - CONTENT - PAG.8 SAFETY INSTRUCTIONS ......................................8 FIRST INSTALLATION......................................10 FIRST ESPRESSO ........................................12 MY FAVORITE ESPRESSO ....................................12 ADJUSTING THE CERAMIC COFFEE GRINDER ...............................13 FIRST CAPPUCCINO ......................................13 WATER DISPENSER ......................................14 “SPECIAL” BEVERAGES .......................................14 DESCALING ........................................15 CAPPUCCINATORE CLEANING .....................................18 BREW GROUP CLEANING ....................................21 MENU FOR CUSTOMIZATION AND MAINTENANCE ...............................22 BEVERAGE MENU ..............................................22 MACHINE MENU ..............................................23...
- Page 77 FR - TABLE DES MATIÈRES- PAG.26 PRESCRIPTIONS DE SÉCURITÉ ....................................26 PREMIÈRE INSTALLATION ....................................30 PREMIER CAFÉ EXPRESSO ....................................32 MON CAFÉ EXPRESSO IDÉAL ....................................32 RÉGLAGE DU MOULIN À CAFÉ EN CÉRAMIQUE ..............................33 PREMIER CAPPUCCINO ......................................33 BUSE DE DISTRIBUTION DE L'EAU ..................................34 BOISSONS « SPECIAL » .......................................34 DÉTARTRAGE ........................................35 NETTOYAGE CAPPUCCINATORE ...................................38 NETTOYAGE DU GROUPE DE DISTRIBUTION ................................41...
- Page 78 IMPORTANT SAFEGUARDS When using electrical appliances, basic safety precautions should always be followed, including the following: 1. Read all instructions. 2. Do not touch hot surfaces. Use handles or knobs. 3. To protect against fire, electric shock and injury to persons do not immerse cord, plugs, or appliance in water or other liquid.
- Page 79 CAUTION This appliance is for household use only. Any servicing, other than cleaning and user maintenance, should be performed by an authorized service center. Do not immerse machine in water. To reduce the risk of fire or electric shock, do not disassemble the machine. There are no parts inside the machine serviceable by the user.
-
Page 80: Safety Instructions
Safety instructions www.philips.com/support Norme di sicurezza • Never clean with scrubbing powders or harsh cleaners. Simply use a EN - Safety instructions soft cloth dampened with water. This machine is equipped with safety features. Nevertheless read the safety • Descale your machine regularly. The machine indicates when descal- instructions carefully and only use the machine as described in these in- ing is needed. -
Page 81: Norme Di Sicurezza
Safety instructions www.philips.com/support Norme di sicurezza • Non immettere mai nel serbatoio acqua calda o bollente. Utilizzare IT - Norme di sicurezza solo acqua fredda. La macchina è dotata di dispositivi di sicurezza. Tuttavia è necessario legge- • Per la pulizia non utilizzare polveri abrasive o detergenti aggressivi. È re attentamente le indicazioni per la sicurezza descritte nelle presenti istru- suffi ciente un panno morbido inumidito con acqua. -
Page 82: First Installation
Instructions www.philips.com/support Istruzioni FIRST INSTALLATION PRIMA INSTALLAZIONE Attach the external drip tray. Fit the Cappuccinatore suc- Rotate the support by 90°, Open the lid and remove the Rinse and fi ll the water tank then push it downwards until tion tube holder into the fi rst water tank by the handle. - Page 83 Instructions www.philips.com/support Istruzioni RINSING STOP Place a container under the The machine performs an Upon completion this display After fi rst installation, once you switch on the power button, automatic rinse cycle. the “ ” button fl ashes. To turn on the machine press any dispensing spout.
-
Page 84: First Espresso
Instructions www.philips.com/support Istruzioni HOT WATER STOP When the hot water dispens- Repeat step 22-24 until the water tank is empty. Fill the water tank again up to the MAX level. Then the ma- ing procedure is complete, chine is ready for use. empty the container. -
Page 85: Adjusting The Ceramic Coffee Grinder
Instructions www.philips.com/support Istruzioni ADJUSTING THE CERAMIC COFFEE GRINDER REGOLAZIONE MACINACAFFÈ IN CERAMICA The grinder adjustment knob, inside the coff ee bean hopper, MUST be turned only when the ceramic coff ee grinder is working. La manopola per la re- golazione del grado di macinatura, posta all’in- terno del contenitore Press and turn the grinder... -
Page 86: Water Dispenser
Instructions www.philips.com/support Istruzioni CAPPUCCINO CAPPUCCINO STOP STOP The machine pours frothed The machine brews coff ee. Remove the cup. milk. La macchina eroga schiuma La macchina eroga caff è. Prelevare la tazzina. di latte. WATER DISPENSER EROGATORE ACQUA REMOVING THE WATER DISPENSER RIMOZIONE DELL’ERO- GATORE ACQUA... -
Page 87: Descaling
Instructions www.philips.com/support Istruzioni SPECIAL BEVERAGES SPECIAL BEVERAGES SPECIAL BEVERAGES HOT MILK LATTE MACCHIATO LATTE MACCHIATO HOT WATER HOT MILK HOT MILK HOT WATER HOT WATER Press the button to start the preparation. In the special beverages, you can also fi nd latte macchiato and hot milk. - Page 88 Remove the INTENZA water fi lter (if installed) and pour the button to enter the menu. the DESCALING cycle. entire Saeco descaler in the water tank. Do not use vignegar as descaler. Fill with fresh water up to the MAX level. Premere il tasto per selezionare l'opzione “DECALCIFICA-...
- Page 89 Instructions www.philips.com/support Istruzioni STEP 1/2 DESCALING STEP 1/2 DESCALING PLACE A CONTAINER UNDER DISPENSING SPOUTS PAUSE PAUSE Press the button. The descaling cycle is activated. To empty the container during the process, the descaling cy- The bar shows the progress. cle may be paused by pressing the button.
-
Page 90: Cappuccinatore Cleaning
Instructions www.philips.com/support Istruzioni CAPPUCCINATORE CLEANING PULIZIA CAPPUCCINATORE Insert the suction tube in a container fi lled with fresh water. Press the button to start the cleaning cycle. Daily Place a container under the dispensing spout. Inserire il tubo di aspirazione in un contenitore pieno di Premere il tasto per avviare il ciclo di pulizia. - Page 91 REFILL WATER TANK Place the water tank back in the machine. Rinse the water tank and Pour the Saeco Milk Circuit Cleaner into a container. Add ½ lt Press the button. of lukewarm water and let it dissolve completely. fi ll it with fresh water up to MAX level.
- Page 92 Instructions www.philips.com/support Istruzioni REFILL REFILL INSERT CAPPUCC. WATER TANK WATER TANK HOSE IN A CONTAINER WITH 1/2 L WATER When the machine stops Place back the water tank. Wash the container thor- Insert the suction tube in the Place a container under the dispensing, fi ll the tank with oughly and fi ll it with fresh cappuccinatore.
-
Page 93: Brew Group Cleaning
Instructions www.philips.com/support Istruzioni BREW GROUP CLEANING PULIZIA DEL GRUPPO CAFFÈ Press the button and open Remove the drip tray and Remove the brew group: Pull Carry out maintenance to the Check the alignment. the service door. coff ee grounds drawer. brew group. -
Page 94: Menu For Customization And Maintenance
Instructions www.philips.com/support Istruzioni MENU FOR CUSTOMIZATION AND MAINTENANCE PERSONALIZZAZIONE E MANUTENZIONE When you enter the programming mode: button = (confi rms a selection or a change you have made) MENU button = (scrolls up the menu) BEVERAGE MENU MACHINE MENU button = (scrolls down the menu) button = (confi rms when you exit a selection) Quando si entra nella modalità... -
Page 95: Machine Menu
Instructions www.philips.com/support Istruzioni MACHINE MENU MENU MACCHINA MENU MENU BEVERAGE MENU BEVERAGE MENU MACHINE MENU MACHINE MENU Press the button. Press the button to select the “MACHINE MENU” ; press the button to enter the menu. Premere il tasto Premere il tasto per selezionare la voce “MENU MACCHI- NA”;... -
Page 96: Meaning Of The Display
Instructions www.philips.com/support Istruzioni MEANING OF THE DISPLAY SIGNIFICATO DEL DISPLAY CLOSE EMPTY DRIP TRAY INSERT COFFEE CLOSE REFILL FRONT DOOR GROUNDS DRAWER HOPPER DOOR WATER TANK Close the service door. Open the service door and Insert the coff ee grounds Close the bean hopper inner Remove the water tank and drawer and the internal drip... - Page 97 30 seconds and then switch it on again. If the prob- cycle. lem persists, Philips SAECO hotline in your country and inform them the code shown in the display. A macchina accesa, rimuo- È...
-
Page 98: Prescriptions De Sécurité
IMPORTANT Lors de l’utilisation d’appareils électriques, il est indispensable de respecter toujours les précautions de sécurité principales, y compris les suivantes : 1. Lire toutes les instructions. 2. Ne pas toucher de surfaces chaudes. Utiliser les poignées ou les boutons. 3. - Page 99 PRÉCAUTIONS La machine est réservée à un usage domestique. Tout entretien, en dehors du nettoyage et de l’entretien usuel par l’usager, doit être fait par un service après-vente autorisé. Ne pas plonger la base dans l’eau. Pour éviter les courts-circuits et les décharges électriques, ne pas démonter la base. Elle ne contient aucune pièce qui demande un entretien de la part de l’usager.
-
Page 100: De - Inhalt
Sicherheitshinweise www.philips.com/support Prescriptions de sécurité • In den Behälter dürfen ausschließlich Kaff eebohnen eingefüllt wer- DE - Sicherheitshinweise den. Pulverkaff ee, Instantkaff ee oder andere Gegenstände können Die Maschine ist mit Sicherheitsvorrichtungen ausgestattet. Dennoch soll- Schäden an der Maschine verursachen, wenn sie in den Kaff eeboh- ten die in der vorliegenden Bedienungsanleitung beschriebenen Sicher- nenbehälter eingefüllt werden. - Page 101 Sicherheitshinweise www.philips.com/support Prescriptions de sécurité • Laisser refroidir la machine avant d’insérer ou de retirer des pièces ou FR - Prescriptions de sécurité avant de procéder à son nettoyage. La machine est dotée de dispositifs de sécurité. Il est toutefois nécessaire de •...
-
Page 102: Erste Installation
Hinweise www.philips.com/support Instructions ERSTE INSTALLATION PREMIÈRE INSTALLATION Die externe Abtropfschale Den Halter des Ansaug- Den Halter um 90° drehen, Den Deckel anheben und Den Wassertank spülen einsetzen. schlauchs des Cappuccinatore dann nach unten drücken, bis den Wassertank am Griff und mit frischem Wasser in die erste untere Nut der er in Position einrastet. - Page 103 Hinweise www.philips.com/support Instructions RINSING STOP Einen Behälter unter den Die Maschine führt einen Am Ende des Vorgangs wird Nach der ersten Installation blinkt die Taste “ ” nach Druck Auslauf stellen. automatischen Spülzyklus obige Bildschirmansicht des Hauptschalters. Eine beliebige Taste drücken, um die aus.
-
Page 104: Erster Espresso
Hinweise www.philips.com/support Instructions HOT WATER STOP Nach Abschluss der Ausgabe Den Vorgang ab Punkt 22 bis Punkt 24 wiederholen, bis der Anschließend den Wassertank erneut bis zum Füllstand des heißen Wassers den Wassertank leer ist. MAX füllen. Nach Beendigung des Vorgangs ist die Maschine Behälter leeren. -
Page 105: Einstellung Keramikmahlwerk
Hinweise www.philips.com/support Instructions EINSTELLUNG KERAMIKMAHLWERK RÉGLAGE DU MOULIN À CAFÉ EN CÉRAMIQUE Der Drehknopf für die Mahlgradeinstellung, der sich im Kaff eeboh- nenbehälter befi ndet, DARF NUR DANN gedreht werden, wenn sich das Keramikmahlwerk in Betrieb befi ndet. Le bouton de réglage du degré... -
Page 106: Wasserdüse
Hinweise www.philips.com/support Instructions CAPPUCCINO CAPPUCCINO STOP STOP Die Maschine gibt Milch- Die Maschine gibt Kaff ee aus. Die Tasse entnehmen. schaum aus. La machine distribue de la La machine distribue du café. Retirer la tasse. mousse de lait. WASSERDÜSE BUSE DE DISTRIBUTION DE L'EAU ABNAHME DER WAS- SERDÜSE ENLÈVEMENT DE LA BUSE... -
Page 107: Entkalkung
Hinweise www.philips.com/support Instructions SPECIAL BEVERAGES SPECIAL BEVERAGES SPECIAL BEVERAGES HOT MILK LATTE MACCHIATO LATTE MACCHIATO HOT WATER HOT MILK HOT MILK HOT WATER HOT WATER Die Taste drücken, um die Zubereitung zu starten. Unter den Spezialgetränken können auch Latte Macchiato und heiße Milch ausgegeben werden. - Page 108 Enlever le fi ltre à eau INTENZA (si installé) et verser l'antical- TRAGE » ; appuyer sur la touche pour accéder au menu. pour démarrer le cycle de caire Saeco dans le réservoir à eau. Ne pas utiliser de vinaigre DÉTARTRAGE. comme anticalcaire. Remplir avec de l'eau fraîche jusqu'au niveau MAX.
- Page 109 Hinweise www.philips.com/support Instructions STEP 1/2 DESCALING STEP 1/2 DESCALING PLACE A CONTAINER UNDER DISPENSING SPOUTS PAUSE PAUSE Der Entkalkungszyklus wird gestartet. Um den Entkalkungszyklus kurzzeitig zu unterbrechen und Die Taste drücken. Anhand der Leiste kann der Fortschritt des Vorgangs den Behälter während des Vorgangs zu entleeren, wird die angezeigt werden.
-
Page 110: Reinigung Cappuccinatore
Hinweise www.philips.com/support Instructions REINIGUNG CAPPUCCINATORE NETTOYAGE CAPPUCCINATORE Den Ansaugschlauch in einen Behälter mit frischem Wasser Die Taste drücken, um den Reinigungszyklus zu starten. Täglich einstecken. Einen Behälter unter den Auslauf stellen. Insérer le tuyau d’aspiration dans un récipient plein d’ e au Appuyer sur la touche pour démarrer le cycle de Quotidien... - Page 111 Produkt vollständig aufl öst. Réinsérer le réservoir à eau dans la machine. Rincer le réservoir et le Verser le Saeco Milk Circuit Cleaner dans un récipient. Ajouter Appuyer sur la touche remplir avec de l’ e au fraîche ½ l d'eau tiède, puis attendre que le produit soit entièrement jusqu’au niveau MAX.
- Page 112 Hinweise www.philips.com/support Instructions REFILL REFILL INSERT CAPPUCC. WATER TANK WATER TANK HOSE IN A CONTAINER WITH 1/2 L WATER Nach Ende der Ausgabe, Den Wassertank wieder in Den Behälter gründlich Den Ansaugschlauch in den Einen Behälter unter den den Tank mit frischem seine Position einsetzen.
-
Page 113: Reinigung Der Brühgruppe
Hinweise www.philips.com/support Instructions REINIGUNG DER BRÜHGRUPPE MENU PERSONNALISATION ET ENTRETIEN Die Taste drücken und die Die Abtropfschale und Die Brühgruppe herausneh- Die Wartung der Brühgruppe Die Ausrichtung überprüfen. Servicetür öff nen. den Kaff eesatzbehälter men, indem am entsprechen- ausführen. abnehmen. den Griff gezogen und die Taste «PUSH»... -
Page 114: Personalisierungs- Und Wartungsmenü
Hinweise www.philips.com/support Instructions PERSONALISIERUNGS- UND WARTUNGSMENÜ PERSONNALISATION ET ENTRETIEN Bei der Öff nung des Programmiermodus: Taste = (Bestätigung einer Anwahl oder einer vorgenommenen Änderung) MENU Taste = (Überfl iegen des Menüs nach oben) BEVERAGE MENU MACHINE MENU Taste = (Überfl iegen des Menüs nach unten) Taste = (Bestätigung des Verlassens einer Anwahl) En modalité... -
Page 115: Maschinenmenü
Hinweise www.philips.com/support Instructions MASCHINENMENÜ MENU MACHINE MENU MENU BEVERAGE MENU BEVERAGE MENU MACHINE MENU MACHINE MENU Die Taste drücken. Die Taste drücken und die Option “MASCHINENMENÜ” anwählen. Die Taste drücken, um das Menü zu öff nen. Appuyer sur la touche Appuyer sur la touche pour sélectionner la fonction « MENU MACHINE » ;... -
Page 116: Bedeutung Der Displayansichten
Hinweise www.philips.com/support Instructions BEDEUTUNG DER DISPLAYANSICHTEN SIGNIFICATION DE L'AFFICHEUR CLOSE EMPTY DRIP TRAY INSERT COFFEE CLOSE REFILL FRONT DOOR GROUNDS DRAWER HOPPER DOOR WATER TANK Die Servicetür schließen. Die Servicetür öff nen und die Den Kaff eesatzbehälter und Den internen Deckel des Den Wassertank herausneh- interne Abtropfschale leeren. - Page 117 30 secondes puis la remettre en marche. Si rer le cycle. le problème persiste, contacter le centre d’assistance Philips SAECO de votre Pays et communiquer le code indiqué sur l'affi cheur. INSERT WATER SPOUT Die Heißwasserdüse einsetzen, um die Ausgabe zu starten.
-
Page 120: Es - Índice - Pág
Normas de seguridad www.philips.com/support Indicações para a segurança • Dejar enfriar la máquina antes de introducir o extraer cualquiera de ES - Normas de seguridad sus componentes y antes de proceder a su limpieza. La máquina está provista de dispositivos de seguridad. No obstante, es •... -
Page 121: Indicações Para A Segurança
Normas de seguridad www.philips.com/support Indicações para a segurança • Deixe a máquina arrefecer antes de introduzir ou remover peças e PT - Indicações para a segurança antes de realizar a sua limpeza. A máquina está dotada de dispositivos de segurança. Contudo, é necessário •... -
Page 122: Primera Instalación
Instrucciones www.philips.com/support Instruções PRIMERA INSTALACIÓN PRIMEIRA INSTALAÇÃO Introducir la bandeja de goteo Introducir el soporte del tubo Girar el soporte 90° y, a con- Levantar la tapa y extraer el Enjuagar y llenar el depósito externa. de aspiración del Cappuccina- tinuación, empujarlo hacia depósito de agua por el asi- con agua fresca. - Page 123 Instrucciones www.philips.com/support Instruções RINSING STOP Colocar un recipiente bajo la La máquina realiza un ciclo de Una vez terminado el proce- Tras la primera instalación, al pulsar el interruptor general, el salida de café. enjuague automático. so, se visualiza la pantalla de botón “...
-
Page 124: Primer Café Exprés
Instrucciones www.philips.com/support Instruções HOT WATER STOP Una vez fi nalizado el suminis- Repetir el procedimiento del punto 22 al 24 hasta vaciar el de- Volver a llenar el depósito de agua hasta el nivel MAX. Tras este tro de agua caliente, vaciar el pósito de agua. -
Page 125: Regulación Del Molinillo De Café De Cerámica
Instrucciones www.philips.com/support Instruções REGULACIÓN DEL MOLINILLO DE CAFÉ DE CERÁMICA AJUSTE DO MOINHO DE CAFÉ DE CERÂMICA El mando de regulación del grado de molido, que se encuentra en el interior del contenedor de café en gra- no, DEBE girarse sólo con el molinillo de café... -
Page 126: Salida De Agua
Instrucciones www.philips.com/support Instruções CAPPUCCINO CAPPUCCINO STOP STOP La máquina suministra la cre- La máquina suministra el café. Retirar la taza. ma de leche. A máquina distribui espuma A máquina distribui café. Retire a chávena. de leite. SALIDA DE AGUA DISTRIBUIDOR DE ÁGUA EXTRACCIÓN DE LA SALI- DA DE AGUA REMOÇÃO DO DISTRIBUI-... -
Page 127: Descalcificación
Instrucciones www.philips.com/support Instruções SPECIAL BEVERAGES SPECIAL BEVERAGES SPECIAL BEVERAGES HOT MILK LATTE MACCHIATO LATTE MACCHIATO HOT WATER HOT MILK HOT MILK HOT WATER HOT WATER Pulsar el botón para dar inicio a la preparación. Otras bebidas especiales disponibles son la leche manchada y la leche caliente. - Page 128 CIÓN”; pulsar el botón para acceder al menú. inicio al ciclo de DESCALCIFI- to descalcifi cante Saeco en el depósito de agua. No utilizar vina- CACIÓN. gre como antical. Rellenar con agua fresca hasta el nivel MAX. Pressione a tecla para seleccionar a opção “DESCALCIFICA-...
- Page 129 Instrucciones www.philips.com/support Instruções STEP 1/2 DESCALING STEP 1/2 DESCALING PLACE A CONTAINER UNDER DISPENSING SPOUTS PAUSE PAUSE Da comienzo el ciclo de descalcifi cación. Para poner en pausa el ciclo de descalcifi cación y poder vaciar el Pulsar el botón La barra permite visualizar el progreso del ciclo.
-
Page 130: Limpieza Del Cappuccinatore
Instrucciones www.philips.com/support Instruções LIMPIEZA DEL CAPPUCCINATORE LIMPEZA DO CAPPUCCINATORE Introducir el tubo de aspiración en un recipiente lleno de agua Pulsar el botón para dar inicio al ciclo de limpieza. Diaria fresca. Colocar un recipiente bajo el Cappuccinatore. Introduza o tubo de aspiração num recipiente cheio de água Pressione a tecla para iniciar o ciclo de limpeza. - Page 131 WATER TANK Volver a introducir el depósito de agua en la máquina. Enjuagar el depósito y llenarlo Verter el Saeco Milk Circuit Cleaner en un recipiente. Añadir ½ Pulsar el botón con agua fresca hasta el nivel l de agua templada y esperar a que el producto se disuelva por MAX.
- Page 132 Instrucciones www.philips.com/support Instruções REFILL REFILL INSERT CAPPUCC. WATER TANK WATER TANK HOSE IN A CONTAINER WITH 1/2 L WATER Cuando el suministro haya fi - Volver a introducir el depósito Lavar bien el recipiente y lle- Introducir el tubo de aspira- Colocar un recipiente bajo el nalizado, llenar el depósito con de agua.
-
Page 133: Limpieza Del Grupo De Café
Instrucciones www.philips.com/support Instruções LIMPIEZA DEL GRUPO DE CAFÉ LIMPEZA DO GRUPO CAFÉ Presionar el pulsador y abrir la Extraer la bandeja de goteo y Extraer el grupo de café tiran- Realizar el mantenimiento del Comprobar la alineación. puerta de servicio. el cajón de recogida de posos. -
Page 134: Menú De Personalización Y Mantenimiento
Instrucciones www.philips.com/support Instruções MENÚ DE PERSONALIZACIÓN Y MANTENIMIENTO MENU DE PERSONALIZAÇÃO E MANUTENÇÃO Una vez en el modo de programación: botón = (confi rmar una selección o una modifi cación efectuada) MENU botón = (desplazar el menú hacia arriba) BEVERAGE MENU MACHINE MENU botón = (desplazar el menú... -
Page 135: Menú Máquina
Instrucciones www.philips.com/support Instruções MENÚ MÁQUINA MENU MÁQUINA MENU MENU BEVERAGE MENU BEVERAGE MENU MACHINE MENU MACHINE MENU Pulsar el botón Pulsar el botón para seleccionar la opción “MENÚ MÁQUINA”; pulsar el botón para acceder al menú. Pressione a tecla Pressione a tecla para seleccionar a opção “MENU MÁQUI- NA”;... -
Page 136: Significa De Los Mensajes De La Pantalla
Instrucciones www.philips.com/support Instruções SIGNIFICADO DE LOS MENSAJES DE LA PANTALLA SIGNIFICADO DO VISOR CLOSE EMPTY DRIP TRAY INSERT COFFEE CLOSE REFILL FRONT DOOR GROUNDS DRAWER HOPPER DOOR WATER TANK Cerrar la puerta de servicio. Abrir la puerta de servicio y Introducir el cajón de recogida Cerrar la tapa interna del con- Extraer el depósito de agua y... - Page 137 30 segundos y volver a encenderla. Si el nar y dar inicio al ciclo. problema persiste, contactar con la línea de asistencia al cliente de Philips SAECO del país y comunicar el código indicado en la pantalla. Com a máquina ligada, retire É...
- Page 138 Accessories go to www.shop.philips.com/service to buy accessories...
-
Page 139: Accessories
go to www.shop.philips.com/service to buy accessories Accessories Accessories Accessori - Zubehör -Accessoires Accesorios - Acessórios INTENZA+ water fi lter Milk circuit cleaner Coff ee oil remover product number: CA6702 product number: CA6705 product number: CA6704 Filtro acqua INTENZA+ Sistema di pulizia circuito latte Pastiglie sgrassanti n. - Page 140 Il produttore si riserva il diritto d`apportare qualsiasi modifica senza preavviso. The manufacturer reserves the right to change the features of the product without prior notice. Der Hersteller behält sich das Recht vor, Änderungen am Produkt ohne Vorankündigung vorzunehmen. Le producteur se réserve le droit d‘apporter des modifi cations au produit sans aucun préavis. El fabricante se reserva el derecho a realizar modifi...
Need help?
Do you have a question about the Energica HD8851 and is the answer not in the manual?
Questions and answers