Table of Contents
Advertisement
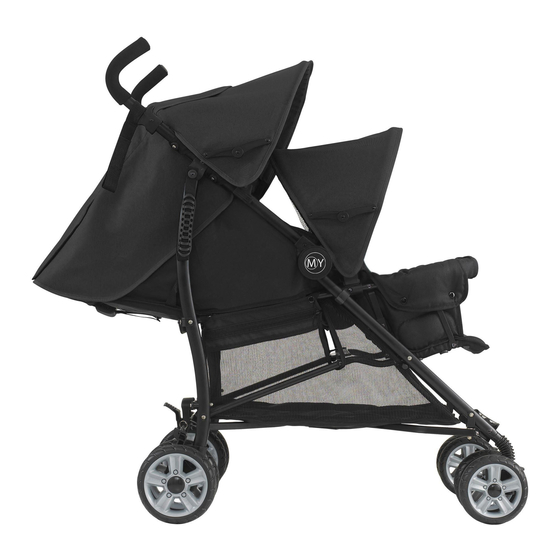
Sienta Duo
Tandem Pushchair
This product is tested to: BS EN 1888:2012
Front seat suitable from: 6 months up to 15kg
Rear seat suitable from: BIRTH up to 15kg
INSTRUCTIONS: Please read carefully and keep for future
reference. Your child's safety may be affected if you do not
follow these instructions
V10
Advertisement
Table of Contents

Related Manuals for My Child Sienta Duo


Summary of Contents for My Child Sienta Duo
- Page 1 Sienta Duo Tandem Pushchair This product is tested to: BS EN 1888:2012 Front seat suitable from: 6 months up to 15kg Rear seat suitable from: BIRTH up to 15kg INSTRUCTIONS: Please read carefully and keep for future reference. Your child’s safety may be affected if you do not...
-
Page 3: Safety Instructions
Safety instructions ATTENTION: This pushchair is designed to carry 1 child in the front seat and 1 child in the rear seat. DO NOT carry more than 2 children in this pushchair. WARNING! Never leave your child unattended. WARNING! Ensure that all the locking devices are engaged before use. WARNING! To avoid injury ensure that your child is kept away when folding and unfolding this product. -
Page 4: Care And Maintenance
0161 335 2508. Welcome Thank you for purchasing the MyChild Sienta Duo Tandem Pushchair. Please read the instructions and warnings carefully before use to ensure safe and satisfactory operation of this product. -
Page 5: Parts Checklist
Parts checklist Contained in your carton are: Part Chassis Front hood Rear hood Harness pads* Basket* Rear wheel assembly Front wheels Locking pin Locking ring Seat liner Raincover These are pre-fitted but are removable page 3... -
Page 6: Front Wheel Assembly
Front wheel assembly 1. Align the front wheel assembly with the front axle, ensuring you have the spring pin (A) on the rear of the axle aligned with the small hole (B) on the rear of the wheel assembly. Push the front wheel assembly onto the axle until you hear the spring pin ‘click’... -
Page 7: Rear Wheel Assembly
Rear wheel assembly click 1. Line up the rear wheel assembly with 2. Push the wheel assembly onto the the back legs of the pushchair, so that back leg until the spring pins (C) click into the frame ‘LOCK’ (A) and the ‘BRAKE’ place. -
Page 8: Opening The Pushchair
Opening the pushchair 1. Hold the pushchair by the handles and 2. DO NOT try and open the pushchair by release storage strap (A). Whilst holding forcing the handles apart. Place your foot the handles, allow the front legs to drop on the frame ‘LOCK’... -
Page 9: Folding The Pushchair
Folding the pushchair WARNING! Fold the rear hood back and the front hood forward before attempting to fold the pushchair. Failure to do so may damage the hoods. 1. Place the toe of your shoe under the 2. Pull back both catches (A) on the bottom bar directly under the ‘BRAKE’... - Page 10 Carrying the pushchair 1. Once you have attached the storage strap (A), carry the pushchair using the integral carry handle (B) located on the side of the chassis. Adjusting the rear backrest 1. To recline: Whilst pressing the button, on 2.
-
Page 11: Using The Brakes
Adjusting the front backrest 1. To lower the backrest on the front seat, pull the lever on the back of the seat and move the backrest backwards. To raise the backrest, simply move the backrest forward. The front seat has 2 positions upright or reclined. -
Page 12: Shopping Basket
Shopping basket 1. The basket is held in place with 6 press studs (3 on each side). Wrap the straps around the frame at points 1, 2 and 3 and fasten the press studs. Attaching/Using/Removing the rear hood 1. Slide the rear hood clips (A) onto the 2. - Page 13 Attaching/Using/Removing the rear hood (continued) 3. To open: pull the front of the hood 4. To remove: Unfasten all of the hood’s forwards, then press down on the hinges Velcro tabs and Velcro straps. (E) to lock the hood open. Lift up the end of the clip and slide the clip off the attachment.
-
Page 14: Using The Harness
Attaching/Using/Removing the front hood (continued) 3. To remove: Lift up the end of the clip and slide the clip off the attachment. Using the harness WARNING: Ensure harness is correctly fitted at all times. 1.To lock: Clip the shoulder harness strap clips (A) onto the loop of the waist strap connectors (B). - Page 15 Adjusting the rear seat shoulder harness position 1. The rear seat unit is suitable from birth. There are 3 pairs of shoulder harness positions (A1,2 & 3), two pairs of waist harness positions (B1 & 2) and two crotch strap positions (C1 & 2). Select the harness positions that will allow you to adjust the harness appropriately to suit your child’s age and size.
- Page 16 Adjusting the rear seat waist harness position To adjust the rear seat waist harness you will need to undo the webbing and pass it through the seat, reposition it and reattach the webbing. 1. Locate the split ring (A) for the waist harness at the back of the rear seat. 2.
- Page 17 Adjusting the rear seat crotch harness position 1. To adjust the crotch strap position 2. To adjust the crotch strap position closer to the child, slide the buckle under further from the child, slide the buckle out the strip of fabric on the seat. from under the strip of fabric on the seat.
- Page 18 Fitting the seat liner (continued) 2. To fit the seat liner whilst the shoulder straps on the pushchair are in the highest position: Unclip the shoulder straps (D) from the waist connectors. 2a. Pass the shoulder straps through the shoulder button holes (E). Pull the waist and crotch straps around the seat liner and reconnect the shoulder harness strap clips (D) to the loop of the waist strap connectors.
-
Page 19: Fitting The Raincover
Fitting the raincover 1. The rain cover fits over the front of the tandem from the handlebars to the footrest. It is held in place with Velcro loops and strips around the frame. ATTENTION: Allow raincover to dry before storing. Tips and advice When mounting a kerb position a foot against one of the rear wheels to act as a pivot point, making it easier to tilt the pushchair back before pushing it up the... - Page 20 Customerservice@kooltrade.co.uk Imported by MyChild. M34 3QA www.mychild.co.uk Tel: 0161 335 2508...
Need help?
Do you have a question about the Sienta Duo and is the answer not in the manual?
Questions and answers