Table of Contents
Advertisement
Quick Links
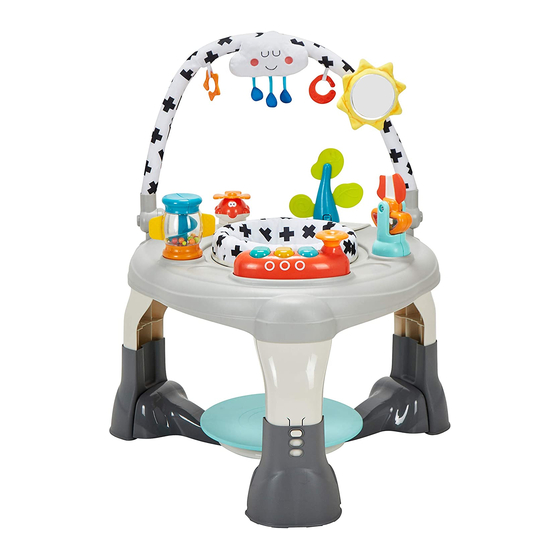
Lovely World
Activity Centre
Suitable for children who can sit up unaided, approximately
from 4 months. It is not intended for children who can walk by
themselves and weigh more than 11kg/25lbs.
INSTRUCTIONS: Read the instructions carefully before use and
keep them for future reference. The child may be hurt if you
do not follow these instructions.
V1
Advertisement
Table of Contents

Summary of Contents for My Child Lovely World
- Page 1 Lovely World Activity Centre Suitable for children who can sit up unaided, approximately from 4 months. It is not intended for children who can walk by themselves and weigh more than 11kg/25lbs. INSTRUCTIONS: Read the instructions carefully before use and keep them for future reference.
-
Page 2: Safety Instructions
Safety instructions Warning: Adult assembly required. Warning: Use the activity centre only if your child meets all of the following conditions: Your child is at least 4 months old. • Your child can sit up unaided. • Your child is less than 76.2cm (30 inch) tall. •... -
Page 3: Battery Disposal
0161 335 2508. Welcome Thank you for purchasing the MyChild Lovely World Activity Centre. Please read the instructions and warnings carefully before use to ensure safe and satisfactory operation of this product. - Page 4 Parts List You will require one Phillips screwdriver (not supplied) Contained in your carton are: Part Legs Feet Screws Activity Centre Top Removable Toy Mount Seat Ring Seat Fabric Flying Car Toy Tree Teether Candy Jar Toy Boat Toy Musical Play Tray Sun Mirror Cloud Teethers...
- Page 5 Attaching Legs and Feet 1. Place the Activity centre top (4) face- down on the floor and insert the three legs (1) into the their fixing points. Secure all legs using screws (3). Ensure all screws are tightened correctly using a Phillips screwdriver (not supplied).
- Page 6 Assembling and attaching the jump platform Locked Unlocked 1. Ensure the stool (18) is folded down (see “Converting the stool” on page 11). Attach the footplate (19) to the stool (18) and lock it in place 2. Place the jump platform under the activity centre and attach the three stool legs (i, ii, iii) to the feet of the activity centre.
-
Page 7: Seat Assembly
Seat assembly WARNING! Children MUST NOT be seated in the activity centre unless the jump platform is attached. 1. Place the seat fabric (7) into the seat 2. Fold the seat fabric over the seat unit. unit (6). 3. Hook the 8 webbing strips on the 4. - Page 8 Toys assembly 1. Insert the Flying car toy (8) and Tree Teether (9) into the sockets located on the removable toy mount (5). Note: Toys (8) and (9) can be put in either socket. 2. Insert the Candy jar toy (10) and Boat toy (11) into the sockets located on the activity centre top and turn the toys clockwise to lock them in position.
- Page 9 Musical toy assembly (continued) 2. Insert 2 x 1.5V AA batteries (not supplied) ensuring the correct battery orientation is observed and then reattach the cover, replacing the screw and ensuring it is not over tightened. ATTENTION: Refer to ‘Battery warnings’ on page 2.
- Page 10 Toy bar assembly IMPORTANT! Take care when attaching the Left and Right toy bar end mounts. The Toy Bar will not work correctly if the end mounts are incorrectly attached. front right left back 1. Insert the end mount (16) marked “L” into the mounting hole on the left hand side of the activity centre ensuring button (A) is facing outwards away from the activity centre and that locator slot (B) matches up with the locator tab (C) on the activity centre.
- Page 11 Toy bar assembly (continued) 3. Attach the sun mirror (13) and cloud (14) in your desired location on the toy bar using the velcro tabs and hook the teethers (15) through the loops on the toy bar. Converting the stool To convert from the jump board mode to a stool: 1.
- Page 12 Converting the seat into a storage basket 1. Remove the seat unit from the activity centre by pressing the four clips (A) on the underside of the seat unit whilst lifting and rotating the seat unit. 2. With the seat upside down; i.
- Page 13 Converting activity centre to a play table 1. Remove all the plastic toys from the activity centre top. Unclip the flying car toy (8), tree teether (9) and remove. Turn the boat toy (11) and candy jar toy (10) anti-clockwise to unlock them and remove.
- Page 14 Converting activity centre to a play table (continued) 4. Squeeze the release clip on the top of the removable toy mount and pull the mount up by approx 1cm. 5. Squeeze the release clip on the underside of the removable toy mount and remove the toy mount.
-
Page 15: Height Adjustment
Height adjustment 1. Press in the button on each leg and raise or lower the leg until it clicks into place. Note: Ensure all legs are set at the same height before using. WARNING: DO NOT adjust the height whilst a child is seated in the activity centre. - Page 16 Customerservice@kooltrade.co.uk Imported by MyChild. M34 3QA www.mychild.co.uk Tel: 0161 335 2508...


Need help?
Do you have a question about the Lovely World and is the answer not in the manual?
Questions and answers