Advertisement
Quick Links
Download this manual
See also:
User Manual
Advertisement

Related Manuals for My Child Easy Twin


Summary of Contents for My Child Easy Twin
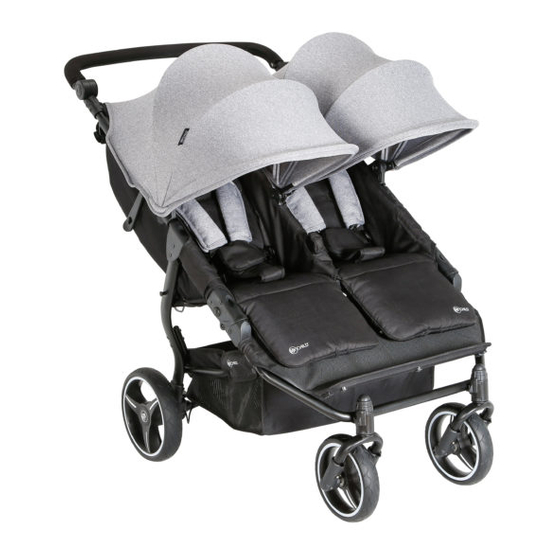
- Page 1 Easy Twin Pushchair This product is tested to: BS EN 1888:2012 Suitable for children from: BIRTH up to 15kg IMPORTANT: Keep these instructions for future reference. Your child’s safety may be affected if you do not follow these instructions...
-
Page 2: Safety Instructions
Safety instructions IMPORTANT: Keep these instructions for future reference. WARNING: Never leave your child unattended. WARNING: Ensure that all the locking devices are engaged before use. WARNING: To avoid injury ensure that your child is kept away when unfolding and folding this product. -
Page 3: Care And Maintenance
0161 335 2508. Welcome Thank you for purchasing the MyChild Easy Twin Pushchair. Please read the instructions and warnings carefully before use to ensure safe and satisfactory operation of this product. -
Page 4: Parts Checklist
Parts checklist Contained in your carton are: Part Chassis Front wheels Rear wheels Rear axle Left hand hood Right hand hood Harness pads* Raincover These are pre-fitted but are removable page 4... - Page 5 Possible combinations using optional extras There are six possible combinations: 1. Two pushchair seats (no extras). 2. Car Seat on left (requires upper-left-hand car seat adapter). 3. Car seat on both sides (requires upper-left-hand and lower-right-hand adapters) 4. Carrycot on left (requires the left-hand or “main” carrycot) 5.
- Page 6 Assembling the pushchair for the first time 1. Place the pushchair on the floor “face- 2. Release the folding lock by lifting the down” as shown. lock off the peg (A). click 3. Hold the bar at the front of the 4.
- Page 7 Assembling the pushchair for the first time (continued) 5. Attaching the rear axle: Line up the 6. Attaching the rear wheels: Push the rear axle (A) with the chassis’s back legs spindle (C) on each of the rear wheels’ as shown. Push the axle onto the back into the holes (D) on the outside of the legs until the spring pins (B) click into rear axle.
- Page 8 In Use: Opening the pushchair click 1. Release the folding lock by lifting the 2. Place your foot on the rear axle and lock off the peg (A). raise the handle upwards until the chassis clicks into the locked open position. In Use: Adjusting the handle 1.
- Page 9 In Use: The brake WARNING: The brake MUST always be ON when making adjustments, e.g. taking the child out, putting the child in or letting go of the handlebar. 1. Press down on the brake lever with 2. Pull the brake lever up with your foot to your foot to apply the brake.
- Page 10 In Use: The harness WARNING: Ensure each harness is correctly fitted at all times. Adjust the sliders on the waist and shoulder straps so that the harness fits snugly. 1. To lock: Clip the shoulder harness strap 2. To release : Press the button (D) in the clips (A) onto the loop of the waist strap centre of the buckle.
- Page 11 In Use: Adjusting the shoulder harness position (continued) To adjust the crotch strap position closer to the child, slide the buckle under the loop of fabric on the seat-base (A). To adjust the crotch strap position further from the child, slide the buckle out from under the loop of fabric on the seat-base.
- Page 12 In Use: Attaching/Removing the hood 1. Push the round hood connector (A) 2. To remove the hood; unfasten the press into the slot on mounting point (B) and studs on the back of the hood, unclip connect the hood-clip (C) over the stud the hood-clip (F) and pull the round at point (D).
- Page 13 In Use: Removing the seat fabrics If you do not intend to use one or both of the pushchair seats for an extended period of time (i.e. you intend to attach a carrycot) then it is possible to remove the pushchair seat fabrics for storage.
-
Page 14: After Use/Storage
In Use: Removing the seat fabrics (continued) 2. Standing behind the pushchair, pull 3. Check that the front wheels have up both release catches (B) and fold the folded away under the pushchair and pushchair downwards. that the folding lock reaches the peg (C). Do not force it down. - Page 15 After use/storage (continued) 2. To remove the rear wheels: Pull up on the quick release mechanism (B) and pull the wheel out from the rear axle. 3. To remove the rear axle: Push in the spring pins (C) on the inside of the axle and pull the axle off from the rear legs.
- Page 16 Customerservice@kooltrade.co.uk Imported by MyChild. M34 3QA www.mychild.co.uk Tel: 0161 335 2508...
Need help?
Do you have a question about the Easy Twin and is the answer not in the manual?
Questions and answers