Advertisement
Quick Links
Digital Camera
Universal Li-Ion Charger
Instruction
Manual
Charging Time Table:
Battery Capacity
Time
600mAh
~ 80 mins
1000mAh
~ 150 mins
1400mAh
~ 180 mins
1800mAh
~ 240 mins
3 LED Indicators:
Conditions
Charge
Voltage
Power On
–
3.6V: Red
Charging Battery
Flashing Green
7.2V: Green
3.6V: Red
Fully Charge
Green
7.2V: Green
Error
Flashing Green
ALIGNMENT GUIDES & BATTERY POSITION
Charger Base
A
B
Universal
Adaptor Plate
D
E
F
G
DSC Battery Table
Brand
Battery
Canon
BP-511/512
BP-522/535
NB-1L
NB-1LH
NB-2L
NB-3L
NB-2F12
BP-2L12/14
BP-3LCL
Casio
NP-20
NP-30
NP-40
Fuji
NP-40
NP-60
NP-80
NP-100
NP-120
GP
VAL001
VAL002
VCL002
VCL003
VCL004
VCL005
Charging LED
VCL011
Voltage LED
VFL001
Power LED
VFL002
VFL003
VFL004
VFL005
Power
VKL001
–
Red
VML001
VML002
Red
VNL001
VNL002
Red
VNL003
–
Flashing Red
VNL004
VPEL001
VPEL002
VPL003
VPL004
VPL006
VPL007
VSL001
VSL002
VSL003
VSL004
VSL005
VSL012
VSL016
VYL001
VYL002
C
Hitachi
VM-BPL13/27/30/60
VM-E330/535
VM-NP500
VM-N520
JVC
BN-V101
BN-V312U
BN-306
BN-V812/V814
Kodak
KLIC-3000
KLIC-5000
KLIC-5001
KLIC-7000
Kyocrea
BP-780S
Minolta
NP-200
NP-400
DR-LB1
DR-LB4
NP-600
Nikon
EN-EL1
EN-EL2
H
EN-EL3
EN-EL5
Olympus LI-10
LI-10B
LI-12B
LI-20B
PS-BLM1
Base Unit /
Battery
Base Unit /
Brand
Battery
Universal Plate Position
Universal Plate
Base
A
Optex
LI10
Universal
LI11
Universal
Base
A
LI12
Universal
Universal
D
Universal
D
LI13
Universal
LI14
Universal
Universal
D
LI15
Universal
Universal
D
LI16
Universal
Universal
D
LI17
Universal
Universal
D
LI19
Universal
Universal
D
LI23
Universal
Universal
D
LI26
Universal
Universal
D
LI27
Universal
Universal
D
LI29
Universal
Universal
D
LI30
Universal
Universal
D
LI38
Universal
Universal
F
LI41
Universal
Universal
F
LI61
Universal
Universal
D
LI62
Universal
Universal
D
Panasonic AG-BP15P
Base
Universal
H
AG-BP25
Base
Base
A
CGR-S101A
Universal
Universal
D
CGR-B202A
Base
Universal
D
CGR-602A
Universal
Base
A
CGR-S602E
Universal
Universal
D
CGR-D120
Universal
Universal
D
CGR-D220
Universal
Universal
F
CGR-S602A
Universal
Universal
F
CGA-S300A/1B
Universal
Universal
D
CGA-DU07
Universal
Universal
D
CGA-DU14
Universal
Universal
D
CGA-DU21
Universal
Universal
H
CGA-S001E
Universal
Universal
H
CGA -S002
Universal
Universal
H
CGA -S301
Universal
Universal
E
CGA -S302A
Universal
Universal
D
DMW-BC7
Universal
Universal
H
DMW-BCA7
Universal
Universal
D
DMW-BL14
Universal
Universal
D
DMW-BM7
Universal
Universal
D
PV-DBP5
Base
Universal
G
VW-VBA05
Universal
Universal
G
VM-VBA10
Universal
Universal
G
VW-VBD1/E
Base
Base
B
VW-VBD2
Base
Base
B
VW-VBD07
Universal
Base
B
VW-VBD14
Universal
Base
C
VW-VBP10
Universal
Universal
F
Pentax
D-L12
Universal
Universal
H
D-L17
Universal
Universal
H
D-L18
Universal
Universal
D
Polaroid
PR105DG
Universal
Universal
H
Ricoh
DB-30
Universal
Base
B
DB-40
Universal
Base
B
DB-43
Universal
Base
B
Sanyo
DB-L10
Universal
Base
B
DB-L20
Universal
Universal
F
UR-211
Universal
Universal
H
UR-421
Universal
Universal
H
Sony
LIP-10
Universal
Base
B
NP-500/520
Base
Universal
F
NP-F10/F20/F30
Base
Universal
D
NP-F330
Base
Universal
D
NP-F530
Base
Universal
H
NP-F550/ F570
Base
Universal
H
NP-F720/F730/F730H
Base
Universal
H
NP-F750/F750SP
Base
Universal
H
NP-F930/F950/F960
Base
Universal
D
NP-FM50/FM70/FM90
Base
Universal
D
NP-FC10/FC11
Base
Universal
D
NP-FF50/70
Base
Universal
H
NP-FP50
Base
Universal
E
NP-FP70
Base
Universal
H
NP-FP90
Base
Universal
D
NP-FS11/FS21/FS31
Base
Universal
D
NP-FR1
Universal
Universal
D
NP-FT1
Universal
Universal
D
NP-QM51/QM71/QM91
Base
Universal
D
Toshiba
PDR-BT2
Universal
Universal
H
PDR-BT3
Universal
GB
Battery
Position
GP Digital Camera Universal Lithium Ion Charger is designed for 3.6V and 7.2V Lithium Ion batteries for
D
digital cameras from Canon, Casio, Fuji, GP, Hitachi, JVC, Kodak, Kyocera, Minolta, Nikon, Olympus, Optex,
Panasonic, Pentax, Polaroid, Ricoh, Sanyo, Sony and Toshiba.
D
D
Features
-
Precision end-of-charge voltage detection
H
- Top-off charging maintains battery in full charge
H
- LED indicator displays charging mode
F
- Automatic 3.6V/7.2V detection with LED indication
- Timer Protection
E
- Overcharge protection
D
- Abnormal battery detection
D
Operating Instructions
D
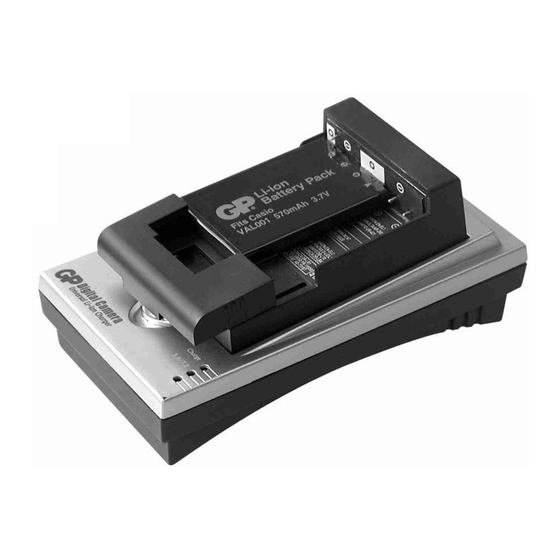
Use either the universal plate or the charger base to charge your battery. Please
D
refer to the DSC Battery Table and Alignment Guides. Connect the AC adaptor to
the rear of the charger. (see diagram 1)
G
The battery voltage will be detected by the middle LED. A red colour will be displayed
H
for batteries of 3.6 / 3.7V, while a green colour for 7.2 / 7.4V. In case of error
D
condition, disconnect the AC power adapter. Remove the battery from the plate
D
or charger base, and then detach the plate from charger. After that, attach the plate,
connect the AC adapter and slide in the battery again. If the error condition remains,
G
contact your local supplier.
H
Using the Charger Base
H
Note the alignment guides (A-C) and contacts on the battery before sliding the
B
battery into place. For some battery models, you may need to either press the
battery down and then slide it up (away from the indicator) or press the battery up
B
and then slide it down. Do not force the battery down to the contacts. If it does not
D
easily slide into the guides, re-align the guides and try again.
B
Using the Universal Plate
G
Install and remove the universal plate as shown in diagram 2. Before installing the
G
battery onto the plate, check the polarity signs (+/-) on the battery. Locate the
alignment guides (D-H) and polarity positions on the universal plate of the battery.
G
Pull the sliding grip at the lower side of the plate out (see diagram 3). While aligning
G
the side of the battery along the guide, slide in the battery and connect the contacts.
After that, release the sliding grip gently to hold the battery securely in place.
G
D
Important Safety Instructions
* Read all the instructions and cautions before using the charger.
G
* Use Lithium Ion batteries ONLY. Using other batteries will void the
G
warranty and cause injury and damage.
G
* Do not use any power cord or extension cord from 3rd parties.
* Do not use the charger with damaged cord or plug.
G
* Unplug the charger when it is not in use.
G
* Do not disassemble the charger or adapter. This may cause electric shock or fire.
D
* Do not operate the charger if it is subject to damage in any way.
* Do not use the charger when it is wet.
D
* Do not leave the battery connected to the charger or plate for
D
prolonged period. Remove the battery after charging is completed.
G
* Keep batteries away from fire, water or extreme condition.
G
G
B
D
D
El cargador Universal de Litio Ion para Cámaras Digitales de GP está diseñado para baterías de Litio Ion
B
de 3.6V y 7.2V de las marcas: Canon, Casio, Fuji, GP, Hitachi, JVC, Kodak, Kycera, Minolta, Nikon, Olympus,
Optex, Panasonic, Pentax, Polaroid, Ricoh, Sanyo, Sony y Toshiba.
B
Características
G
- Precisión en la detección del final de carga.
G
- Mantiene la bateria completamente cargada.
F
- Indicador LED en modo carga
- Detecta automaticamente, y lo indica con el LED,
D
las baterías de 3.6V/7.2V.
D
- Temporizador de seguridad.
D
- Seguridad contra sobrecarga.
- Detección de baterias anormales o en mal estado.
F
Instrucciones de Uso
F
Utilice tanto el adaptador universal como la base del cargador para cargar sus
D
baterías. Por favor, diríjase a la tabla de baterías DSC y a la guía de alineación.
D
Conecte el adaptador a la parte trasera del cargador. (ver diagrama 1)
D
El LED detectara el voltaje de su batería. Será rojo si la batería es de 3.6/3.7V y
verde si es de 7.2/7.4V. En caso de error, desconecte el cargador de la corriente.
H
Retire la batería del cargador. Quite el adaptador del cargador. Coloque de nuevo
F
el adaptador. Conecte el cargador a la corriente. Si continúa teniendo problemas,
H
contacte con su distribuidor local.
F
Uso de la base del cargador
Tenga en cuenta las guías de alineamiento (A-C) y los contactos en la batería.
B
Entonces introduzca la batería en su lugar. Según el modelo de la batería se
B
colocará, o bien presionando hacia abajo y deslizándola hacia arriba, o al contrario,
presionando hacia arriba y deslizándolo hacia abajo. No fuerce nunca la batería.
B
Si no le resulta sencillo, alinee de nuevo las guías e inténtelo de nuevo.
B
Usar el adaptador Universal
B
Insertar y retirar el adaptador universal tal y como muestra el diagrama 2. Antes
B
de introducir las baterías en el adaptador compruebe la polaridad (+/–). Localice
B
la guía de alineamiento (D-H) y polaridad en el adaptador universal. Deslice el
adaptador sobre el cargador con suavidad hasta que encaje totalmente. Introduzca
B
entonces las baterias correctamente para que hagan contacto y se mantengan
B
seguras en su lugar.
C
Instrucciones importantes de seguridad
C
Lea todas las instrucciones y precauciones antes de usar el cargador.
Utilice sólo baterías de Litio Ion. Utilizar otras baterías no será valida la garantía
C
al mismo tiempo que puede causar daños.
C
No utilice alargadores o cualquier tipo de cable extensible de terceras partes.
No utilice el cargador si esta dañado el cable o el enchufe.
C
Desenchufe el cargador cuando no este utilizándolo.
B
No desmonte ni el cargador ni el adaptador. Esto puede causar cortocircuitos y/o
H
fuego.
No utilice el cargador si está dañado de alguna forma.
H
No utilice el cargador si está mojado.
B
No deje la batería conectada al cargador o al adaptador por un periodo muy
prolongado. Retírelas después de haber finalizado su carga.
D
Mantenga las baterías lejos del fuego, agua y/o condiciones extremas.
D
Specification
Input
: 12 VDC
Stand-by Current
: 30mA
Charging Current
: 800mA max at constant
current mode
Cut Off Termination
: Fixed Voltage
(diagram 1)
(diagram 2)
1
2
2
1
(diagram 3)
E
Especificaciones
Corriente
: 12VDC
Corriente de mantenimiento : 30mAh
Corriente de Carga
: 800mAh como máximo
de corriente constante
Corte del Terminal
: Voltaje fijo
(diagram 1)
(diagram 2)
1
2
2
1
(diagram 3)
Advertisement

Related Manuals for GP EZ Digital


Summary of Contents for GP EZ Digital
-
Page 1: Instruction Manual
Digital Camera Universal Li-Ion Charger Instruction Manual Charging Time Table: Battery Capacity Time 600mAh ~ 80 mins 1000mAh ~ 150 mins 1400mAh ~ 180 mins 1800mAh ~ 240 mins 3 LED Indicators: Conditions Charge Voltage Power Power On – – 3.6V: Red Charging Battery Flashing Green... - Page 2 Specifikace Vstupní nape ˇtí : 12V DC Udrz ˇ ovací proud : 30 mA Nabíjecí proud : 800 mA max pr ˇ i rez ˇ imu konstantního proudu Ukonc ˇ ení nabíjení : fixní nape ˇtí (obr. 1) (obr. 2) (obr.
- Page 3 A GP Univerzális Lítium Ion akkumulátörtolto ˝ készülék digitális fényképezo ˝ gépekhez, úgy lett megtervezve, hogy a Canon, Casio, Fuji, GP, Hitachi, JVC, Kodak , KYocera, Minolta, Nikon, Olympus, Optex, Panasonic, Pentax, Polaroid, Ricoh, Sanyo, Sony és Toshiba által gyártott 3,6V-os és 7,2V-os készülékekben használatos Litium Ion akkumulátorokkal kompatibilis legyen.
- Page 4 GP Digital Camera Universal Lithium Ion lader er designet for 3,6V og 7,2V Litium Ion batterier for digitale kameraer fra Canon, Casio, Fuji, GP, Hitachi, JVC, Kodak, Kyocera, Minolta, Nikon, Olympus, Optex, Panasonic, Pentax, Polaroid, Ricoh, Sanyo, Sony og Toshiba. Egenskaper Specification - Eksakt volt detektering ved ferdig ladning...
Need help?
Do you have a question about the EZ Digital and is the answer not in the manual?
Questions and answers