Philips CDR785/00 Service Manual
Philips compact disc recorder service manual
Hide thumbs
Also See for CDR785/00:
- Service manual (72 pages) ,
- User manual (35 pages) ,
- Specifications (2 pages)
Table of Contents
Advertisement
Compact Disc Recorder
SERVICING
For servicing CDR785/CDR786, the sets can be divided into two parts:
1. Except for the Power board (Switched Mode Power Supply) and the CD-R/W module the set has to
be repaired on component level.
2. The Power board and the CD-R/W module will be exchanged completely in case of a failure.
The defective CD-R/W module has to be returned for central repair.
Available circuit descriptions: The Basics of Compact Disc Recordable/Rewritable
TABLE OF CONTENTS
Technical Specification and Measurement setup................1-1, 1-2
Location of printed circuit boards ............................................1-3
Warnings & Safety ..................................................................2-1
Brief Operating Instructions ..............................................3-1 to 3-15
Dismantling Instructions.....................................................4-1 to 4-5
Service hints ......................................................................5-1 to 5-3
Service Test Program ........................................................5-4 to 5-6
BLOCK DIAGRAMS ..........................................................6-1 to 6-5
WIRING DIAGRAM.................................................................6-6
POWER BOARD (for orientation only) ..............................7-1 to 7-4
FRONT BOARD.................................................................7-5 to 7-6
KEY BOARD left .....................................................................7-7
KEY BOARD right ...................................................................7-8
©
Copyright 2000 Philips Consumer Electronics B.V. Eindhoven, The Netherlands
All rights reserved. No part of this publication may be reproduced, stored in a retrieval
system or transmitted, in any form or by any means, electronic, mechanical, photocopying,
or otherwise without the prior permission of Philips.
Published by MS 0012 Service Audio
3rd generation Compact Disc Recording
chapter
Printed in The Netherlands
Subject to modification
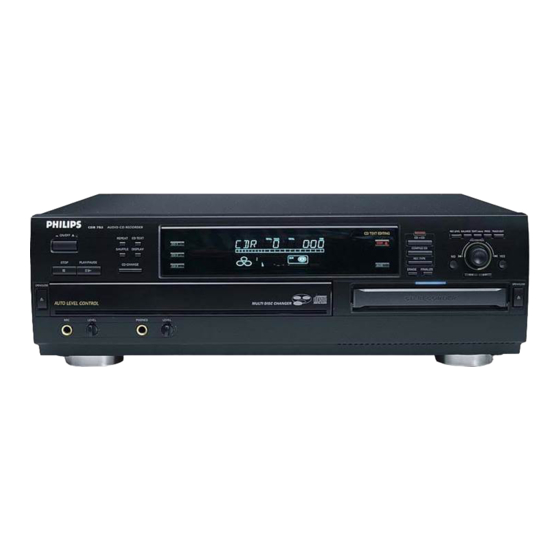
CDR 785
CDR 785
AUDIO CD RECORDER
AUDIO CD RECORDER
ON/OFF
ON/OFF
REPEAT
REPEAT
CD TEXT
CD TEXT
STEP
STEP
STEP
CD 1
CD 1
TEXT TOTAL TRACK
TEXT TOTAL TRACK
TEXT TOTAL TRACK
SHUFFLE
SHUFFLE
DISPLAY
DISPLAY
STOP
STOP
CD 2
CD 2
PLAY/PAUSE
PLAY/PAUSE
1
1
1
2 3 4
2 3 4
2 3 4
5
5
5
6
6
6
7 8
7 8
7 8
9 10 11 12 13
9 10 11 12 13
9 10 11 12 13
CD-CHANGE
CD-CHANGE
CD RW
CD RW
CD RW
COMPILE DISC ALL PROGRAM
COMPILE DISC ALL PROGRAM
COMPILE DISC ALL PROGRAM
CD 3
CD 3
SHUFFLE REPEAT TRACK
SHUFFLE REPEAT TRACK
SHUFFLE REPEAT TRACK
OPEN/CLOSE
OPEN/CLOSE
AUTO LEVEL CONTRO
AUTO LEVEL CONTRO
L
L
MIC
MIC
PHONES
PHONES
4822 725 25242
3104 125 40100
HEADPHONE/MICROPHONE BOARD ...........................7-9 to 7-10
INTERFACE BOARD......................................................7-11 to 7-13
3CDC MODULE................................................................8-1 to 8-9
EXPLODED VIEWS
apparatus ..........................................................................10-1
3CDC module ...............................................................8-8 to 8-9
MECHANICAL PARTSLIST see Exploded views
ELECTRICAL PARTSLIST...................................................10-2 ff
CDR785
/00/01C/17
CDR786
/00
CD TEXT EDITING
TIME TOTAL REM
TIME TOTAL REM
TIME TOTAL REM
REC
REC
REC
TRACK TIME
TRACK TIME
TRACK TIME
RECORD
RECORD
REC LEVEL BALANCE
REC LEVEL BALANCE
TEXT
TEXT
CD CD
CD CD
PROG
PROG
TRACK EDIT
TRACK EDIT
CDR
CDR
JOG CONTROL
JOG CONTROL
14 15 16 17 18
14 15 16 17 18
14 15 16 17 18
19 20 +
19 20 +
19 20 +
COMPILE CD
CD RW
COMPILE CD
CD RW
CD RW
DIGITAL
DIGITAL
DIGITAL
12
12
12
EDIT
EDIT
EDIT
OPTICAL
OPTICAL
OPTICAL
12
12
12
ANALOG
ANALOG
ANALOG
RECORD IN PROGRESS
RECORD IN PROGRESS
RECORD IN PROGRESS
FINALIZE ALC
FINALIZE ALC
FINALIZE ALC
REC TYPE
REC TYPE
NO
NO
AUX
AUX
YES
YES
ERASE
ERASE
FINALIZE
FINALIZE
OPEN/CLOSE
OPEN/CLOSE
CD RECO RDER
CD RECO RDER
chapter
CLASS 1
LASER PRODUCT
©
3103 785 25030
Advertisement
Chapters
Table of Contents

Related Manuals for Philips CDR785/00


Summary of Contents for Philips CDR785/00
- Page 1 LASER PRODUCT © Copyright 2000 Philips Consumer Electronics B.V. Eindhoven, The Netherlands All rights reserved. No part of this publication may be reproduced, stored in a retrieval system or transmitted, in any form or by any means, electronic, mechanical, photocopying, or otherwise without the prior permission of Philips.
-
Page 2: Technical Specification
TECHNICAL SPECIFICATION General: Mains voltage : 220V-230V / 50-60Hz for /00 110V-240V /50-60Hz for /01C 120V / 60Hz for /17 : ≤ 18W Power consumption ≤ 1W in stand by Input / Output: Analog in: : ≤500mV input sensitivity max. input voltage : 2,8V input impedance : 47kΩ... - Page 3 TECHNICAL SPECIFICATION Remote Control: RC5 commands RC283505 SYSTEM CODE RC KEY COMMAND CODE Standby BRIGHTNESS TRACK INCR. CD TEXT TEXT EDIT PROGRAM PLAY ¡ ™ STOP PAUSE SHUFFLE REPEAT RC5 code RC283505, 130300 MEASUREMENT SETUP Use Audio Signal Disc SBC429 4822 397 30184 (replaces test disc 3) S/N and distortion meter...
- Page 4 LOCATION OF PRINTED BOARDS loccation of pcb´s, 240200 picture 1...
-
Page 5: Warnings & Safety
WARNINGS & SAFETY © ñ WARNING WAARSCHUWING All ICs and many other semiconductors are susceptible to Alle IC´s en vele andere halfgeleiders zijn gevoelig voor electrostatic discharges (ESD). Careless handling during electrostatische ontladingen (ESD). repair can reduce life drastically. Onzorgvuldig behandelen tijdens reparatie kan de levensduur When repairing, make sure that you are connected with the drastisch doen vermindern. -
Page 6: Table Of Contents
– 1 Digital coaxial cable(with black plugs) Welcome..............5 Recording modes ............21 – Mains cable In the eighties Philips invented a new audio system - the CD. – 2 batteries for the remote control, size AA About this manual ............5 High speed recording and automatic finalizing ..22 The CD (compact disc) revealed to you the new dimensions of Environmental information .........5... -
Page 7: General Information
1 ON/OFF .......turns the CD recorder/changer ON and ........- balance control (recording) – All Philips CD players and CD recorders with ........- selects settings (menu on) CDR(W) handling ON/OFF indicator..lights up when the set is switched on the sticker shown here are CDRW compatible. -
Page 8: Connections At The Back
CONTROLS AND CONNECTIONS DISPLAY DISPLAY indications CD changer section CD recorder section 1 2 3 1 2 3 4 STEP TEXT TOTAL TRACK TIME TOTAL REM TRACK TIME STEP TEXT TOTAL TRACK TIME TOTAL REM TRACK TIME OPTICAL ANALOG DIGITAL 9 10 11 12 13 14 15 16 17 18 19 20 + 9 10 11 12 13 14 15 16 17 18 19 20 + AC MAINS... -
Page 9: Display Messages
General FINALIZE CD ..laser power calibration performed 96 passage ........times, please finalize disc A-B LISTEN ? ..normal speed recording of a particular PHILIPS CD RECORDER INITIALIZING ..during laser power calibration for passage ........when set is switched on unfinalized discs REC LEV - XX DBrecord level is being adjusted READING ....reading disc information... -
Page 10: Installation
Philips Consumer Service desk in mon output for CD recorder & CD changer deck). This there is a click. -
Page 11: Power Supply/Mains
2 Insert a CD, CDR or CDRW in the appropriate recess in the tray, label side up. 4 Press ON/OFF to switch on the set. PHILIPS CD RECORDER will be displayed. 3 Press OPEN/CLOSE to close the tray (see also “Playing“). READING lights up and the display will show the type of •... -
Page 12: Cd Changer
LOADING DISCS PLAYING PLAYING CD changer Playing CD text Selecting a track AUDIO CD RECOR DER Note: ON/OFF ON/OFF ON/OFF REPEAT CD TEXT REPEAT CD TEXT Only Audio CDs will be accepted in the CD changer deck If a REPEAT CD TEXT CD 1 CD 1... -
Page 13: Search
PLAYING PROGRAM Search Repeat CD(s), track or program Programming track numbers Erasing a track from the program 1 If necessary press STOP 9. JOG CONTROL ON/OFF ON/OFF COMPILE CD REPEAT CD TEXT REPEAT CD TEXT CD 1 CD 1 SHUFFLE REC TYPE DISPLAY SHUFFLE... -
Page 14: Recording General
RECORDING GENERAL RECORDING GENERAL INTERNAL RECORDING Basic information Direct Line Recording (DLR) REC LEVEL key Recording modes We will describe: The CD recorder is equipped with the high-performance Direct For recording from the internal CD Changer-deck you can RECORD REC LEVEL BALANCE TEXT PROG TRACK EDIT... -
Page 15: High Speed Recording And Automatic Finalizing
INTERNAL RECORDING INTERNAL RECORDING • To stop recording manually, press STOP 9. 3 Press COMPILE CD to enter into the record mode. High speed recording and automatic finalizing High speed recording Both decks will be selected in the display, the arrow starts •... -
Page 16: Microphone Recording
INTERNAL RECORDING EXTERNAL RECORDING Microphone recording Analog or digital recording Automatic track increment CD TEXT EDITING RECORD REC LEVEL BALANCE TEXT PROG TRACK EDIT CD CD RECORD REC LEVEL BALANCE TEXT JOG CONTROL PROG TRACK EDIT CD CD COMPILE CD JOG CONTROL COMPILE CD REC TYPE... -
Page 17: Recording With Automatic Synchronized Start
EXTERNAL RECORDING EXTERNAL RECORDING 7 If a digital source is selected: Recording with automatic synchronized start Manual recording After the recording process, the CD recorder stops automatically. Recording of an entire disc or a track with automatic Manual recording from an external source Manual microphone recording start 1 Make sure that the CDR(W) is absolutely free of scratches... -
Page 18: (Un)Finalizing, Erasing
EXTERNAL RECORDING (UN)FINALIZING, ERASING (UN)FINALIZING, ERASING If MIC ONLY is selected: Finalising CDR & CDRW discs Unfinalising CDRW discs Erasing from a CDRW disc Press YES on the set to start recording. The CD recorder starts to record and RECORDING IN CD TEXT EDITING If you want to record (or erase) on (from) an finalized CDRW, It is possible to erase one or more tracks (starting from the... -
Page 19: Special Features
SPECIAL FEATURES SPECIAL FEATURES Storing text during recording Erasing text Text edit (on CD recorder only) You can store and edit text even while recording a single 1 Press TEXT to enter into the text edit menu. 5 Press YES to confirm. track or single CD, or when recording from an external source lights up and TEXT EDIT is displayed. -
Page 20: Track Editing (On Cd Changer Only)
SPECIAL FEATURES TROUBLESHOOTING 5 Press YES to confirm the position of marker A. WARNING LASER SAFETY Track editing (on CD changer only) The marker position B and the new “track” time will be Under no circumstances should you try to repair the This unit employs a laser. -
Page 21: Dismantling Instructions
DISMANTLING INSTRUCTIONS Dismantling the Top Cover • Remove 9 screws as shown in picture 2. • Raise top cover at the rear and pull it backwards. picture 2 Dismantling the Tray Cover picture 3 bottom view • To release the cover from the catch on the tray pull it frontwards on bottom side as shown in picture 4. - Page 22 DISMANTLING INSTRUCTIONS Dismantling the Front Cabinet picture 5 • Remove tray cover first → see description before. • Disconnect flexfoil cables to interface board and CDR module. • Release catches on top as shown in picture 5 and turn front cabinet away. Take care of the flexfoil cables connecting the key boards! •...
- Page 23 DISMANTLING INSTRUCTIONS Dismantling the CDC module continued • Dismantle front cabinet as described before. • Move the tray a few centimetres out to get access to the fastening screws at the rear. • Remove the 3 screws as shown in picture 8. •...
- Page 24 DISMANTLING INSTRUCTIONS Dismantling the CDR module picture 12 • Remove 3 screws as as indicated in picture 12. • Disconnect all cables. • Move the module backwards to release the catch on pos. 205 (see exploded view) • Raise the module on the rear and turn it out. Fixation by a catch on right front-side picture 13...
- Page 25 DISMANTLING INSTRUCTIONS Dismantling the Power board picture 14 • Disconnect all cables. • Remove 3 screws as as indicated in picture 14. • Release the catches on the plastic supports. • Move the board backwards to release the catch on left front-side.
-
Page 26: Service Tools
SERVICE HINTS SERVICE TOOLS TORX T10 screwdriver with shaftlength 150mm ........4822 395 50423 TORX screwdriver set SBC 163 ..............4822 295 50145 Audio signal disc SBC 429..............4822 397 30184 Playability test disc SBC444 ..............4822 397 30245 Test disc 5 (disc without errors) + Test disc 5A (disc with dropout errors, black spots and fingerprints) SBC 426/426A ..............4822 397 30096 Burn in test disc (65 min. - Page 27 SERVICE HINTS General Service position For repairs on: Front Board Power Board Interface Board picture 16 Service position Key Boards After dismantling the front cabinet as described in chapter 4-2 the front unit can be placed on 3CDC- and CDR module and be re-connected again. picture 17...
- Page 28 SERVICE HINTS Service position Headphone/Microphone Board • Dismantle front cabinet as described in chapter 4-2. • Dismantle Headphone/Microphone Board and put it through the opening for the 3CDC-tray in front cabinet. • Mount front cabinet provisional and re-connect flexfoil cables to Front Board. picture 18 Service position 3CDC Module picture 19...
- Page 29 To enter Service SERVICE TESTPROGRAM * To leave Service Testprogram plug mains cord off. Testprogram hold CD y CD & NO buttons CD-CHANGER MODULE depressed while plugging mainscord in. On/Off switch in pos. ON Display shows stands for Service mode version number stands for version number of the µP - software.
- Page 30 To enter Service SERVICE TESTPROGRAM * To leave Service Testprogram plug mains cord off. Testprogram hold CD y CD & NO buttons CDR MODULE depressed while plugging mainscord in. On/Off switch in pos. ON Display shows stands for Service mode version number stands for version number of the µP - software.
- Page 31 To enter Service SERVICE TESTPROGRAM Testprogram hold * To leave Service Testprogram plug mains cord off. CD y CD & NO buttons VARIOUS TESTS depressed while plugging mainscord in. On/Off switch in pos. ON Display shows stands for Service mode version number stands for version number of the µP - software.
-
Page 32: Key Board Left
BLOCK DIAGRAM FRONT BOARD STEP TEXT TOTAL TRACK TIME TOTAL REM TRACK TIME 9 10 11 12 13 14 15 16 17 18 19 20 + KEY BOARD left KEY BOARD right 1405 COMPILE CD TRACK PROG DIGITAL CD RW CD RW 1430 OPTICAL... - Page 33 BLOCK DIAGRAM 3CDC MODULE CD MECHANISM PHOTODIODE & HF AMPLIFIER - LOADER CONTROL BOARD 1805 VAM2202/01 +10V DISC 7876 7806 7877 TDA7073A DQSY EXCK DQSY TURNTABLE FOC + SBSO SRDT MOTOR SBSY SCOR SRDT FOCUS MOTOR FOC - SFSY WFCK µP_CLK 2 SCLK CL11...
- Page 34 BLOCK DIAGRAM CDR-MODULE CDR MAIN BOARD CDL 4009 LOADER ASSY 7703 7330 1501 CDM3800 CON 2 1330 FLASH HALL POWER SUPPLY 7 WIRES DRIVE, HALL FEEDBACK MOTOR FLEX 11P UNIT DRIVER +12V BA6856FP TURN ADDRESS DATA TABLE 7702 FRONT BOARD 7300 7008 DRAM...
- Page 35 BLOCK DIAGRAM SWITCHED MODE POWER SUPPLY / European & USA version Lightning L101, L102 Protection F101 T102 D251 R152 EMI-filter +5V EVER switching D252 transistor C105 C251 6,8V Q151 overvoltage CN101 protection MAINS SOCKET Q152 reference PC151 regulation IC251 PC102 switch on/off CON1 Q251...
- Page 36 BLOCK DIAGRAM SWITCHED MODE POWER SUPPLY / WorldWide version Lightning L101, L102 Protection F101 T102 D251 R152 EMI-filter +5V EVER switching D252 transistor C105 C251 6,8V Q151 overvoltage CN101 protection MAINS SOCKET Q152 reference PC151 regulation IC251 CON1 Q251 ON/OFF +5V EVER PC102 switch on/off...
-
Page 37: Wiring Diagram
WIRING DIAGRAM OPTICAL IN DIG IN/OUT LINE IN/OUT INTERFACE BOARD SUPPLY-BOARD 1309 Componentside view Componentside view (80mm) D_GND 1805 D-GND 1307 1305 UP_CLK 8008 (340mm) EBU_GND DQSY EBU_IN_CDR SRDT +12V SHIELD KILL_R +12V EBU_GND EBU_GND D_GND EBU_OUT_CDR EBU_OUT D_GND SHIELD KILL_L -30V PORE... - Page 38 for orientation only Switched Mode Power Supply / EU + USA version (/00/17) 470k 300V 4,9V 0,1V 1,2V 3,9V 0,1V 4,4V 2200pF 2,4V to Interface Board -0,1V 1305 4,4/0V 8,5V 300V 5 ± 0,25V D111 typ.-25V D112 150V 4,1 ± 0,4V to CDR module typ.-21V 300V...
- Page 39 for orientation only POWER BOARD / component side view POWER BOARD / copper side view USA and European version USA and European version C153 R156 R114 R115 R155 R151 R158 R251 C201 R202 R203 R205 R212 R204 R211...
- Page 40 for orientation only Switched Mode Power Supply / WorldWide version (/01) 300V/140V 4,9V 0,2V/2V 3,9V 0,2V/2V 4,4V 2,4V to Interface Board -0,1V/-0,2V 1305 4,4/0V 8,5V/8V 300V/140V 5 ± 0,25V typ.-25V 4,1 ± 0,4V to CDR module typ.-21V 300V/140V loating 1501 1,5V/3,8V -29,3 ±...
- Page 41 for orientation only POWER BOARD / component side view POWER BOARD / copper side view WorldWide version WorldWide version R156 C153 R132 R118 R131 C113 C108 R116 R155 R151 R158 R257 R251 C214 C207 R202 R210 C213 R203 R204 R205 R212...
- Page 42 1400 A19 7413 I2 STEP TRACK TIME 1401 D19 7414 G3 7404 TEXT TOTAL TRACK TIME TOTAL REM 1402 I19 7415 J5 FRONT BOARD 15-BT-66GN 1403 G19 9421 H18 1405 K19 F400 A6 -30V 1406 F4 F401 G5 2400 B1 F402 G3 9 10 11 12 13 14 15 16 17 18 19 20 + Optional...
- Page 43 FRONT BOARD 2400 B7 3499 D6 1400 F5 9423 B2 copperside view 2401 B8 3500 D6 1401 F8 9425 A9 2402 B8 3501 D6 1402 D9 2403 B7 3502 D6 1403 F1 2404 B8 3503 D7 1405 D1 2405 B8 3504 D6 1406 D4 2406 B7...
- Page 44 1460 A9 1463 A6 1466 B6 1469 C6 1481 B2 3596 C5 6432 B4 9461 B4 1461 B9 1464 B6 1467 C4 1470 D1 3590 A8 6430 B9 6433 B3 9462 B5 1462 C9 1465 A6 1468 C2 1480 A4 3591 B8 6431 B4 9460 A4...
- Page 45 1430 A5 1442 A7 1445 B6 1448 C9 1451 A3 1454 C4 1457 A7 3636 C8 6418 B3 9452 A5 1440 A6 1443 A8 1446 D7 1449 D9 1452 B4 1455 C3 3632 B5 3637 B8 6419 A3 9453 C4 1441 A7 1444 A8 1447 D8...
- Page 46 1491 A1 F618 C6 1492 D1 F619 C8 1690 A10 F620 C2 +12V HEADPHONE / MICROPNONE BOARD 2661 C3 F621 C4 1690 2662 B3 F622 C5 F605 12V +0,6V/-1,2V +12V 2663 C3 F623 D6 HP_R F606 2664 A3 F624 E2 2665 C4 F625 E4 HEADPHONE...
- Page 47 7-10 7-10 1491 B6 2663 B8 2668 B9 2683 A2 2690 A3 3661 B7 3695 B2 8600 A10 1492 B1 2664 A6 2673 A8 2684 A2 2695 A5 3669 A9 3696 A6 1690 B10 2667 A9 2674 B8 2689 A3 2696 B3 3670 B10 3697 A4...
- Page 48 7-11 7-11 1301 G1 F351 G12 1302 G5 F352 I14 1303 F3 F355 C13 1305 G7 F356 C13 1307 C13 F358 C13 INTERFACE BOARD /digital part 1308 G11 F359 C7 1309 H14 F362 A9 1312A E13 F363 C1 1312B C1 F364 D1 1302 DIGITAL IN-SELECTOR...
- Page 49 7-12 7-12 1301 D10 1305 D5 1309 D16 2307 C16 2334 B8 2361 C10 2390 B4 2401 E15 3348 C7 3357 B14 3364 B12 3383 D16 6325 D5 6372 D7 7320 D14 9302 C3 9306 D5 9311 B12 9316 B15 9322 C10 9326 D9 9331 E6...
- Page 50 7-13 7-13 1304 G13 7332 C12 1306 H1 7335A I10 1311A A13 7335B F10 ANALOG SELECTOR 1311B D1 7336A G3 ANALOG OUT 1302 +5VS 2238 B8 7336B H3 INTERFACE BOARD /analog part 3357 DIG_SW_0 V_AMP1+ 1311-A HP_L 2321 E5 7370 H10 YKC21-3699 to 1304 3345...
- Page 51 Dismantling Hints 3CDC99-DS Module (3 Disc Carousel Changer) TABLE OF CONTENTS Dismantling Hints...............8-1 Service Hints ..............8-2 Lubrication Instructions ...........8-2 to 8-3 ESD Warnings ..............8-3 Blockdiagram ..............8-4 Dismantling of Drawer Dismantling of Flex Plate Wiring ................8-4 → A Pull drawer outwards →...
-
Page 52: Service Hints
Service Hints Lubrication Instructions CHASSIS Replacement of CD Drive See also exploded view of changer mechanism. 1. Dismantle printed circuit board: remove 5 screws. Grease 2. Disconnect flexfoil cable and JST connector. Pay attention to WARNING! Grease inside grove 3. Loosen 2 screws (pos 107,108) and remove CD drive- lockings (pos 105,106). - Page 53 WARNING Lubrication Instructions CHARGED CAPACITORS ON THE SERVO BOARD MAY DAMAGE THE CD DRIVE ELECTRONICS WHEN CONNECTING A NEW CD MECHANISM. THAT´S WHY, BESIDES THE SAFETY MEASURES LIKE DRAWER MECHANISM • SWITCH OFF POWER SUPPLY • ESD PROTECTION ADDITIONAL ACTIONS MUST BE TAKEN BY THE REPAIR TECHNICIAN. The following steps have to be done when replacing the CD mechanism: 1.
-
Page 54: Blockdiagram
Blockdiagram Wiring of CD Drive CD MECHANISM PHOTODIODE & HF AMPLIFIER - LOADER CONTROL PCB 1805 +10V DISC 7876 7806 7877 TDA7073A EXCK DQSY TURNTABLE FOC + DQSY SBSO MOTOR SBSY SCOR SRDT FOCUS SRDT MOTOR FOC - SFSY WFCK CL11 SCLK µP_CLK... - Page 55 1800 D2 2803 C5 2810 A4 2822 F9 2833 C10 2840 G4 2851 B11 2879 H5 2891 F4 3802 C4 3811 B4 3820 D3 3826 F9 3834 A4 3841 G5 3847 F5 3857 C2 3870 E3 3897 E7 1801 G1 2805 B5 2811 A5 2823 F10...
- Page 56 Mapping 3CDC99 DS Board Componentside view 3CDC99 DS Board Copperside view 1800 E3 3714 H2 3886 J3 1801 H5 3715 H3 3887 I3 1805 A1 3716 A2 3888 I3 1810 D3 3718 C5 3889 B5 1876 J1 3728 B5 3890 I3 1878 I1 3730 B5 3891 I3...
- Page 57 1805 H15 2804 H4 2852 I2 2862 C2 2872 F10 2881 F8 3707 H4 3716 H12 3762 A3 3809 H11 3859 B7 3874 B13 3880 G6 3886 G6 3896 G10 6872 D8 7810 A3 7876 H3 9839 C14 1876 F3 2812 C1 2853 H4 2863 D2...
-
Page 58: Exploded View
EXPLODED VIEW / 3CDC99-DS Drawer bottom view POS. 60 73 74 POS. 25... -
Page 59: Mechanical Partslist
EXPLODED VIEW / 3CDC99-DS Module top view Chassis top view 116 117 118 Printed Circuit Board MECHANICAL PARTSLIST 3CDC99-DS MODULE –––––––––––––––––––––––––––––––––––––––––––––––––––––––––––––––––––––––––––––––––––––––––––––––––––––––––––––––––– 0003 4822 463 11235 GUIDING LEFT 0053 4822 532 12364 WASHER 0004 4822 463 11236 GUIDING RIGHT 0073 4822 502 12548 SCREW M2,6X3,5 0012 4822 466 12146... - Page 60 3103 301 45120 SPRING, CDR FLAP 4822 462 42159 FOOT, silver 3104 124 06310 FOOT, champagne 4822 462 42158 FOOT, black 4822 459 10887 WORDMARK „PHILIPS“ Pl.Torx 3103 304 67690 KNOB-JOG, black M3x6 3x10 1004 3103 304 69130 KNOB-JOG, champagne...
- Page 61 10-2 FRONT BOARD ELECTRICAL PARTSLIST MISCELLANEOUS RESISTORS ––––––––––––––––––––––––––––––––––––––––––––––––––––– ––––––––––––––––––––––––––––––––––––––––––––––––––––– 1400 4822 267 51453 FFC-CONNECTOR, 12P, SIDE ENTRY 3491 4822 050 11002 1kΩ 0,2W 1401 2422 025 14546 FFC-CONNECTOR, 16P, SIDE ENTRY 3492 © 4822 051 10102 1kΩ 0,25W 1402 4822 265 11531 FFC-CONNECTOR, 9P, SIDE ENTRY 3493 ©...
-
Page 62: Electrical Partslist
10-3 KEY BOARD left KEY BOARD right ELECTRICAL PARTSLIST ELECTRICAL PARTSLIST MISCELLANEOUS MISCELLANEOUS ––––––––––––––––––––––––––––––––––––––––––––––––––––– ––––––––––––––––––––––––––––––––––––––––––––––––––––– 1460 4822 276 13775 TACT SWITCH 1430 4822 267 51453 FFC-CONNECTOR, 12P, SIDE ENTRY 1461 4822 276 13775 TACT SWITCH 1440 4822 276 13775 TACT SWITCH 1462 4822 276 13775 TACT SWITCH... - Page 63 10-4 HEADPHONE BOARD ELECTRICAL PARTSLIST MISCELLANEOUS RESISTORS ––––––––––––––––––––––––––––––––––––––––––––––––––––– ––––––––––––––––––––––––––––––––––––––––––––––––––––– 1491 4822 267 31453 HEADPHONE SOCKET 6,3mm 4601 © 4822 051 20008 CHIP JUMPER 0805 1492 4822 267 31453 MICROPHONE SOCKET 6,3mm 4603 © 4822 051 20008 CHIP JUMPER 0805 1690 4822 265 11535 FFC-CONNECTOR, 8P, SIDE ENTRY 4604 ©...
- Page 64 10-5 INTERFACE BOARD ELECTRICAL PARTSLIST MISCELLANEOUS CAPACITORS ––––––––––––––––––––––––––––––––––––––––––––––––––––– ––––––––––––––––––––––––––––––––––––––––––––––––––––– 1301 4822 267 10732 FFC-CONNECTOR, 12P, TOP ENTRY 2399 © 5322 116 80853 560pF 1302 2422 025 14526 FFC-CONNECTOR, 16P, TOP ENTRY 2400 4822 124 40207 100µF 1303 4822 267 10757 FFC-CONNECTOR, 23P, TOP ENTRY 2401 4822 124 40207...
- Page 65 10-6 INTERFACE BOARD ELECTRICAL PARTSLIST RESISTORS DIODES ––––––––––––––––––––––––––––––––––––––––––––––––––––– ––––––––––––––––––––––––––––––––––––––––––––––––––––– 3362 © 4822 117 10834 47kΩ 0,1W 6325 4822 130 30621 1N4148 3363 4822 116 52175 100Ω 0,5W 6326 4822 130 30621 1N4148 3364 4822 116 83872 220Ω 0,5W 6370 4822 130 30621 1N4148 3366 ©...
- Page 66 10-7 3CDC99-DS MODULE ELECTRICAL PARTSLIST MISCELLANEOUS CAPACITORS ––––––––––––––––––––––––––––––––––––––––––––––––––––– ––––––––––––––––––––––––––––––––––––––––––––––––––––– 0035 4822 361 10753 CAROUSEL MOTOR 2863 4822 124 11912 220µF 6,3V 0070 4822 361 10753 TRAY MOTOR 2865 4822 126 12882 100nF 1800 4822 265 10925 FFC-CONNECTOR, 15P 2869 4822 126 12785 47nF 1805 4822 265 11533...
- Page 67 10-8 3CDC99-DS MODULE ELECTRICAL PARTSLIST RESISTORS RESISTORS ––––––––––––––––––––––––––––––––––––––––––––––––––––– ––––––––––––––––––––––––––––––––––––––––––––––––––––– 3821 4822 116 52289 5,6kΩ 0,16W 3888 4822 050 21003 10kΩ 0,25W 3822 4822 116 52263 2,7kΩ 0,5W 3889 4822 116 83883 470Ω 0,16W 3823 4822 050 11002 1kΩ 0,2W 3890 4822 050 11002 1kΩ...
Need help?
Do you have a question about the CDR785/00 and is the answer not in the manual?
Questions and answers