Philips CDR 785 Manual
Hide thumbs
Also See for CDR 785:
- Service manual (72 pages) ,
- Owner's manual (35 pages) ,
- Specifications (2 pages)
Table of Contents
Advertisement
Advertisement
Table of Contents

Related Manuals for Philips CDR 785


Summary of Contents for Philips CDR 785
- Page 1 Downloaded from www.Manualslib.com manuals search engine...
-
Page 2: Important Safety Instructions
Downloaded from www.Manualslib.com manuals search engine... - Page 3 Downloaded from www.Manualslib.com manuals search engine...
-
Page 4: Limited Warranty
PUERTO RICO OR U.S. VIRGIN ISLANDS... expires, the warranty on all replaced and repaired parts also expires. Take the product to a Philips factory service center (see enclosed list) or authorized service center for repair. When the product has been WHAT IS EXCLUDED? repaired, you must pick up the unit at the center. - Page 5 Downloaded from www.Manualslib.com manuals search engine...
-
Page 6: Table Of Contents
TABLE OF CONTENTS Table of contents IMPORTANT SAFETY INSTRUCTIONS ....2 INTERNAL RECORDING Recording modes ............23 GENERAL INFORMATION...........3 High speed recording and automatic finalizing ..24 LIMITED WARRANTY ..........4 High speed recording..........25 GENERAL INFORMATION Normal speed recording and listening.....25 Welcome..............7 Microphone recording ..........26 About this manual ............7 EXTERNAL RECORDING Environmental information .........7... -
Page 7: General Information
– 1 Digital coaxial cord(with black plugs) – Power cord In the eighties Philips invented a new audio system - the CD. – 2 batteries for the remote control, size AA The CD (compact disc) revealed to you the new dimensions of –... -
Page 8: Discs For Recording
CD players and CD recorders, moisture evaporates. when they are finalized. – All Philips CD players and CD recorders with CDR(W) handling the sticker shown here are CDRW compatible. For recording it is very important to use dust and scratch free discs. -
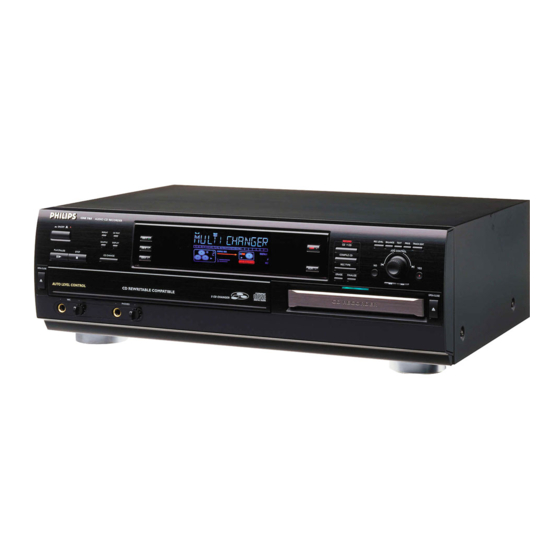
Page 9: Controls And Connections
CONTROLS AND CONNECTIONS & CDR 785 AUDIO CD RECOR DER ON/OFF REPEAT CD TEXT CD TEXT EDITING CD 1 STEP STEP STEP TEXT TOTAL TRACK TEXT TOTAL TRACK TEXT TOTAL TRACK TIME TOTAL REM TIME TOTAL REM TIME TOTAL REM... -
Page 10: Connections At The Back
CONTROLS AND CONNECTIONS OPTIC AL ANALOG DIGITAL AC MAINS 2 3 4 5 Connections at the back 1 Connection to power 2 ANALOG IN.....connects to the line output of a tape deck, amplifier or other analogue source 3 ANALOG OUT CDR & CD ........connects to the line input of an amplifier. -
Page 11: Display
DISPLAY DISPLAY indications CD recorder section CD changer section 1 2 3 4 1 2 3 STEP TRACK TIME TEXT TOTAL TRACK TIME TOTAL REM STEP TEXT TOTAL TRACK TIME TOTAL REM TRACK TIME & 9 10 11 12 13 14 15 16 17 18 19 20 + 9 10 11 12 13 14 15 16 17 18 19 20 + COMPILE CD TRACK PROG... -
Page 12: Display Messages
A-B FAST ?.....highspeed recording of a particular passage General A-B LISTEN ? ..normal speed recording of a particular PHILIPS CD RECORDER passage REC LEV - XX DBrecord level is being adjusted ........when set is switched on READING ....reading disc information NOT FITTING ..time left on CDR(W) disc is not enough... -
Page 13: Installation
INSTALLATION Others AUTO FINAL....when activating/disactivating the auto finalize function NO AUDIO TR ..when the recorder enters a data track during recording FINALIZE CD ..laser power calibration performed 96 ........times, please finalize disc INITIALIZING ..during laser power calibration for unfinalized discs DISC RECOVER ..during disc recovering after power failure OPC ERROR ....failure during OPC procedure (OPC =... -
Page 14: Connections General
2 For playback, connect cord 2 between the ANALOG OUT- CD recorder. If you still have difficulties with the connections jacks on the set and the input jacks of an amplifier e.g. you can always contact the Philips Consumer Service desk in TAPE IN, CD-R or AUX. your country. -
Page 15: Digital Coaxial Connections
(common output for CD recorder & CD changer deck). there is a click. This output can be used for digital playback. (e.g. Philips receiver FR960 or FR970.) 1 Remove the dust caps from the digital optical connection. (We recommend you save the cap.) -
Page 16: Power Supply/Mains
This switches on the AC power supply. 4 Press ON/OFF to switch on the set. PHILIPS CD RECORDER will be displayed. • Press ON/OFF again to switch off the set. • Press y on the remote control to switch the set to Standby mode. -
Page 17: Remote Control
REMOTE CONTROL LOADING DISCS Remote control commands CD recorder AUDIO CD RECORD ER REPEAT CD TEXT CD TEXT EDITING STEP CD 1 STEP STEP TEXT TOTAL TRACK TEXT TOTAL TRACK TEXT TOTAL TRACK TIME TOTAL REM TIME TOTAL REM TIME TOTAL REM SHUFFLE DISPLAY TRACK TIME... -
Page 18: Cd Changer
LOADING DISCS PLAYING CD changer Playing AUD IO CD REC ORD ER Note: ON/OF F Only Audio CDs will be accepted in the CD changer deck If a REPE AT CD TEXT CD 1 non-audio disc is inserted, the display shows WRONG DISC. SHUF FLE DISPL AY CD 2... -
Page 19: Cd Text
PLAYING CD text Selecting a track ON/OF F ON/OF F REPE AT CD TEXT REPE AT CD TEXT CD 1 CD 1 SHUF FLE DISPL AY SHUF FLE DISPL AY CD 2 CD 2 PLAY/ PAUS E STOP PLAY /PAUS E CD-CH ANGE CD-CH ANGE CD 3... -
Page 20: Search
PLAYING Search Repeat CD(s), track or program JOG CONTR OL ON/OF F REPE AT COMPI LE CD CD TEXT CD 1 SHUF FLE REC TYPE DISPL AY CD 2 PLAY/ PAUS E STOP ERASE FINALIZ E CD-CH ANGE CD 3 OPEN/ CLOSE OPEN/ CLOSE CD RE CO RD ER... -
Page 21: Program
PROGRAM Programming track numbers Erasing a track from the program 1 If necessary press STOP 9. ON/OF F REPE AT CD TEXT CD 1 SHUF FLE 2 Press either CD 1, CD 2, CD 3, or CDR to select the desired DISPL AY CD 2 STOP... -
Page 22: Recording General
RECORDING GENERAL Basic information Direct Line Recording (DLR) We will describe: The CD recorder is equipped with the high-performance Direct – Digital recording from internal CDC (fast or normal Line Recording technique. It ensures a perfect recording of the recording). source material, meaning a true “bit for bit”... -
Page 23: Rec Level Key
RECORDING GENERAL INTERNAL RECORDING REC LEVEL key Recording modes For recording from the internal CD Changer-deck you can RECORD REC LEVEL BALAN CE TEXT PROG TRACK EDIT CD CD choose following recording modes: JOG CONTR OL COMPI LE CD REC TYPE –... -
Page 24: High Speed Recording And Automatic Finalizing
INTERNAL RECORDING 2 Press COMPILE CD to enter into the record mode. High speed recording and automatic finalizing Both decks will be selected in the display, the arrow starts blinking. The remaining recording time of the CDR(W), High speed recording and automatic finalizing of the the total playing time of the program and current disc RECORD PROG ? are displayed. -
Page 25: High Speed Recording
INTERNAL RECORDING • To stop recording manually, press STOP 9. High speed recording • If STOP was pressed within 3 seconds after YES, no High speed recording of an entire disc, a track, a recording will take place. program or a track edit Important: RECORD REC LEVEL BALAN CE... -
Page 26: Microphone Recording
INTERNAL RECORDING Microphone recording CD TEXT EDIT ING RECORD REC LEVEL BALAN CE TEXT PROG TRACK EDIT CD CD JOG CONTR OL COMPI LE CD REC TYPE ERASE FINALIZ E PHON ES 1 Make sure that the CDR(W) is absolutely free of scratches and dust particles. -
Page 27: External Recording
EXTERNAL RECORDING Analog or digital recording Automatic track increment RECORD REC LEVEL BALAN CE TEXT PROG TRACK EDIT CD CD JOG CONTR OL COMPI LE CD REC TYPE BRIGHTNESS TRACK INCR. CD TEXT ERASE FINALIZ E When making recordings from an external source, we recommend to do analog recording only if digital recording is not possible. -
Page 28: Recording With Automatic Synchronized Start
EXTERNAL RECORDING 7 If a digital source is selected: Recording with automatic synchronized start After the recording process, the CD recorder stops automatically. Recording of an entire disc or a track with automatic start Note: Recordings from DAT or DCC will automatically stop after 20 seconds silence. -
Page 29: Manual Recording
EXTERNAL RECORDING Manual recording Manual recording from an external source Manual microphone recording 1 Make sure that the CDR(W) is absolutely free of scratches ITING RECORD REC LEVEL BALAN CE TEXT PROG TRACK EDIT CD CD and dust particles. JOG CONTR OL COMPI LE CD 2 Press repeatedly AUX to select the input for the external REC TYPE... -
Page 30: (Un)Finalizing, Erasing
EXTERNAL RECORDING (UN)FINALIZING, ERASING Note: The set is standard adjusted for a mono microphone. If Finalising CDR & CDRW discs you wish to use a stereo microphone, press AUX for more than 5 seconds. The set will display MONO ?. CD TEXT EDIT ING Press NO to select STEREO or YES to select MONO. -
Page 31: Unfinalising Cdrw Discs
(UN)FINALIZING, ERASING Unfinalising CDRW discs Erasing from a CDRW disc If you want to record (or erase) on (from) an finalized CDRW, It is possible to erase one or more tracks (starting from the you have to unfinalize it first. end of the last track) or the entire CDRW. -
Page 32: Special Features
SPECIAL FEATURES Storing text during recording Text edit (on CD recorder only) You can store and edit text even while recording a single track or single CD, or when recording from an external source. RECORD REC LEVEL BALAN CE TEXT/ store PROG TRACK EDIT... - Page 33 SPECIAL FEATURES Erasing text 1 Press TEXT/store to enter into the text edit menu. 5 Press YES to confirm. lights up and TEXT EDIT is displayed. ERASE MEMORY is displayed. TEXT 2 Rotate ¡ JOG CONTROL ™ to select the text erase menu. 6 Press YES to confirm the text erasure of that particular disc.
-
Page 34: Track Editing (On Cd Changer Only)
SPECIAL FEATURES 5 Press YES to confirm the position of marker A. Track editing (on CD changer only) The marker position B and the new “track” time will be displayed. The first 4 seconds before marker position B CD TEXT EDIT ING until marker position B will be played continously. -
Page 35: Troubleshooting
TROUBLESHOOTING WARNING LASER SAFETY Under no circumstances should you try to repair the This unit employs a laser. Only a qualified service set yourself as this will invalidate the warranty. Do not person should remove the cover or attempt to service open the set as there is a risk of electric shock.
Need help?
Do you have a question about the CDR 785 and is the answer not in the manual?
Questions and answers