Table of Contents
Advertisement
BEDIENUNGSANWEISUNG
mit Montageanweisungen
Instructions for use and installation instructions
Instructions d'utilisation et avis de montage
Gebruiksaanwijzing en montagehandleiding
Istruzioni di uso e di montaggio
Instrucciones de uso y de montaje
Instruções de uso e de montagem
Ο∆ΗΓΙΕΣ ΧΡΗΣΗΣ ΚΑΙ ΣΥΝΑΡΜΟΛΟΓΗΣΗΣ
EKI 607.2 / 807.2 / 848.0
225681 N91
Advertisement
Table of Contents

Related Manuals for Kuppersbusch BEDIENUNGSANWEISUNG EKI 607.2


Summary of Contents for Kuppersbusch BEDIENUNGSANWEISUNG EKI 607.2
- Page 1 BEDIENUNGSANWEISUNG mit Montageanweisungen Instructions for use and installation instructions Instructions d'utilisation et avis de montage Gebruiksaanwijzing en montagehandleiding Istruzioni di uso e di montaggio Instrucciones de uso y de montaje Instruções de uso e de montagem Ο∆ΗΓΙΕΣ ΧΡΗΣΗΣ ΚΑΙ ΣΥΝΑΡΜΟΛΟΓΗΣΗΣ EKI 607.2 / 807.2 / 848.0 225681 N91...
-
Page 2: Table Of Contents
Disposing of the packaging Please ensure the environmentally-friendly disposal of the packaging that came with your appliance. Recycling the packaging material saves on resources and cuts down on waste. Disposing of old appliances The symbol on the product or on its packaging indicates that this product may not be treated as household waste. -
Page 3: Safety Instructions
Safety instructions Connection and operation Safety instructions • The appliances are constructed in accordance with the relevant safety regulations. • Connecting the appliance to the mains and repairing and servicing the appliance may only be carried out by a qualified electrician according to currently-valid safety regulations. -
Page 4: Appliance Description
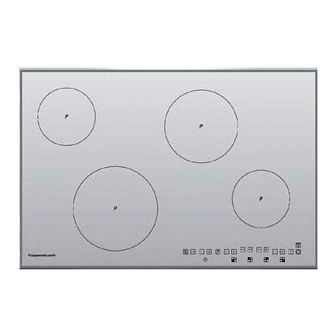
Appliance description 1. Induction cooking zone front left 2. Induction cooking zone back left 3. Induction cooking zone back right 4. Induction cooking zone front right 5. Touch-control operating panel 6. Glass ceramic hob 7. Control keys timer 8. Control keys, front left cooking zone 9. -
Page 5: Operation
Operation The hob Operation The hob is equipped with an induction cooking mode. An induction coil underneath the glass ceramic hob generates an electromagnetic alternating field which penetrates the glass ceramic and induces the heat-generating current in the pot base. With an induction cooking zone the heat is no longer transferred from a heating element through the cooking pot into the food being cooked;... -
Page 6: Cookware For Induction Hobs
Operation Cookware for induction hobs Cookware for induction cooking zones must be made of metal and have magnetic properties. The base must be sufficiently large. Only use pots with a base suitable for induction. Suitable cookware Unsuitable cookware Enamelled steel pots with a thick Pots made of copper, base stainless steel, aluminium,... -
Page 7: Operating The Keys
Operation Suitable for induction cooking Operating the keys The controls described here expect the pressing of a (selection) key to be followed by the pressing of a subsequent key. The next key will need to be pressed within 10 seconds, otherwise the selection will be deleted. -
Page 8: Locking
Operation Locking The lock can be used to lock key operation and cooking level settings. Only the off key can be used to switch the hob off. Activating the lock (while cooking): 1. Press the Lock key to activate function. The control lamp above the lock key will light up. -
Page 9: Automatic Switch-Off (Timer)
Operation Timer indicator lamp Stand-by dot for the automatic switch-off device Minute minder lamp Automatic switch-off (timer) The automatic switch-off device is used to automatically switch off any cooking zone after a stipulated period of time. Cooking times ranging from 1 minute to 99 minutes can be set. -
Page 10: Automatic Boost Function
Operation Cooking level Automatic boost function Setting Time (min:sec) 0:40 1:12 2:00 2:56 4:16 7:12 2:00 3:12 Automatic boost function Parboiling takes place at power level 9 with the automatic boost function. After a certain time the power level will switch down automatically to a lower simmering setting (1 to 8). -
Page 11: Power Boost Setting (Cooking Zones Marked With A P)
Operation Modules (power management) Power boost setting (cooking zones marked with a P) The power boost setting makes additional power available for induction cooking zones. A large quantity of water can be brought to the boil very quickly. The power boost setting operates for 10 minutes, after which the power level is automatically reduced to cooking level 9. -
Page 12: Cleaning And Care
Cleaning and Care Cleaning and Care • Before cleaning, switch off the hob and let it cool down. • Never clean the glass ceramic hob with a steam cleaner or similar appliance! • When cleaning make sure that you only wipe lightly over the ON and the OFF key. -
Page 13: What To Do If Trouble Occurs
What to do if trouble occurs What to do if trouble occurs Interference with and repairs to the appliance by unqualified persons are dangerous as they can result in an electric shock, or short circuit. Do no interfere with or try to repair the appliance; this could cause injury to persons and damage to the appliance. -
Page 14: Instructions For Assembly
Instructions for assembly Note Instructions for assembly The KÜPPERSBUSCH induction hob may only be built-in in accordance to the instructions included in this manual. In the case of failure to observe these instructions, KÜPPERSBUSCH shall decline any liability and the approved marks of conformity will become invalid! Safety instructions for kitchen unit fitters •... - Page 15 Instructions for assembly Clips • Drive the clips into the worktop cut-out at the intervals indicated. It is not necessary to adjust the height due to the horizontal stop. • Important! The horizontal drive of the clips must be flush with the worktop (avoid the risk of fractures).
-
Page 16: Electrical Connection
Instructions for assembly Electrical connection • The electrical connection must be carried out by a quali- fied electrician who is authorised to carry out such work! • Statutory regulations and the connection specifications issued by the local power supply company must be strictly observed. •... - Page 17 Kuppersbusch USA 1883 Massaro Blvd. Tampa, FL 33619 Toll: (800) 459-0844 P: 813-288-8890 F: 813-288-8604...
Need help?
Do you have a question about the BEDIENUNGSANWEISUNG EKI 607.2 and is the answer not in the manual?
Questions and answers