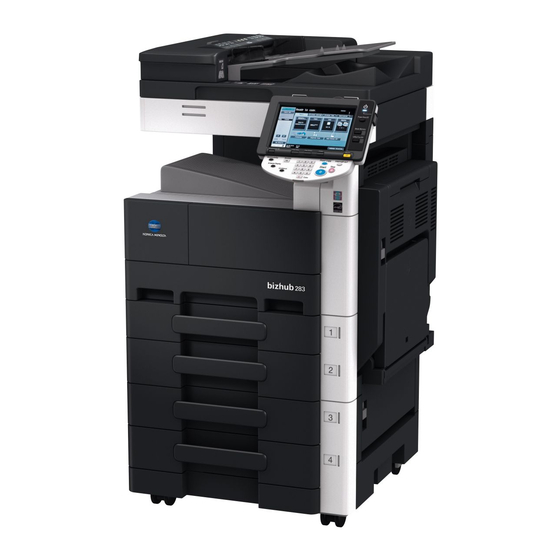
Konica Minolta bizhub 423 Stringing Machine
Hide thumbs
Also See for bizhub 423:
- Service manual (426 pages) ,
- Quick manual (286 pages) ,
- User manual (126 pages)
Table of Contents
Advertisement
Advertisement
Table of Contents

Related Manuals for Konica Minolta bizhub 423


Summary of Contents for Konica Minolta bizhub 423
-
Page 1: Service Manual
SERVICE MANUAL SECURITY FUNCTION This Service Manual (Ver. 1.02) describes bizhub 423 / bizhub 363 / bizhub 283 / bizhub 223 / bizhub 7828 / ineo 423 / ineo 363 / ineo 283 / ineo 223 / N607 / N606 / N605 Control Software (MFP Controller: A1UD0Y0-0100-GM0-04). -
Page 2: Revision History
Revision history After publication of this service manual, the parts and mechanism may be subject to change for improvement of their performance. Therefore, the descriptions given in this service manual may not coincide with the actual machine. When any change has been made to the descriptions in the service manual, a revised version will be issued with a revision mark added as required. -
Page 3: Table Of Contents
Security Function Ver. 1.02 Jun. 2011 CONTENTS Security function Overview ......................... 1 Compliance with the ISO15408 standard..............1 Data to be protected....................1 Precautions for operation control ................2 Checking the firmware version number..............4 Security authentication firmware version number..........4 Accessing the Service Mode................... - Page 4 Security Function Ver. 1.02 Jun. 2011 8.9.1 Administrator Unlocking function procedure ..........30 8.10 Bluetooth Settings ....................31 8.10.1 Bluetooth settings procedure ..............31 Overwrite All Data function ................... 33 Overwrite All Data procedure ................33 Items to be cleared by Overwrite All Data ............33 9.2.1 Items cleared by Overwrite All Data............
-
Page 5: Overview
Security Function Ver. 1.02 Jun. 2011 1. Overview Overview This Service Manual contains the essential operating procedures and precautions for using the security functions. Compliance with the ISO15408 standard This machine has an enhanced security function: Set the Enhanced Security Mode, in Administrator Settings, to [ON]. -
Page 6: Precautions For Operation Control
4. Precautions for operation control Security Function Ver. 1.02 Jun. 2011 Precautions for operation control A. Requirements of the service engineer The service engineer should take full responsibility for controlling the machine during his or her procedures for setting up and servicing the machine so that no improper operations are performed. - Page 7 Security Function Ver. 1.02 Jun. 2011 4. Precautions for operation control D. Machine maintenance control When the service engineer performs maintenance service jobs for the machine, he or she should check the firmware version number and the checksum value, and make sure that the system has not been altered.
-
Page 8: Checking The Firmware Version Number
Refer to P.35 for the method of how to re-write the firmware. Security authentication firmware version number MFP Controller Ver. Check Sum bizhub 423/363/283/223/7828 A1UD0Y0-0100-GM0-04 3323 Refer to P.16 for the method of checking the firmware version. Accessing the Service Mode Access method to the Service Mode 1. - Page 9 Security Function Ver. 1.02 Jun. 2011 6. Accessing the Service Mode • If a wrong CE Password has been entered, no further entry can be made for 5 sec. Wait, therefore, for at least 5 sec. before attempting to enter the correct CE Pass- word.
-
Page 10: Access Lock Of Service Mode
6. Accessing the Service Mode Security Function Ver. 1.02 Jun. 2011 Access lock of Service Mode • Use the following procedure to release the access lock state of the Service Mode. Releasing the access lock state will also clear the illegal access count reached in CE authentication. -
Page 11: Enhancing The Security Function
Security Function Ver. 1.02 Jun. 2011 7. Enhancing the security function Enhancing the security function • Perform the Enhanced Security Mode procedures while making checks of installation checklist in User’s Guide [Security Operations]. • To make the Enhanced Security Mode, service settings must first be made. Make the necessary service settings and check that they have been correctly made. - Page 12 7. Enhancing the security function Security Function Ver. 1.02 Jun. 2011 4. Touch [ON]. A1UDS1E025DA 5. Touch [END] and [CE Password]. 6. The default setting is “92729272.” Using the keyboard shown on the display, enter “92729272” in Current Password and touch [END]. A1UDS1E026DB...
- Page 13 Security Function Ver. 1.02 Jun. 2011 7. Enhancing the security function 7. From the keyboard shown on the display, enter a new 8-digit password and touch [END]. NOTE • Be sure to change the CE password. • If the Password Rule setting is set to “ON,” a password consisting of only the same character, one consisting of less than 8 digits, or the same password as that set before the change cannot be set.
- Page 14 7. Enhancing the security function Security Function Ver. 1.02 Jun. 2011 11. Check that “Controller 0” is selected. A1UDS1E028DA 12. Touch [END] to display the Service Mode screen. 13. Touch [System 2]. 14. Touch [HDD] and check that “Installed” is selected. A1UDS1E029DA 15.
- Page 15 Security Function Ver. 1.02 Jun. 2011 7. Enhancing the security function 18. Press the following keys in this order to display the Billing Setting screen: Stop9 A1UDS1E030DA 19. Touch [Management Function Choice]. 20. Check that “UnSet” is selected and then touch [END]. A1UDS1E031DA...
-
Page 16: Requests To The Administrator
7. Enhancing the security function Security Function Ver. 1.02 Jun. 2011 7.2.2 Requests to the administrator • When making the Enhance Security setting, the Administrator settings must first be made. The administrator must perform or check the following settings. Item Setting/Check Default Setting Administrator Password... -
Page 17: Functions Disabled By The Setting Of Enhanced Security Mode
Security Function Ver. 1.02 Jun. 2011 7. Enhancing the security function 7.2.3 Functions disabled by the setting of Enhanced Security Mode • Note that setting Enhanced Security Mode to “ON” disables the following functions. (1) Terminal Debug (forcibly prohibited when Enhanced Security Mode is set to “ON”) (2) Print Data Capture (forcibly prohibited when Enhanced Security Mode is set to “ON”) - Page 18 7. Enhancing the security function Security Function Ver. 1.02 Jun. 2011 When Enhanced Security mode is set to Function Name Default Setting [ON] • To set whether to encrypt ON (not to be changed) access by SSL. SSL Encryption Strength AES-256, AES/3DES •...
- Page 19 Security Function Ver. 1.02 Jun. 2011 7. Enhancing the security function When Enhanced Security mode is set to Function Name Default Setting [ON] Image Log Transfer Settings • Specifies whether to transfer the input or output image data OFF (not to be changed) to the server using whenever MFP inputs or outputs image data.
-
Page 20: Service Mode Functions
8. Service Mode functions Security Function Ver. 1.02 Jun. 2011 Service Mode functions • The Service Mode is used to set various service functions. Firmware Version • This function is used to display the firmware version information of the machine. When the Enhanced Security Mode settings are to be made, this function should be used to check the firmware version number of the MFP Controller and the checksum value against the security authentication version. -
Page 21: Ce Authentication Function
Security Function Ver. 1.02 Jun. 2011 8. Service Mode functions CE Authentication function • The service engineer uses an 8-digit CE password for verifying his or her identity as ser- vice engineer, as he or she attempts to use the functions available from the Service Mode. -
Page 22: Administrator Password Function
8. Service Mode functions Security Function Ver. 1.02 Jun. 2011 Administrator Password function • This function is used when the administrator sets the administrator password. It also allows a new administrator password to be set without requiring the entry of the currently set administrator password. - Page 23 Security Function Ver. 1.02 Jun. 2011 8. Service Mode functions 4. Enter the default value “12345678” as the new password from the keyboard on the screen. Then, touch [END]. NOTE • Use the default value “12345678” as the password used only temporarily. A1UDS1E034DB 5.
-
Page 24: Ce Password Function
8. Service Mode functions Security Function Ver. 1.02 Jun. 2011 CE Password function • The CE Password function is used to change the CE password to call the Service Mode to the screen. 8.4.1 Setting the CE password 1. Call the Service Mode to the screen. See P.4 2. - Page 25 Security Function Ver. 1.02 Jun. 2011 8. Service Mode functions 3. Touch [CE Password]. 4. Type the currently used CE password from the keyboard shown on the display and touch [END]. NOTE • If there is a mismatch in the CE Password between that currently set and that just entered, the machine displays a message telling that the CE Password entered is wrong.
- Page 26 8. Service Mode functions Security Function Ver. 1.02 Jun. 2011 5. Type the 8-digit password to be newly used from the keyboard shown on the display and touch [END]. NOTE • If Password Rules of Security Settings available from Administrator Settings is set to “ON,”...
-
Page 27: Initialization Function
Security Function Ver. 1.02 Jun. 2011 8. Service Mode functions Initialization function • The Data Clear function resets the current settings for various functions to the default values. • Since all subsequent data will be cleared, execute “Data Clear” function with care. Once Data Clear has been executed, be sure to again designate the settings of items whose data has been cleared. - Page 28 8. Service Mode functions Security Function Ver. 1.02 Jun. 2011 Item Details SSL certificate Deletes the currently set SSL certificate. (PageScope Web Connection) SSL encryption strength Deletes the currently set SSL encryption strength setting. (PageScope Web Connection) Administrator Password Enables a change of the Administrator password made over the Change via Network network.
-
Page 29: Initialize Method
Security Function Ver. 1.02 Jun. 2011 8. Service Mode functions 8.5.1 Initialize method 1. Call the Service Mode to the screen. See P.4 2. Touch [System 1]. 3. Touch [Initialization]. 4. Select [Clear All Data] or the clear item in [Clear Individual Data] and press the Start key. -
Page 30: Hdd Format
8. Service Mode functions Security Function Ver. 1.02 Jun. 2011 HDD Format • Do not perform HDD format carelessly, as performing HDD format clears the fol- lowing data. Whenever HDD format is executed, be sure to make the settings again for the types of data that have been reset. -
Page 31: Hdd Format Execution Procedure
Security Function Ver. 1.02 Jun. 2011 8. Service Mode functions 8.6.1 HDD format execution procedure 1. Call the Service Mode to the screen. See P.4 2. Touch [State Confirmation]. 3. Touch [Memory/HDD Adj.]. 4. Touch []. 5. Touch [HDD Format]. 6. -
Page 32: Hdd Installation Setting
8. Service Mode functions Security Function Ver. 1.02 Jun. 2011 HDD installation setting • HDD installation setting sets whether the hard disk is installed or not. • Changing the HDD installation setting from “Installed” to “Not Installed” will clear the fol- lowing types of data. -
Page 33: Operation Ban Release Time Setting
Security Function Ver. 1.02 Jun. 2011 8. Service Mode functions Operation ban release time setting • This function is used to set the period of time to be elapsed before the access lock state is released. • When the access lock release operation is performed, the machine measures the period of time set with this function and releases the access lock state after the lapse of the set period of time. -
Page 34: Administrator Unlocking Function
8. Service Mode functions Security Function Ver. 1.02 Jun. 2011 Administrator Unlocking function • When Administrator authentication using the Administrator password is set into an access lock state, this function may be used to release the access lock state. • The access lock state for the Administrator password authentication can generally be released by turning OFF and ON the main power switch and upon the lapse of the period of time to be elapsed before the access lock state is released. -
Page 35: Bluetooth Settings
Security Function Ver. 1.02 Jun. 2011 8. Service Mode functions 8.10 Bluetooth Settings • When printng images from the device via Bluetooth communication, it is necessary to install the optional local interface kit EK-605 and set the bluetooth setting in the service mode. - Page 36 8. Service Mode functions Security Function Ver. 1.02 Jun. 2011 4. Touch [Effective], and touch [END]. A1UDS1E048DA...
-
Page 37: Overwrite All Data Function
Security Function Ver. 1.02 Jun. 2011 9. Overwrite All Data function Overwrite All Data function • The Overwrite All Data function overwrites and deletes all data saved in all areas of the HDD and resets all passwords stored in NVRAM to the default settings. It can be used when the machine is to be discarded or use of a leased machine is terminated at the end of the leasing contract, thereby properly blocking leaks of data. - Page 38 9. Overwrite All Data function Security Function Ver. 1.02 Jun. 2011 Image File The following data is deleted: • Image files other than Secure Print Documents, ID & Print Doc- uments, and User Box files • Image files of jobs in queue state •...
-
Page 39: Firmware Rewriting
Security Function Ver. 1.02 Jun. 2011 10. Firmware rewriting 10. Firmware rewriting 10.1 Outline • There are two ways to update the firmware: One is by directly connecting with the main body using the USB memory device, and the other is by downloading over a network using the Internet ISW. - Page 40 10. Firmware rewriting Security Function Ver. 1.02 Jun. 2011 NOTE • USB memory must be connected with the main power switch/sub power switch off. • When updating the firmware, use the service port for the service. It cannot be updated when connected to another service port. 6.
- Page 41 Security Function Ver. 1.02 Jun. 2011 10. Firmware rewriting 8. Press the [START]. (At this time, the Start key starts blinking red.) 9. Check that the control panel shows the message indicating that the data has been rewritten correctly ([Downloading Completed]). Check also the check sum value ([Check Sum ####]) shown on the control panel.
-
Page 42: Action When Data Transfer Fails
10. Firmware rewriting Security Function Ver. 1.02 Jun. 2011 10.2.3 Action when data transfer fails • If “NG” appears on the control panel, indicating that rewriting has been unsuccessful (in which case the Start key lights up red), take the following steps. 1. -
Page 43: Fax Function
Security Function Ver. 1.02 Jun. 2011 11. FAX function 11. FAX function NOTE • When the user use the machine with the facsimile function, it is necessary to install and setting the optional FAX kit FK-508 properly by the service engineer. 11.1 Installing/setting procedure of the FAX kit 11.1.1 Install procedure... - Page 44 11. FAX function Security Function Ver. 1.02 Jun. 2011 16. Pass the cable B through the edge cover and the cord clamp A’s (1) (2). NOTE • When routing the cable B in the cord clamp A (2), pass the cable B at the rear side of the cord clamp A (2), fold the cable back, and pass it through the cord clamp A (2).
-
Page 45: Setting Procedure
Security Function Ver. 1.02 Jun. 2011 11. FAX function 11.1.2 Setting procedure A. Setting the FAX (circuit 1) 1. Plug the power cord into the power outlet and turn on the machine. 2. Display the Service Mode screen. 3. Touch “System 2.” 4. - Page 46 11. FAX function Security Function Ver. 1.02 Jun. 2011 B. Caution when performing dial transfer After setting the country code, dialing operations may be selected after the switchboard dial tone is detected depending on the destination. In this case, depending on the switchboard connected to the machine and the type of dial tone received from the switchboard, dialing operations may not be available.
- Page 47 Security Function Ver. 1.02 Jun. 2011 11. FAX function E. Caution when performing dial transfer After setting the country code, dialing operations may be selected after the switchboard dial tone is detected depending on the destination. In this case, depending on the switchboard connected to the machine and the type of dial tone received from the switchboard, dialing operations may not be available.
- Page 48 11. FAX function Security Function Ver. 1.02 Jun. 2011 Blank Page...
- Page 49 © 2010 KONICA MINOLTA BUSINESS TECHNOLOGIES, INC. © 2010 KONICA MINOLTA BUSINESS TECHNOLOGIES, INC. Printed in Japan Printed in Japan Use of this manual should be strictly supervised to Use of this manual should be strictly supervised to DDA1UD-C-SE1 DDA1UD-C-SE1 avoid disclosure of confidential information.
Need help?
Do you have a question about the bizhub 423 and is the answer not in the manual?
Questions and answers