Advertisement
Installer: Leave these instructions with consumer.
Consumer: Keep these instructions for future reference.
WARNING: If the information in this
manual is not followed exactly, a fire
or explosion may result causing
property damage, personal injury or
loss of life.
Do not store or use gasoline or other
flammable vapors and liquids in the
vicinity of this or any other appliance.
WHAT TO DO IF YOU SMELL GAS.
Do not try to light any appliance.
Do not touch any electrical switch; do
not use any phone in your building.
Immediately call your gas supplier from a
neighbor's phone. Follow the gas supplier's
instructions.
If you cannot reach your gas supplier, call
the fire department.
Installation and service must be performed
by a qualified installer, service agency or
the gas supplier.
Questions, Problems, Missing Parts? Before
returning to your retailer, call our customer
service department at 1-800-416-3511,
9 a.m. – 5 p.m. EAST, Monday – Friday.
ASSEMBLY INSTRUCTIONS
CSA Model 98900L
Printed in China
WARNING: Improper installation,
Adjustment alteration, service or
maintenance can cause injury or property
damage. Read the installation, operating
and maintenance instructions thoroughly
before installing or servicing this equipment.
WARNING: For Outdoor Use Only
FOR USE WITH 20LB. PROPANE
CYLINDER WITH TYPE 1 CONNRCTION
(NOT SUPPLIED) OR FOR USE WITH
NATURAL GAS AFTER CONVERSION
KIT (SUPPLIED) IS INSTALLED.
WARNING: Do Not Burn Wood or
any other materials in this firepit.
WARNING:
USE FACTORY APPROVED REPLACEMENT
PARTS AND ACCESSORIES ONLY.USE OF
UNAPPROVED PART OR ACCESSORIES CAN
VOID THE WARRANTY ON THIS PRODUCT AND
RESULT IN A HAZARDOUS CONDITION.PLEASE
CONTACT US FOR INFORMATION REGARDING
REPLACEMNT HOSES, THERMOCOUPLES,
ELECTRODES, IGNITION MODULES,
LAVAROCKS, LOGS, ETC.
1
Advertisement
Table of Contents

Subscribe to Our Youtube Channel
Related Manuals for Agio 98900L


Summary of Contents for Agio 98900L
-
Page 1: Assembly Instructions
9 a.m. – 5 p.m. EAST, Monday – Friday. VOID THE WARRANTY ON THIS PRODUCT AND RESULT IN A HAZARDOUS CONDITION.PLEASE CONTACT US FOR INFORMATION REGARDING REPLACEMNT HOSES, THERMOCOUPLES, ELECTRODES, IGNITION MODULES, CSA Model 98900L LAVAROCKS, LOGS, ETC. Printed in China... -
Page 2: Table Of Contents
TABLE OF CONTENTS Important Safety Information Information about Propane Specifications Installation Natural Gas Conversion Lighting Instructions Maintenance Batteries Parts List Warranty... -
Page 3: Important Safety Information
IMPORTANT SAFETY INFORMATION The installation must conform with local codes or, in the absence of local codes, with the National Fuel Gas Code, ANSI Z223.1, or CAN/CGA –B149.2, Propane Installation Code. The appliance and its appliance main gas valve must be disconnected from the gas supply piping system during any pressure testing of that system at test pressures in excess of 1/2 psi (3.5kPa). -
Page 4: Information About Propane
IMPORTANT SAFETY INFORMATION ABOUT PROPANE (LP) GAS A self contained LP-gas cylinder for use with this appliance must have a capacity of 20 lbs. and must be equipped with a Type 1 connector and an OPD (overfill protection device). The LP-gas supply cylinder to be used must be constructed and marked in accordance with the specification for LP-gas cylinders of the U.S. -
Page 5: Installation
INSTALLATION With the help of another person, turn the table base assembly in the upright position. With the help of another person, carefully place the natural stone table top onto the table base. After making any necessary adjustments to the alignment of the natural stone table top and the top connector bracket, use bolts and washers as shown in Fig.3. - Page 6 Figure 6. Log B Figure 7. Log C Figure 8. Log D Figure 9. Log E Remove any lava rock from the ignition well as shown in Fig. 10. Figure 10 Remove any lava rock from the ignition well...
- Page 7 Lift off the tank door, place the tank in the holder and use the chain to hold the tank. Connect the regulator as shown in Fig. 11. Screw the black handle clock-wise to tighten. Turn the handle counterclock-wise to remove. The hose must point down. Open the control door and check that the valve is turned all the way clockwise to the “OFF”...
-
Page 8: Natural Gas Conversion
Natural gas conversion must be performed only by natural gas provider or service company. 1. Disconnect the gas hose from the gas valve. See Fig. 13. Figure 13 2. Disconnect the gas tube from the orifice and remove the orifice holder as shown in Fig .14. Figure 14 3. -
Page 9: Lighting Instructions
Figure 17 LIGHTING INSTRUCTIONS 1. Locate the control and igniter panel. Make sure the control knob is in the “OFF” position. See Fig. 18. Open the tank door and open the tank valve all the way. 2. Push in the igniter button. You will hear a slight clicking sound. With the igniter button pushed in, push and turn the control knob to the “ON”... -
Page 10: Maintenance
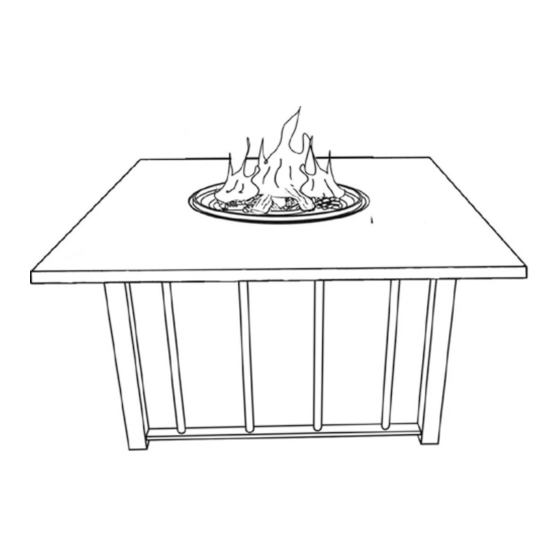
MAINTENANCE The flames should look like those in Fig. 19. To clean the burner, use a soft brush after the burner and lava rocks have cooled completely. Never use a vacuum cleaner on the lava rocks. It is recommended that the lava rocks be stored indoors during the winter if they will be subjected to freezing temperatures. -
Page 11: Parts List
Parts List Manufactured by: Agio-USA Part Number Description FP0002 LAVA ROCKS 1337 Taylor Farm Rd #100 FP0003 ELECTRODE Virginia Beach, VA 23453 FP0004 THERMOCOUPLE Service Center: 1-800-416-3511 FP0006 IGNITION MODULE Made in China FP0005 NATURAL GAS FLEXIBLE CONNECTION HOSE FP0716...
Need help?
Do you have a question about the 98900L and is the answer not in the manual?
Questions and answers
I push knob in to light and it doesn’t sound like gas is flowing. It doesn’t light.