
Related Manuals for Channel Vision DS3 series


Summary of Contents for Channel Vision DS3 series
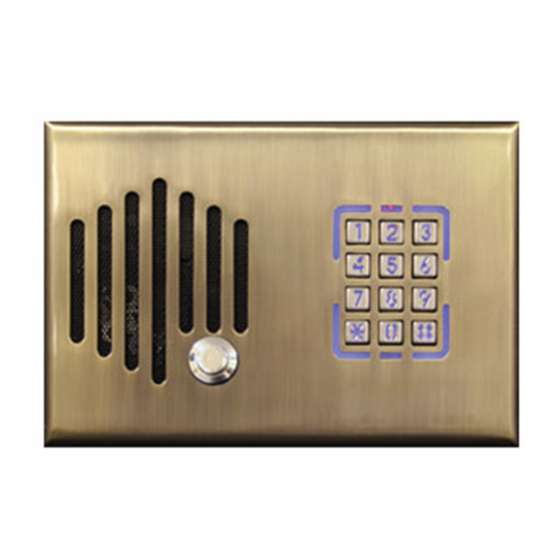
- Page 1 1 2 3 4 5 6 7 8 9 * 0 # -XXXX DS3-XXXXC DS3-XXXXP Telephone Entry Door Intercom...
- Page 2 Channel Vision’s DS3-Series door stations can interface with a variety of telephone entry control products to provide communication with the front door. They are available in a variety of configurations including options for a hidden camera and compatibility with Panasonic’s popular KSU phone systems.
-
Page 3: Understanding The Model Number
If there is not a letter suffix on the model number, such as DS3-0212, that door station is compatible with Channel Vision’s telephone entry products including models P-0920, P-0921, C-0920, and TE110. If the suffix is the letter “C”, such as DS3-0212C, then the door plate is compatible with Channel Vision’s Whole-House CAT5 Intercom... - Page 4 Attaching the Companion Board This door intercom product consists of two sub assemblies which must be attached to each other before the final assembly can be installed. In this guide the electronic sub assembly will be referred to as the “Companion Board”...
- Page 5 Attaching the Companion Board (DS3-XXXXC) This door intercom product consists of two sub assemblies which must be attached to each other before the final assembly can be installed. In this guide the electronic sub assembly will be referred to as the “Companion Board”...
- Page 6 Attaching & Installing the Camera The DS3-6xxx, DS3-6xxxC, & DS3-6xxxP come with a mini color camera that can be attached to the integrated mount that allows the camera to see through the opening in the plate. The illustrations bellow show how to mount the camera.
- Page 7 Panasonic Compatible (DS3-xxxxP) Channel Vision's Panasonic models are a compatible replacement for the Panasonic KXT30865. They are an attractive alternative to the standard plastic door station sold by Panasonic. This product interfaces with Panasonic’s KSU phone systems to provide communication with the front door.
- Page 8 Channel Vision Compatible CAT5 Intercom -xxxx ) The diagram below shows how to connect the DS3-xxxxC to Channel Vision’s CAT5 Whole-House Intercom system. When the button is pressed on the DS-xxxxC the ST-2000 Intercom Stations will generate a door chime.
-
Page 9: Keypad Connections
Keypad connections Programming the Keypad System password (default is 4567) is required to enter system setting modes. The reader will send a beep sound to indicate entering system setting modes. If there isn’t any action within 20 seconds, the system will escape from the setting mode. - Page 10 Set Door Strike Time Duration Press: * # [system password] # System Reaction: One beep Press: 4 [enter the 2-digit time duration in seconds (01-99)] System Reaction: One beep (Time duration set successfully) Press: * (to exit process) System Reaction: One beep (strike duration has been set) Setting Activation Mode NOTE : Set the activation mode before attempting to use the user passwords.
- Page 11 Controlling Electric Locks The DS-Keypad contains both Normally Open and Normally Closed relay contacts allowing it be used for either “fail-safe” or “fail-secure” lock mechanisms. Fail-secure locks remain locked when the power is off and unlock when power is applied to the mechanism. Of course, it is still possible to manually open the lock from the inside of the building.
- Page 12 Integrating the TE110DS For systems using P-0920 or P-0921 Example shown is a P-0920 and normally open lock type. TE110DS (Sold Separately) Fail-Secure Strike Lock (N.O.) Power Supply Strike – Connect “NO” and “COM DOOR” from keypad to the “Unlock Door” terminals.
- Page 13 Integrating the ST-C5IDS For systems using the P-0930 Press and hold door station number to activate ST-C5IDS P-0930 ST-2000 Room 1 Link Link Room 1 Room 2 Room 3 Room 4 Room 5 Room 6 Model H A N N E L Whole-House Intercom Room 2 P-0930...
- Page 14 Optional Keypad Functionalities Anti-tamper switch: Orange N.C. Blue Contact between orange and blue is normally closed. Close when tamper switch pressed (installed) and opens when switch is released. Tamper switch - If using the tamper switch feature, this must remain pressed when the keypad is installed Use included tamper spring make sure it contacts back of case.
-
Page 15: Troubleshooting
Precautions 1. To avoid damages to the keypad, verify voltage levels and the polarity of the current before connecting power to the keypad or to other devices. 2. To eliminate electrical interferences, avoid sharing the electric current of locks with that of the DS keypad. 3. - Page 16 Channel Vision products are not intended for use in medical, lifesaving, life sustaining or critical environment applications. Channel Vision customers using or selling Channel Vision products for use in such applications do so at their own risk and agree to fully indemnify Channel Vision for any damages resulting from such improper use or sale. Specifications:...
Need help?
Do you have a question about the DS3 series and is the answer not in the manual?
Questions and answers