
Related Manuals for Minolta Minolta VECTISS100


Summary of Contents for Minolta Minolta VECTISS100
- Page 1 INSTRUCTION MANUAL BASIC OPERATION ADVANCED OPERATION ADDITIONAL FEATURES APPENDIX...
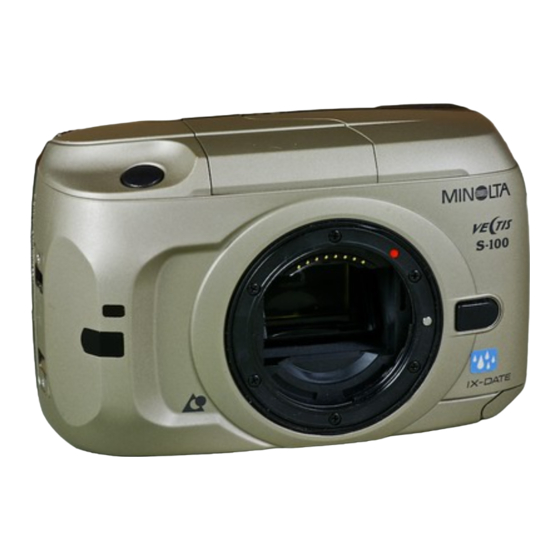
- Page 2 Thank you for purchasing the Minolta Vectis S-100. The Vectis S-100 is an ultra compact IX240 type system camera with variable print-aspect-ratio and magnetic storage of date and exposure information. The Vectis S-100 also incorporates the revolutionary TTL side viewfinder. The side viewfinder provides a high viewfinder magnification, high eyepoint, and large diopter range, in addition to giving the camera its distinctive profile.
-
Page 3: Table Of Contents
TABLE OF CONTENTS FOR PROPER AND SAFE USE...4 NAMES OF PARTS...9 QUICK OPERATION ...14 BASIC OPERATION Attaching the Strap ...17 Installing the Batteries ...18 Checking the Battery Power...19 Attaching and Removing the Lens ...20 Diopter Adjustment ...22 Handling the Camera...23 Loading Film ...24 Full Auto Operation ...28 Special Focusing Situations ...30... -
Page 4: For Proper And Safe Use
FOR PROPER AND SAFE USE Read and understand all warnings and cautions before using this product. WARNING Batteries may become hot or explode due to improper use. • Use only the batteries specified in this instruction manual. • Do not install the batteries with the polarity (+/-) reversed. •... - Page 5 FOR PROPER AND SAFE USE Splashproof This camera is splashproof and can be used in light rain or snow. • Do not place the camera under running water or immerse. Please Note: • When using the camera outdoors in heavy rain, keep the camera protected from the rain. •...
-
Page 6: Names Of Parts
FOR PROPER AND SAFE USE Film Cassette Warning The film used in Advanced Photo System cameras stores some data magnetically. Do not place the cassette on or near anything that creates a magnetic field, such as a television or stereo speakers. This device complies with Part 15 of the FCC Rules. - Page 7 NAMES OF PARTS Data panel Viewfinder* Diopter- adjustment dial Film chamber Subject-program-select button Film-chamber release Self-timer (57)/Drive-mode (58)/Remote-control button (59) Main switch Flash-mode button (33) Control-panel door Red-eye-reduction (34)/ Format-selector switch Wireless-flash button (66) Battery chamber Exposure-mode button Control dial Program-reset button (71) * Do not touch...
- Page 8 NAMES OF PARTS Data Panel Subject-program indicators Subject-program pointer Portrait Mode (38) Manual-focus indicator (56) Landscape Mode (39) Close-up Mode (40) Shutter-speed/ Sports Mode (41) Aperture/Film Speed/ Night Portrait Mode (42) Exposure-compensation/ Date/Time display Exposure-compen- Exposure-mode sation indicator (64) indicators (44) Wireless-flash indicator (66) Flash-mode...
-
Page 9: Quick Operation
QUICK OPERATION 1. Insert battery Open the battery-chamber door using the eyepiece cap. Insert the batteries into the chamber, then snap the battery-chamber door shut. 2. Attach lens Align the red mounting dot on the lens with the one on the camera. -
Page 10: Basic Operation
BASIC OPERATION This section provides the information necessary to operate your camera in most photographic situations. This section covers: • Battery Installation • Attaching and Removing the Lens • Diopter Adjustment and Camera Handling • Loading and Rewinding the Film •... -
Page 11: Installing The Batteries
INSTALLING THE BATTERIES Your camera uses two CR2 batteries to supply power for all camera operations. 1. Using the eyepiece cap, open the battery-chamber door. • Turn the camera off before removing the old batteries. • Remove dirt and moisture from the camera and batteries before opening the battery- chamber door. -
Page 12: Attaching And Removing The Lens
ATTACHING AND REMOVING THE LENS Attaching the Lens 1. Remove the body cap. 2. Remove the rear lens cap. 3. Align the red mounting dots on the lens and camera body. 4. Gently insert the lens into the mount, then turn clockwise until it clicks into the locked position. -
Page 13: Diopter Adjustment
DIOPTER ADJUSTMENT If you are near or far sighted, you can adjust the eyepiece for your eyesight. The diopter adjustment range is from -3.0 to +1.0 diopters. Adjusting the Diopter: 1. Center your subject in the focus frame. 2. Press the shutter-release button partway down to focus on the subject. -
Page 14: Loading Film
LOADING FILM Use IX240 type film in this camera. • The automatic transport system will load the film, set the film speed, and advance the film after each exposure. • Once loaded, the film chamber cannot be opened until the film is rewound into the cassette (Film Chamber Lock). - Page 15 LOADING FILM The film speed appears in the data panel, then the film is advanced to the first frame. When the loading sequence is complete, the frame counter displays the number of frames remaining on the roll. • If the shutter-release button is not pressed after loading, an unexposed ( ) roll can be removed by pressing the rewind button, then the film-chamber release.
-
Page 16: Fully Automatic Operation
FULLY AUTOMATIC OPERATION Full Auto is the camera’s standard operating mode and is suited for use in almost any situation. • Press the program-reset button to set the camera to fully automatic operation (Full Auto) at any time. See page 71. 1. -
Page 17: Special Focusing Situations
SPECIAL FOCUSING SITUATIONS The camera may not be able to focus in situations like those described below. When the focus lamp blinks, use focus hold (page 31) or manual focus (page 56). See page 13 for an explanation of the focus signals. If two subjects at different distances overlap in the focus frame... -
Page 18: Using The Built-In Flash
USING THE BUILT-IN FLASH In P mode, the built-in flash will pop-up automatically when the shutter is pressed partway down. Once the flash is up, it will fire when necessary. • The shutter will not release until the flash is charged. •... -
Page 19: Red-Eye Reduction
USING THE BUILT-IN FLASH Red-Eye Reduction Light reflecting from your subjects eyes may produce the effect known as red-eye. Use the built-in flash’s red-eye- reduction mode to produce more natural looking photographs by reducing the red-eye effect. 1. Open the control-panel door. -
Page 20: Advanced Operation
ADVANCED OPERATION Refer to the individual sections as you increase your familiarity with the camera. Each function can be explored independently after the Basic Operations section has been mastered. Subject Program Selection Portrait Mode Landscape Mode Close-up Mode Sports Mode Night Portrait Mode Phtotgraphing Night Scenes Creative Exposure Modes... -
Page 21: Portrait Mode
PORTRAIT MODE Portraits have the greatest impact when the subject is separated from the background. Portrait mode sets the camera to achieve this effect, leaving you free to capture the perfect expression. Press the program-select button until the subject- program pointer is under Tips: •... -
Page 22: Close-Up Mode
CLOSE-UP MODE Accurate focusing and a large depth of field are required for good close-up photographs. Close-Up mode sets the camera to obtain the greatest depth of field possible at a shutter speed fast enough to prevent blur due to camera shake. -
Page 23: Night Portrait Mode
NIGHT PORTRAIT MODE Night portraits require the camera’s flash exposure to be balanced with the background exposure. In Night Portrait mode, the camera sets the largest possible aperture with a longer shutter speed, allowing the background to appear in the photograph. -
Page 24: Creative Exposure Modes
CREATIVE EXPOSURE MODES Your camera has three exposure modes: Aperture Priority (A- mode), Shutter Prioity (S-mode), and Program (P-mode). In P-mode, the camera sets the aperture and shutter speed automatically. P-mode is set when Full Auto operation is selected. Select A-mode to control the depth-of-field in your images (see Aperture Control on page 47). - Page 25 A MODE - APERTURE PRIORITY A Mode Flash When the built-in flash is up, it will fire each time a picture is taken. When the built-in flash is down, it will not fire. Press the flash-mode button to turn the flash on. •...
-
Page 26: S Mode - Shutter Priority
S MODE - SHUTTER PRIORITY In S mode, you select the shutter speed and the camera automatically sets the aperture required for proper exposure. Use S mode when you want to control the blur caused by subject movement. 1. Open the control-panel door. -
Page 27: Additional Features
S MODE - SHUTTER PRIORITY Shutter Speed Control ADDITIONAL Fast Shutter Speed Slow Shutter Speed In addition to controlling the duration of the exposure, shutter FEATURES speed determines how moving subjects will appear in the final image. Depending on the speed of your subject, slow shutter speeds will make a moving subject appear to flow, creating a feeling of motion. -
Page 28: Date/Time Imprinting
DATE/TIME IMPRINTING Your camera records date and time information on the film’s magnetic data strip. The recorded information is read at the photo lab and imprinted on the back of your photographs. • Some labs cannot print date and /or time information on the front of your photographs. - Page 29 DATE/TIME IMPRINTING Changing the Date/Time Format 1. Open the control-panel door, then press the date button. 2. Press and hold the select button until all items in the date display blink. 3. Turn the control dial to change the display format.
-
Page 30: Manual Focus
MANUAL FOCUS When autofocus is not suitable and focus hold is not possible, focus the lens manually. The autofocus system will monitor focus and indicate when a subject in the focus frame is in focus. 1. Press the focus-mode button. in the data panel. -
Page 31: Continuous-Drive Mode
CONTINUOUS-DRIVE MODE In this mode, the camera continues to release the shutter and advance the film as long as the shutter-release button is held down. 1. Press the drive-mode button until in the data panel. 2. Press the shutter-release button down and hold. •... - Page 32 REMOTE-CONTROL (optional) • To cancel, press the remote-control button again, or turn the camera off. • If the camera’s remote-control receiver does not blink, the camera did not receive the signal. • If the flash ‘pops-up’ when the release button on the remote control is pressed, wait a few seconds for the flash to charge, then press the release button again to take the picture.
-
Page 33: Af Illuminator
REMOTE-CONTROL (optional) Changing the Battery The remote control uses a 3V lithium battery (CR2032). When pressing the remote-control buttons does not release the camera’s shutter, the battery must be replaced. 1. Pull out the battery chamber and remove the old battery. 2. -
Page 34: Exposure Compensation
EXPOSURE COMPENSATION Metered Exposure Over Exposure This function lets you compensate exposure +/- 3 EV in 1/2 EV increments when the camera’s metering system may not be able to accurately determine exposure. More exposure is recommended for very bright scenes, such as snow or beach scenes. -
Page 35: Wireless/Remote Off-Camera Flash
WIRELESS/REMOTE OFF-CAMERA FLASH Built-in Flash Wireless /Remote Flash Wireless /Remote Off-Camera Flash is available with the Minolta 5400HS, 5400xi, and 3500xi accessory flashes. Wireless /Remote flash give you access to the greater range and creative control available with an accessory flash. In Wireless /Remote flash mode, the off-camera flash is triggered by a coded signal from the camera’s built-in flash when you press the shutter-release button. - Page 36 WIRELESS/REMOTE OFF-CAMERA FLASH Taking Pictures in Wireless/Remote Flash Mode 1. Position your camera and 3500xi flash unit using the information on this page. If you are using a flash unit other than the 3500xi off camera, refer to the instruction manual for that flash to determine the aperture, camera to subject distance, and the flash to subject distance.
-
Page 37: Appendix
APPENDIX PROGRAM-RESET BUTTON The program-reset button quickly returns the camera to fully-automatic operation. Pressing the program-reset button will set the camera as follows: FUNCTION P-MODE SETTING Exposure mode Focus mode Flash mode Exposure Compensation Film-drive mode Single-frame advance Self-timer Wireless/Remote Flash •... -
Page 38: Lab Services
LAB SERVICES To receive the best possible prints, take your film to a photolab displaying the Certified Advanced Photo System Photofinishing Service logo. Photofinishers displaying this logo have been certified according to Advanced Photo System guidelines. • The following is a list of services required for certification, see your photolab for a full list of available services. -
Page 39: Accessory Information
ACCESSORY INFORMATION This camera is designed to work specifically with lenses, and accessories manufactured and distributed by Minolta. Using incompatible accessories with this camera may result in unsatisfactory performance or damage the camera and accessories. Lenses All V-series lenses can be used with this camera. Lens Hood Use a lens hood to reduce flare and ensure maximum image quality. -
Page 40: Care And Storage
CARE AND STORAGE Cleaning • If the camera or lens barrel is dirty, wipe it gently with a soft, clean, dry cloth. If the camera or lens comes in contact with sand, gently blow away loose particles - wiping may scratch the surface. -
Page 41: Technical Details
TECHNICAL DETAILS Camera Type: IX240 type system camera Lens: Minolta V lens AF System: Type: TTL phase-detection system Sensor: One CCD line sensor Focus Modes: Autofocus/Manual focus AF Mode Selection: Single-frame /Continuous drive Sensitivity: EV 1-19 (ISO 200) AF Illuminator: Type: Flash Range: 0.6 - 5m Metering: Without Flash: 2-segment metering... -
Page 42: Trouble Shooting
TROUBLE-SHOOTING Refer to these pages to determine the cause of a problem you are experiencing with your camera. If the information does not cover the problem you are experiencing or the condition continues, contact your nearest Minolta Service Facility. Problem Batteries are loaded incorrectly No display appears when... -
Page 43: Camera Warnings
CAMERA WARNINGS MODE DISPLAY Batteries have been replaced. blink Camera operation malfunction. Err appears Lens is not attached, or is attached improperly. appears Required shutter speed is beyond the range of the camera. 1000 or 30” blinks Required aperture is beyond the range of the lens. -
Page 44: Landscape Mode
QUICK REFERENCE GUIDE Program Reset Focus Hold Setting manual fill-flash Setting flash cancel Setting red-eye reduction Selecting a subject program mode Taking night portraits Taking night scenes Imprinting date/time Manual rewind Portrait Mode Landscape Mode Close-up Mode Sports Mode Night Portrait Mode... - Page 45 Minolta Co., Ltd. 3-13, 2-Chome, Azuchi-Machi, Chuo-Ku, Osaka 541, Japan Minolta GmbH Kurt-Fischer-Strasse 50, D-22923 Ahrensburg, Germany Minolta France S.A. 365 Route de Saint-Germain, F-78420 Carrieres- Sur-Seine, France Minolta (UK) Limited Rooksley Park, Precedent Drive, Rooksley, Milton Keynes, MK13 8HF, England Minolta Austria Ges.
Need help?
Do you have a question about the Minolta VECTISS100 and is the answer not in the manual?
Questions and answers