Table of Contents
Advertisement
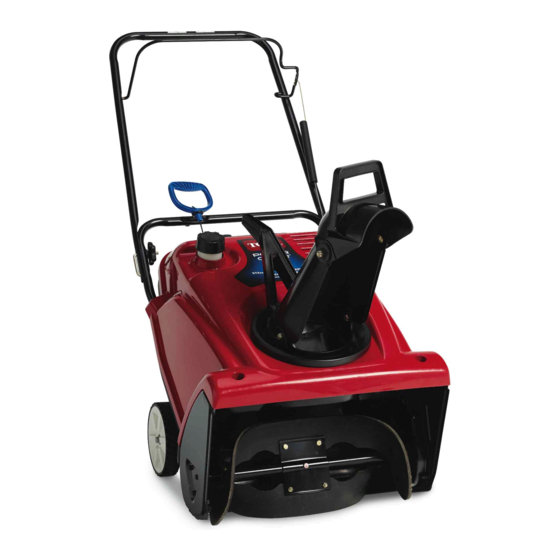
Power Clear
Model No. 38741—Serial No. 315000001 and Up
Model No. 38742—Serial No. 315000001 and Up
Introduction
WARNING
CALIFORNIA
Proposition 65 Warning
This product contains a chemical or chemicals
known to the State of California to cause cancer,
birth defects, or reproductive harm.
The engine exhaust from this product
contains chemicals known to the State of
California to cause cancer, birth defects,
or other reproductive harm.
This machine is intended to be used by residential
homeowners or professional, hired operators. It is
designed primarily for removing snow from paved
surfaces, such as driveways and sidewalks, and other
surfaces for traffic on residential or commercial
properties. It is not designed for removing materials
other than snow, nor is it designed for clearing off gravel
surfaces.
Read this information carefully to learn how to operate and
maintain your machine properly and to avoid injury and
machine damage. You are responsible for operating the
machine properly and safely.
You may contact Toro directly at www.Toro.com for machine
and accessory information, help finding a dealer, or to register
your machine.
Whenever you need service, genuine Toro parts, or additional
information, contact an Authorized Service Dealer or Toro
Customer Service and have the model and serial numbers of
your machine ready. Figure 1 identifies the location of the
model and serial numbers on the machine. Write the numbers
in the space provided.
© 2014—The Toro® Company
8111 Lyndale Avenue South
Bloomington, MN 55420
®
721 R/E Snowthrower
This manual identifies potential hazards and has safety
messages identified by the safety alert symbol (Figure 2),
which signals a hazard that may cause serious injury or death
if you do not follow the recommended precautions.
This manual uses 2 words to highlight information.
Important calls attention to special mechanical information
and Note emphasizes general information worthy of special
attention.
Register at www.Toro.com.
Figure 1
1. Model and serial number location
Model No.
Serial No.
Figure 2
1. Safety alert symbol
Original Instructions (EN)
All Rights Reserved *3385-215* A
Printed in the USA
Form No. 3385-215 Rev A
Operator's Manual
G016241
Advertisement
Table of Contents

Subscribe to Our Youtube Channel
Related Manuals for Toro Power Clear 721 R 38741


Summary of Contents for Toro Power Clear 721 R 38741
-
Page 1: Introduction
You are responsible for operating the machine properly and safely. Figure 2 You may contact Toro directly at www.Toro.com for machine and accessory information, help finding a dealer, or to register 1. Safety alert symbol your machine. -
Page 2: Table Of Contents
Keep the area of operation clear of all persons, particularly Clearing a Clogged Discharge Chute ......3 small children. Maintenance and Storage.......... 3 Toro Snowthrower Safety ......... 4 • Exercise caution to avoid slipping or falling. Safety and Instructional Decals ......... 5 Setup ................ -
Page 3: Operation
Operation Clearing a Clogged Discharge Chute • Do not put hands or feet near or under rotating parts. Keep clear of the discharge opening at all times. Hand contact with the rotating rotor blades inside the • Exercise extreme caution when operating on or crossing discharge chute is the most common cause of injury gravel drives, walks, or roads. -
Page 4: Toro Snowthrower Safety
Toro Snowthrower Safety The following list contains safety information specific to Toro products or other safety information that you must know. • Rotating rotor blades can injure fingers or hands. Stay behind the handles and away from the discharge opening while operating the machine. Keep your face, hands, feet, and any other part of your body or clothing away from moving or rotating parts. -
Page 5: Safety And Instructional Decals
Safety and Instructional Decals Important: Safety and instruction decals are located near areas of potential danger. Replace damaged decals. 94-2577 1. To engage the rotor blades, hold the control bar against the handle. 2. To disengage the rotor blades, release the control bar. 117-9103 (Model 38742 only) Order part no. -
Page 6: Setup
Setup Loose Parts Use the chart below to verify that all parts have been shipped. Procedure Description Qty. – No parts required Unfold the handle. Discharge chute Chute handle Phillips head bolts Install the discharge chute. Washers Locknuts Unfolding the Handle No Parts Required Figure 5 Procedure... -
Page 7: Filling The Engine With Oil
Installing the Discharge Chute Filling the Engine with Oil No Parts Required Parts needed for this procedure: Discharge chute Procedure Chute handle Your machine does not come with oil in the engine, but it Phillips head bolts does come with a bottle of oil. Washers Important: Before starting the engine, fill the engine with oil. -
Page 8: Adjusting The Control Cable
Product Overview 3. Unscrew the oil fill cap and remove it. 4. With the machine in the operating position, carefully pour oil into the crankcase. Wait 3 minutes for the oil to settle and add enough to bring it to the point of overflow. -
Page 9: Filling The Fuel Tank
Filling the Fuel Tank • For best results, use only clean, fresh (less than 30 days old), unleaded gasoline with an octane rating of 87 or higher ((R+M)/2 rating method). • Ethanol: Gasoline with up to 10% ethanol (gasohol) or 15% MTBE (methyl tertiary butyl ether) by volume is acceptable. - Page 10 Figure 17 Figure 14 Note: Use only a UL-listed, 16-gauge extension cord 1. Choke lever recommended for outdoor use that is not longer than 50 feet (15 m). WARNING The electrical cord can become damaged, causing a shock or fire. Figure 15 Thoroughly inspect the electrical cord before 1.
-
Page 11: Engaging The Rotor Blades
Disengaging the Rotor Blades Note: If you pull the recoil handle and feel no resistance, the starter may be frozen. Thaw out the To disengage the rotor blades, release the control bar (Figure starter before attempting to start the machine. 20). -
Page 12: Clearing A Clogged Discharge Chute
Preventing Freeze-up after Use • Let the engine run for a few minutes to prevent moving parts from freezing. Stop the engine, wait for all moving parts to stop, and remove ice and snow from the machine. • Clean off any snow and ice from the base of the chute. •... -
Page 13: Maintenance
• • If the machine does not propel itself forward on slippery Overlap each swath to ensure complete snow removal. surfaces or in heavy snow, push forward on the handle, • Discharge the snow downwind whenever possible. but allow the machine to work at its own pace. Maintenance Note: Determine the left and right sides of the machine from the normal operating position. -
Page 14: Adjusting The Control Cable
Adjusting the Control Cable Checking the Control Cable Service Interval: After the first hour—Check the control cable and adjust it if necessary. Yearly—Check the control cable and adjust it if necessary. Move the control bar back toward the handle to remove the slack in the control cable (Figure 25). -
Page 15: Inspecting The Rotor Blades
Changing the Engine Oil Service Interval: After the first 2 hours Yearly Run the engine a few minutes before changing the oil to warm it. Warm oil flows better and carries more contaminants. 1. Siphon the fuel from the fuel tank into an approved fuel container, or run the engine until it stops. -
Page 16: Servicing The Spark Plug
Max fill: 20 oz. (0.6 l), type: automotive detergent oil with an API service classification of SJ, SL, or higher. Use Figure 31 below to select the best oil viscosity for the outdoor temperature range expected: Figure 31 G016327 Figure 33 4. -
Page 17: Replacing The Drive Belt
13. Connect the wire to the spark plug. Note: Ensure that the breather tube is routed above the spark plug wire as shown in Figure 36. Figure 36 1. Breather tube 2. Carburetor drain bolt 14. Remove the fuel tank cap. Figure 34 15. - Page 18 8. Install the brake spring onto the idler arm (Figure 38). 9. Install the drive belt cover with the bolts you removed in step 1. Note: Ensure that the drive belt is properly adjusted and operating; refer to Checking the Control Cable and Adjusting the Control Cable.
-
Page 19: Storage
Storage 16. Cover the machine and store it in a clean, dry place out of the reach of children. Allow the engine to cool before storing it in any enclosure. Storing the Snowthrower WARNING • Gasoline fumes are highly flammable, explosive, and dangerous if inhaled. - Page 20 Notes:...
- Page 21 Notes:...
- Page 22 Such use will not reduce the warranty obligations of The Toro Company. 10. Add-on or modified parts that are not approved by The Toro Company may not be used. The use of a non-approved add-on or modified parts by the purchaser will be grounds for disallowing a warranty claim.
- Page 23 1. Fuel System Parts • Carburetor and internal parts • Cold starting enrichment (primer or choke) • Fuel pump • Fuel line, fittings, and clamps • Fuel tank, cap, and tether • Carbon canister 2. Air Induction System • Air cleaner •...
- Page 24 Toro importer. If all other remedies fail, you may contact us at Toro Warranty Company. Australian Consumer Law: Australian customers will find details relating to the Australian Consumer Law either inside the box or at your local Toro Dealer.
Need help?
Do you have a question about the Power Clear 721 R 38741 and is the answer not in the manual?
Questions and answers