Sign In
Upload
Download
Table of Contents
Contents
Add to my manuals
Delete from my manuals
Share
URL of this page:
HTML Link:
Bookmark this page
Add
Manual will be automatically added to "My Manuals"
Print this page
×
Bookmark added
×
Added to my manuals
Manuals
Brands
Dynaudio Manuals
Speaker System
AIR 25
Reference manual
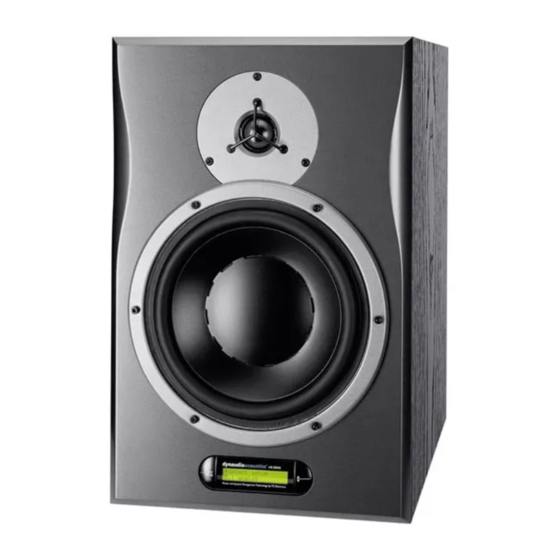
Dynaudio AIR 15 Reference Manual
Professional air active monitor system
Hide thumbs
Also See for AIR 15
:
User manual
(60 pages)
,
User manual
(60 pages)
1
Table Of Contents
2
3
4
5
6
7
8
9
10
11
12
13
14
15
16
17
18
19
20
21
22
23
24
25
26
27
28
29
30
31
32
33
34
35
36
37
38
39
40
41
42
43
44
45
46
47
48
49
50
51
52
53
54
55
56
57
58
59
60
61
62
63
64
65
66
67
68
69
70
71
72
73
74
75
76
77
78
79
80
81
82
83
84
85
86
87
88
89
90
91
92
93
94
95
96
97
98
99
100
101
102
103
104
105
106
107
108
109
110
111
112
113
114
115
116
117
118
119
120
121
122
123
124
125
126
127
128
129
page
of
129
Go
/
129
Contents
Table of Contents
Bookmarks
Table of Contents
Table of Contents
Important Safety Instructions
Emc/Emi
Before You Begin
Your New Dynaudio Professional AIR Monitors
About this Manual
The AIR Concept
Introduction
The Master/Slave Concept
The Master Unit
The Slave and Subwoofer Units
Initializing the Network
Remote Control Using AIR Remote or AIR Control Software
Common Features for both the Master and Slave Units
Standby, Power Save Mode and Powering down Your AIR System
Other AIR Features
Rear Panel Controls and Connections
AIR Master Unit with Analog Inputs - Rear Panel
Slave/Sub - Rear Panel
Digital I/O Card (Optional)
Operating Your AIR Monitors
The AIR Display and Keys
Basic Navigation/Operation
AIR Menu Structure and Parameters
Home Screen
Configuring Bass Management
Setup Menu ► Setup Selection
Setup Menu ► Monitor Tasks Setup
Setup Menu ► External Clock Setup
AIR Base
Setup Menu ► Analog Input Sensitivity
Setup Menu ► Monitor Calibration
Setup Menu ► Clear Setup for Entire Network
AIR Setups
Stereo Setup - Digital or Analog
Stereo Setup with Mono Subwoofer - Digital or Analog
Stereo Setup with Two Subwoofers - Digital or Analog
5.1 Setup - Digital
5.1 Setup - Analog
5.3 Setup - Digital
5.3 Setup - Analog
6.1 Setup - Analog
5.1 Setup with Digital AES/EBU Card
Stereo Setup with Chains on Left and Right
7.1 Setup - Analog or Digital
5.1 Setup - Digital - 192 Khz
6.1 Setup - Digital - 192 Khz
Recalling and Storing Presets
Recalling Presets
Storing Presets
Parameter Storage
Placing the Monitors
Overview
General Considerations: Symmetry
Front Monitors, Left and Right
Center Front Monitor
Surround Monitors, Left and Right
Monitor Positions
Checking and Optimizing Monitor Placement
Overview
Assigning Monitor Positions
Phase Checking
Checking Monitor Placement
Equalizing the Monitors
Calibrating the Main Monitors
Setup Menu ► Monitor Calibration
Placing the Subwoofer
Checking Subwoofer Placement
Calibrating the Subwoofers with the Main Monitors
AIR Remote
AIR Remote - Introduction
AIR Control Software
AIR Control Software - Introduction
AIR Control Software Main Features
AIR Control Software System Requirements
Obtaining AIR Control Software
Installing AIR Control Software
Setting up AIR Control Software
Global and Local Parameters
Basic Editing Procedures
AIR Control Software Version Information
Global - Main Page
File Page
Bass Management Page
EQ Link Page
Lock Page
Preferences Page
Selecting Monitors for Configuration
Monitor Setup Page
Monitor EQ Page
Monitor Firmware Page
Monitor Log Page
Cables
TC LINK Via Standard Cat 5 Cables
AES/EBU Cables
Balanced Audio Cables
Custom Serial to CAT 5 Cable
USB to COM 9 Pin Adapter
Presets
Reset Procedures
Error Messages
Warranty
Exceptions
Technical Specifications
AIR 6 & AIR 15 (Master and Slave)
AIR 20 & AIR 25 (Master and Slave)
Air Base 1 & Air Base 2
AIR Base 12
Room Size and Typical Listening Distance
General Specifications for AIR 6, AIR 15, AIR 20, AIR 25, AIR BASE 1, AIR BASE 2, AIR BASE 12 & AIR Base
AIR Remote
General Specifications for All Products
Delay in System
Certificate of Conformity
Appendix: Acoustics
Introduction
Sabine's Formula
Absorbers
Diffusors
Standing Waves
Comb Filtering
Rear Wall Cancellation
Subwoofers
Bass Management
The LFE Channel
Delaying Monitors
Line-Up and Calibration
Measuring Sound Pressure
Links
Support Resources
Dynaudio Professional on
Advertisement
Quick Links
1
The Master/Slave Concept
Download this manual
Dynaudio Professional AIR
Reference manual
2014-09-28
Table of
Contents
Previous
Page
Next
Page
1
2
3
4
5
Advertisement
Table of Contents
Need help?
Do you have a question about the AIR 15 and is the answer not in the manual?
Ask a question
Questions and answers
Related Manuals for Dynaudio AIR 15
Speaker System Dynaudio Air Series User Manual
Dynaudio user's manual portable speaker air series (60 pages)
Speaker System Dynaudio pmn User Manual
Dynaudio loudspeaker user's manual (60 pages)
Speaker System Dynaudio Esotar / Esotec Manual
Esotar / esotec series (23 pages)
Speaker System Dynaudio Xeo Owner's Manual
(116 pages)
Speaker System Dynaudio Focus loudspeakers Owner's Manual
Dynaudio focus loudspeakers owners manual (28 pages)
Speaker System Dynaudio BM Compact mkIII Owner's Manual
Active monitor system (16 pages)
Speaker System Dynaudio BM5 mkIII Owner's Manual
Active monitor system (16 pages)
Speaker System DYNAUDIO Contour Owner's Manual
(20 pages)
Speaker System Dynaudio Xeo Hub Owner's Manual
(32 pages)
Speaker System Dynaudio BM6 mkIII Owner's Manual
Active monitor system (16 pages)
Speaker System Dynaudio DBM50 User Manual
(12 pages)
Speaker System Dynaudio BM12 mkIII Owner's Manual
Active monitor system (16 pages)
Speaker System Dynaudio OW Series User Manual
(14 pages)
This manual is also suitable for:
Air base 2
Air base 12
Air base 24
Air base 1
Air remote
Table of Contents
Save PDF
Print
Rename the bookmark
Delete bookmark?
Delete from my manuals?
Login
Sign In
OR
Sign in with Facebook
Sign in with Google
Upload manual
Upload from disk
Upload from URL


Need help?
Do you have a question about the AIR 15 and is the answer not in the manual?
Questions and answers