Table of Contents
Advertisement
Available languages
Available languages
Quick Links
Advertisement
Table of Contents

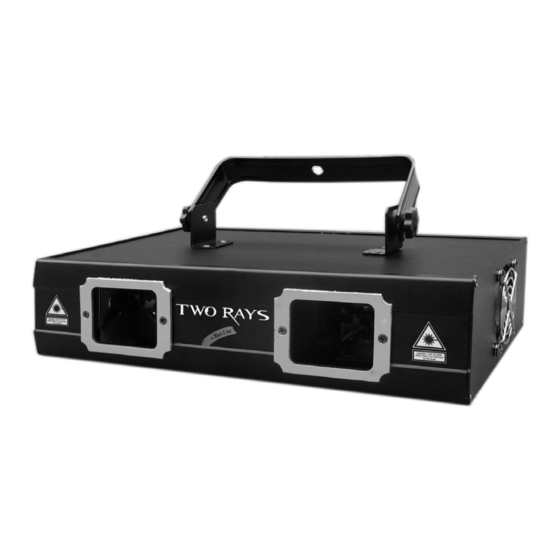
Summary of Contents for PROEL PLLAS115X2TWO RAYS
- Page 1 Laser Effect PLLAS115X2 MANUALE UTENTE USER MANUAL Rev. 01-07/12...
-
Page 2: Table Of Contents
INDICE NORME DI SICUREZZA....................3 ALIMENTAZIONE ......................4 MONTAGGIO IN SOSPENSIONE.................. 4 CONNESSIONE CON UNA LINEA DMX ..............5 MESSA IN FUNZIONE...................... 6 MANUTENZIONE......................8 DATI TECNICI........................9 TABLE OF CONTENTS MAIN GUIDELINES......................10 AC POWER........................11 OVEREAD MOUNTING ....................11 DMX 512 CONNECTION ....................12 OPERATION........................13 BASIC SERVICE ........................15 TECHNICAL DATA......................16... -
Page 3: Norme Di Sicurezza
• Leggere il presente manuale prima di dare corrente all’apparecchiatura e di installarla, seguire le precauzioni di sicurezza elencate sotto ed osservare tutti gli avvertimenti indicati nel presente manuale e stampati sull’apparecchiatura. Si prega di contattare un PROEL distributore per ricevere assistenza per qualsiasi dubbio su come attivare l’apparecchiatura in modo sicuro. -
Page 4: Alimentazione
ALIMENTAZIONE Prima dell’attivazione assicurarsi che le impostazioni di fabbrica relative a tensione e frequenza siano conformi alla rete locale. Collegare sempre l’apparecchiatura a terra elettricamente. Usare esclusivamente fonti di alimentazione AC conformi alle normative locali ed alle convenzioni elettriche e che siano dotate delle protezioni contro sovraccarico e contro difetti nel sistema di messa a terra. -
Page 5: Connessione Con Una Linea Dmx
CONNESSIONE CON UNA LINEA DMX Proiettore 3 Proiettore 2 Proiettore 1 Indirizzo 11 Indirizzo 6 Indirizzo 1 DMX-512 Controller I cavi DMX non devono venire a contatto con altri cavi, in tal caso infatti gli apparecchi potrebbero non funzionare correttamente o non funzionare affatto. Usare solo cavi DMX con spina e presa tipo XLR 3 poli, per la connessione alla centralina DMX o per il collegamento tra apparecchi. -
Page 6: Messa In Funzione
MESSA IN FUNZIONE Dopo aver connesso il proiettore alla rete di alimentazione, esso può essere acceso. Ogni proiettore occupa 5 canali DMX. Per fare in modo che il segnale di controllo sia correttamente ricevuto da ogni proiettore, è necessario che ognuno di essi sia indirizzato. Questo può... - Page 7 CANALI DMX Canale Funzione Valore Specifiche 000 – 050 Laser spento 051 – 101 Selezione disegni CH 1 Modalità di funzionamento 102 – 152 Selezione effetti 153 – 203 Modalità automatica 204 - 255 Modalità musicale CH 2 Selezione Disegni 000 –...
-
Page 8: Manutenzione
MANUTENZIONE Per mantenere elevata la qualità delle prestazioni del PLLAS115X2, è fondamentale una pulizia regolare degli elementi dell’asse ottico, così come dei fori di aerazione e della ventola di raffreddamento. Importante! Polvere eccessiva, depositi di fumo ed altre scorie riducono le prestazioni e causano surriscaldamento. -
Page 9: Dati Tecnici
DATI TECNICI PLLAS115X2 Alimentazione AC 100/240V - 50/60HZ Potenza assorbita Potenza laser Rosso: 100mW/650nm Blu: 300mW/450nm Colore laser Rosso, blu Modalità controllo DMX - Musicale - Automatico Canali DMX Sistema di raffreddamento Tramite ventola Protezione IP20 Peso netto 3,45 kg Dimensioni imballo (LxPxH) mm. -
Page 10: Main Guidelines
PROEL distributor for assistance. Refer any service operation not described in this manual to a qualified technician. • Do not modify the fixture or install other than genuine PROEL accessories and upgrade kits. • Refer servicing to qualified personnel. -
Page 11: Ac Power
AC POWER Before operation ensure that factory setting of voltage and frequency match local power supply. Always ground (earth) the fixture electrically. Use only a source of AC power that complies with local building and electrical codes and has both overload and ground-fault protection. If it is necessary to substitute power supply plug, connect it in accordance with the following code: GREEN/YELLOW:... -
Page 12: Dmx 512 Connection
DMX-512 CONNECTION Projector 3 Projector 2 Projector 1 Address 11 Address 6 Address 1 DMX-512 Controller The wires must not come into contact with each other, otherwise the fixtures will not work at all, or not will work properly. Only use only a DMX cable and 3-pin XLR-plugs and connectors in order to connect the controller with the fixture or one fixture with another. -
Page 13: Operation
OPERATION After you connected the effect to the mains, the fixture starts running. During the reset, the motors are trimmed and the device is ready for use afterwards. Each projector occupies 5 channels. To ensure that the control signals are properly directed to each projector, the projector requires addressing. - Page 14 DMX CONTROL CHANNELS Channel Function Value Specifications 000 – 050 Laser off 051 – 101 Patterns selection CH 1 Control modes selections 102 – 152 Different effect selection 153 – 203 Automatocally run 204 - 255 Sund run CH 2 Effect pattern selection 000 –...
-
Page 15: Basic Service
BASIC SERVICE Regular cleaning of the elements in the optical path, as well as the air vents, is vital to maintaining the operational quality of the PLLAS115X2. Important! Excessive dust, smoke fluid, and particulate build-up degrades performance and causes overheating and damage to the fixture that is not covered by the warranty. Cleaning the air vents: To maintain adequate cooling, dust must be cleaned from the air vents periodically. -
Page 16: Technical Data
TECHNICAL DATA PLLAS115X2 Power supply AC 100/240V - 50/60HZ Power consumption Laser Power Red: 100mW/650nm Blue: 300mW/532nm Laser color Red, blue Control mode DMX – Sound mode – Auto mode DMX channels Cooling system IP rating IP20 Net weight 3,45 kg Package dimensions (LxWxH) mm. - Page 20 Proel S.p.A. Via alla Ruenia 37/43 64027 Sant'Omero (TE) ITALY Tel. +39 0861 81241 Fax. +39 0861 887862 Mail: info@proelgroup.com Web: www.proel.com...


Need help?
Do you have a question about the PLLAS115X2TWO RAYS and is the answer not in the manual?
Questions and answers