Toyota sp100 series Instruction Manual
A,b type home-use sewing machine
Hide thumbs
Also See for sp100 series:
- Instruction manual (59 pages) ,
- Quick instructions (16 pages) ,
- Instruction manual (54 pages)
Table of Contents
Advertisement
Advertisement
Table of Contents

Related Manuals for Toyota sp100 series


Summary of Contents for Toyota sp100 series
- Page 1 SP100 Series A, B type HOME-USE SEWING MACHINE INSTRUCTION MANUAL • Read this manual carefully before use and always follow the instructions. • Keep the manual in a convenient place for easy reference. • If you give the sewing machine to someone else, also give...
-
Page 2: Table Of Contents
Contents Before use (Be sure to read this section before use) • Important safety instructions ..........3 • How to change the power plug ......... 5 • Part names ............... 6 • Part names and their functions ......... 8 • Quick adviser .............. -
Page 3: Before Use (Be Sure To Read This Section Before Use)
Before use (Be sure to read this section before use) Important safety instructions These safety instructions are designed to prevent danger or damage arising from the incorrect operation of the machine. Read carefully and always follow the instructions. Explanation of “ Warning”... - Page 4 Caution Be sure to close the bobbin case cover before operating the sewing machine. Not doing so could cause an injury. When the machine is not in use it should be stored safely, not on the floor as protruding parts could cause injury if a person fell on the machine. Not doing so could cause an injury.
-
Page 5: How To Change The Power Plug
Caution Do not operate on an unstable surface such as a sofa or a bed. If the sewing machine falls down, it could cause an injury or damages to the machine. Do not drop or insert any foreign objects into any openings such as opening space when you remove the face cover and / or the outer casing space of bobbin case. -
Page 6: Part Names
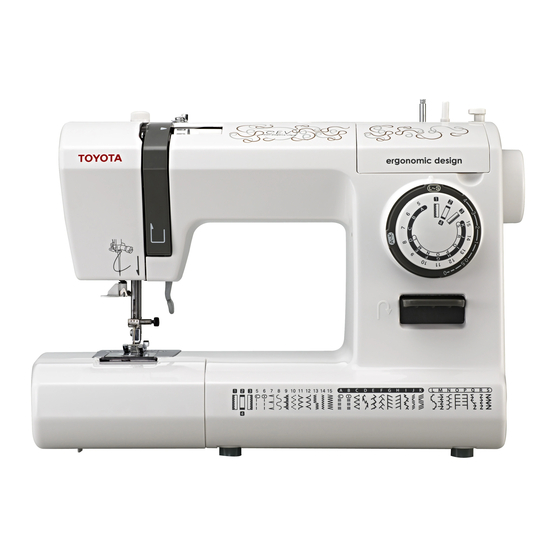
Part names Upper thread tension dial Spool pin Thread guide Quick adviser Take-up lever Pattern selection dial Light bulb Face cover Reverse sewing lever Extension table (Accessory Box) Needle clamp screw Needle thread guide Presser foot holder Needle plate Presser foot holder clamp screw Feed dog Presser foot... - Page 7 Thread winding spindle Thread Hollow for carrying winding switch Insert your hand into the hollow when carrying sewing machine Presser foot lever Thread cutter Handwheel Main power switch Buttonhole adjustment screw Terminal box Battery holder Foot controller...
-
Page 8: Part Names And Their Functions
Part names and their functions The various parts of the sewing machine have the functions described below. Extension table (Accessory Box) • Pull out the extension table (accessory box) in the direction of the arrow. Presser foot lever • When sewing, lower the presser foot lever to lower the presser foot. -
Page 9: Pattern Selection Dial
Handwheel • Use the handwheel to manually raise and lower the needle. Note: Always turn the handwheel towards yourself (in the direction of the arrow). If the handwheel is turned in the opposite direction, the thread may become tangled. Pattern selection dial •... -
Page 10: Quick Adviser
Quick adviser The quick adviser (under the lid on the sewing machine) provides various descriptions such as basic machine operations. Accessing the quick adviser Flip up the lid to open it. Quick adviser (Stored inside) -
Page 11: How To Operate Foot Controller
How to operate foot controller Caution Be sure to use the main power switch to turn off the sewing machine before connecting the foot controller. Not doing so could cause an injury. Operation „ Insert the power cord connector into Press the “... -
Page 12: Sewing Preparations
Sewing preparations Connecting the power Warning Do not touch the power plug with wet hands. Doing so could cause an electric shock. Hold the power plug, to remove or insert into the power outlet. Not doing so could damage the cord and cause an electric shock, fire or injury. -
Page 13: Installation Of Battery For Winding The Lower Thread
Installation of battery for winding the lower thread A battery is supplied as one of the accessories. Before winding the lower thread, install it in the battery holder on back of sewing machine. Caution When the machine is not used for an extended period, remove the battery. -
Page 14: Winding The Lower Thread
Note: Winding the lower thread Prepare a specially designed bobbin. Turn off the Pull up the spool pin. sewing machine. Position the spool of thread and the spool cap on to the spool pin. Main power switch Note: A felt was originally put on to the spool pin. - Page 15 Caution While the bobbin is being wound, do not touch the thread winding spindle or the handwheel. Doing so could cause an injury. Pull the thread from the thread Spool cap spool, and then hold it with Spool of thread one hand while passing it around the thread guide with Felt...
-
Page 16: Threading The Lower Thread
Threading the lower thread Open the bobbin case cover, and insert the bobbin into the bobbin case. If the bobbin is incorrectly inserted into the bobbin case, the stitching will not be sewn correctly. Turn off the sewing machine. Main power switch Pull the bobbin case cover towards yourself. - Page 17 Pass the thread through A , then B , and then pull the thread to the rear, as shown below. Pull out about 15 cm of thread to the rear. 15 cm Fit the projections on the bobbin case cover into the race retainer grooves, and then push the bobbin case cover closed.
-
Page 18: Threading The Upper Thread
Threading the upper thread Turn off the Raise the presser foot lever. sewing machine. Main power switch Presser foot lever Thread guide ( Complete Pass the thread through the presser foot, and then Take-up lever pull out about 15 cm of thread to the rear. - Page 19 Turn the handwheel towards Pull up the spool pin. yourself to raise the take-up Position the spool of lever. thread and the spool cap on to the spool pin. Handwheel Take-up lever Spool cap Spool of thread Felt Spool Pull the thread from Spool pin ( the thread spool, and hold it with one hand.
-
Page 20: Pulling Up The Lower Thread
Pulling up the lower thread Raise the presser foot lever. Loosely Do not pull the hold the upper thread taut. thread with your left hand, and then turn the handwheel towards yourself one full turn. Lightly pull the upper thread with your left hand to pull up the lower thread. -
Page 21: Application Of Each Stitch Pattern
Application of each stitch pattern Caution Before turning the pattern selection dial, use the main power switch to turn off the sewing machine. Not doing so could cause an injury. Caution Do not turn the pattern selection dial while the needle is lowered. Doing so could break the needle and cause an injury. -
Page 22: Changing The Presser Foot
Changing the presser foot Caution Before changing the presser foot, use the main power switch to turn off the sewing machine. Not doing so could cause an injury. Removal Raise the presser foot lever. Turn the handwheel towards yourself to raise the needle. Note: Never turn in the wrong direction. - Page 23 Installation Position the presser foot pin directly below the groove in the presser foot holder. Presser foot holder Groove Presser foot pin Lower the presser foot lever to Presser foot lever secure the presser foot. In order to avoid losing the presser foot, we recommend storing the machine when it is not being used with the needle and the presser foot lowered.
-
Page 24: Changing The Needle
Changing the needle Caution Before changing the needle, use the main power switch to turn off the sewing machine. Not doing so could cause an injury. Broken needles are dangerous. Be sure to dispose of them in a safe place away from children. Not doing so could cause an injury. -
Page 25: Relationship Between The Needle, Thread And Fabric, And Adjusting The Thread Tension
Relationship between the needle, thread and fabric, and adjusting the thread tension The quality of the sewing finish will improve if the needle and thread are changed to match the type of fabric. Follow the directions in the table below. Thin fabrics Normal fabrics Thick fabrics... -
Page 26: Sewing
Sewing Straight stitching and reverse sewing Caution Do not pull the fabric excessively while sewing. Doing so could break the needle and cause an injury. Straight stitch Turn the handwheel towards yourself to raise the needle. Turn the pattern selection dial to choose the pattern. Zigzag sewing foot (Originally attached to the sewing machine) -
Page 27: Thread Cutter
Thread cutter Thread cutter Line up the two threads, and cut them with the thread cutter on the presser bar. Reverse sewing Reverse sewing is performed at the beginning and the end of sewing to prevent the thread from unraveling. Reverse sewing is performed while pressing down the reverse sewing lever. -
Page 28: Sewing Thick Fabric
Sewing thick fabric When sewing over thick fabric, the presser foot may tilt and be unable to feed through the fabric. Place fabric or thick paper of the same thickness as the fabric you wish to sew under the presser foot. This will enable smooth sewing. - Page 29 Sewing tube-shaped fabrics Pull out the extension table (accessory box) in the direction of the arrow. Sew tube-shaped fabrics such as trousers or sleeves, by pulling them over the machine free arm as shown in the diragram.
-
Page 30: Zigzag Sewing
Zigzag sewing There are various zigzag applications, such as applique and overcasting. Turn the handwheel towards yourself to raise the needle. Turn the pattern selection dial to choose the pattern. Zigzag sewing foot (Originally attached to the sewing machine) 5.0 mm (For details on changing the presser foot, refer to “Changing the presser foot”... -
Page 31: Adjusting Thread Tension
Adjusting thread tension Adjustment method for upper thread tension Straight stitch Upper thread is tight • Upper thread is tight Wrong side Right side Upper thread is loose Lower the upper thread tension. Wrong side Right side • Upper thread is loose Zigzag sewing Upper thread is tight Right side... -
Page 32: Buttonhole Sewing
Buttonhole sewing Buttonhole sewing to match the size of the button is possible. For stretch fabric or thin fabric, it is recommended to use a stabilizer for a better buttonhole finish. Caution Before changing the presser foot, use the main power switch to turn off the sewing machine. - Page 33 Raise the needle to the highest position, set the pattern dial to “1”, sew the left side and stop at the line marked on the fabric. Raise the needle to the highest position, set the pattern dial to “2”, and sew 5 to 6 bar-tack stitches. “2”...
- Page 34 Caution When using the buttonhole cutter to cut the buttonholes, do not hold the fabric in front of the cutter. Doing so could cause an injury to your hand. Use the buttonhole cutter to cut the center, making sure not to cut the stitches.
-
Page 35: Overcasting
Overcasting This is a sewing method that prevents unraveling at the edge of the fabric. Caution Before changing the presser foot, use the main power switch to turn off the sewing machine. Not doing so could cause an injury. Select one pattern from No.5, No.6 and No.10. Note: Select pattern No.10 when sewing thin fabric. -
Page 36: Zipper Insertion
Zipper insertion Caution Before changing the presser foot, use the main power switch to turn off the sewing machine. Not doing so could cause an injury. Change to the zipper foot. Zipper foot 2.0 mm (For details on changing the presser foot, refer to “Changing the presser foot”... - Page 37 Sew until just before the presser foot makes contact with the slider, and then stop the sewing machine. Slider Turn the handwheel towards yourself to lower the needle into the fabric. Raise the presser foot. Move the slider to the rear of the Slider presser foot, and finish the sewing.
-
Page 38: Blind Hem Stitching
Blind hem stitching In this sewing method the stitch cannot be seen on the front of the fabric. Caution Before changing the presser foot, use the main power switch to turn off the sewing machine. Not doing so could cause an injury. Zigzag sewing foot (Originally attached to... - Page 39 Position the fabric so that the needle Fold slightly catches the fold. Needle on the left side Lower the presser foot, and start sewing. The part of the stitch that catches the fold will be visible from the right side of the fabric. Sew evenly so that the stitching is not too large or too small.
-
Page 40: Maintenance
Maintenance Cleaning and maintenance must not be made by children without proper supervision. Feed dog and hook maintenance If the sewing machine makes a loud noise or rotates slowly, there could be thread waste or dust in the hook or feed dog. Perform maintenance on the hook and the feed dog. Caution Before cleaning the hook, use the main power switch to turn off the sewing machine, and then remove the power plug from the outlet. - Page 41 Lift up the bobbin case so that part c Use the screwdriver for the needle plate to loosen is moved past part d , as shown. the screws in the needle plate, and then remove the needle plate. Pull out the bobbin case in the direction of the arrow to remove it.
- Page 42 z Attaching the Bobbin Case Position the bobbin case so With the bobbin case tilted to that part a on the bobbin case the left, insert the left side of is below part b on the sewing the bobbin case into the hook, machine.
- Page 43 Attach the needle plate with red mark a on the bobbin case positioned as shown in the diagram. Tighten the needle plate screws. Attach the presser foot and insert the needle. Check that the needle correctly enters the hole in the needle plate. If the bobbin case is not installed correctly, the handwheel does not turn smoothly.
-
Page 44: Changing Light Bulb
Changing light bulb Warning Before changing the light bulb, use the main power switch to turn off the sewing machine, remove the power plug from the outlet, and then wait until the bulb cools. Not doing so could cause a burn or electric shock. Loosen the screw with a Screw + screw driver of your... -
Page 45: Servicing Double-Insulated Products (230V-240V)
Servicing double-insulated products (230V-240V) In a double-insulated product, two systems of insulation are provided instead of grounding. No grounding means are provided on a double-insulated product nor should a means for grounding be added to the product. Servicing a double-insulated product requires extreme care and should only be done by qualified service personnel with knowledge of the system under his or her responsibility. - Page 46 Trouble Cause Countermeasure Page Needle incorrectly inserted Insert the needle correctly into the machine The needle clamp screw is Firmly tighten the screw loose Needle The needle is too fine for the Use the appropriate size keeps fabric needle for the fabric breaking The upper thread tension is Loosen the upper tension...
- Page 47 18, 19 correctly fabric thread guide) If the above treatments do not solve the SP100 SERIES / SERIE MODEL / MODELE problem, contact the service center as described in your warranty. Manufacturer/ : ZHEJIANG AISIN ELITE Fabricant MACHINERY & ELECTRIC When calling for service, please note the CO., LTD.P.R.C.
-
Page 48: Others
Others Recycling DO NOT THROW AWAY! EU ONLY We are committed to the protection of the environment. We strive to minimize the environmental impact of our pro ducts by continuously improving product design and our manufacturing methods. At end of life please dispose of this product in an environmentally responsible way. The crossed-out wheelie bin symbol featured above and on the product’s data- plate means that this product falls under the scope of the E.U. -
Page 49: Safety Precaution About The Battery
Safety precaution about the battery Warning If the alkaline solution from the battery should get in the eyes or come into contact with the skin or clothes, rinse with a large quantity of clean water and consult a doctor immediately. Not doing so could cause an injury. -
Page 50: Specifications
Specifications SP100 Series Model XXX15 Hook type Horizontal Needle Home-use sewing machine needle (HA-1) Bobbin TOYOTA-exclusive plastic bobbin Maximum stitch length 4 mm Maximum stitch width 5 mm Straight stitch needle position Center needle position, left needle position Sewing machine weight 4.8 kg... - Page 51 EU ONLY Imported by / Importé par : Web: www.home-sewing.com Head Office Avenue de l’Industrie 21, Parc Industriel, 1420 Braine-L’Alleud BELGIUM TEL: +32 (0) 2 387 1817 FAX: +32 (0) 2 387 1995 UK Branch Unit 4, Swan Business Park, Sandpit Road, Dartford, Kent, DA1 5ED UK. TEL: +44 (0) 1322 291137 FAX: +44 (0) 1322 279214 France Branch 70 chemin de la chapelle Saint Antoine 95300 Ennery, France...
Need help?
Do you have a question about the sp100 series and is the answer not in the manual?
Questions and answers