Table of Contents
Advertisement
Quick Links
Advertisement
Table of Contents

Related Manuals for Alecto DBX-89


Summary of Contents for Alecto DBX-89
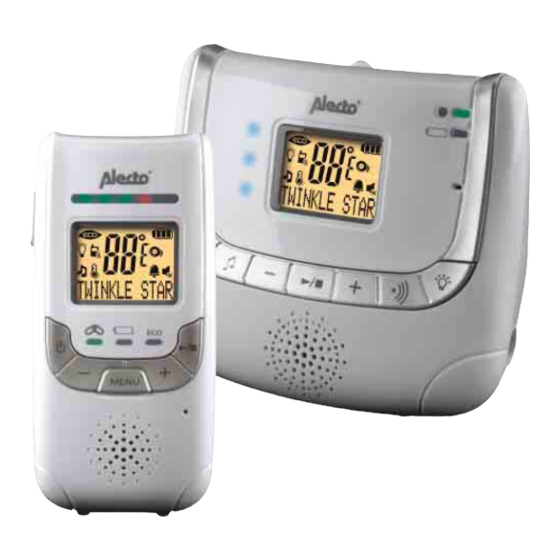
- Page 1 USERS MANUAL DBX-89...
-
Page 2: Eco Mode
1 ECO MODE This Alecto DBX-89 babyphone is equipped with an unique ECO mode. Already in normal operation mode, the baby- unit stops transmission when the baby is not crying. In Full Eco mode it even suppresses the controlling signals between the baby-unit and the parent unit, so no transmit- ting at all. -
Page 3: Overview
2 OVERVIEW OVERVIEW PARENT UNIT: sound indication LED’s microphone (for the talk back talk back button feature display (see paragraph 2.3) 10 volume up; down button when power on/off programming volume down; down button 11 start/stop lullaby when programming 12 lamps (see paragraph 2.4) MENU : link check loudspeaker... -
Page 4: Overview Baby Unit
OVERVIEW BABY UNIT: temperature sensor (backside loudspeaker baby unit volume-up built-in nightlight (not visible 10 page (to page the parent unit) when switched-off 11 DC input for power adapter display (see paragraph 2.3) 12 nightlight power on/off 13 microphone selection lullaby 14 lamps (see paragraph 2.4) volume-down : power... -
Page 5: Overview Display
OVERVIEW DISPLAY: displaying of the on when night light is enabled several functions off when night light is disabled and warnings during use on when lullaby is playing displaying of the on when the speaker volume is turned several settings off;... -
Page 6: Overview Lamps
battery indication: full battery level 2/3 battery level 1/3 battery level battery empty parent unit: this indication animates in cycle while charging baby-unit: this indication does not light when the power adapter is connected OVERVIEW LAMPS: Baby unit: Lamp : Power Indicator on when the parent unit is switched on off when the parent unit is switched off Lamp... -
Page 7: Installation
3 INSTALLATION PARENT UNIT: The parent unit is powered by 2 supplied rechargeable batteries. These batteries are charged through the inclu- ded power adapter. ATTENTION: NEVER install normal batteries in the parent unit. Normal batteries cannot be charged and will damage the parent unit when charged. -
Page 8: Baby Unit
BABY UNIT: You can use the baby unit from the mains power or on alkaline batteries. Even if you are going to use the unit from the mains, you are recommended to insert alkaline batteries (excl.). This guarantees automatic backup in case of mains failure. - Page 9 • Follow the local regulations regarding the disposal of your packing materials, exhausted batteries and used units. Wherever possible, recycle those mate- rials.
-
Page 10: Using Your Baby Monitor
4 USING YOUR BABY MONITOR Please read these instructions carefully, and be reminded that this baby monitor is just intended as an aid. It is not a substitute for responsible, correct parental supervision. POWER ON/OFF: provided the parent unit is off, press and hold <POWER>... -
Page 11: Language
LANGUAGE: It is recommended to fi rst set the language so that all text comes on the LCD in your favorite language. By default the English language is programmed. You only have to set the language onto the parent unit, the baby unit will be synchronized automatically. -
Page 12: Sound Alert
Optical indication: the sound is also displayed visually by LED’s; monitoring can therefore be carried out even when the volume has been reduced or switched off altogether SOUND ALERT: With the volume set to off, the babyphone can still warn you with beep-tones that the baby is crying loud. -
Page 13: Vibra Alert
VIBRA ALERT: If the vibrator is set on, the parent unit will vibrate when the noise level from the baby unit reaches the level that turns on LEDs 3, 4 and 5 while the loudspeaker volume of parent unit is switched off. enable/disable vibra alert: Menu press the MENU button... -
Page 14: Lullabies
LULLABIES: 5 Different lullabies are programmed into this babyphone start/stop: press button to play press button again to stop (you can also press button on the baby unit to start playing the lullabies) lullaby indication: the icon is on when the baby unit is playing lullabies select lullabies from the Parent unit: Menu... - Page 15 select lullabies from the Baby unit: press button to select another lullaby control the volume on the Baby unit: Press the - button to decrease the volume or the + button to increase the volume control the volume on the Parent unit: Menu press the MENU button fi...
-
Page 16: Nightlight
NIGHTLIGHT: You can control the nightlight directly on the baby unit or remotely by the parent unit. control the nightlight on the Baby unit: press the button to switch-on/off the nightlight control the nightlight on the Parent unit: Menu press the MENU button fi... -
Page 17: Talk Back
TALK BACK: Press and hold TALK on the Parent unit Talk to speak to the baby. The display on the Parent unit shows [ TALK ] and the display on the Baby unit show [ TALKBACK ] control the volume on the Baby unit: press the - button to decrease the volume or the + button to increase the volume... -
Page 18: Sensitivity
4.10 SENSITIVITY: You can adjust the sensitivity on the Parent Unit to monitor the sound from Baby Unit: Menu press the MENU button fi nd the option [ SENSITIVITY ] Menu press the MENU button select the required level There are fi ve levels of sensitivity which are indicated by lighted blocks: level 1 represents lowest sensitivity level 4 represents a high sensitivity... - Page 19 Menu press the MENU button fi nd the option [ TEMPERATURE ] Menu press the MENU button use the buttons -/+ to select between: to alter between Celsius and [ FORMAT ] Fahrenheit to set the minimum temperature [ MIMIMUM ] (in between 11°C (50°F) and 21°C(68°F)) to set the maximum temperature [ MAXIMUM ]...
-
Page 20: Alarm
temperature alert indication: the icon is on when the temperature alert is enabled working temperature alert: If the temperature goes beyond the minimum or maximum level, “COLD” or “HOT” indication displays and the current temperature flashes in the displays of both Units. If the Temperature alert is set to On, an alert will be sound at the Parent Unit. - Page 21 use the buttons -/+ to select between: [ OFF ] and [ SET TIMER ] press the MENU button to disable the [ OFF ] alarm press the MENU button to set the alarm [ SET TIMER ] feature 1. pres the MENU button and use -/+ to set the hours 2.
-
Page 22: Paging The Parent Unit
4.13 PAGING THE PARENT UNIT: Use this feature to call the parent unit in case you need help in the baby room or to find the parent unit. The parent unit must be switched-on to use this feature. press the button to generate tones at the parent unit for 120 seconds;... -
Page 23: Full Eco
Please be informed that the power setting only takes effect 30 seconds after the baby unit is idle (no transmitting). The effective ranges depend on your local circumstances and should be found out empirically. 4.15 FULL ECO: When FULL ECO is activated, there is no transmitting at all when the baby is not crying. -
Page 24: Others
5 OTHERS LINK CHECK: As soon and as long the parent unit is in contact with the baby unit, the link-LED on the parent unit lights stea- dily. When the baby unit gets out of range (or is powered off), the link-LED on the parent unit starts blinking and the text [ SEARCHING ] comes on the display. -
Page 25: Battery Indication
BATTERY INDICATION: Both the parent unit and the baby unit are equipped with a battery level indicator in the display: : full battery level : 2/3 battery level : 1/3 battery level : battery empty Baby unit: the battery indicator is off when the baby unit is powered by the power adapter the battery indicator is on and indicates the capacity when the baby unit is powered by batteries... -
Page 26: Restore To Default
in idle state this icon shows the actual capacity of the batteries soon after the battery icon shows ‘empty batteries’ ), the parent unit will switch-off; reconnect the power adapter to get the parent unit function again RESTORE TO DEFAULT: As follow the settings of the babyphone can be restored to the default values: Parent unit:... -
Page 27: Safety) Instructions And Tips
6 (SAFETY) INSTRUCTIONS AND TIPS GENERAL: The Babyphone is for the detection of sound by which the guarding of babies, little children and the helpless is a common used feature. Be advised that this babyphone is never capable to meet with the presence of an adult or a parent. -
Page 28: Temperature Indication
TEMPERATURE INDICATION: The temperature sensor is located on the backside of the baby unit. To ensure a correct reading you may not cover this sensor or place the unit in direct sunlight. Avoid placing next to a heating device. The range is 10°C to 39°C. Attention: the tempera- ture indication is indicative only. -
Page 29: Power Supply
POWER SUPPLY: Power adapters: Use only the mains adapters supplied with this baby monitor. Incorrect adapter type(s) can cause dama- ge to the unit(s). Power consumption of the power adapters: Baby unit: in off mode: 0,0W in on mode, baby asleep: <0,1W when baby cries: 0,9W Parent-unit: when charging: 1,5W when batteries full: <0,1W... -
Page 30: Maintenance
MAINTENANCE: Never use chemical cleansers to clean the cabinet, the cabinet may only be cleaned with a moist cloth. Always disconnect the babyphone from the mains (remove the power adapters) before cleaning. DISPOSAL OF THE DEVICE (ENVIRONMENT): At the end of the product lifecycle, you should not throw this product into the normal house- hold garbage but bring the product to a col- lection point for the recycling of electrical and elec-... -
Page 31: Declaration Of Conformity
CONFORMITY This babyphone complies with the essential requirements and provisions as described in the European Directive 1999/5/EC. The declaration of conformity is available on the website WWW.ALECTO.INFO 8 TECHNICAL SPECIFICATIONS No. of channels: Frequency: 1881.792 - 1897.344 MHz Power supply of Baby Unit:... -
Page 32: Troubleshooting
9 TROUBLESHOOTING Link light on the • Check whether the parent unit is powered on. parent unit does • Check whether the supplied rechargeable batteries not come on are correctly installed and that they are not drained. • Recharge the parent unit by connecting it to the power supply. - Page 33 The parent unit • The microphone sensitivity level of the baby unit may is too sensitive be set too high. Decrease the microphone sensitivity to room sounds level of the baby unit from the parent unit. The baby • The parent unit and the baby unit are too close to monitor system each other.
-
Page 34: Table Of Contents
10 CONTENTS ECO MODE ............ 2 OVERVIEW OVERVIEW PARENT UNIT ......3 OVERVIEW BABY UNIT ........ 4 OVERVIEW DISPLAY ........5 OVERVIEW LAMPS ........6 INSTALLATION PARENT UNIT ..........7 BABY UNIT ............ 8 RECOMMENDATIONS ........8 USING YOUR BABY MONITOR POWER ON/OFF ........... - Page 35 OTHERS LINK CHECK ..........24 BATTERY INDICATION ......... 25 RESTORE TO DEFAULT ....... 26 (SAFETY) INSTRUCTIONS AND TIPS GENERAL ............27 TEMPERATURE INDICATION ....... 28 MULTIPLE UNITS .......... 28 REACH ............28 BATTERY LIFE TIME ........28 POWER SUPPLY ........... 29 MAINTENANCE ..........
-
Page 36: Guarantee
11 GUARANTEE You have a guarantee of 24 MONTHS after the date of purchase of this babyphone. We guarantee during this period the free repair of defects caused by material- and construction faults. This at the im- porters discretion. It is only possible to claim to the guarantee when you enclose your purchase ticket with the babyphone.
Need help?
Do you have a question about the DBX-89 and is the answer not in the manual?
Questions and answers