Table of Contents
Advertisement
Advertisement
Table of Contents

Subscribe to Our Youtube Channel
Related Manuals for Sunrise Medical Quickie Pulse 6


Summary of Contents for Sunrise Medical Quickie Pulse 6
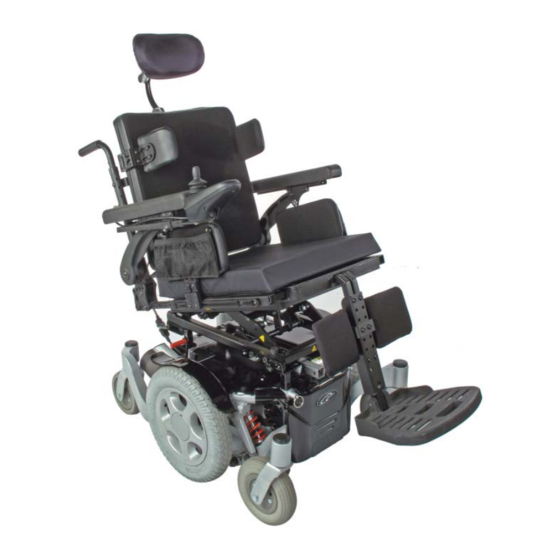
- Page 1 Quickie Pulse 6 Service Manual ©2009 Sunrise Medical Inc. 111425 Rev A...
-
Page 2: Table Of Contents
Quickie Pulse 6 Service Manual Contents Introduction ............ 0.1 Four Bars- Right Motor Disconnected .... 3.3 Basic Setup ........... 0.2 Five Bars - Right Motor Wiring Trip ....3.4 Multimeter Tutorial ......... 0.3 Six Bars - Charger Connected......3.4 Health and Safety .......... 0.5 Seven Bars - Possible Joystick Trip .... -
Page 3: Introduction
Service Manual. This Service Manual is intended as a troubleshooting guide for the Quickie Pulse 6. Photographs and content may differ from the actual products in some cases due to changes in specifications and other factors. -
Page 4: Basic Setup
Does Display light up when Power On/Off switch is depressed? □ If no - recheck the 4 checks listed above then refer to the section on Diagnostics. If yes – the Power Wheelchair is ready to drive SUNRISE MEDICAL PULSE 6 SERVICE MANUAL 2009 PAGE 0.2... -
Page 5: Multimeter Tutorial
You’ll notice that this side is “fused”, so that you don’t end up melting the meter’s circuits. Current up to 10A. Same as above, except it can take more current, as the name suggests. SUNRISE MEDICAL PULSE 6 SERVICE MANUAL 2009 PAGE 0.3... - Page 6 “contact” range, it will beep. This feature found on some multimeters enables you to check for shorts without taking your eyes off your work. Other meters may have a light that turns on when a short is found. SUNRISE MEDICAL PULSE 6 SERVICE MANUAL 2009...
-
Page 7: Health And Safety
Do not allow metal tools to drop on to or touch the exposed terminals of the batteries or other exposed connections, as this could cause a short circuit, which may result in an explosion. SUNRISE MEDICAL PULSE 6 SERVICE MANUAL 2009... - Page 8 • Move in unintended directions. • If any of these occur, severe injury could result. 2. EMI can damage the control system of a power chair, resulting in a safety hazard and/or costly repairs. SUNRISE MEDICAL PULSE 6 SERVICE MANUAL 2009 PAGE 0.6...
- Page 9 Quickie control systems: • Breath Control (“Sip n Puff”) • Tri-Switch Head Array • Proximity Head Array • Proportional Mini-Joystick/Chin Control • Buddy Button • Wafer Board SUNRISE MEDICAL PULSE 6 SERVICE MANUAL 2009 PAGE 0.7...
-
Page 10: Electro Static Discharge
Do not place the printed circuit board on a hard surface. • Tighten board mounting screws only hand tight (torque12.4 in lbs/1.4Nm) in a cross pattern to reduce stress on mounting holes and PCB board material. SUNRISE MEDICAL PULSE 6 SERVICE MANUAL 2009 PAGE 0.8... -
Page 11: Batteries
ACID = H2O ACID = H2SO2 H2SO2 Recharge As battery discharges, the sulfate from the electrolyte forms on the plates. As battery recharges, the sulfate is driven back into the electrolyte SUNRISE MEDICAL PULSE 6 SERVICE MANUAL 2009 PAGE 0.9... - Page 12 • with a regular interval check - Another way of truly Current / Voltage check knowing how much time your battery will last is also time consuming. SUNRISE MEDICAL PULSE 6 SERVICE MANUAL 2009 PAGE 0.10...
- Page 13 Batteries function as a power wheelchair’s fuel tank. The larger the group size, the farther the wheelchair will go. • Use the size specifi ed by the wheelchair manufacturer. Never undersized batteries. SUNRISE MEDICAL PULSE 6 SERVICE MANUAL 2009 PAGE 0.11...
-
Page 14: Vr2 Remote Controller
Speed/Profile indicator- A series of five LED’s, whichdisplay speed and profile settings Speed/ Profile Decrease. Used Speed/ Profile Increase. Used to decrease the Speed/ Profile to Increase the Speed/ Profile setting. setting. SUNRISE MEDICAL PULSE 6 SERVICE MANUAL 2009 PAGE 0.12... -
Page 15: Vr2 Plugs/Connectors
M1 = RIGHT SIDE MOTOR M2 = LEFT SIDE MOTOR JSM = JOYSTICK MODULE INH-2 = INHIBIT 2 A1 = ACTUATOR 1 A2 =ACTUATOR 2 OBC = ON BOARD CHARGER + - =BATTERY SUNRISE MEDICAL PULSE 6 SERVICE MANUAL 2009 PAGE 0.13... -
Page 16: R-Net Remote Controller
Controller. Horn Key- Activates a warning horn. Speed/ Profile Decrease. Used to decrease the Speed/ Profile Speed/ Profile Increase. Used setting. to Increase the Speed/ Profile setting. SUNRISE MEDICAL PULSE 6 SERVICE MANUAL 2009 PAGE 0.14... -
Page 17: R-Net Remote Controller
Controller. Horn Key- Activates a warning horn. Speed/ Profile Increase. Used Speed/ Profile Decrease. Used to Increase the Speed/ Profile to decrease the Speed/ Profile setting. setting. SUNRISE MEDICAL PULSE 6 SERVICE MANUAL 2009 PAGE 0.15... -
Page 18: R-Net Plugs/Connectors
M1 = RIGHT SIDE MOTOR M2 = LEFT SIDE MOTOR JSM = JOYSTICK MODULE INH-2 = INHIBIT 2 A1 = ACTUATOR 1 A2 =ACTUATOR 2 OBC = ON BOARD CHARGER + - =BATTERY SUNRISE MEDICAL PULSE 6 SERVICE MANUAL 2009 PAGE 0.16... -
Page 19: Main Wiring Diagram Vr2
POWER HARNESS Drive Dual-Toggle SB50 SB50 Left Dual-Toggle 3.5 mm Stereo DUAL-TOGGLE 4-Way Amp Right Single Actuator Black Phone Jack Mate-N-Loc Switch HARNESS Driver Circuit Fuse Fuse Breaker Black Black Battery Battery SUNRISE MEDICAL PULSE 6 SERVICE MANUAL 2009 PAGE 0.17... -
Page 20: Main Wiring Diagram Rnet
SB50 Left Dual-Toggle 3.5 mm Stereo Right DUAL-TOGGLE 4-Way Amp Single Actuator Black Mate-N-Loc Phone Jack Switch HARNESS Driver Circuit Fuse Fuse Breaker Black Black R-NET DUAL-TOGGLE SINGLE ACTUATOR Battery Battery SUNRISE MEDICAL PULSE 6 SERVICE MANUAL 2009 PAGE 0.18... -
Page 21: Basic Tool List
• 13mm combination wrench • Flat blade screwdriver • Cutter for zip-tie • 19mm socket wrench • Needle nose pliers • 5mm socket wrench • 5mm Allen wrench • 3/8 combination wrench SUNRISE MEDICAL PULSE 6 SERVICE MANUAL 2009 PAGE 0.19... -
Page 22: Section1
If the voltage meter reads zero, then measure the Battery Connector as shown in (fig 1.5.3).If the voltage meter reads full voltage, A1.5.2 then replace the controller, or else proceed to the next step. A1.5.3 SUNRISE MEDICAL PULSE 6 SERVICE MANUAL 2009 PAGE 1.1... -
Page 23: Check Battery Wire Harness
1 ohm, then change the circuit breaker, otherwise proceed to next step. A1.8.1 Main Harness If the above steps did not correct the problem, change the main harness. SUNRISE MEDICAL PULSE 6 SERVICE MANUAL 2009 PAGE 1.2... -
Page 24: Vr2 Remote Controller Display
The control system safety circuits have been activated and the control system has been prevented from moving the wheelchair. This indicates a system trip, i.e. the VR2 has detected a problem somewhere in the wheelchair's electrical system. Please refer to Section 3 (VR2 Controller Diagnostics). SUNRISE MEDICAL PULSE 6 SERVICE MANUAL 2009... -
Page 25: Vr2 Controller Diagnostic Codes
A3.2.2 Otherwise, check the brushes on the left motor (Figure A3.2.1). Ensure that they are not excessively worn. Replace as required. A3.2.1 SUNRISE MEDICAL PULSE 6 SERVICE MANUAL 2009 PAGE 3.1... -
Page 26: Three Bars - Left Motor Wiring Trip)
Test 1 Test 2 right). If all of the readings are open, then replace the controller. If any of the readings are short, then replace the left motor. Test 3 Test 4 SUNRISE MEDICAL PULSE 6 SERVICE MANUAL 2009 PAGE 3.2... -
Page 27: Four Bars- Right Motor Disconnected
A3.4.2 Otherwise, check the brushes on the right motor (Figure A3.4.1). Ensure that they are not excessively worn. Replace as required. A3.4.1 SUNRISE MEDICAL PULSE 6 SERVICE MANUAL 2009 PAGE 3.3... -
Page 28: Five Bars - Right Motor Wiring Trip
Seven Bars + Speed Profile Indicator Communication Error Inspect wiring between joystick module and controller. Replace the jumper or joystick module with damaged wiring. If the problem persists replace the controller. SUNRISE MEDICAL PULSE 6 SERVICE MANUAL 2009 PAGE 3.4... -
Page 29: Eight Bars - Possible Control System Trip
1 and pin 2 of the charger A3.9.1 port of the VR2 controller, see (figure A3.9.1) If the meter reads more than 30 volts, then check the charger. Otherwise, replace your controller. SUNRISE MEDICAL PULSE 6 SERVICE MANUAL 2009 PAGE 3.5... -
Page 30: R-Net Troubleshooting Procedures
The connectors are designed to visually indicate when they are not mated correctly. If yellow is showing between the halves (A), push them closer together until only black is visible. Retest as necessary. fig. 4.2 SUNRISE MEDICAL PULSE 6 SERVICE MANUAL 2009 PAGE 4.1... - Page 31 Verify that the circuit breaker located at the front of the power chair is not tripped (fig 4.4). Reset if it is tripped and retest. fig. 4.4 Disconnect the batteries (fig 4.5). fig. 4.5 SUNRISE MEDICAL PULSE 6 SERVICE MANUAL 2009 PAGE 4.2...
- Page 32 4.8 If the above tests pass, replace the wiring harness leading from the batteries through the circuit breaker and control module. Retest as necessary. SUNRISE MEDICAL PULSE 6 SERVICE MANUAL 2009 PAGE 4.3...
-
Page 33: R-Net Fault Codes
A latch function has exceeded it preset time. Brake Lamp Short Left Lamp Short Right Lamp Short L Ind Lamp Short R Ind Lamp Short L Ind Lamp Failed R Ind Lamp Failed SUNRISE MEDICAL PULSE 6 SERVICE MANUAL 2009 PAGE 5.1... - Page 34 The predetermined sleep time has been exceeded due to inactivity by the user. Charging This indication is present when the battery charger is connected. There may also be an error in the control module. Contact Sunrise Technical Service for assistance. SUNRISE MEDICAL PULSE 6 SERVICE MANUAL 2009 PAGE 5.2...
- Page 35 Complete the Motor and Gearbox Inspection section of this manual. The left motor has a short circuit to a battery connection. Contact Sunrise Medical Technical Service for assistance. The right motor has a bad connection. Complete the Motor and Gearbox Inspection section of this manual.
-
Page 36: Example Of R-10 Fault Isolation
Omni. “Creep” speed as indicated by the turtle on the hand control ("A" fi g 5.2). Tilt the seating system to the rear. fig. 5.2 SUNRISE MEDICAL PULSE 6 SERVICE MANUAL 2009 PAGE 5.4... - Page 37 Removal section of this manual. Retest as necessary. fig. 5.5 If the above test passes, replace in this order: Cable leading from tilt to control module. Control module Retest as necessary SUNRISE MEDICAL PULSE 6 SERVICE MANUAL 2009 PAGE 5.5...
-
Page 38: Power Chair Will Not Drive In Creep Speed When Tilted
(fi g. 5.8). If it is open, replace the micro-switch assembly. Refer to Tilt Actuator and Micro-Switch Removal section of this manual. Retest as necessary. Closed fig. 5.8 SUNRISE MEDICAL PULSE 6 SERVICE MANUAL 2009 PAGE 5.6... -
Page 39: Tilt Will Not Operate
Disconnect the 6-pin cable leading to the control module. fig. 5.10 Select tilt on the hand control and place a rubber band around the joystick to hold it displaced (fi g. 5.11). fig. 5.11 SUNRISE MEDICAL PULSE 6 SERVICE MANUAL 2009 PAGE 5.7... - Page 40 At the 6 pin connector (fi g. 5.13) on the rear fig. 5.13 of the tilt, check continuity between the indicated pins (fi g. 5.14). Voltage to the actuator fig. 5.14 SUNRISE MEDICAL PULSE 6 SERVICE MANUAL 2009 PAGE 5.8...
- Page 41 Example 3, the tilt is in the full up position. If the readings are not correct, replace the tilt actuator. fig. 5.17 Refer to Tilt Actuator and Micro-Switch Removal section this manual. Retest as necessary. SUNRISE MEDICAL PULSE 6 SERVICE MANUAL 2009 PAGE 5.9...
- Page 42 Note: in this example, a small surface charge is present. After the voltage has stabilized, record the voltage. Typical value for a fully charged pair of batteries is 25.6 VDC (12.8 VDC each). fig. 5.20 SUNRISE MEDICAL PULSE 6 SERVICE MANUAL 2009 PAGE 5.10...
- Page 43 If the voltage does not return to .1 VDC of the starting voltage at the end of the 5 minute test, evaluate the age of the batteries and the use they have received, and consider replacing them. SUNRISE MEDICAL PULSE 6 SERVICE MANUAL 2009...
- Page 44 Less than 11.9 VDC indicates an excessively discharged battery. Values larger than 13 VDC indicate either an overcharged battery or one that has just been removed from charge, as in this example. SUNRISE MEDICAL PULSE 6 SERVICE MANUAL 2009 PAGE 5.12...
-
Page 45: Motor/Gearbox Inspection
Caution: Use care not to damage the brush cap with excessive force in the next step. Remove the brush by using a common screwdriver to unscrew the cap (fi g. 6.1). fig. 6.3 SUNRISE MEDICAL PULSE 6 SERVICE MANUAL 2009 PAGE 6.1... - Page 46 Verify that it is clean, not overheated, and does not show signs of excessive arcing. Normal color is bright copper to dull brown copper. Contact Sunrise Medical Technical Service if in doubt of its condition. fig. 6.5 Inspect the motor connector at both the motor end and the control module end for signs of over heating (fi...
- Page 47 The new brush assemblies should be run-in prior to measuring their resistance. Contact Sunrise Technical Service if the readings are either signifi cantly higher or lower than those recorded above. fig. 6.8 SUNRISE MEDICAL PULSE 6 SERVICE MANUAL 2009 PAGE 6.3...
-
Page 48: Removal Procedures
(fi g. 7.2). fig. 7.2 Flip back the arms to prevent damage to the arms as the seat back is tilted (fi g. 7.3). fig. 7.3 SUNRISE MEDICAL PULSE 6 SERVICE MANUAL 2009 PAGE 7.1... - Page 49 Locate the two batteries mounted in the base (fi g. 7.6). Note the battery connectors. fig. 7.6 Disconnect the battery connectors (fi g. 7.7). Remove the batteries. Replace the batteries by reversing the previous procedures. fig. 7.7 SUNRISE MEDICAL PULSE 6 SERVICE MANUAL 2009 PAGE 7.2...
-
Page 50: Motor And Gearbox Removal
Remove the wheel’s hubcap by prying it off using a common screw drive (fi g. 7.10) . fig. 7.10 Remove the wheel by removing the 4 bolts using a 6 mm Allen wrench (fi g. 7.11). fig. 7.11 SUNRISE MEDICAL PULSE 6 SERVICE MANUAL 2009 PAGE 7.3... - Page 51 Allen wrench (fi g. 7.13). fig. 7.13 Lift the motor out from the side of the power chair (fi g. 7.14). Replace the motor/gearbox assembly by reversing the previous procedures. fig. 7.14 SUNRISE MEDICAL PULSE 6 SERVICE MANUAL 2009 PAGE 7.4...
-
Page 52: Control Module Removal
Remove the rear cover by lifting the two quick release pins from the cover (fi g. 7.16). fig. 7.16 Carefully disconnect the connectors leading to the control module (fi g. 7.17). fig. 7.17 SUNRISE MEDICAL PULSE 6 SERVICE MANUAL 2009 PAGE 7.5... - Page 53 7.18 Slide the control module up to remove it (fi g. 7.19). Reverse the above procedures to install the control module fig. 7.19 SUNRISE MEDICAL PULSE 6 SERVICE MANUAL 2009 PAGE 7.6...
-
Page 54: Shock Removal
Section 7 Removal Procedures (cont.) Shock Removal The shocks used in this power base are pre- adjusted at the factory. Contact Sunrise Medical Technical Service if adjustment is required. Remove the batteries. Refer to the Battery Removal section of this manual. -
Page 55: Front Caster Arm Removal
19 mm wrenches (fi g. 7.23 & 7.24). fig. 7.23 fig. 7.24 Remove the coupler that connects to the two braces (fi g. 7.25). fig. 7.25 SUNRISE MEDICAL PULSE 6 SERVICE MANUAL 2009 PAGE 7.8... - Page 56 (fi g. 7.26). fig. 7.26 Remove the front caster arm assembly. (fi g. 7.27) Reverse the previous procedures to install the front caster arm assembly. fig. 7.27 SUNRISE MEDICAL PULSE 6 SERVICE MANUAL 2009 PAGE 7.9...
-
Page 57: Rear Caster Arm Removal
(fi g. 7.28 & 7.29) fig. 7.28 fig. 7.29 Remove the rear caster arm assembly (fi g. 7.30). Reverse the previous procedures to install the rear caster arm assembly fig. 7.30 SUNRISE MEDICAL PULSE 6 SERVICE MANUAL 2009 PAGE 7.10... -
Page 58: Front Or Rear Caster Fork Removal
Reverse the previous procedures to install the caster fork. fig. 7.34 SUNRISE MEDICAL PULSE 6 SERVICE MANUAL 2009 PAGE 7.11... -
Page 59: Caster Removal
(fi g. 7.35). fig. 7.35 Remove the caster using two 13 mm wrenches (fi g. 7.36). fig. 7.36 fig. 7.37 Reverse the previous procedures to install the caster (fi g. 7.37). SUNRISE MEDICAL PULSE 6 SERVICE MANUAL 2009 PAGE 7.12... -
Page 60: Tilt Actuator And Micro-Switch Removal
Locate the micro-switch assembly and remove using a 3 mm Allen wrench (fi g. 7.40). Note: this step may be eliminated if the micro- switch is to be disconnected and left in place. fig. 7.40 SUNRISE MEDICAL PULSE 6 SERVICE MANUAL 2009 PAGE 7.13... - Page 61 Use two 13 mm wrenches and remove the nuts at both ends of the actuator (fi g. 7.43). Remove both pins from the tilt actuator. fig. 7.43 SUNRISE MEDICAL PULSE 6 SERVICE MANUAL 2009 PAGE 7.14...
- Page 62 Note the connections of the wires and separate them (fi g. 7.45). Remove the actuator. Reverse the previous procedure to install the actuator/micro-switch assembly. Retest as necessary. fig. 7.45 SUNRISE MEDICAL PULSE 6 SERVICE MANUAL 2009 PAGE 7.15...
Need help?
Do you have a question about the Quickie Pulse 6 and is the answer not in the manual?
Questions and answers