
Related Manuals for Sanyo HVR-DX625H


Summary of Contents for Sanyo HVR-DX625H
- Page 1 INSTRUCTION MANUAL HVR-DX625H DVD Recorder+VCR Please read this manual carefully before connecting your DVD Recorder+VCR and operating it for the first time. Keep the manual in a safe place for future reference.
-
Page 2: Safety Instructions
Safety Instructions Safety Instructions Please keep the product’s guarantee sheet and receipt in a safe place. Precautions • Read this booklet carefully. • Make sure the rating of your household electricity supply matches that shown on the back of your product. •... -
Page 3: Important Safeguards
Important Safeguards Important Safeguards IMPORTANT FOR LASER PRODUCTS CAUTION RISK OF ELECTRIC SHOCK LASER This Digital Video Disc Player employs a DO NOT OPEN Laser System. To ensure proper use of this product please read this owner’s CAUTION: TO REDUCE THE RISK OF ELECTRIC manual carefully and retain for future SHOCK, DO NOT REMOVE COVER (OR reference. - Page 4 Important Safeguards This set has been designed and manufactured to assure ventilation to ensure reliable operation of the unit personal safety. Improper use can result in electric shock and to protect it from overheating. These openings or fire hazard. The safeguards incorporated in this unit must not be blocked or covered.
- Page 5 Important Safeguards personal injury and serious damage to the The product should be situated away from heat product. sources such as radiators, heat registers, stoves, or other products (including amplifiers) that 17 DISC produce heat. Do not use a cracked, deformed or repaired disc. To prevent battery electrolyte leakage, which may These discs are easily broken and may cause result in injury and damage to the unit or other...
-
Page 6: Table Of Contents
Table of Contents Table of Contents Introduction Recording Safety Instructions ______________________1 Basic Recording ________________________45 Recording to TV Important Safeguards ____________________2 One Touch Record (OTR) Table of Contents _______________________5 Checking the Recording Time Overview ______________________________6 To Pause the Recording One Touch Copy - DVD to VHS Identification of Controls _________________10 Copy Edit (DVD VCR) -
Page 7: Overview
Overview Overview DVD, DVD+R, DVD+RW? Dual Media What is a DVD? Supporting Disc ±RW / ±R DVD (Digital Versatile Disc) is a storage medium that Recording Format ±Disc + VR format combines the convenience of the compact disc with Finalize -RW, -R, +R the latest digital video technology. -
Page 8: About Symbols
Overview About Symbols Disc-related Terms Title About the Symbol The main film, accompanying feature content, or ‘ ’ may appear on the TV screen during operation. music album. Each title is assigned a title reference This icon means the function explained in this User's number enabling you to locate it easily. -
Page 9: About Dvd Recording
Overview About DVD Recording Notes on Recording Macrovision Corporation and other rights owners. Use of this copyright protection technology must • The recording times shown are not exact because be authorized by Macrovision Corporation, and is the DVD Recorder + VCR uses variable bit-rate intended for home and other limited viewing uses video compression. -
Page 10: Notes On Discs
Overview Precautions Caution Do not mix old and new batteries. Never mix Handling the Unit different types of batteries (standard, alkaline, etc.). When shipping the unit The original shipping carton and packing materials come in handy. For maximum Notes on Discs protection, re-pack the unit as it was originally packaged at the factory. -
Page 11: Identification Of Controls
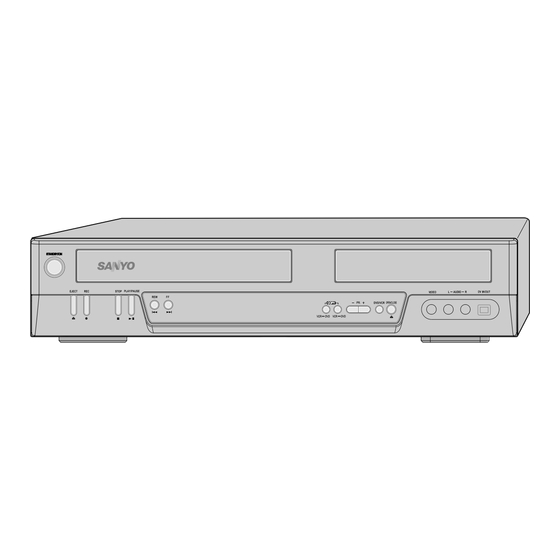
Identification of Controls Identification of Controls Front Panel & ! STANDBY/ON ) Front Panel Display Turns the DVD Recorder + VCR on and off. Shows the current status of the DVD Recorder + VCR. @ Cassette Compartment (VCR deck) 1 COPY Insert a video cassette here. -
Page 12: Front Panel Display
Identification of Controls Front Panel Display Channel Recording on tape Indicates a VCR Timer Recording is PR23 TV Channel 1 1 : 1 5 set. Indicates a VCR Timer Recording is Input mode 1 1 : 1 5 in standby mode. AV-1 AV1 input R E C... -
Page 13: Remote Control
Identification of Controls Remote Control Turns the DVD Recorder+VCR on and off. - Opens and closes the disc tray in DVD mode. - Ejects the tape in the VCR deck in VCR mode. Selects VCR mode. Selects DVD mode. Switches the DVD Recorder+VCR input to TV tuner, AV1, FAV or DV. - Selects numbered options in menus. - Page 14 Identification of Controls - DVD: Searches backward/forward. - VCR: Rewinds/advances during Stop mode. Press during Play mode for fast reverse/forward picture search. Stops playback or recording. Skips to the next or previous chapter/track. Commercial Skip skips forward 30 seconds. Displays a disc’s Title menu, if available. Increases or decreases the slow motion speed when playing a DVD or VHS tape.
-
Page 15: Rear Panel
Identification of Controls Rear panel & ! AC Power Cord ^ RF IN (FROM ANT.) Plug into a power outlet. Connect to your antenna or cable TV outlet. @ AUDIO OUT (L, R) & RF OUT (TO TV) Connect to a TV or other equipment with audio Connect to a TV with an RF input. -
Page 16: Connections
Connections Connections Connecting Antenna/Cable To enable you to set up your new DVD Disconnect the antenna/cable from the rear of recorder+VCR, it must be connected it to your your TV. TV using either a Audio/Video cable or a Connect this cable to the jack marked RF IN COMPONENT and associated AUDIO cable. -
Page 17: Connecting A Tv
Connections Connecting a TV Choose one of the following TV connections, Component Video Connection depending on the capabilities of your equipment. • If your television is a high-definition or ‘digital ready’ television, you may take advantage of the Rear of TV DVD Recorder + VCR’s Progressive Scan output S-VIDEO ANTENNA... -
Page 18: Connecting An Amplifier/Receiver
Connections Connecting an Amplifier / Receiver • Due to the DTS Licensing agreement, the Connecting to an amplifier equipped with two digital output will be in DTS digital out when the channel analog stereo or Dolby Pro Logic ll/Pro DTS audio stream is selected. Logic •... -
Page 19: Connecting Optional Equipment
Connections Connecting Optional Equipment Connecting a Digital Camcorder To receive audio/video signals from other equipment, Using the front panel DV IN jack, it is possible to connect the AVF (Audio/Video Front) jacks on the connect a DV digital camcorder, video deck or DVD Recorder + VCR to the audio/video out jacks on DVD+R/RW recorder and digitally transfer DV tapes or your external component, using optional audio/video... -
Page 20: Initial Installation
Initial Installation Initial Installation After successfully connecting your DVD Recorder + VCR to your TV and other devices, Welcome this chapter will show you how to complete the initial installation. Before using the recorder, You must follow the initial installation process to set the time, date, channels, and please finish the Initial Wizard. -
Page 21: Setup Menu
Setup menu Setup menu Setup Menu Overview The DVD Recorder + VCR Setup menu includes six Press [ENTER]. The ‘Manual Set’ menu appears. categories, including: Installation, Recording Options, Use [… †] to select ‘Standard’. Languages, Preference, System Info and Disc Options. -
Page 22: Auto Set
Setup menu Auto Set Installation > Manual Set Standard PAL-BG The DVD Recorder + VCR has a frequency Reception Antenna synthesized tuner capable of receiving channels that Auto Search Fine Tune include VHF Low E2~S6, VHF High S7~S36, and Decoder UHF S37~E69. -
Page 23: Clock Setting
Setup menu Clock Setting Adjust Channels Follow steps 1-2 as shown under ‘Manual Set’. Follow steps 1-2 as shown under ‘Manual Set’. Use [… †] to select ‘Clock Setting‘. Use [… †] to select ‘Adjust Channels’. Installation Installation Manual Set Manual Set Auto Set Auto Set... -
Page 24: Recording Options Settings
Setup menu RECORDING Options Settings VCR Record Quality Recording VCR Quality You can set the default VCR recording quality to SP DVD Quality √ 5 min (Standard Play) or LP (Long Play). SP is higher Chapter Mark 10 min † quality, but LP provides 2 times the recording time;... -
Page 25: Preference > Video Setting
Setup menu Preference > Video Setting Press [SETUP]. Video Output Use [œ √] to select ‘Preference‘. The default video output is set to 576i (interlaced scan mode). While ‘Preference‘ is selected, press [√] to select Interlace (576i) or Progressive (576p) : If you ‘Video‘. -
Page 26: Preference > Audio Setting
Setup menu Preference > Audio Setting Follow the same procedure as ‘Video’ Settings to Dynamic Range select ‘Audio’ Settings. While watching DVD movies, you may wish to Preference compress the dynamic range of the audio output (the Video difference between the loudest and quietest Audio passages). -
Page 27: Preference > Parental Control
Setup menu Preference > Parental Control Set Parental Level The initial password is ‘0000‘. You must enter this password before you can change the Parental The Parental Controls feature allows you to prevent Level. DVDs from being played based on their ratings or to have certain discs played with alternative scenes. -
Page 28: Change Password
Setup menu Change Password • Master Password : If you forget your password, press 3,3,0,8 on the remote control While ‘Preference‘ is selected, press [… †] to and then press [ENTER]. select ‘Change Password‘. • Set the new password to something other than Press [ENTER]. -
Page 29: Preference > Vcr
Setup menu Preference > VCR System > System Info This feature enables you to search for Index marks or ‘System Info’ helps service personnel identify key specific times on your VHS tapes. firmware information about your DVD Recorder + VCR in case service is required. -
Page 30: System > Divx(R) Vod Drm
Setup menu System > DivX(R) VOD DRM System > Restore Default We provide you the DivX® VOD (Video On Demand) If you wish, you can reset the DVD Recorder + VCR to registration code that allows you to rent and purchase its original factory settings. -
Page 31: Disc > Format
Setup menu Disc > Format Disc > Finalize If you load a completely blank disc to the DVD Finalizing ‘fixes’ the recordings in place so that the disc Recorder + VCR, the recorder will initialize the disc can be played on a regular DVD player or computer to DVD+VR mode. -
Page 32: Disc > Protect
Setup menu Disc > Protect Disc > Disc Label When recording in DVD-RAM / DVD+RW / +R disc or Use this to enter a name for the disc. This name VR mode formatted DVD-RW disc, set to 'Protect' to appears when you load the disc and when you display prevent accidental recording, editing or deleting of the disc information on-screen. -
Page 33: Disc > Disc Info
Setup menu Disc > Disc Info Tip: Disc Info includes : Label, numbers of titles, media Remote control buttons for entering a name type, status, space, remainder. [MENU]: Back to the previous menu. Disc [CLEAR]: Cancels all entered characters. Format Finalize [ENTER]: Confirm the character. -
Page 34: On-Screen Display Overview
On-Screen Display Overview On-Screen Display Overview Disc Information options for DVD The On-Screen Display provides feedback on the status of the DVD Recorder + VCR and/or the Title DVD+VR currently loaded disc or VCR. To access the On- † Shows the current title number and total Screen Display (or OSD), press [DISPLAY]. -
Page 35: Playback
On-Screen Display Overview Changing TV Channels Use […†] to select the ‘Subtitle‘ icon on the on- screen display. When DVD Recorder+VCR is in live mode, you can change TV channels using the [0-9] or [PR+/–] buttons Use [œ √] repeatedly to select desired subtitle on the remote control or [PR+/–] buttons on the front language. -
Page 36: Vcr Playback
VCR Playback VCR Playback Before You Begin Tracking Control Press the [VCR] button to set the remote control Auto Tracking to operate the VCR deck. The automatic tracking function adjusts the picture to Turn the TV on and select the video input source remove snow or streaks. -
Page 37: Special Playback Features
VCR Playback Special Playback Features Counter Memory Function Notes on special playback features (EG: FFW or FBWD) This is useful if there is a section of tape you want to Horizontal lines (noise bars) will appear on the TV view immediately after recording or if you want to screen. -
Page 38: Dvd Playback
DVD Playback DVD Playback Playing a DVD Press [DVD] to set the remote control to operate speeds (greater than or equal to 2x) may not be recognized. the DVD. • A disc which is recorded with unauthorized Turn the TV on and select the video input source movie material may not be played. -
Page 39: Selecting Chapters
DVD Playback Zoom level as follows: x1 (normal size) Use [œ √] to select the desired title number. x1 (normal size) Selecting Chapters Use the [œ √…†] buttons to scroll around the zoomed picture. When a title on a disc has more than one chapter, you can select among all available chapters as follows: To resume normal playback, press [ZOOM] repeatedly until the X1 (normal picture) appears. -
Page 40: Playing A Picture, Audio Or Divx Files
Playing a Picture, Audio or DivX files Playing a Picture, Audio or DivX files DivX Playback Disc Media The DVD Recorder + VCR can play DivX files on a I t e m : 0 0 0 3 / 0 0 0 3 /DivX disc such as CD-R/RW, DVD+R/RW or DVD-R/RW. - Page 41 Playing a Picture, Audio or DivX files Cancel : cancel the second menu. Subtitles When the subtitles are not displayed provided 11 When the second menu appears while the DivX although it has a file of subtitles: category is selected, select ‘Open’ and press [ENTER].
-
Page 42: Audio Cd Playback
Playing a Picture, Audio or DivX files Audio CD Playback The DVD Recorder + VCR can play audio CDs on CD- You can select 'Play', 'Playlist', and 'Cancel' on the second menu. R/RW, DVD+R/RW, DVD-R/RW. Insert the disc and close the tray. For creating a playlist, check tracks by using [√] then press [ENTER] to activate the second menu. -
Page 43: Mp3 Playback
Playing a Picture, Audio or DivX files MP3 Playback The DVD Recorder + VCR can play MP3 files on a Use […†] to select functions. disc such as CD-R/RW, DVD+R/RW or DVD-R/RW. Open : open the sub-folders. Prior to playing MP3 files on disc, insert disc and Playlist : create a playlist with files in the folder. -
Page 44: Jpeg Playback
Playing a Picture, Audio or DivX files JPEG Playback Disc Media The DVD Recorder + VCR can play JPEG Picture files I t e m : 0 0 0 3 / 0 0 0 3 /Picture on a disc such as CD-R/RW, DVD+R/RW or DVD- Picture 1003110651.jpeg Audio... - Page 45 Playing a Picture, Audio or DivX files Playing MP3 Files During a Slide Show [ZOOM]: Enter the zoom mode You can enjoy a slide show while listening to MP3 music files. Prepare the Disc which includes both MP3 and JPEG files and insert the disc. The Media Browser appears automatically.
-
Page 46: Basic Recording
Basic Recording Basic Recording Recording to TV Follow the instructions below to record a TV program. • The maximum number of DVD titles per disc is 49. If the DVD Recorder+VCR is powered off Turn on the DVD Recorder+VCR and load a during DVD recording, the recording will not be recordable disc or tape. -
Page 47: Checking The Recording Time
Basic Recording Checking the Recording Time One Touch Copy - DVD to VHS Total time and recorded time are displayed on the TV If the DVD you are attempting to copy is copy- protected, you will not be able to copy the disc. It is screen after pressing [DISPLAY]. -
Page 48: One Touch Copy - Vhs To Dvd
Basic Recording Search with [FF/REW] or [NEXT/PREV] button. √√ DVD] again to start copying. Press [VCR Press [VCR œœ DVD] and you can change REC Stop the Copy Process SPEED. To stop copying at any time, press [STOP]. Press [VCR œœ DVD] again to resume copy. Copying will stop automatically when the VHS tape ends. -
Page 49: Timer Recording
Timer Recording Timer Recording Timer Recording using Manual Set Record Screen The Timer Recording function allows you to record up Timer Recording List 1/1 28/11/2010 13:09:33 to 16 programs within a period of one month. Target Date Start Stop PR No. Mode Repeat DVD 28/11 Tue - -:- - - -:- -... -
Page 50: Timer Recording Using G-Code System
Timer Recording Canceling a Timer Recording Stopping a Timer Recording in Progress You can clear a Timer Recording any time before the After a Timer Recording has started, you can still recording actually starts. cancel the program by pressing [STOP]. To confirm, •... -
Page 51: Canceling A Timer Recording
Timer Recording Timer Recording Troubleshooting Even if a Timer Recording is set, the DVD Recording Priority Recorder + VCR will not record if: • Timer Recording and OTR (One Touch • A protected disc is in the tray; see ‘Disc’ settings Record) have the same priority but they have on a page 31. -
Page 52: Recording From An External Input
Recording from an External Input Recording from an External Input Recording from External Components You can record from an external component, such as Find the place on the camcorder tape from a camcorder, VCR or Digital Camera, connected to which you want to start recording. any of the DVD Recorder + VCR’s external inputs. -
Page 53: Dvd Playback And Editing
DVD Playback and Editing DVD Playback and Editing This section explains various functions of DVD editing. Playing a DVD title Erasing a DVD title Follow these instructions to erase a title from the Title Follow these instructions to play back a scene from the Title List. -
Page 54: Protecting A Dvd Title
DVD Playback and Editing Protecting a DVD title Renaming (Labeling) a DVD title If you want to protect a title from accidental recording, Follow these instructions to rename a title list editing, or erasing, you can protect the title. Later, if name,i.e., to edit the title of a recorded program. -
Page 55: Dividing A Dvd Title
DVD Playback and Editing Dividing a DVD title Use to divide the title into two separate titles. Follow Press [ENTER] while the curser is on the 'OK'. these instructions. Title List Select the title to be divided using […†œ √] and DVD+VR press [ENTER]. -
Page 56: Set Index Picture
DVD Playback and Editing Set Index Picture Follow these instructions to set an index picture. Title List DVD+VR Select the title to be edited using […†œ √] and A-B Erase press [ENTER]. Title:8 Then select ‘Edit‘ using […†] on the left side Set Point A Set Point B menu. -
Page 57: Troubleshooting
Troubleshooting Troubleshooting Check the following guide for the possible cause of a problem before contacting customer support. Symptom Cause Solution The power cord is disconnected. Plug the power cord into the wall outlet No power. securely. The TV is not set to receive DVD Select the appropriate video input on the TV No picture. - Page 58 Troubleshooting Symptom Cause Solution Can’t play disc recorded The disc was not finalised (or not made Finalise the disc; see page 30. on this DVD Recorder + compatible if using a DVD+RW). VCR on another DVD Some players will not play even a No solution.
-
Page 59: Moisture Condensation
Troubleshooting Moisture Condensation Moisture condensation can occur: In locations where moisture condensation may occur: When the DVD Recorder + VCR is moved from a Keep the DVD Recorder + VCR plugged into an AC cold place to a warm place. power outlet with the power on. -
Page 60: Technical Specifications
Technical Specifications Technical Specifications General Dynamic range More than 90 dB Power requirements 200–240V~, 50/60 Hz Resolution Over 500 lines (HQ Recording) Power consumption Operation : Maximum 26W Standby : 5W Inputs Dimensions(approx.) 430 *92 *312 (w*h*d) Mass (approx.) 4.96 Kg Antenna In Antenna or CATV input, 75 Operating temperature 5°C to 35°C... - Page 61 SANYO Electric CO.,Ltd. Code No., 0000000...
Need help?
Do you have a question about the HVR-DX625H and is the answer not in the manual?
Questions and answers