Reloop TerminalMix4 Instruction Manual
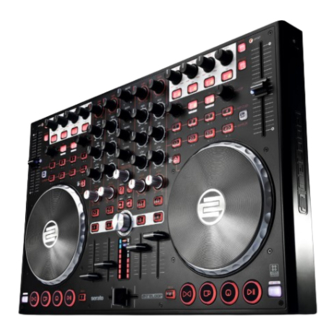
Professional 4 deck midi controller with integrated 4 channel audio interface
For more information, please visit reloop.com
Table of Contents
Advertisement
Available languages
Available languages
Quick Links
Deutsch .............................................................................02-17
English ...............................................................................18-33
Français .............................................................................34-49
Español ..............................................................................50-67
PRofessIonelleR 4-Deck-MIDI-conTRolleR MIT
InTegRIeRTeM 4-kanal-auDIo-InTeRface
PRofessIonal 4 Deck MIDI conTRolleR wITh
InTegRaTeD 4 channel auDIo InTeRface
conTRôleuR MIDI PRofessIonnel à 4 PlaTInes avec
InTeRface auDIo 4 canaux InTégRée
conTRolaDoR MIDI PRofesIonal con cuaTRo PlaTos
e InTeRfaz De auDIo De 4 canales InTegRaDa
Bedienungsanleitung
ACHTUNG!
Lesen Sie sich vor der ersten Inbetriebnahme zur eigenen Sicher-
heit diese Bedienungsanleitung sorgfältig durch! Alle Personen,
die mit der Aufstellung, Inbetriebnahme, Bedienung, Wartung und
Instandhaltung dieses Gerätes zu tun haben, müssen entspre-
chend qualifiziert sein und diese Betriebsanleitung genau be-
achten. Dieses Produkt erfüllt die Anforderungen der geltenden
europäischen und nationalen Richtlinien, die Konformität wurde
nachgewiesen, die entsprechenden Erklärungen und Unterlagen
sind beim Hersteller hinterlegt.
Instruction Manual
CAUTION!
For your own safety, please read this operation manual carefully
before initial operation! All persons involved in the installation, set-
ting-up, operation, maintenance and service of this device must be
appropriately qualified and observe this operation manual in de-
tail. This product complies with the requirements of the applicable
European and national regulations. Conformity has been proven.
The respective statements and documents are deposited at the
manufacturer.
Mode d'emploi
ATTENTION!
Pour votre propre sécurité, veuillez lire attentivement ce mode
d'emploi avant la première utilisation ! Toutes les personnes
chargées de l'installation, de la mise en service, de l'utilisation,
de l'entretien et la maintenance de cet appareil doivent possé-
der les qualifications nécessaires et respecter les instructions
de ce mode d'emploi. Ce produit est conforme aux directives
européennes et nationales, la conformité a été certifiée et les
déclarations et documents sont en possession du fabricant.
Manual de instrucciones
¡ATENCIÓN!
En aras de su propia seguridad, ¡lea detenidamente este manual
de instrucciones antes de la primera puesta en marcha! Todas
las personas relacionadas con el montaje, la puesta en marcha,
la operación, el mantenimiento y la reparación de este equipo
deben estar correctamente cualificadas y haber leído con aten-
ción este manual de instrucciones. Este producto cumple con los
requisitos de las directivas europeas y nacionales, se ha com-
probado la conformidad y las declaraciones y los documentos
correspondientes están en posesión del fabricante.
WARNUNG!
Um Feuer oder einen elektrischen Schock zu vermeiden, setzen
Sie dieses Gerät nicht Wasser oder Flüssigkeiten aus! Öffnen Sie
niemals das Gehäuse!
WARNING!
To prevent fire or avoid an electric shock do not expose the
device to water or fluids!
Never open the housing!
ATTENTION !
Afin d'éviter un incendie ou une décharge électrique, veillez à te-
nir cet appareil à l'écart des liquides et de l'humidité ! N´ouvrez
jamais le boîtier !
¡ADVERTENCIA!
Para evitar incendios o descargas eléctricas, ¡no sumerja este
equipo en agua u otras sustancias líquidas! ¡Nunca abra la
carcasa!
Für weiteren Gebrauch aufbewahren!
Keep information for further reference!
Gardez ces instructions pour des utilisations ultérieurs!
¡Conservar para su uso posterior!
www.reloop.com
Reloop Trademark
Global Distribution GmbH
Schuckertstr. 28
48153 Muenster / Germany
© 2012
1
Advertisement
Chapters
Table of Contents

Subscribe to Our Youtube Channel
Related Manuals for Reloop TerminalMix4


Summary of Contents for Reloop TerminalMix4
- Page 1 ¡Nunca abra la carcasa! Für weiteren Gebrauch aufbewahren! Keep information for further reference! Gardez ces instructions pour des utilisations ultérieurs! ¡Conservar para su uso posterior! www.reloop.com Reloop Trademark Global Distribution GmbH Schuckertstr. 28 48153 Muenster / Germany © 2012...
-
Page 2: Table Of Contents
Virtual DJ LE 4-Deck Reloop Edition Installation......8 3.3.1 Virtual DJ LE 4-Deck Reloop Edition Installation / Windows ..8 3.3.2 Virtual DJ LE 4-Deck Reloop Edition Installation / Mac OSX ..9 3.4. Traktor Unterstützung ................. 9 BeDIenung ....................10 Software-Funktionstabelle .............. -
Page 3: Sicherheitshinweise
Inbetriebnahme bitten wir sie, alle anweisungen sorgfältig zu studieren und zu befolgen. Nehmen Sie den Reloop Terminal Mix 4 aus der Verpackung. Bitte überprüfen Sie vor der ersten Inbetriebnahme, ob kein offensichtlicher Trans- portschaden vorliegt. Sollten Sie Schäden am Stromkabel oder am Gehäuse entdecken, nehmen Sie das Gerät nicht in Betrieb und setzen Sie sich bitte mit Ihrem Fachhändler in Verbindung. -
Page 4: Wartung
waRTung Überprüfen Sie regelmäßig die technische Sicherheit des Gerätes auf Beschädigungen des Netzkabels oder des Gehäuses, sowie auf die Abnut- zung von Verschleißteilen wie Dreh- und Schiebereglern. Wenn anzunehmen ist, dass ein gefahrloser Betrieb nicht mehr möglich ist, so ist das Gerät außer Betrieb zu setzen und gegen unbeabsichtigten Betrieb zu sichern. - Page 5 geRäTeoBeRseITe geRäTeoBeRseITe nuMMeR BezeIchnung shIfT BezeIchnung nuMMeR BezeIchnung shIfT BezeIchnung Play/Pause-Taste Pitchfader Deck-Auswahl-Schalter Offset LED Range Gain-Regler EQ-Regler Keylock Filter-Regler Effekt-Parameter Monitor-CUE-Taste FX On-Tasten Effektwechsel-Taste FX Tempo Load-Taste Fader Start-Taste Linefader Tap-Taste Master-Lautstärke Loop-Länge Loop-Anfang verschieben Loop In-Taste Booth-Lautstärke Kopfhörerlautstärke Loop-Ende verschieben Loop Out-Taste CUE-Mix-Überblendung...
-
Page 6: Inbetriebnahme
Doppelklick. TIPP! Reloop stellt stets aktualisierte Treiber online zur verfügung. für mehr Informationen lesen sie bitte das kapitel „updates & support“. hInweIs! Bitte stellen sie sicher, dass sie die Treiber-Installation mit administratorrechten starten. ansonsten kann die Installation mit einer fehlermeldung scheitern. -
Page 7: Serato Dj Intro Installation
3.2 serato DJ Intro Installation 3.2.1 serato DJ Intro Installation / windows Auf der beiliegenden Installations-CD finden Sie das Verzeichnis „Serato DJ Intro“. Öffnen Sie dieses und wählen Sie die für Ihr System passende Setup Datei aus. Starten Sie nun die Installation mit einem Doppelklick. hInweIs! Bitte stellen sie sicher, dass sie die Installation mit administratorrechten ausführen. -
Page 8: Serato Dj Intro Installation / Mac Osx
3.3 virtual DJ le 4-Deck Reloop edition Installation 3.3.1 virtual DJ le 4-Deck Reloop edition Installation / windows Auf der beiliegenden Installations-CD finden Sie das Verzeichnis „VirtualDJ LE (Terminal Mix 4)“. Öffnen Sie dieses und wählen Sie die für Ihr System passende Setup-Datei aus. -
Page 9: Virtual Dj Le 4-Deck Reloop Edition Installation / Mac Osx
4. Nachdem die Installation erfolgreich war, können Sie nun VirtualDJ LE 4-Deck Reloop Edition starten. 3.4. Traktor unterstützung Reloop stellt Traktor Mappings zur Verfügung (4-Deck, 2-Deck 2-Sample-Decks), die Sie in unserem Forum herunterladen können. Eine Anleitung, wie Sie die Mappings einbinden, finden Sie ebenfalls in unserem Forum. -
Page 10: Bedienung
Nachdem der Reloop Terminal Mix 4 angeschlossen und richtig in der DJ-Software konfiguriert wurde, kann dieser nun bedient werden. Bitte beachten Sie, dass zwischen VirtualDJ LE 4-Deck Reloop Edition und Serato DJ Intro einige Unterschiede bestehen. Sie können der Tabelle ent- nehmen, ob die Funktionen in Ihrer ausgewählten DJ-Software zur Verfügung stehen. - Page 11 geRäTeoBeRseITe nuMMeR BezeIchnung shIfT BezeIchnung Synchronisierungs-Taste Das Tempo des aktuellen Decks wird dem Master-Deck angeglichen. (Virtu- alDJ: Y, Serato: Y) CUP-Taste Springt zum zuletzt gesetzten Cue-Punkt zurück und startet von diesem die Wiedergabe. (VirtualDJ: Y, Serato: Y) Cue-Taste Befindet sich das Deck im Play-Mode, springt der Track zum zuletzt gesetz- ten Cue-Punkt zurück.
-
Page 12: Routing-Funktionen
Möchten Sie das Signal in eine Software routen, so stellen Sie den Input-Routing-Schalter -F57- auf „SW“. hInweIs! In serato DJ Intro und virtualDJ le Reloop edition ist es nicht möglich, das signal der externen Quelle in die software zu routen. -
Page 13: Durchführen Eines Firmware-Updates
ACHTUNG! Standardmäßig ist der Terminal Mix 4 auf die MIDI-Kanäle 1-4 konfiguriert. Deck A ist dabei auf dem 1., Deck B auf dem 2., Deck C auf dem 3. und Deck D auf dem 4. Kanal. Die offiziellen Mappings seitens Reloop sind auf die standardmäßige Konfiguration ausgelegt. Eine veränderung ist damit im normalfall nicht notwendig. -
Page 14: Midi-Zuweisungstabelle
6.2 MIDI-zuweisungstabelle SHIFT + SHIFT + ITEMS TYPE DECK A DECK B DECK C DECK D SW NOTE VR CC SW NOTE VR CC LED NOTE LED NOTE RANGE SW/LED CH 1 CH 2 CH 4 KEY LOCK SW/LED CH 1 CH 2 CH 3 CH 4... -
Page 15: Tipps Zur Fehlerbehebung
Kapitels „Computer-Konfiguration“. - Ebenfalls kann es sein, dass im Einstellungsdialog des ASIO-Treibers die verfügbare Computer-Leistung neu konfiguriert werden muss. Öffnen Sie dazu die Reloop ASIO-Settings und erhöhen Sie den „ASIO Buffer“. Es gibt ein Problem, das hier nicht Diverse Ursachen. -
Page 16: Technische Daten
OUTPUT=0dB) NOTES: *1: WITH 20KHz LOW PASS FILTER *2: WITH 20KHz LOW PASS FILTER, „IHF-A“ WEIGHTED *3: ALL TEST CONDITION WITH EXTERNAL POWER SUPPLY UNIT Reloop Distribution Global Distribution GmbH Schuckertstrasse 28 48153 Münster / Germany Fax: +49.251.6099368 Technische Änderungen vorbehalten. - Page 18 Virtual DJ LE 4-Deck Reloop Edition Installation......24 3.3.1 Virtual DJ LE 4-Deck Reloop Edition Installation / Windows ..24 3.3.2 VirtualDJ LE 4-Deck Reloop Edition Installation / Mac OSX ..25 Traktor Support ..................25 OpEraTIOn ....................26 Software Function Chart..............26 Routing Functions .................
-
Page 19: Safety Instructions
Please remove the Reloop Terminal Mix 4 from its packaging. Before initial operation please make sure that the device has not been visibly damaged during transport. If you detect any damage to the power cable or the casing, do not operate the device and contact your specialised dealer. - Page 20 MAINTeNANCe Check the technical safety of the device regularly for damage to the mains cord or the casing, as well as for wearout of wear parts such as rotary knobs and sliding faders. If it is to be assumed that a safe operation is no longer feasible, then the device must be disconnected and secured against accidental use. Always disconnect the mains plug from the outlet! It must be assumed that a safe operation is no longer feasible, if the device bears visible defects, if the device no longer functions, following longer storage under unfavourable conditions or after major transport stress.
- Page 21 SURFACe SURFACe deSIGNATION SHIFT deSIGNATION deSIGNATION SHIFT deSIGNATION Play/Pause Button Pitch Fader Deck Select Switch Offset LED Range Gain Dial EQ Dial Keylock Filter Dial Effect Parameter Monitor CUE Button FX On Buttons Effect Change Button FX Tempo Load Button Fader Start Button Linefader Tap Button...
-
Page 22: Initial Operation
Insert the included installation CD into your drive. In the folder “Drivers“ select the included ASIO driver and start the installation via a double click. TIp! reloop regularly provides drivers online. for more information please see the chapter “updates & Support“. nOTE! please make sure to carry out the driver installation with admin rights. Otherwise the installation may fail with an error message. - Page 23 3.2 Serato DJ Intro Installation 3.2.1 Serato DJ Intro Installation / Windows On the included CD you can find the directory “Serato DJ Intro”. Open this directory and select the setup file that corresponds to your system. Start the installation with a double click. nOTE! please make sure to carry out the driver installation with admin rights. Otherwise the installation may fail with an error message. When using Windows Vista or Windows 7 respectively, carry out the installation setup by right-clicking followed by the selection “Carry out as administrator“.
- Page 24 2. Now drag and drop the file “Serato DJ Intro” in your “Programs” folder. 3. You can now start Serato DJ Intro via your “Programs” folder. 3.3 virtual DJ lE 4-Deck reloop Edition Installation 3.3.1 virtual DJ lE 4-Deck reloop Edition Installation / Windows On the included installation CD you can find the directory “Virtual DJ LE (Terminal Mix 4)”. Open it and select the setup file that corresponds to your system. Now start the installation with a double click. nOTE! please make sure to carry out the driver installation with admin rights. Otherwise the installation may fail with an error message.
- Page 25 1. You will now be lead through the installation. Click “Continue”. 2. Now please carefully read the license agreement and click “Continue”. 3. Select a memory location for the installation and click “Install”. 4. After a successful installation you can start VirtualDJ LE 4-Deck Reloop Edition. 3.4 Traktor Support Reloop provides Traktor mappings (4-deck, 2-deck, 2 sample decks) which you can download from our forum. An instruction how to embed the mappings can also be found in our forum.
- Page 26 4. OpEraTIOn 4.1 Software function Chart After the Reloop Terminal Mix 4 has been properly connected and correctly configured in the DJ software it can now be used. Please note that there are several differences between VirtualDJ LE 4-Deck Reloop Edition and Serato DJ Intro. From the following chart you can see whether the functions are available in your selected DJ software. gErÄTEOBErSEITE deSIGNATION...
- Page 27 gErÄTEOBErSEITE deSIGNATION SHIFT deSIGNATION -T18- Sync Button The current deck's tempo will be matched to the master deck. (VirtualDJ: Y, Serato: Y) CUP Button Jumps to the last set cue-point and starts playback from this point. (VirtualDJ: Y, Serato: Y) Cue Button If the deck is in play mode, the track jumps back to the last set cue point. By pressing again, playback starts as long as the button is being held.
- Page 28 If you wish to route the signal to a software, put the Input Routing Switch -F57- in the “SW” position. nOTE! In Serato DJ Intro and virtualDJ lE reloop Edition it is not possible to route the external source‘s signal to the software.
- Page 29 CauTIOn! By default the Terminal mix 4 is configured for mIDI channels 1-4. Deck a is assigned to channel 1, deck B to channel 2, deck C to channel 3 and deck D to channel 4. reloop‘s official mappings are laid out for the standard configuration. usually an adjustment is not neces- sary.
- Page 30 6.2 mIDI assignment Chart SHIFT + SHIFT + ITEMS TYPE DECK A DECK B DECK C DECK D SW NOTE VR CC SW NOTE VR CC LED NOTE LED NOTE RANGE SW/LED CH 1 CH 2 CH 4 KEY LOCK SW/LED CH 1 CH 2 CH 3 CH 4 CH 1 CH 2 CH 1...
- Page 31 - It is also possible that in the ASIO driver‘s settings the available computer capacity has to be re- configured. To do so open the Reloop ASIO settings and increase the “ASIO Buffer”. There is a problem that is not listed Various causes. Visit the website www.reloopdj.com/forum to get here. support for your Reloop products.
-
Page 32: Technical Specifications
MIC IN 1KHz -54dB THD+N(*1) (OUTPUT VR MAXIMUM): MASTER/BOOTH OUTPUT: 0.05% LINE IN IKHz -14dB (INPUT LEVEL SET TO OUTPUT=0dB) NOTES: *1: WITH 20KHz LOW PASS FILTER *2: WITH 20KHz LOW PASS FILTER, „IHF-A“ WEIGHTED *3: ALL TEST CONDITION WITH EXTERNAL POWER SUPPLY UNIT Reloop distribution Global Distribution GmbH Schuckertstrasse 28 48153 Münster / Germany Fax: +49.251.6099368 Subject to technical alterations. Illustrations similar to original product. Misprints excepted. - Page 34 Installation Virtual DJ LE 4-Deck Reloop Edition......40 3.3.1 Installation Virtual DJ LE 4-Deck Reloop Edition / Windows ..40 3.3.2 Installation Virtual DJ LE 4-Deck Reloop Edition /Mac OSX ..41 Prise en charge de Traktor ..............41 UTILISATION ....................42 Table des fonctions du logiciel ............
-
Page 35: Consignes De Sécurité
Jockey. Avant la mise en service, nous vous prions de lire attentivement ce mode d‘emploi et de respecter les instructions pendant l‘utilisation. Retirez la Reloop Terminal Mix 4 de son emballage. Avant la première mise en service, vérifiez le bon état de l‘appareil. Si le boîtier ou le câble sont endommagés, n‘utilisez pas l‘appareil et contactez votre revendeur. -
Page 36: Entretien
ENTrETIEN Contrôlez régulièrement le bon état de l‘appareil (boîtier, cordon) et l‘usure éventuelle des molettes et curseurs. Si vous supposez que l‘appareil ne peut plus être utilisé en toute sécurité, mettez l‘appareil hors-service et assurez-le contre toute réutilisation involontaire. Débranchez la fiche électrique de la prise de courant ! La sécurité... - Page 37 FACE SUPÉrIEUrE DE L‘APPArEIL : FACE SUPÉrIEUrE DE L‘APPArEIL : ÉLÉmENT DÉSIGNATION DÉSIGNATION 2èmE ÉLÉmENT DÉSIGNATION DÉSIGNATION 2èmE FONCTION FONCTION Pitch Fader Touche Play/Pause Sélecteur de platine DEL Offset Régleur de gain Range Régleur EQ Keylock Paramètre d'effet Régleur de filtre Touche Monitor-CUE Touches FX On Touche de changement...
-
Page 38: Mise En Service
Insérer le cédérom d‘installation livré dans votre lecteur. Sélectionner le pilote adapté pour votre système dans le répertoire „Drivers“ et lancer l‘installation par un double-clic. Conseil : Vous pouvez toujours télécharger la dernière version d‘un pilote sur le site Reloop. Consulter le chapitre „Mises à jour & support“ pour de plus amples informations. -
Page 39: Installation Serato Dj Intro
3.2 Installation Serato DJ Intro 3.2.1 Installation Serato DJ Intro / Windows Le cédérom d‘installation ci-joint contient le répertoire „Serato DJ Intro“. Accéder au répertoire et sélectionner le fichier d‘installation respectif pour votre système d‘exploitation. Lancer ensuite l‘installation par un double-clic sur le fichier. NOTE! vous devez posséder les droits d‘administrateur pour lancer l‘installation du pilote. -
Page 40: Installation Serato Dj Intro / Mac Osx
3. Vous pouvez ensuite démarrer Serato DJ Intro dans votre dossier „Programme“. 3.3 Installation virtual DJ LE 4-Deck reloop Edition 3.3.1 Installation Virtual DJ LE 4-Deck Reloop Edition / Windows Le cédérom d‘installation ci-joint contient le répertoire „Virtual DJ LE (Terminal Mix 4)“. Accéder au répertoire et sélectionner le fichier d‘installation respectif pour votre système d‘exploitation. -
Page 41: Installation Virtual Dj Le 4-Deck Reloop Edition /Mac Osx
4. Lorsque l‘installation est achevée, vous pouvez démarrer votre Virtual DJ LE 4-Deck Reloop Edition. 3.4 Prise en charge de Traktor Reloop met à disposition des mappages Traktor (4-Deck, 2-Deck 2-Sample-Decks), que vous pouvez télécharger dans notre forum. Notre forum contient également une notice explicative sur l‘intégration des mappages. -
Page 42: Utilisation
Après avoir raccordé le contrôleur Reloop Terminal Mix 4 et correctement configurée dans le logiciel DJ, vous pouvez à présent l‘utiliser. Tenir compte des quelques différences entre Virtual DJ LE 4-Deck Reloop Edition et Serato DJ Intro. Consultez la table pour vérifier si les fonctions sont disponibles dans votre logiciel DJ sélectionné. - Page 43 FACE SUPÉrIEUrE DE L‘APPArEIL : ÉLÉmENT FONCTION FONCTION AVEC TOUCHE MAJ ENFONCéE -T18- Touche de synchronisation Adapte le tempo de la piste actuelle à celui de la platine Master. (Virtual DJ : Y, Serato : Y) Touche CUP Retourne au dernier point Cue réglé et lance la lecture à partir de ce point. (Virtual DJ : Y, Serato : Y) Touche Cue Lorsque la platine est en mode de lecture, la piste retourne au dernier point...
-
Page 44: Fonctions De Routage
Si vous désirez router le signal dans un logiciel, positionner le sélecteur de routage d‘entrée -F57- sur „SW“. NOTE! Serato DJ Intro et virtual DJ LE reloop Edition ne permettent pas de router le signal de la source externe dans le logiciel. -
Page 45: Mise À Jour Du Micrologiciel
ATTENTION ! Par défaut, le Terminal Mix 4 est configuré sur les canaux MIDI 1-4. La platine A est alors affectée au canal 1, la platine B au canal 2, la platine C au canal 3 et la platine D au canal 4. Les mappages officiels fournis par Reloop sont conçus pour la configuration par défaut. - Page 46 6.2 Table d‘affectation MIDI SHIFT + SHIFT + ITEMS TYPE DECK A DECK B DECK C DECK D SW NOTE VR CC SW NOTE VR CC LED NOTE LED NOTE RANGE SW/LED CH 1 CH 2 CH 4 KEY LOCK SW/LED CH 1 CH 2...
-
Page 47: Conseils De Dépannage
6.3 Conseils de dépannage Si vous avez des problèmes lors de l‘utilisation de votre Reloop Jockey 3, consultez cette ressource en premier recours pour dépanner : SYmPTômE CAUSES POSSIBLES DÉPANNAGE Causes possibles Branchement incorrect du câble USB ou de la Vérifier le branchement correct du câble USB sur... -
Page 48: Caractéristiques
OUTPUT=0dB) NOTES: *1: WITH 20KHz LOW PASS FILTER *2: WITH 20KHz LOW PASS FILTER, „IHF-A“ WEIGHTED *3: ALL TEST CONDITION WITH EXTERNAL POWER SUPPLY UNIT Reloop Distribution Global Distribution GmbH Schuckertstrasse 28 48153 Münster / Germany Fax: +49.251.6099368 Sous réserve de modifications techniques. - Page 50 Instalación Virtual DJ LE 4-Deck Reloop Edition ......56 3.3.1 Instalación Virtual DJ LE 4-Deck Reloop Edition / Windows ..56 3.3.2 Instalación Virtual DJ LE 4-Deck Reloop Edition / Mac OSX ..57 Soporte Traktor ..................57 manEjo ......................58 Tabla de funciones del software ............
-
Page 51: Indicaciones De Seguridad
Retire el equipo Reloop Terminal Mix 4 de la caja. Antes de la primera puesta en marcha, compruebe si el equipo presenta daños visibles produci- dos por el transporte. Si descubre daños en el cable de alimentación o en la carcasa, no ponga en marcha el equipo y contacte con su distribui- dor especializado. -
Page 52: Mantenimiento
mANTENImIENTo Compruebe regularmente la seguridad técnica del equipo en cuanto a daños del cable de red o de la carcasa, así como el deterioro de las piezas de desgaste y de los reguladores giratorios y deslizantes. Si se sospecha que no es posible un funcionamiento seguro, desconecte el equipo y asegúrelo contra una conexión involuntaria. ¡Retire el enchu- fe de la caja de enchufe! Es posible que el equipo ya no funcione de manera segura si presenta daños visibles o que ya ni siquiera funcione después haberlo guardado durante un largo período de tiempo en condiciones desfavorables o después de haberlo transportado de manera inadecuada. - Page 53 PartE suPErior dEl EquiPo PartE suPErior dEl EquiPo ElEmENTo dENomINACIÓN dENomINACIÓN CoN ElEmENTo fUNCIÓN dENomINACIÓN CoN shift shift Pitch Fader (Fader del pitch) Tecla Reproducir/Pausa Interruptor de selección LED de Offset de plato Range (Rango) Regulador Gain (Ganancia) Keylock (Bloqueo de Regulador EQ (Ecualiza- tonalidad) ción)
-
Page 54: Puesta En Marcha
Coloque el CD de instalación suministrado en el lector. En la carpeta “Drivers” seleccione el controlador ASIO suministrado e inicie la instalación haciendo doble clic. ¡consEjo! reloop pone a su disposición de forma online el controlador actualizado. Para más información, lea el capítulo “actualizaciones y soporte”. -
Page 55: Instalación De Serato Dj Intro
3.2 instalación de serato dj intro 3.2 instalación de serato dj intro / Windows En el CD de instalación adjunto encontrará el directorio “Serato DJ Intro”. Ábralo y seleccione el archivo de instalación adecuado para su siste- ma. Inicie la instalación haciendo doble clic. ¡aViso! asegúrese de iniciar la instalación como usuario con derechos de administrador. -
Page 56: Instalación De Serato Dj Intro / Mac Osx
3.3 instalación Virtual dj lE 4-deck reloop Edition 3.3.1 instalación Virtual dj lE 4-deck reloop Edition / Windows En el CD de instalación adjunto encontrará el directorio “VirtualDJ LE (Terminal Mix 4)”. Ábralo y seleccione el archivo de instalación adecuado para su sistema. -
Page 57: Instalación Virtual Dj Le 4-Deck Reloop Edition / Mac Osx
4. Después de haber finalizado con éxito la instalación, puede iniciar VirtualDJ LE 4-Deck Reloop Edition. 3.4 soporte traktor Reloop pone a su disposición mapeos de Traktor (2 platos de muestras para modo de 2 platos y 4 platos) que se pueden descargar de nuestro foro. También encontrará instrucciones para cargar los mapeos. -
Page 58: Manejo
Después de haber conectado Reloop Terminal Mix 4 y haber configurado correctamente el software para DJ, puede empezar a utilizarlo. Tenga en cuenta que puede haber algunas diferencias entre VirtualDJ LE 4-Deck Reloop Edition y Serato DJ Intro. Puede utilizar la tabla para saber si las funciones de su software para DJ seleccionado están disponibles. - Page 59 fACE SUpéRIEURE dE l‘AppAREIl : ElEmENTo fUNCIÓN función al actiVar shift -t18- Tecla de sincronización Se equilibra el tempo del plato actual con el plato maestro. (VirtualDJ: Y, Serato: Y) Tecla Cup Regresa al último punto de inserción fijado, desde donde comienza la repro- ducción.
-
Page 60: Funciones De Enrutamiento
Si desea enrutar la señal en un software, conmute el interruptor de enrutamiento de entrada -F57- a “SW”. ¡aViso! En serato dj intro y Virtualdj lE reloop Edition no es posible enrutar la señal de la fuente externa en el software. -
Page 61: Actualización Del Firmware
¡atEnción! Por defecto, terminal mix 4 está configurado para los canales 1-4 midi. El plato a está configurado para el canal 1; el plato b, para el 2; el plato c, para al 3 y el plato d, para el canal 4. los mapeos oficiales de reloop están diseñados según la configuración estándar. En los casos normales, no es necesario realizar ninguna modificación. -
Page 62: Tabla De Asignación Midi
6.2 tabla de asignación midi SHIFT + SHIFT + ITEMS TYPE DECK A DECK B DECK C DECK D SW NOTE VR CC SW NOTE VR CC LED NOTE LED NOTE RANGE SW/LED CH 1 CH 2 CH 4 KEY LOCK SW/LED CH 1 CH 2... -
Page 63: Consejos Para La Solución De Errores
ASIO tenga que configurarse de nuevo. Para ello, abra los ajustes de ASIO y aumente “ASIO Buffer”. Se produce un problema que aquí no Diferentes causas. Visite la página web www.reloopdj.com/forum, para se describe. recibir ayuda con sus productos Reloop. -
Page 64: Datos Técnicos
OUTPUT=0dB) NOTES: *1: WITH 20KHz LOW PASS FILTER *2: WITH 20KHz LOW PASS FILTER, „IHF-A“ WEIGHTED *3: ALL TEST CONDITION WITH EXTERNAL POWER SUPPLY UNIT Reloop distribution Global Distribution GmbH Schuckertstrasse 28 48153 Münster / Alemania Fax: +49.251.6099368 Reservado el derecho para realizar modificaciones técnicas.
Need help?
Do you have a question about the TerminalMix4 and is the answer not in the manual?
Questions and answers