Table of Contents
Advertisement
Quick Links
Download this manual
See also:
Instruction Manual
Advertisement
Table of Contents

Related Manuals for HITEC X1 Pro


Summary of Contents for HITEC X1 Pro
-
Page 2: Table Of Contents
Warnings and safety notes ............4 charger layout ...............10 specifications ................11 features ...................12 Power supply connections ............15 battery connections ...............16 operating the X1 Pro ..............17 lithium ..................18 Charge Mode ................... 18 Balance Charge Mode ..............20 Fast Charge Mode ................22 Storage Mode .................. 24 Discharge Mode ................ -
Page 3: Introduction
InTroducTIon We are excited that you have selected the Hitec X1 Pro battery bal- ance charger and discharger. Capable of charging all battery types including Lithium, NiCd/NiMH and Lead-Acid chemistries with a tremendous 230-watt charge amperage rate, this professional char- ger is innovatively designed and engineered, providing a safe and reliable performance. -
Page 4: Warnings And Safety Notes
THe oPeraTor and MaY neGaTe anY claIMs for daMaGes Incurred. Hitec RCD USA will not be held responsible for any damages or injuries that may occur by persons who fail to follow these warn- ings or who fail to properly follow the instructions in this manual. - Page 5 WarnInGs and safeTY noTes The allowable DC input voltage is 11-18V DC. Keep the charger away from dust, damp, rain, heat, direct sunlight and excessive vibration. If the charger is dropped or suffers any type of impact, it should be inspected by an authorized service station before using it again.
- Page 6 WarnInGs and safeTY noTes (cont.) • A battery pack which consists of different types of cells (including different manufacturer’s cells) • A battery that is already fully charged or just slightly discharged • Any non-rechargeable batteries (these pose an explo- sion hazard) •...
- Page 7 Connect the battery’s main leads to the charger output: red is positive and black is negative. Keep in mind that the gauge or thickness of your charging leads from the X1 Pro to your battery must be of an acceptable current rating to handle the applied...
- Page 8 WarnInGs and safeTY noTes (cont.) charge current. For maximum safety and charging effectiveness, always match or exceed the main battery lead rating when as- sembling or selecting your charging leads. If you charge a battery at a high current rate (amperage) with a charging lead not rated for the chosen amperage, the wire could get hot, catch fire, short out and/or potentially destroy your battery and the charger.
- Page 9 Lithium batteries are known to reach full capacity after a break-in period of about 10 charge/discharge cycles. We do not recom- mend you use the X1 Pro Charger to do this, normal use and recharging will achieve the same results. If you wish to perform...
-
Page 10: Charger Layout
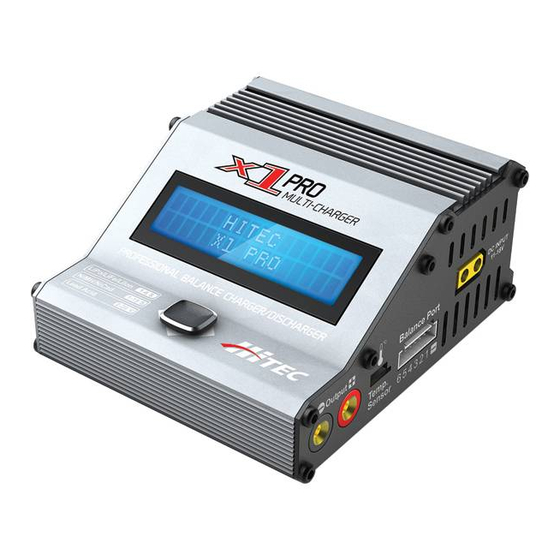
1. X1 Pro Charger 4. DC Input Power Cable 2. Balance Adaptor 5. 18AWG Wire Charging Cable 3. Balancing Board 6. 2S LiPo Hardcase Charging Lead LCD Display DC Input 11-18V (XT60 Type) Balance Socket Temp. Sensor Charging Output... -
Page 11: Specifications
cHarGer laYouT Smart Cooling Fan Micro USB Port for PC Control and DC Input 11-18V Firmware Upgrade sPecIfIcaTIons Input Voltage Range 11~18 Volts DC Charge Circuit Power 180 Watts Disharge Circuit Power 30 Watts Charge Current Range 0.1-16.0 Amps Discharge Current Range 0.1-8.0 Amps LiPo, LiFe &... -
Page 12: Features
The X1 Pro “AUTO” feature sets the charge and discharge current for you automatically, preventing overcharging which can damage your battery. In the event of an error, the X1 Pro instantly discon- nects the circuit and sounds an alarm. This feature can be set by the user and controlled through the two-way link for maximum safety. -
Page 13: Lipo Battery Meter
(cont.) fast and storage Mode of lithium batteries The X1 Pro features two styles of charging. “Fast” charge reduces the charge duration while “Store” controls the final voltage of your battery to optimize your packs for long term storage and maximum lifespan. - Page 14 Protect your battery by setting a maximum time limit for charging and discharging. Pc control software “charge Master” The free “Hitec Charge Master” software gives you unparalleled ability to operate the charger through your PC. You can monitor pack voltage, cell voltage and other data during charging and view charge data in real-time graphs.
-
Page 15: Power Supply Connections
DC power source must be capable of delivering at least 17 amps while maintaining 12V DC. XT60 Connector plugged Bullet connectors plugged directly into charger directly into power supply. X1 Pro Dual Banana Plugs ePowerBox 17A... -
Page 16: Battery Connections
baTTerY connecTIons (cont.) connecTInG THe baTTerY before connecting a battery, it is absolutely essential to check one last time that you have set the parameters correctly. If the settings are incorrect, the battery may be damaged and could even burst into fl ames or explode. To avoid short circuits between the banana plugs, always connect the charge leads to the charger fi rst, and only then to the battery. -
Page 17: Operating The X1 Pro
THe X1 Pro cHarGer The joystick feature makes operating the X1 Pro very easy. Simply toggle the joysick up, down, right or left to scroll through the vari- ous programs and change program settings. Detailed descriptions of how to locate and edit each program feature is given in the following sections. -
Page 18: Lithium
This program is only suitable for charging/discharging lithium (LiPo/LiIon/LiFe) batteries. lITHIuM - cHarGe Modes The X1 Pro offers the following lithium charge modes: Charge, Bal- ance Charge, Fast Charge, Storage and Discharge. before selecTInG a cHarGe Mode, IT Is crITI- cal THaT You selecT THe correcT TYPe of lITHIuM baTTerY To be cHarGed. - Page 19 lITHIuM - cHarGe Mode (cont.) In THe cHarGe Mode, lITHIuM baTTerIes can be cHarGed WITHouT THe use of a balance note adaPTor. a balance adaPTer can be used, buT IT Is noT requIred. balance cHarGe Mode Is alWaYs recoMMended for anY baTTerY WITH a balance lead.
-
Page 20: Balance Charge Mode
lITHIuM - cHarGe Mode (cont.) cell count does not match, toggle left (◄) once to return to the previous screen and carefully check the number of cells of the bat- tery pack before proceeding. Once charging has commenced, the charger Li3s 1.2A 12.69V ChG 022:43 00682 will display the following real-time informa-... - Page 21 lITHIuM - balance cHarGe Mode (cont.) before You beGIn cHarGInG Your baTTerY, Make sure You HaVe read and undersTand all of THe WarnInGs and safeTY InforMaTIon Warning conTaIned on PaGes 4-9. See page 16 for the appropriate charging connections setup for this operation.
-
Page 22: Fast Charge Mode
lITHIuM - balance cHarGe Mode (cont.) Once charging has commenced, the charger Li3s 1.2A 12.69V will display the following real-time information: BAL 022:43 00682 battery type/cell count, charging current, battery voltage, charging time and charged capactiy. durInG cHarGInG, THe baTTerY sHould be Placed InsIde a fIreProof/reTardanT baG and on a fIreProof surface, aWaY froM oTHer caution... - Page 23 lITHIuM - fasT cHarGe Mode (cont.) First, select the correct battery type by fol- LiPo fAST ChG 0.8A 22.2V(6S) lowing the instructions on page 18. Once you have set the correct battery type, toggle up (▲) or down (▼) until you see the “...
-
Page 24: Storage Mode
lITHIuM - fasT cHarGe Mode (cont.) durInG cHarGInG, THe baTTerY sHould be Placed InsIde a fIreProof/reTardanT baG and on a fIreProof surface, aWaY froM caution oTHer coMbusTIble objecTs. If you are using a balance adaptor, during 4.09 4.09V 4.09V charging you may toggle up (▲) once to 0.00 0.00V 0.00V view the voltage of each individual cell. - Page 25 lITHIuM - sToraGe Mode (cont.) First, select the correct battery type by fol- LiPo STORAGE 8.1A 22.2V(6S) lowing the instructions on page 18. Once you have set the correct battery type, toggle up (▲) or down (▼) until you see the “ ”...
-
Page 26: Discharge Mode
lITHIuM - sToraGe Mode (cont.) durInG cHarGInG, THe baTTerY sHould be Placed InsIde a fIreProof/reTardanT baG and on a fIreProof surface, aWaY froM caution oTHer coMbusTIble objecTs. During charging you may toggle up (▲) 4.09 4.09V 4.09V once to view the voltage of each individual 0.00 0.00V 0.00V cell. - Page 27 lITHIuM - dIscHarGe Mode (cont.) cHarGe ProGraM as THIs Is THe safesT MeTHod of sTorInG Your lITHIuM cHeMIsTrY baTTerIes. In dIscHarGe Mode, lITHIuM baTTerIes can be dIscHarGed WITH or WITHouT THe use of a balance adaPTor. THe use of a balance adaP- note Tor Is recoMMended for dIscHarGInG anY baTTerY THaT Has a balance lead.
- Page 28 lITHIuM - dIscHarGe Mode (cont.) Toggle and hold the joysick to the right (►) for three seconds and you will see “ ” followed by the “ BATTERY ChECK WAIT... CON- “ screen. fIRM CANCEL This screen displays the number of cells R:3SER S:3SER you set up as ”...
-
Page 29: Nicd/Nihm
To be cHarGed. faIlure To do Warning so can resulT In daMaGe To THe baTTerY and PossIble eXPlosIon. selecting a battery Type When you power on the X1 Pro you will PROGRAM SELECT automatically be taken to the “ NiMh BATT PROGRAM ”... -
Page 30: Auto Charge Mode
nicd/niMH - cHarGe Mode (cont.) Toggle and hold the joysick to the right (►) for three seconds to begin charging. Once charging has commenced, the charger NiMh 1.6A 5.96V will display the following real-time informa- ChG 003:43 00090 tion: battery type, charging current, battery voltage, charging time and charged capactiy. -
Page 31: Discharge Mode
nicd/niMH - auTo cHarGe Mode (cont.) Toggle and hold the joysick to the right (►) for three seconds to begin charging. Once charging has commenced, the charger NiMh 1.6A 5.96V will display the following real-time informa- AUT 003:43 00090 tion: battery type, charging current, battery voltage, charging time and charged capactiy. -
Page 32: Re-Peak Mode
NiMh RE-PEAK Toggle right (►) once and the number of re-peak cycles will begin flashing. Toggle up (▲) or down (▼) to change the number of re- peak cycles you want the X1 Pro to execute. The X1 Pro can re-peak... -
Page 33: Cycle Mode
- re-Peak Mode (cont.) charge the battery a maximum of 3 times consecutively. The X1 Pro will use the amperage value entered in Charge Mode for this operation. Toggle and hold the joysick to the right (►) for three seconds to begin charging. - Page 34 DChG>ChG Toggle up (▲) or down (▼) to change this to the number of cycles you want the X1Pro to execute. The X1 Pro can cycle the battery a maximum of 5 times consecutively. Toggle and hold the joysick to the right (►) for three seconds to begin cycling.
-
Page 35: Pb (Lead Acid)
To be cHarGed. faIlure To do so can Warning resulT In daMaGe To THe baTTerY. selecting the battery Type When you power on the X1 Pro, you will automatically be taken ” screen. Toggle left (◄) once to enter the to the “ LiPo BALANCE ”... - Page 36 Pb cHarGe Mode (cont.) After selecting the correct battery type, if ChARGE the screen does not read “ ”, toggle 0.1A 2.0V(1P) ChARGE up (▲) or down (▼) to select the “ “ mode. ChARGE Toggle right (►) once and the amp rate Pb ChARGE value will begin flashing.
-
Page 37: Discharge Mode
Pb dIscHarGe Mode Pb dIscHarGe Mode before You beGIn dIscHarGInG Your baTTerY, Make sure You HaVe read and undersTand all of THe WarnInGs and safeTY InforMaTIon Warning conTaIned on PaGes 4-9. After selecting the correct battery type, DISChARGE if the screen does not read “ ”, 0.1A 2.0V(1P) -
Page 38: Charge Master
X1 Pro’s fi rmware all from the software interface. In order to connect the X1 Pro to the computer and use the software, you will need a USB-A to USB Mini-B cable that is not included in this package. -
Page 39: Battery Memory
MeMorY The X1 Pro can store up to 10 different battery profiles. This allows you to easily recall stored profiles without having to go through the setup process each time you charge a battery. When you power on the X1 Pro, toggle down (▼) repeatedly until ”. - Page 40 baTTerY MeMorY (cont.) discharge current setting DSCh CURRENT 2.2A Toggle up (▲) once to enter the “ DSCh ” screen. Toggle right (►) once and the amperage value CURRENT will begin flashing. Toggle up (▲) or down (▼) to change the amperage value.
-
Page 41: Lithium Battery Meter
MeTer The X1 Pro allows you to check a battery’s total voltage, the high- est voltage, the lowest voltage and each cell’s voltage. Connect the battery in the same manner as you would for charg- ing. -
Page 42: System Setup
When the X1 Pro is powered on for the first time, all system settings will be set to default. Each parameter can be adjusted by the user, allowing for greater control of the charge process for the specific battery being charged. - Page 43 sYsTeM seT uP (cont.) Toggle up (▲) until you see the “ SAfETY SAfETY TIMER ” screen. Toggle right (►) once and 120Min TIMER ” will begin flashing. Toggle up (▲) or down (▼) once to “ “ or “ change this setting.
- Page 44 sYsTeM seT uP (cont.) Input Power low cut-off This function monitors the voltage of the input source used to power the charger. If the voltage drops below the user setting, the program will end immediately to protect the input source. Toggle up (▲) once and you will see the Input Power Low “...
-
Page 45: Warnings And Error Messages
WarnInGs and error MessaGes The battery/charger connections (red/black) REVERSE POLARITY are reversed. The battery connection has been discon- CONNECTION BREAK nected. The battery connection is wrong. CONNECT ERROR ChECK MAIN PORT The balance connection is wrong. BALANCE CONNECT ERROR The input voltage is less than 11V. DC IN TOO LOW The input voltage is higher than 18V. -
Page 46: Warranty And Service
Year lIMITed WarranTY For a period of one year from the date of purchase, HITEC RCD USA, INC. shall REPAIR OR REPLACE, at our option, defective equipment covered by this warranty. Otherwise, the purchaser and/or con- sumer is responsible for any charges for the repair or replacement of the charger. - Page 47 ParTIcular PurPose and WHeTHer eXPress or IMPlIed. rePaIr or rePlaceMenT as ProVIded under THIs WarranTY Is THe eXclusIVe reMedY. HITec rcd, Inc. sHall noT be lIable for anY IncIdenTal or con- sequenTIal daMaGes for breacH of anY eXPress or IMPlIed WarranTY relaTInG To THIs ProducT, eXcePT To THe eXTenT ProHIbITed bY aPPlIcable laW.
- Page 48 WarranTY and serVIce (cont.) serVIce and rePaIr InforMaTIon To have your Hitec charger serviced: 1. Visit the Hitec website at www.hitecrcd.com and download the service request form (under Support section). 2. Fill out the service request form completely and include a copy of your original receipt showing the purchase date.
Need help?
Do you have a question about the X1 Pro and is the answer not in the manual?
Questions and answers