Table of Contents
Advertisement
Quick Links
Table of Contents
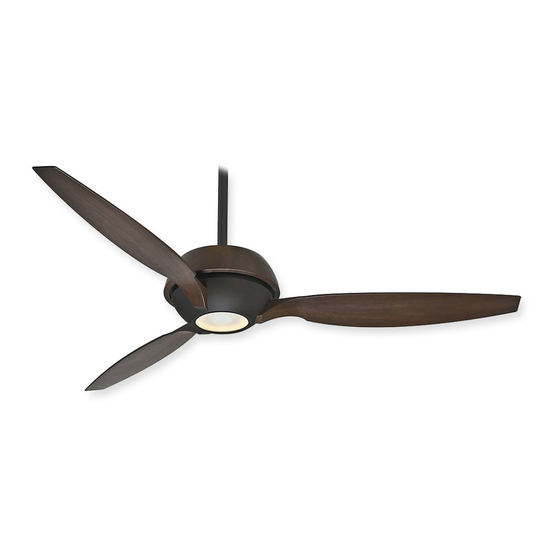
Congratulations on purchasing your new
Casablanca® ceiling fan! It will provide
comfort and performance in your home
or office for many years. This installation
and operation manual contains complete
instructions for installing and operating
your fan.
We are proud of our work and appreciate
the opportunity to supply you with the
best ceiling fan available anywhere in the
world.
To register your fan, please visit:
www.CasablancaFanCo.com/register
Save your receipt for proof of purchase.
What to Expect with
Your Installation
7 feet
Blades
Canopy
Wall Control
12
M8519-01 • 06/13/14 • © Casablanca Fan Company
Tools Needed
30 inches
2
Ladder
3
Motor Housing
6
7
Operation
13
14
1
www.CasablancaFanCo.com
Mounting Options
Ceiling Bracket
4
Downrod
Wiring
8
Maintenance
& Cleaning
Troubleshooting
?
?
16
1.888.227.2178
5
11
?
17
Advertisement
Table of Contents

Subscribe to Our Youtube Channel
Related Manuals for Casablanca Riello 59119


Summary of Contents for Casablanca Riello 59119
- Page 1 Downrod Wiring best ceiling fan available anywhere in the world. To register your fan, please visit: www.CasablancaFanCo.com/register Save your receipt for proof of purchase. Maintenance Canopy Operation & Cleaning Troubleshooting Wall Control M8519-01 • 06/13/14 • © Casablanca Fan Company...
-
Page 2: What To Expect With Your Installation
Assess ceiling angle Select a downrod length installed and used in accordance with the instructions may cause harmful interference to radio communications. M8519-01 • 06/13/14 • © Casablanca Fan Company... -
Page 3: Tools Needed
Go to www.CasablancaFanCo.com/FAQs and click “How do I properly install multiple remote- controlled fans?” for more information. Power Drill 9/64” Drill Bit (optional) (optional) If mounting to a support structure, you will also need these tools. M8519-01 • 06/13/14 • © Casablanca Fan Company... -
Page 4: Mounting Options
You need BOTH You need ONLY a Longer a Longer Downrod & Downrod an Angled Mounting Kit *most common M8519-01 • 06/13/14 • © Casablanca Fan Company M8519-01 • 06/13/14 • © Casablanca Fan Company... -
Page 5: Ceiling Bracket
To avoid possible electrical shock, before 1-888-277-2178. installing your fan, disconnect the power by turning off the circuit breakers to the outlet Refer to warning w.1 on pg. 2 box associated with the wall switch location. M8519-01 • 06/13/14 • © Casablanca Fan Company... - Page 6 Your blades are shielded with Dust Armor® which is a nanotechnology coating that repels dust. For cleaning the fan, use soft brushes or cloths to prevent scratching. Cleaning agents may damage the finishes. M8519-01 • 06/13/14 • © Casablanca Fan Company...
-
Page 7: Motor Housing
Place the upper motor housing on top of Attach the upper motor housing to the the fan assembly as shown and align the fan using three upper motor housing screw holes. screws found in the hardware bag. M8519-01 • 06/13/14 • © Casablanca Fan Company... - Page 8 Steps 1-5 to remove standard downrod pipe Longer Downrod for angled ceilings or ceilings 10’ or higher Shorter Downrod for fans installed close to ceiling Steps 6-10 to reassemble with new pipe M8519-01 • 06/13/14 • © Casablanca Fan Company...
- Page 9 4-5 full turns) until it stops. with pliers. DO NOT can be inserted. from the top of the HAND TIGHTEN. downrod. 8” 3/8” If the setscrew is not tightened securely, the fan may fall. M8519-01 • 06/13/14 • © Casablanca Fan Company...
- Page 10 Put the wires and downrod through the canopy. Let the canopy sit loosely on CANOPY OR WIRES. Place the downrod top of the fan. ball into the slot in the ceiling bracket. M8519-01 • 06/13/14 • © Casablanca Fan Company...
- Page 11 Spread the wires apart, with the grounded wires on one side of Refer to CAUTION c.1 on pg. 2 the outlet box and the ungrounded wires on the other side of the outlet box. M8519-01 • 06/13/14 • © Casablanca Fan Company...
-
Page 12: Wall Control
(1) this device may not cause harmful interference, and (2) this device must accept the green wire coming from the wall control with an included wire nut. any interference received, including interference that may cause undesired operation. M8519-01 • 06/13/14 • © Casablanca Fan Company... -
Page 13: Operation Instructions
Insert the two canopy screws lifted into place, the canopy fits into the screw holes are aligned. found in the hardware bag. the hanging bracket as shown. See next page for fan operation instructions. M8519-01 • 06/13/14 • © Casablanca Fan Company... -
Page 14: Operation
If using the transmitter with multiple Before restoring power, check to ensure the fans, repeat this process for each fan. upper motor housing is securely installed as per the installation steps on page 7 of this manual. M8519-01 • 06/13/14 • © Casablanca Fan Company... - Page 15 The reverse (a) downward air flow pattern. button changes the direction that In cold weather, use (b) upward the blades turn. The power button air flow pattern. turns the fan off and on. M8519-01 • 06/13/14 • © Casablanca Fan Company...
-
Page 16: Maintenance And Cleaning
Maintenance & Cleaning www.CasablancaFanCo.com 1.888.227.2178 Casablanca fans have the power to cut your cooling costs up to 40%. Beat the High Cost of Cooling The air movement created by a Casablanca ceiling fan lets you set your thermostat higher and still stay comfortable. -
Page 17: Troubleshooting
• Make sure you have paired the your remote controls, please go to remote. www.CasablancaFanCo.com/FAQs and click “How do I properly install multiple remote-controlled fans?” for information on how to correct this issue. M8519-01 • 06/13/14 • © Casablanca Fan Company...
Need help?
Do you have a question about the Riello 59119 and is the answer not in the manual?
Questions and answers