Table of Contents
Advertisement
ALPINE ELECTRONICS MARKETING, INC.
1-7, Yukigaya-Otsukamachi, Ota-ku,
Tokyo 145-0067, JAPAN
Phone: 03-5499-4531
ALPINE ELECTRONICS FRANCE S.A.R.L.
(RCS PONTOISE B 338 101 280)
98, Rue de la Belle Etoile, Z.I. Paris Nord Il,
B.P. 50016, 95945 Roissy Charles de Gaulle Cedex,
France
Phone +33-(0)1-48638989
iLX-007E
• OWNER'S MANUAL
Please read before using this equipment.
ALPINE ELECTRONICS OF AUSTRALIA PTY. LTD.
161-165 Princes Highway, Hallam
Victoria 3803, Australia
Phone 03-8787-1200
ALPINE ELECTRONICS GmbH
Wilhelm-Wagenfeld-Str. 1-3, 80807 München, Germany
Phone 089-32 42 640
ALPINE ELECTRONICS OF U.K. LTD.
Alpine House
Fletchamstead Highway, Coventry CV4 9TW, U.K.
www.alpine.co.uk
R R
ALPINE ITALIA S.p.A.
Viale Cristoforo Colombo, 8
20090 Trezzano sul Naviglio MI, Italy
Phone +39 02 484781
ALPINE ELECTRONICS DE ESPAÑA, S.A.
Portal de Gamarra 36, Pabellón, 32
01013 Vitoria (Alava)-APDO 133, Spain
Phone 945-283588
ALPINE ELECTRONICS OF AMERICA, INC.
19145 Gramercy Place, Torrance,
California 90501, U.S.A.
Phone 1-800-ALPINE-1 (1-800-257-4631)
Designed by ALPINE Japan
68-24567Z85-A
EN
Advertisement
Table of Contents

Subscribe to Our Youtube Channel
Related Manuals for Alpine iLX-007E


Summary of Contents for Alpine iLX-007E
- Page 1 • OWNER’S MANUAL Please read before using this equipment. ALPINE ELECTRONICS MARKETING, INC. ALPINE ELECTRONICS OF AUSTRALIA PTY. LTD. ALPINE ITALIA S.p.A. 1-7, Yukigaya-Otsukamachi, Ota-ku, 161-165 Princes Highway, Hallam Viale Cristoforo Colombo, 8 Tokyo 145-0067, JAPAN Victoria 3803, Australia...
-
Page 3: Table Of Contents
Using Siri ............9 Right) ............17 About Hands-Free Phone ....... 10 Adjusting Fader (Between Front and Rear) ..17 Applying Alpine TuneIt App ......10 Setting the Bass Level ........17 Adjusting the sound via the iPhone .... 10 Setting the Treble Level ........17 Radio Setting the Subwoofer ........17... - Page 4 Caution ........... 27 Display Backlighting Adjustment ....21 Precautions ..........27 Changing the Opening Image ...... 21 About iLX-007E ..........22 Installation ............28 Displaying the Product Information .... 22 Uninstalling the original car stereo ..... 28 Initializing the System ......... 22 Mounting the Microphone.
-
Page 5: Operating Instructions
DO NOT DISASSEMBLE OR ALTER. Installation Location Doing so may result in an accident, fire or electric shock. Make sure the iLX-007E will not be installed in a location subjected to: USE ONLY IN CARS WITH A 12 VOLT NEGATIVE GROUND. - Page 6 This will restrict operation of these functions to times when the vehicle is parked. This ensures the focus of the driver’s attention will be on the road and not on the iLX-007E. This has been done for the safety of the driver and passengers.
-
Page 7: Features
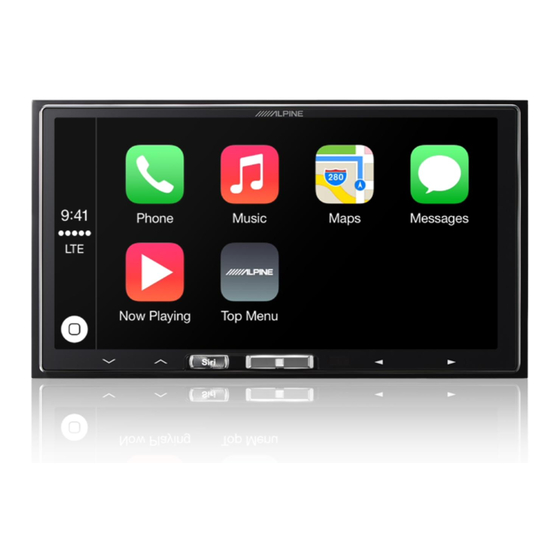
Features About Apple CarPlay Apple CarPlay allows your iPhone 5 or later to operate smoothly from this head unit. About Home Screen The Home Screen for this unit gives direct access to those applications designed to work with Apple CarPlay. The Apple CarPlay icon will indicate whether the appropriate iPhone is connected. -
Page 8: Getting Started
• The unit can be turned on by pressing Home button or Siri button. • The iLX-007E is a precision device. Careful handling of the unit button should provide you with years of trouble-free operation. -
Page 9: Turning The System On
Turning the System On Operating an Item in a List With the Alpine system, when the ignition key is turned to ACC or ON, To scroll through a list, touch the screen and slide the opening screen will be automatically displayed. -
Page 10: About Hands-Free Phone
This unit’s sound tuning is programmable from a connected iPhone. It is also possible to download specific parameters for certain vehicles from Alpine’s TuneIt database stored in the Cloud. Using the Alpine TuneIt App customized parameters can also be uploaded for others to share and rate. -
Page 11: Listening To The Radio
Listening to the Radio Presetting Stations Automatically The tuner can automatically seek and store 6 strong stations in the Press the Home button. selected band in order of signal strength. The Home screen is displayed. After selecting the desired band, touch and hold Touch [Radio]. -
Page 12: Apple Carplay (Optional)
Apple CarPlay takes the things you want to do with your iPhone while Operating Auxiliary Devices (Optional) driving and puts them right on iLX-007E. You can get directions, make calls, send and receive messages, and listen to music, all in a way that To operate devices connected to the AUX terminals of iLX-007E, allows you to stay focused on the road. -
Page 13: Operating The Mobile Digital Tv Receiver (Dtv)
Example for AUX main screen Operating the Mobile Digital TV Receiver (DTV) To operate the Mobile Digital TV Receiver (DTV) (Optional), set “Setting the Auxiliary Name” (page 24) to “DTV”. Changing to the Mobile Digital TV Receiver (DTV) Mode Press the Home button. The Home screen is displayed. -
Page 14: Camera Operation (Optional)
Adjusting the Caution Display Location Camera Operation Touch the screen when the image from the camera is (Optional) displayed. The operation screen is displayed on the screen. • After a 5-second time-out, the operation screen returns to the camera display screen. The video from an optional camera can be viewed from this head unit’s display. - Page 15 2 Distance guidance marks Error between the screen and the actual road surface The marks represent the distance from the rear of the car In the following conditions, errors are produced between the screen (from the end of the bumper). guidance and the actual road surface.
-
Page 16: Other Camera Operation
• For details on how to operate the list screen, refer to page 9. About Alpine TuneIt App You can also set the Audio Setup of this unit through the Alpine TuneIt App installed to your iPhone. It is also possible to download specific parameters for certain vehicles from Alpine’s TuneIt database. -
Page 17: Adjusting Balance (Between Left And Right)
Setting the Bass Level • Using the Alpine TuneIt App you can download the optimal Bass Engine SQ tuning data for your speaker system. You can emphasize or weaken the bass level. -
Page 18: Adjusting The Bass Engine Sq Level
• From Level 0 to Level 6, the effect of BASS ENGINE SQ increases level by level. The medium to high frequencies become more clear, and * when set this item via Alpine TuneIt App. produces well balanced sound in all the bands. About Setup when the external power amplifier is... -
Page 19: Display Setup
Switching Display Modes Display Setup Setting item: Display Mode Setting contents: WIDE (Initial setting) / NORMAL Display Setup Operation The parking brake must be engaged to access the Display Setup screen. Attempting to access this screen while driving will display the warning-Unable to operate while driving. In WIDE mode, the picture is stretched horizontally to fill the entire display. -
Page 20: Saving And Calling The Adjusted Picture Quality
Saving and calling the adjusted picture General Setup quality When adjusting Camera, you can store the settings made for “Adjusting General Setup Operation Brightness, Color, and Contrast”. Setting item: Preset1 / Preset2 1 After completing “Adjusting Brightness, Color, and The parking brake must be engaged to access the General Setup Contrast”... -
Page 21: Setting The Time
• The setting value is always valid for navigation mode, even though Setting the Time the Touch Sound Feedback is turned off. • Any changes made to either Adjusting the Operating Sound or Apple Setting item: Clock Adjust CarPlay (page 18) for Notifications & Guidance are reflected in the Additional items: Hour / Minute others ’... -
Page 22: About Ilx-007E
If “ ” does not appear, proceed to step 4. whenever you contact Alpine Tech Support or an Alpine-authorized dealer. Contents: iLX-007E (model name) / Serial Number / Firmware Version Initializing the System You can initialize all data, to restore the factory settings. Remove the USB Flash memory, from the system before operation. -
Page 23: Camera Setting
Adjusting guides simultaneously Camera Setting Touch [Link]. The 3 vertical guides of the currently-selected guide link [Camera] is selected on the Application setup menu in step 3. Refer to together, allowing them to be adjusted simultaneously. “Application Setup Operation” (page 22). Setting the Camera Input With an optional camera connected, its video is output to the monitor. -
Page 24: Apple Carplay Setting
After turning on the “AUX In”, this setting can be carried out. The video This product use software that can be updated through a Flash Memory input type can be changed. device. Download the software from the Alpine website and update the Setting item: Signal product using the Flash Memory device. -
Page 25: If This Message Appears
Audio/Visual • The Parking Brake is not engaged. - Connect the Parking Brake Lead, then engage the Parking Connected USB Device is not supported. Brake. (See page 30) • An iPhone that is not supported by the unit is connected. - Connect an iPhone that is supported by the unit. -
Page 26: Specifications
Specifications MONITOR SECTION Screen Size 7.0" LCD Type Transparent type TN LCD Operation System TFT active matrix Number of Picture Elements 1,152,000 pcs. (800 × 480 × 3 (RGB)) Effective Number of Picture Elements 99% or more Illumination System FM TUNER SECTION Tuning Range 87.5 –... -
Page 27: Installation And Connections
Do not tap into these leads to provide power for this safety-related system), or tanks should NEVER be used for unit. When connecting the iLX-007E to the fuse box, make sure installations or ground connections. Using such parts could disable the fuse for the intended circuit of the iLX-007E has the control of the vehicle and cause fire etc. -
Page 28: Installation
Installation Microphone Note on installation • Install at an angle between horizontal and 30°. Note that Cable clamp installing at an angle outside of this range will result in a (Sold separately) loss of performance and possible damage. Installing the Unit Remove the Face Plate from the unit. - Page 29 • The diagram and the fuse amperage shown above are in the case when iLX-007E is used individually. • If the switched power (ignition) lead of the iLX-007E is connected directly to the positive (+) post of the vehicle’s battery, the iLX-007E draws some current (several hundred milliamperes) even when its switch is placed in the OFF position, and the battery may be discharged.
-
Page 30: Connections
Connections AUX INPUT To Video/Audio (R, L) Output terminal REMOTE OUT To remote input lead (Brown) CAMERA IN To camera Antenna Microphone (Included) Front Left Amplifier Front Right Rear Left Amplifier Rear Right Amplifier Subwoofers REMOTE TURN-ON To amplifier or equalizer (Blue/White) REVERSE To plus side of the back... - Page 31 WHITE is left. Subwoofer RCA Connectors RED is right and WHITE is left. Steering Remote Control Interface Connector To steering remote control interface box. For details about connections, consult your nearest Alpine dealer. AUX/CAMERA/REMOTE OUT Connector MIC Input Connector To Microphone (Included).
-
Page 32: System Example
System Example Connection of an iPhone iPhone (Sold separately) USB Extension Cable (Included) Lightning to USB Cable (Included with iPhone) USB Connector * About iPhone models usable with this unit, refer to Apple CarPlay section (page 12). • Do not leave an iPhone in a vehicle for a long time. Heat and humidity may damage the iPhone and you may not be able to play it again. - Page 33 Connection of an External device AUX/CAMERA/REMOTE OUT Connector To Video Output Terminal (Yellow) (Red) DVD Player,etc (sold separately) (White) To Audio Output Terminal 1 Video/Audio Input Connector (AUX INPUT) 2 AV/RCA interface cable (4-pole mini AV plug to •...
- Page 34 Connection of an External Amplifier Power Supply Connector REMO REMOTE ON (Blue/White) (Blue/White) Power Cable Amplifier 4 ch (Sold separately) Input Front speaker Input Rear speaker REMOTE ON (Blue/White) Subwoofer Input Amplifier for subwoofer (Sold separately) 1 Front Output RCA Connectors 3 Subwoofer RCA Connector RED is right and WHITE is left.
- Page 35 Connection of camera AUX/CAMERA/REMOTE OUT Connector To Video Output terminal Camera with RCA video output (sold separately) HCE-C105, etc. CAMERA Cable 1 CAMERA Input Connector 2 RCA Extension Cable (sold separately) • When a rear camera is used, make sure REVERSE cable is connected correctly.
Need help?
Do you have a question about the iLX-007E and is the answer not in the manual?
Questions and answers