Table of Contents
Advertisement
Quick Links
ALPINE ELECTRONICS MARKETING, INC.
1-7, Yukigaya-Otsukamachi, Ota-ku,
Tokyo 145-0067, JAPAN
Phone: 03-5499-4531
ALPINE ELECTRONICS OF AMERICA, INC.
19145 Gramercy Place, Torrance,
California 90501, U.S.A.
Phone 1-800-ALPINE-1 (1-800-257-4631)
ALPINE ELECTRONICS OF AUSTRALIA PTY. LTD.
161-165 Princes Highway, Hallam
Victoria 3803, Australia
Phone 03-8787-1200
JEIL Moon Hwa Co.
18-6, 3Ga, Pil_dong, Jung_gu, Seoul, Korea
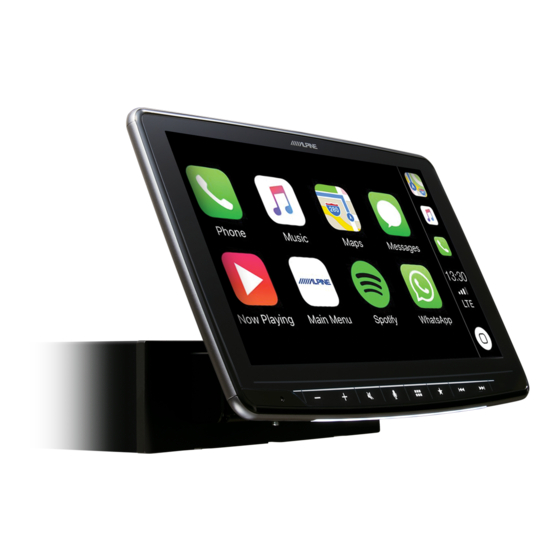
9-inch Digital Media Station
iLX-F309E
• OWNER'S MANUAL
Please read before using this equipment.
ALPINE ELECTRONICS GmbH
Wilhelm-Wagenfeld-Str. 1-3, 80807 München, Germany
Phone 089-32 42 640
ALPINE ELECTRONICS OF U.K. LTD.
Fletchamstead Highway, Coventry CV4 9TW, U.K.
ALPINE ELECTRONICS France S.A.R.L.
184 allée des Erables
CS 52016 – Villepinte
95 945 Roissy CDG cedex
Phone : + 33(0)1 48 63 89 89
Alpine House
www.alpine.co.uk
FRANCE
ALPINE ITALIA S.p.A.
Viale Cristoforo Colombo 8,
20090 Trezzano sul Naviglio MI, Italy
Phone +39 02 484781
ALPINE ELECTRONICS DE ESPAÑA, S.A.
Portal de Gamarra 36, Pabellón, 32
01013 Vitoria (Alava)-APDO 133, Spain
Phone 945-283588
Designed by ALPINE Japan
Printed in Korea
PART NO. 68-34732Z79-A
M3514658010
Advertisement
Table of Contents

Related Manuals for Alpine iLX-F309E


Summary of Contents for Alpine iLX-F309E
- Page 1 01013 Vitoria (Alava)-APDO 133, Spain Phone 1-800-ALPINE-1 (1-800-257-4631) Phone 945-283588 ALPINE ELECTRONICS France S.A.R.L. ALPINE ELECTRONICS OF AUSTRALIA PTY. LTD. 184 allée des Erables 161-165 Princes Highway, Hallam CS 52016 – Villepinte Victoria 3803, Australia 95 945 Roissy CDG cedex...
-
Page 2: Table Of Contents
ENGLISH Contents Deleting Items ..........23 Applying Alpine TuneIt App Operating Instructions Adjusting the sound via the Smartphone ..24 Facebook Notification Function ....... 24 Setup WARNING Setup Operation ..........26 Points to Observe for Safe Usage ......7 Wireless (Bluetooth) Setup WARNING ............ - Page 3 Setting the Time ..........37 Access to Apple CarPlay ........45 Setting Security code ........38 Radio/RDS About iLX-F309E ..........38 Setting Demo mode to Off/On ...... 38 Radio Basic Operation Car Setup .............. 39 Listening to the Radio ........47 Steering wheel Setting ........
- Page 4 USB Flash drive (Optional) Deleting the Phone Book Entries ....66 Searching in the Phone Book ......66 Playback ..............55 Fast-forwarding/Fast-reversing (USB Video Bluetooth Audio only) ..............55 Playback ..............67 Stopping Playback (USB Video only) ....55 Repeat Play ............67 Repeat Play ............
- Page 5 Installation and Connections WARNING ............ 78 CAUTION ............. 78 Precautions ..........79 Accessory List ............79 Installation ............79 Caution concerning the installation location ............79 Mounting the GPS Antenna inside the vehicle ............80 Mounting the Microphone......80 Installation example using the Original Mounting Bracket ........
-
Page 6: Operating Instructions
They contain instructions on how to use this product KEEP THE VOLUME AT A LEVEL WHERE YOU CAN STILL HEAR OUTSIDE in a safe and effective manner. Alpine cannot be responsible for problems resulting from failure to observe the instructions in this NOISES WHILE DRIVING. -
Page 7: Caution
Failure to do so may cause personal injury or damage to the equipment. Doing so will exceed the current carrying capacity of product. Return it to your authorized Alpine dealer or the nearest the wire and result in fire or electric shock. -
Page 8: Notice
NOTICE CAUTION Alpine accepts no responsibility for lost data, etc., even if data, etc., is Product Cleaning lost while using this product. Use a soft dry cloth for periodic cleaning of the product. For more severe stains, please dampen the cloth with water only. Anything On Handling USB Flash drive else has the chance of dissolving the paint or damaging the plastic. - Page 9 • The Bluetooth® word mark and logos are registered trademarks owned by the Bluetooth SIG, Inc. and any use of such marks by Alpine Electronics, Inc. is under licence. • The terms HDMI and HDMI High-Definition Multimedia Interface, and the HDMI Logo are trademarks or registered trademarks of HDMI Licensing, LLC in the United States and other countries.
-
Page 10: Features
Features The screen design used in the Owner’s Manual may differ from the actual screen. Favourite Function Frequently used functions can be easily recalled. Register them to the Favourite screen. For details, see “Favourite Function” (page 21). Favourite screen example •... -
Page 11: Switching The Audio Sources Screen To A Dedicated Screen
Switching the Audio Sources Screen to a Dedicated Screen You can switch the Audio Sources screen to a dedicated screen by touching the icon on one of the three edges of the screen, or by swiping vertically or horizontally. For details on how to swipe the screen, see “Touch Screen Operation” (page 14). •... -
Page 12: Getting Started
• The unit is a precision device. Careful handling of the unit should provide you with years of trouble-free operation. Turning the System On With the Alpine system, when the ignition key is turned to ACC or ON, RESET switch the opening screen will be automatically displayed. -
Page 13: Initial System Start-Up
Initial System Start-Up Touch Screen Operation Be sure to press the RESET switch when using the unit for the first time, You can operate the system by using the touch panel on the screen. after changing the car battery, etc. •... -
Page 14: Switching Sources
Switching Sources Operating the Function Button on the Audio/ Video Main Screen Switching Sources from the Menu screen Using the Function button on the Audio/Visual main screen. Press the (MENU) button. The menu screen is displayed. Touch [ ] to change to the Function mode. •... -
Page 15: About Basic Operation For List Screen
About Basic Operation for List Screen About the Shortcut Setup Screen Basic operations on the Setup list screen and the Search list screen. Displaying the Sound Setup screen. How to display on the list screen differs depending on the selected item. Touch the upper part of the Audio source screen or swipe downward in the Audio source screen. -
Page 16: Sound Setup Function
Setting the BASS ENGINE SQ Sound Setup Function Setting the BASS ENGINE Type Tone Adjustment mode Creating the ideal Bass impact for your musical taste using BASS ENGINE SQ. Setting contents: Standard (Initial setting) / Punch / Rich / Mid Bass / Low Bass Standard: Mild low-end boost with mid-range focus for front- centre staging. -
Page 17: Edit Menu
*3 Use to display the Facebook Notification List on the connected smartphone via this unit. (page 25) Displays when Alpine TuneIt App is set to “USB (iPhone)” or “Bluetooth (Android), ” and when a smartphone with Alpine TuneIt App installed is connected. (page 24) *4 Displays the Android Auto screen, displayed when an Android Smartphone installed Android Auto App is connected. -
Page 18: About The Indicator Display
About the Indicator Display Opening screen Customisation The Indicator Bar at the bottom of the screen displays various types of You can set a BMP image that is stored on a USB flash drive as the information, like the current time. opening screen. -
Page 19: How To Input Characters And Numbers (Keypad)
How to Input Characters and Numbers (Keypad) The displayed screens and procedures may vary slightly depending on the function used, but the basic input method is the same. Input screen area. Cursor position alteration switch Cancel Keypad mode finishes. (Delete) Returns to the previous character and erases it. -
Page 20: Favourite Function
Favourite Function Editing the Favourite Screen Touch [ ] (Edit). A checkbox is displayed on the upper left area of the registration Using the Favourite Function icon and it changes to Edit mode. This unit enables you to recall functions easily by registering frequently used items such as the Audio source, the Shortcut Dialing icons, etc. -
Page 21: Changing Item Names
Audio Changing Icons (only the Shortcut Dialing [Radio]* / [DAB]* / [USB/iPod] / [HDMI/DVD] / [AUX] / [Bluetooth icons) Audio] / [Apple CarPlay]* / [Android Auto]* You can change the icons of Shortcut Dialing. *1 You can choose the frequency from Preset 1 - 12, registered into each The following example explains how to change the Shortcut Dialing FM1/FM2/MW/LW band of Radio. -
Page 22: Deleting Items
Deleting Items When deleting a selected item Touch the checkbox at the left of the item you want to delete and place a check ( ) in it. Touch [ ] (Delete). The selected item will be deleted. When deleting all items Touch [ ] (Delete All). -
Page 23: Applying Alpine Tuneit App
Smartphone is not in a service area or receives no signal. For “Like” operation. (Valid when Wall Posts or Comments is • Turn Apple CarPlay to Off before using Alpine TuneIt App. Refer to received) “Apple CarPlay Setup” (page 42). - Page 24 Displaying Facebook Screen During Notification incoming or Notification List screen, you can switch to Facebook screen. Facebook screen example Message content Poster’s photo Close button: Close the Facebook screen. Touch Poster’s picture or Poster’s name to switch to Facebook screen. The detailed information of Notification is displayed.
-
Page 25: Setup
Wireless (Bluetooth) Setup Setup [Wireless] is selected on the Setup main screen in step 3. See “Setup Operation” (page 26). Setup Operation Wireless Setup Menu screen Press the (MENU) button. The Menu screen is displayed. • You can also display the menu screen, by touching the lower part of the Audio source screen or by swiping upward. -
Page 26: Bluetooth Setup
Touch [ ] (Audio), [ ] (Hands-free) or [ ] (Both) Bluetooth Setup of the device you want to connect from the list. Audio: Sets for use as an Audio device. [Bluetooth] is selected on the Wireless Setup Menu screen in step 1. See Hands-free: Sets for use as a Hands Free Device. -
Page 27: Iphone Auto Pairing Setting
iPhone Auto Pairing Setting Changing the Character Code of the Phone Book Make sure the “Bluetooth” setting is “On” ( ). See “Bluetooth Setup” (page 27). You can select the character code that is used when transferring the When an iPhone is connected via USB and it is not on the Registered phone book or history from a mobile phone. -
Page 28: General Setup
*1 You can make this setting in the Sound Setup screen of the Shortcut General Setup Setup. For details, see “Sound Setup Function” (page 17). *2 You can also make the setting in the Bal./Fad. screen. For details on how to adjust, see “Setting the Balance/Fader/Rear [General] is selected on the setup main screen in step 3. -
Page 29: Setting The Media Xpander (Mx Hd)
Fad./Bal. screen Setting the Media Xpander (MX HD) Media Xpander (MX HD) makes vocals or instruments sound distinct regardless of the music source. The Radio (FM/DAB), USB Flash drive and iPod/iPhone, will be able to reproduce the music clearly even in cars with a lot of road noise. -
Page 30: Equalizer Presets
Adjusting the Frequency Equalizer Presets Touch [ ] or [ ] of “Frequency” to adjust the frequency of the selected band. 10 typical equalizer settings are preset at the factory for a variety of musical source material. Adjustable frequency bands: 20 Hz to 20 kHz (in 1/3 octave steps) Setting item: EQ Presets... -
Page 31: Adjusting The Crossover Settings (X-Over)
Adjusting the Crossover Settings (X-OVER) Adjusting the Time Correction (TCR) Before performing the following procedures, see “About the Crossover” Before performing the following procedures, see “About Time (page 34). Correction” (page 34). Setting item: Setting item: X-OVER Time Correction • When the Sound Setup of the Shortcut Setup is selected to “BASS ENGINE SQ, ”... -
Page 32: Setting The Volume For Each Source
Setting the Volume for Each Source Adjusting the Ring Tone Level Setting item: You can adjust the receive volume, during the call. Source Volume Setup Radio / DAB / Compressed Media* Setting item: iPod Music / AUX / HDMI* / Bluetooth Audio / Apple CarPlay / Ring Tone Level Android Auto Setting contents:... -
Page 33: About The Crossover
Adjusting to a frequency range outside that recommended may cause damage to the speakers. For the recommended crossover frequencies of Alpine speakers, refer to the respective Owner’s Manual. We are not responsible for damage or malfunction of speakers caused by... -
Page 34: Language Setting
Example 2. Listening Position: All Seats Language Setting Adjust the time correction level of each speaker to almost the same level. The Setup menu, feedback information, etc. for this unit can be changed Sit in the listening position (driver’s seat, etc.) and to appear in the selected language. -
Page 35: Adjusting Colour Of Picture
Adjusting Colour of Picture Screen Setup Setting item: [Screen] is selected on the General Setup Menu screen in step 2. See Colour Setting content: “General Setup” (page 29). -15 to +15 (Initial setting: 0) You can set up the brightness, colour, display, etc., of the screen. You can adjust the colour between MIN (-15) and MAX (+15). -
Page 36: Switching The Display Colour
Adjusting the Minimum Level of Backlight General Setup You can adjust the brightness of the backlight. This function could be used, for instance, to change the screen brightness while travelling at [General] is selected on the General Setup Menu screen in step 1. See night. -
Page 37: Setting Security Code
Model Name, and to initialise various settings. Displaying the Product Information You can view the version information of this product. Make note of this information and refer to it whenever you contact Alpine Tech Support or an Alpine-authorized dealer. Setting contents:... -
Page 38: Car Setup
Sources Setup Car Setup [Sources] is selected on the Setup main screen in step 3. See “Setup [Car] is selected on the General Setup Menu screen in step 1. See Operation” (page 26). “General Setup” (page 29). Sources Setup Menu screen Steering wheel Setting Set this item when Apple CarPlay is used/Android smartphone which installed Android Auto App is connected. -
Page 39: Radio Setup
Setting PTY31 (Emergency Broadcast) Radio Setup Reception [Radio] is selected on the Sources Setup Menu screen in step 1. See PTY31 (Emergency Broadcast) reception can be set to On/Off. “Sources Setup” (page 39). Setting item: PTY31 Setting contents: On (Initial setting) / Off •... -
Page 40: Setting Announcement Reception
Setting Announcement Reception AUX Setup You can select your desired station from 8 announcement types. [AUX] is selected on the Sources Setup Menu screen in step 1. See If “On” is set, when the selected announcement is received, the unit will “Sources Setup”... -
Page 41: Switching The Visual Input Signal System
*1 When Camera Select is set to “Off, ” you cannot select this item. *2 CAN-I/F BOX should be connected before this operation. *3 Set this setting after closing the Alpine TuneIt App. Apple CarPlay Setup The following steps 1 to 3 are common to each “Setting item”... -
Page 42: Camera Setup
Adjusting Guides Simultaneously Camera Setup <Rear Camera> [Camera] is selected on the System Setup Menu screen in step 1. See Touch [Link]. “System Setup” (page 42). The 3 vertical guides of the currently-selected guide link You can set up items related to the Camera. together, allowing them to be adjusted simultaneously. -
Page 43: Can-I/F Setup
“System Setup” (page 42). air conditioner, etc. Set Alpine TuneIt App to USB (iPhone) when an iPhone is connected, or 5 sec/10 sec*: The screen is displayed for 5 seconds/10 seconds, then set to Bluetooth (Android) when an Android Smartphone is paired. -
Page 44: Android Auto (Optional)
Android Auto Apple CarPlay (Optional) (Optional) Apple CarPlay is a smarter, safer way to use your iPhone in the car. Apple CarPlay takes the things you want to do with your iPhone while What is Android Auto driving and puts them right on the unit. You can get directions, make calls, send and receive messages, and listen to music, all in a way that Android Auto is designed to make it easier to use apps from your phone allows you to stay focused on the road. -
Page 45: Radio/Rds
MW/LW band main screen example Radio/RDS RDS (FM1/FM2) main screen example Function mode Function mode Band display Displays the band of the signal currently being received. Frequency display Preset mode button Touch or swipe to the right when you use the Preset mode screen. -
Page 46: Radio Basic Operation
Radio Basic Operation Presetting Stations Manually Tune in a desired radio station you wish to store in the Listening to the Radio preset memory by manual or automatic seek tuning. Touch the Preset number you want to store, for at least 2 Press the (MENU) button and select radio mode. -
Page 47: Inputting Frequency Directly And Receiving The Radio Station
RDS Operation Inputting Frequency Directly and Receiving the Radio Station Turning AF (Alternative Frequencies) On or Off You can input a frequency of the same band directly and receive the radio station. The RDS (Radio Data System) is a radio information system using the Touch [ ] (Direct Tune). -
Page 48: Receiving Traffic Announcement
Select the desired programme type in the PTY list Receiving Traffic Announcement screen. PTY Seek starts and the receivable programme type is received. Touch [ ] (TA). If no PTY station is found, “No PTY. ” will be displayed. The “TA” indicator lights up and the unit switches to standby mode for the traffic announcement. -
Page 49: Dab/Dab+/Dmb
Preset mode screen example DAB/DAB+/DMB DAB main screen example Preset button Swipe vertically in the list to change pages. Full Search mode button (All Service list, Current Ensemble list or PTY list is displayed) Swipe to the right when you use the Full Search mode screen. •... -
Page 50: Presetting Service
Touch [ ] / [ ], [ ] / [ ] or [ ] / [ ] to change Service Component/PTY Search Function the Service or Ensemble up or down respectively. Touch and hold to change the Service or Ensemble continuously. You can select your favourite Service Component from the All Service •... -
Page 51: Interruption Function
Interruption Function Inputting Channel Number Directly and Receiving the Broadcasts If Interruption Function is enabled, when the following broadcast is received, the unit switches to the DAB source screen automatically, and You can receive your desired station by inputting the channel number will receive broadcasts. -
Page 52: Displaying Dab Text
Displaying DAB Text Text messages from a DAB station can be displayed. Tune in a DAB station that transmits text messages. Touch [ ] (Info) in the DAB mode repeatedly to switch to the desired display. Station Info Mode Dynamic Label Mode Station Info Mode Station Info Mode... -
Page 53: Usb Flash Drive (Optional)
Song title USB Flash drive Album title Elapsed time Info mode switching button (Optional) Info mode display File Name Quick Search button You can play back music files (MP3/WMA/AAC/FLAC) and video files Touch or swipe to the right to use the Quick Search mode. (AVI/MKV/MP4) stored in a USB flash drive on the internal player of this system. -
Page 54: Playback
Playback Repeat Play Press the (MENU) button and select USB mode. Touch [ The display shows the USB mode screen. The Repeat mode select pop up screen is displayed. • You can select and change the source in Favourite screen •... -
Page 55: Switching Display Modes (During Video File Play Back)
Switching Display Modes (During Video File Play Back) You can switch the Display Mode while playing a Video File. Touch [ Each time you touch, the Display Mode is switched. Fill • The [ ] button displays the currently selected mode. (e.g. [Fit]) •... -
Page 56: Ipod/Iphone (Optional)
Elapsed time iPod/iPhone Quick Search button* Touch or swipe to the right when using Quick Search mode. *1 Podcast mode. (Optional) *2 If you have never used Search mode with the currently connected iPod/ iPhone, pressing the Quick Search button switches the screen to the Full Search mode screen. -
Page 57: Searching For A Music File
Full Search Mode Searching for a Music File For example: Searching by Artist name An iPod/iPhone can contain thousands of songs. For this reason, this The following example explains how an Artists search is performed. unit can make various searches using the search function as shown Another search mode can be used for the same operation, although the below. -
Page 58: Alphabet Search Function
Alphabet Search Function Repeat Play The unit is provided with an alphabet search function for effective Touch [ ] to repeatedly play back the currently track. searching. When you use this function in the search mode, you can The tracks (files) will be played repeatedly. Touch [ ] again to deactivate Repeat play. -
Page 59: Hdmi Device (Optional)
Smartphones). When making HDMI connections, you need to set this unit. HDMI on the unit suitable for the connected device. For details, see • Use only the Alpine Special HDMI connection cable. “HDMI Setup” (page 42). Press the (MENU) button and select HDMI mode. -
Page 60: Bluetooth Operation
Bluetooth compatible device to this unit. The device mobile device or personal computer over short distances. This enables a name of this unit is “iLX-F309E” and the initial number of the passcode hands-free call or data transmission between Bluetooth compatible is “0000. -
Page 61: Answering A Call
Answering a Call Hanging up the Telephone Incoming calls are announced by the received call ring tone and a Touch [ ] (End Call). displayed message (PHONE No., etc.). The call finishes. An incoming call triggers the ringtone and an incoming call display. -
Page 62: Calling
Second incoming call during a conversation in the Phone Making a phone call using the Phone Menu Operation screen • The display or operation may differ depending on the connected mobile Making a phone call from the Recent Events list phone or the caller’s mobile phone. -
Page 63: Using Voice Recognition Function
Entering a Phone Number to Make a Call Speak into the microphone supplied with this unit. • If no speech is detected, the unit may pause depending on version Touch [ ] (Keypad). of the connected iPhone. In that case, touch the microphone icon ] in the centre of the Voice Control mode screen. -
Page 64: Operations During A Conversation
Adjusting the volume Phone Book Function Adjust the speaker/microphone volume in Voice Dial mode. Perform the same procedure to adjust the speaker/microphone volume of hands- free phone. Phone Book screen example Touch [ ] or [ ]. Adjust the speaker and microphone volumes. Stopping input to the microphone If the surrounding sound (road noise, etc.) is loud, you may wish to cut input to the microphone for 3 seconds. -
Page 65: Deleting The Phone Book Entries
Deleting the Phone Book Entries Bluetooth Audio Deleting One Entry from the Phone Book If a Bluetooth compatible mobile phone, portable player, etc. is connected by wireless, you can play back a song (operation is Touch [ ] (Edit). controllable from the unit). Touch the checkbox [ ] of the contact name (or phone •... -
Page 66: Playback
Playback Random Play Available for AVRCP Ver. 1.3, 1.4 and 1.5 only. Press the (MENU) button and select Bluetooth Audio mode. Touch [ The display shows the Bluetooth Audio mode screen. The Random Play mode select pop up screen is displayed. •... -
Page 67: Connecting A Bluetooth Device
Connecting a Bluetooth Device Registering a Bluetooth device in the unit enables automatic connection. If it does not connect automatically, run through the connection procedure again. Touch [ ] (Phone Setting). The Device Setting select pop up screen is displayed. Touch [Reconnect]. -
Page 68: Auxiliary Device (Optional)
Operating an AUX, AUX DVD or GAME Auxiliary Device Example for AUX, AUX DVD, GAME mode display (Optional) Operating Auxiliary Devices (Optional) To operate devices connected to the AUX terminals of the unit, follow the procedure described below. • Set AUX to “On. ” See “AUX Setup” (page 41). •... -
Page 69: Camera Operation (Optional)
Guide Display ON/OFF Setting Camera Operation Touch the screen when the image from the camera is (Optional) displayed. The operation screen is displayed on the screen. • After a 5-second time-out, the operation screen returns to the When an optional rear camera is connected, the view video of camera camera display screen. - Page 70 Distance guidance marks When there is a steep upward slope behind the car The marks represent the distance from the rear of the car (from (example) the rear end of the bumper). <Screen> • The marks do not move in synchronisation with the steering wheel.
-
Page 71: About Vehicle Interlock Function
Parking Sensor screen About Vehicle The Parking sensor screen turns on when the front or rear sensor on your vehicle detects an obstacle within a certain distance. Interlock Function Parking Sensor Full screen example When the front or rear sensor detects an obstacle within a certain Communication between your vehicle and the unit allows you to set and distance, the Parking Sensor screen is displayed, and the indicator that display various functions of your vehicle. -
Page 72: Information
About the software licence of the product The software installed in the product contains open-source software. MP3 (USB Flash drive) See the following Alpine website for details on the open source software. Sampling rates: 48 kHz, 44.1 kHz, 32 kHz, 24 kHz, 22.05 kHz, 16 kHz, 12 kHz, 11.025 kHz, 8 kHz... - Page 73 Corresponding File Systems Terminology This device supports FAT 16/32. Bit rate The maximum nested folder depth is 8 (including the root This is the “sound” compression rate specified for encoding. The higher directory). File names are limited to 256 characters (including the the bit rate, the higher the sound quality, but also the larger the files.
-
Page 74: In Case Of Difficulty
• If the area you are in is a primary signal area, the antenna may properly connected, or then consult your authorized not be grounded and connected properly. Alpine dealer. - Check your antenna connections; make sure the antenna is properly grounded at its mounting location. -
Page 75: If This Message Appears
DAB Antenna error If this Message Appears • The DAB antenna cable is either damaged or not connected correctly to the product. - Check that the antenna cable is not kinked or otherwise Various messages are displayed on the screen during operation. In damaged. -
Page 76: Specifications
GPS SECTION Specifications GPS Reception frequency 1,575.42 ±1 MHz GPS Reception sensitivity -130 dB max. MONITOR SECTION Bluetooth SECTION Screen Size 9” LCD Type Transparent type TN LCD Bluetooth Specification Bluetooth V3.0 Operation System TFT active matrix Output Power +4 dBm Max. (Power class 2) Number of Picture Elements 1,152,000 pcs.
Need help?
Do you have a question about the iLX-F309E and is the answer not in the manual?
Questions and answers