Table of Contents
Advertisement
Quick Links
Advertisement
Table of Contents

Subscribe to Our Youtube Channel
Related Manuals for Alpine IVE-W535ABT


Summary of Contents for Alpine IVE-W535ABT
- Page 1 MOBILE MEDIA STATION IVE-W535ABT IVE-W535EBT •OWNER’S MANUAL Please read before using this equipment. YAMAGATA (Wuxi) Co., Ltd. Designed by ALPINE Japan No.163 Xixian Road, Meicun, WND, Wuxi, Printed in China Jiangsu Province, China 214112 68-21057Z56-A (Y_B5)
- Page 2 ALPINE ELECTRONICS MARKETING, INC. ALPINE ELECTRONICS OF AUSTRALIA PTY. LTD. ALPINE ELECTRONICS FRANCE S.A.R.L. 1-7, Yukigaya-Otsukamachi, Ota-ku, 161-165 Princes Highway, Hallam (RCS PONTOISE B 338 101 280) Tokyo 145-0067, JAPAN Victoria 3803, Australia 98, Rue de la Belle Etoile, Z.I. Paris Nord Il,...
-
Page 3: Table Of Contents
ENGLISH Contents About MX (Media Xpander) button ....23 Touch Operation ..........23 Selecting an Item in a List ......23 Operating Instructions About the Indicator Display ......24 Radio WARNING Listening to the Radio ........25 WARNING ..........7 Presetting Stations Manually ......25 CAUTION ..........7 Presetting Stations Automatically ....25 NOTICE ............. - Page 4 RSE Setting ............. 49 Saving and Calling the Adjusted Picture Setting the Rear Seat Entertainment Quality ............. 38 System ............49 About IVE-W535ABT/IVE-W535EBT ..38 BLUETOOTH Setup Displaying the Product Information .... 38 ® Checking the DivX Registration ....38 BLUETOOTH Setup Operation .....
- Page 5 Displaying BLUETOOTH Information ..50 DTMF (Touch-Tone) Function ....58 Phone Book Function ........58 Registering the BLUETOOTH Device ... 50 Synchronising the Phone Book ....58 Automatic Connection Setting ......51 Adding the Phone Book ......59 Setting the Passcode ........51 Deleting the Phone Book Entries ....
- Page 6 Other Camera Operation ......... 69 System Example ..........92 About the Adjustment of the Caution Display Location ........... 69 USB Memory (Optional) Playback ............70 Repeat Play ............. 70 Random Play (M.I.X.) ........71 Random Play (M.I.X. ALL) ......71 Searching for a Desired Song ......
-
Page 7: Operating Instructions
Failure to do so may cause personal injury or damage to the DO NOT OPERATE ANY FUNCTION THAT TAKES YOUR product. Return it to your authorized Alpine dealer or the nearest ATTENTION AWAY FROM SAFELY DRIVING YOUR VEHICLE. Alpine Service Center for repairing. -
Page 8: Notice
• High humidity and water • Excessive dust If you have problems, do not attempt to repair the unit yourself. • Excessive vibrations Return it to your Alpine dealer or the nearest Alpine Service Station for servicing. Correct Handling Never Attempt the Following Do not drop the disc while handling. -
Page 9: Discs Playable On This Unit
Using The discs listed below can be played on this unit. such accessories can cause operational problems. We recommend not using these accessories on discs played in Alpine DVD players. Mark (logo) Recorded Content... - Page 10 Tips for making your own discs ® DVD-ROMs, DVD-RAMs, CD-ROMs (excluding MP3/WMA/ The IVE-W535ABT/IVE-W535EBT plays DVD Video, DivX AAC files), photo CDs, etc. Audio CD and has a built in MP3/WMA/AAC decoder. The following information is designed to help you create your own...
- Page 11 • This unit is compatible with discs recorded in the standard DVD-Video format. Alpine accepts no responsibility for lost data, etc., even if data, etc., • Note that discs not finalised (processed to enable to play on is lost while using this product.
- Page 12 • The BLUETOOTH word mark and logos are registered trademarks owned by the Bluetooth SIG, Inc. and any use of such marks by Alpine Electronics, Inc. is under licence. • “MPEG Layer-3 audio coding technology licenced from Fraunhofer IIS and Thomson.”...
-
Page 13: Features
Features Auto User Setting Change With the IVE-W535ABT/IVE-W535EBT, you can register up to two users. Each user can configure their own preferred settings. By registering their respective BLUETOOTH devices to the unit, each user can be identified automatically. USER1 USER2... -
Page 14: Easy Sound Setting By Car Type (I-Personalize)
Easy Sound Setting by Car Type (i-Personalize) This function lets you set and reproduce the best audio environment for the environment in your car. On the unit, select and set the car category/steering wheel position/speaker type and size/seat material. For details of how to configure the settings, refer to “Car Specific Sound Setup” (page 20). Display example when setting is completed... -
Page 15: Getting Started
• AUX/PRE OUT cable ............1 Controllable with Remote Control • Camera cable ..............1 This unit can be controlled with an optional Alpine remote control. • USB extension cable ............1 For details, consult your Alpine dealer. Point the optional remote • Microphone................1 control transmitter at the remote control sensor. -
Page 16: Turning The System On
Insert the under side of the front panel into the main unit. With the Alpine system, when the ignition key is turned to ACC or ON, the opening screen will be automatically displayed. Push the up side of the front panel until it locks firmly into the main unit. -
Page 17: Initial System Start-Up
Initial System Start-Up Adjusting the Volume Be sure to press the RESET switch when using the unit for the first Rotate the Rotary encoder until the desired sound is time, after changing the car battery, etc. obtained. Volume: 0 - 35 Turn off the unit power. -
Page 18: User Registration
Touch [Search]. User Registration You can register up to two users. Configure the User 1 and User 2 settings for each user. Press the (My Favorites) button. The My Favorites screen is displayed. Touch [Start]. The system starts searching for BLUETOOTH devices. When the search is completed, the BLUETOOTH Device List is displayed. -
Page 19: Setting My Favorites
Editing My Favorites You can delete names in My Favorites or change the layout. Setting My Favorites Touch [ Configure the My Favorites settings. “ ” appears and the mode switches to the Edit mode. Press the (My Favorites) button. My Favorites screen for USER1 is displayed. -
Page 20: Displaying The Camera Image
Changing a BLUETOOTH device i-Personalize Setup You can change the BLUETOOTH devices associated with a user. You can configure the audio settings by car type. Touch the user [Phone] you want to change. Touch [i-Personalize]. The BLUETOOTH Device Setup screen is displayed. The i-Personalize Setup screen is displayed. -
Page 21: Settings When Switching Users
5 letters maximum) Header (fixed) • Save the setting data in the root folder. • For details about procedures of download, see ALPINE’s web site. Touch [Downloaded Sound Settings]. Setting data files are displayed in a list with a maximum of 5 items. -
Page 22: How To Input Characters And Numbers (Keypad)
How to Input Characters and Numbers Top banner and Bottom banner Fade Out (Keypad) Setting Character input is required for user registration, place searches, etc. When “Top/Bottom Banner Fade Out” is set to [ON], the Top banner The displayed screens and procedures may vary slightly depending on and Bottom banner on the Audio/Visual Playback screen fade out after 5 the function used, but the basic input method is the same. -
Page 23: Screen Off Function
Switching Sources Using the Top banner Touch Operation Touch the source button for the Top banner at the top of the Audio/ Visual Playback screen and select the desired source. You can operate the system by using the touch panel on the screen. Source button •... -
Page 24: About The Indicator Display
About the Indicator Display The Indicator Bar at the bottom of the screen displays various types of information, like the current time. The display will differ depending on the source. For details, refer to the display example of each source. Lights up when connected to a BLUETOOTH compatible device. -
Page 25: Radio
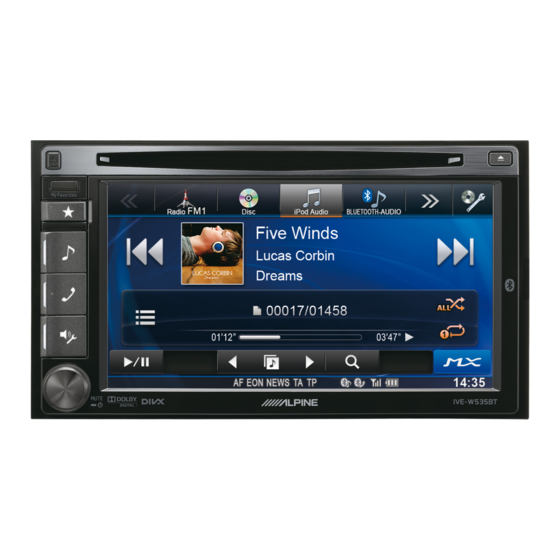
Presetting Stations Manually Radio Tune in a desired radio station you wish to store in the preset memory by manual or automatic seek Display example for Radio main screen tuning. Touch and hold any one of the preset buttons for at least 2 seconds. -
Page 26: Cd/Mp3/Wma/Aac
] again or touch [ ] in the middle of the screen to start playback. • The IVE-W535ABT/IVE-W535EBT can play back MP3/WMA/AAC files saved to CD or DVD. Use a format compliant with this unit. For further information about playing or storing MP3/WMA/AAC files, refer to pages 27 and 28 before using the unit. -
Page 27: Searching From Cd Text
Searching from CD Text About MP3/WMA/AAC Touch [ (Search)] of Bottom banner during CAUTION playback. Except for private use, duplicating audio data (including MP3/ The CD text search screen is displayed. WMA/AAC data) or distributing, transferring, or copying it, whether for free or for a fee, without permission of the copyright Touch the selected track name. - Page 28 Supported playback sampling rates and bit rates Order of files Files are played back in the order that the writing software writes them to the disc. Therefore, the playback order may not be Sampling rates: 48 kHz, 44.1 kHz, 32 kHz, 24 kHz, 22.05 kHz, what’s expected.
-
Page 29: Dvd
DVD/TV/Video unless the vehicle is stopped and the emergency brake is applied. Information display-1 DVD-Video: If the IVE-W535ABT/IVE-W535EBT is not installed Title name/Chapter No. ® DivX correctly, the driver will be able to watch the DVD/TV/ Title name/File No./Current File No./Total File No. -
Page 30: If A Menu Screen Appears
Select a desired menu item by touching [ ], [ ] or [ • Play Position Memory Function Even if you turn power off or switch the Ignition key to OFF during playback or change the source, playback will continue from the point where playback stopped when the power is turned ON again. -
Page 31: Stopping Playback (Pre Stop)
Stopping Playback (PRE STOP) Finding the Beginnings of Chapters/ Tracks/Files Touch the stop button during playback to stop playback. That position is During playback, touch [ ] or [ stored in the memory. The chapter/track/file switches each time the button is touched, and playback of the selected chapter/track/file starts. -
Page 32: Selecting Folders
Selecting Folders Searching Directly by Chapter Number Touch [ ] or [ ] of Bottom banner to select the folder. Use this function to easily move to the beginnings of the chapters on the • Touch [ ] to play from the first file of the previous folder. disc. -
Page 33: Switching The Angle
® Switching the Angle About DivX ® On DVDs in which scenes have been filmed from multiple angles, the DivX is a codec (software) to compress moving images while angle can be switched during playback. maintaining image quality using a highly advanced compression ratio and operating speed. -
Page 34: Setup Operation
Setting items: Language / Date/Time / Remote Sensor / Security Setup Code / Top/Bottom Banner Fade Out / Screen/LED Customize / Visual / About / Installation • Depending on the item, repeat step 3. Setup Operation Touch [ ] or [ ] etc., to change its setting. -
Page 35: Date/Time Setting
Date/Time Setting Remote Sensor Setting [Date/Time] is selected on the General setup menu in step 3. Refer to [Remote Sensor] is selected on the General setup menu in step 3. Refer “General Setup Operation” (page 34). to “General Setup Operation” (page 34). For remote control operation, the remote sensor of the external device (monitor, etc.) can be switched, as you prefer. -
Page 36: Setting Top Banner And Bottom Banner Display
Switching the Display Colour Setting Top banner and Bottom banner You can choose from 5 different display colours. Display Setting item: Screen Colour Setting contents: Blue (Initial setting) / Red / Green / Amber / [Top/Bottom Banner Fade Out] is selected on the General setup menu Black in step 3. -
Page 37: Switching Display Modes
Touch [ ] of the desired item. Adjusting the Live Contrast Settable items differ depending on the application. [Audio] (Video media): This function automatically adjusts the areas on the screen that are too Display Mode* / Live Contrast / Visual EQ / Bright / Colour / Tint bright or too dark and corrects them to natural brightness. -
Page 38: Adjusting Picture Quality
You can view the version information of this product. Make note of this • Do not detach the front panel by pressing the (Release) button information and refer to it whenever you contact Alpine Tech Support or until system restart is complete. an Alpine-authorised dealer. -
Page 39: Sound Setup
Sound Setup Setting the Balance/Fader/Subwoofer [Balance/Fader/Subwoofer] is selected on the Sound setup menu in step 3. Refer to “Sound Setup Operation” (page 39). Sound Setup Operation The parking brake must be engaged to access the Setup screen. Attempting to access this screen while driving will display the warning-Unable to operate while driving. -
Page 40: Setting The Subwoofer Phase
MX CD Setting the Subwoofer Phase CD mode processes a large quantity of data. This data is used to reproduce the sound cleanly by making use of the data The subwoofer output phase is toggled Subwoofer Normal (0°) or quantity. Subwoofer Reverse (180°). -
Page 41: Adjusting The Parametric Equalizer Curve (Parametric Eq)
Setting the Bandwidth Adjusting the Parametric Equalizer Touch [ ] or [ ] of “Q Adjust” to select the bandwidth. Curve (Parametric EQ) Setting contents: 1 (Initial setting) / 2 / 3 To adjust another band, repeat step 1, and adjust all [Parametric EQ] is selected on the Sound setup menu in step 3. -
Page 42: Adjusting The Time Correction (Time Correction)
Adjusting the Time Correction (Time Adjusting the Crossover Settings (X- Correction) OVER) [Time Correction] is selected on the Sound setup menu in step 3. Refer [X-OVER] is selected on the Sound setup menu in step 3. Refer to “Sound Setup Operation” (page 39). to “Sound Setup Operation”... -
Page 43: Setting Defeat
Calling the X-OVER adjusted value About Time Correction Calling the pre-set X-OVER adjusted value. Touch [Preset1], [Preset2], or [Preset3] on the X- The distance between the listener and the speakers in a car vary widely OVER screen. due to the complex speaker placement. This difference in the distances The setting stored in the Preset will be recalled. - Page 44 Time Correction Value List Example 2. Listening Position: All Seats Time Time Distance Distance Distance Distance Difference Difference Adjust the time correction level of each speaker to almost the same level. (cm) (inch) (cm) (inch) (msec) (msec) 173.4 68.3 Sit in the listening position (driver’s seat, etc.) and 176.8 69.7 measure the distance (in meters) between your head...
-
Page 45: About The Crossover
Adjusting to a frequency range outside that recommended may cause damage to the speakers. Crossover (X-OVER): For the recommended crossover frequencies of Alpine speakers, refer This unit is equipped with an active crossover. The crossover limits the to the respective Owner’s Manual. -
Page 46: Source Setup
Source Setup Disc Setting [Disc] is selected on the Source setup menu in step 3. Refer to “Source Setup Operation” (page 46). Source Setup Operation • You can perform DVD setup in DVD video mode. • Touch [Stop] before performing Disc setup. The parking brake must be engaged to access the Source mode Changing the Language Setting screen. -
Page 47: Setting Of The Subtitle Language
Set the rating level of PARENTAL Setting of the Subtitle Language 4 Touch [Parental]. Set the language of the subtitles displayed on the screen. 5 Touch “ ” on “ ” to turn “On". Select “Off” to cancel parental lock or if you do not want Setting item: SUBT. -
Page 48: Aux Setting
4:3 PAN-SCAN: Setting the Primary AUX Name (AUX Select this when connected to a conventional 4:3 size monitor. The picture will fill the entire TV screen. However, due to the Setup) mismatch in aspect ratio, parts of the movie at the extreme left and right sides will not be visible (when playing a 16:9 size When AUX In is set to “ON”, this setting is available. -
Page 49: Setting The Aux3
Setting the AUX3 Connection with external input devices is available through the iPod VIDEO connector. An optional adapter cable is required (standard RCA to 3.5ø mini-phono plug or 3.5ø to 3.5ø mini phono plug). You can also play back video connecting with an optional AV cable (4- pole mini AV plug to 3-RCA). -
Page 50: Bluetooth Setup
BLUETOOTH Setup Displaying BLUETOOTH Information [BLUETOOTH Info] is selected on the BLUETOOTH setup menu in step 3. BLUETOOTH Setup Operation Refer to “BLUETOOTH Setup Operation” (page 50). You can display the BLUETOOTH device name and device address of this unit. The parking brake must be engaged to access the Setup screen. -
Page 51: Automatic Connection Setting
Deleting a BLUETOOTH Device from the list Changing the Character Code of the You can delete the information of a previously connected Phone Book BLUETOOTH compatible device. Touch [Set BLUETOOTH Device]. [Default Phonebook Encoding] is selected on the BLUETOOTH setup menu in step 3. -
Page 52: Setting The Time For Automatic Reception Of A Call
Setting the Time for Automatic Adjusting the Calling Volume Reception of a Call [Calling Volume] is selected on the BLUETOOTH setup menu in step [Auto Answer Time] is selected on the BLUETOOTH setup menu in Refer to “BLUETOOTH Setup Operation” (page 50). step 3. -
Page 53: Camera Setup
Camera Setup Direct Camera Setting [Direct Camera] is selected on the Camera setup menu in step 3. Refer to “Camera Setup Operation” (page 53). Camera Setup Operation Setting the Camera Input With an optional camera connected, its video is output to the monitor. When the camera is connected, set this item. -
Page 54: Aux Camera Setting
Display example for front camera mode AUX Camera Setting [AUX Camera] is selected on the Camera setup menu in step 3. Refer to “Camera Setup Operation” (page 53). Setting the Camera Input Setting item: Camera Select/ / Camera Signal* /Guide Adjustment* Setting contents: Off (Initial setting) / Rear* / OTHER... -
Page 55: Camera Interrupt Setting (Power Off Mode)
Adjusting guides simultaneously (for Rear camera only) Touch [Link]. The 3 vertical guides of the currently-selected guide link together, allowing them to be adjusted simultaneously. Turning guide display ON/OFF Turning the selected guide off. Touch [ON/OFF]. The currently selected guide will turn off. To turn the guide on, touch [ON/OFF] again. -
Page 56: Bluetooth Operation
About BLUETOOTH and then connect that BLUETOOTH compatible device to this unit. The device name of this unit is “Alpine AV Receiver” and the initial BLUETOOTH is a wireless technology allowing communication number of the passcode is “0000.” Also refer to the Owner’s Manual between a mobile device or personal computer over short distances. -
Page 57: Changing The Connecting Bluetooth Device
Changing the connecting BLUETOOTH Calling Device Use the Phone menu screen to make a phone call. If multiple BLUETOOTH devices are registered in this device, you can Using Short Cut Dialling to Make a Call change the connection among the registered devices. You can assign up to 4 phone numbers for one-touch dialing to make a Press the (PHONE) button. -
Page 58: Entering A Phone Number To Make A Call
Entering a Phone Number to Make a Call Changing the Voice Output The voice output for calls is switchable between car speakers and the Press the (PHONE) button. mobile phone speaker. The phone menu screen is displayed. Touch [ Touch •... -
Page 59: Adding The Phone Book
Adding the Phone Book Assigning as a Short Cut Dialling Press the (PHONE) button. The phone menu screen is displayed. Number Touch [ Assigning from Call History Touch [Download]. Press the (PHONE) button. Touch [Add]. The Phone menu screen is displayed. Stays on standby for connection of the mobile phone. -
Page 60: Bluetooth Audio
BLUETOOTH Audio Playback If a BLUETOOTH compatible mobile phone, portable player, etc. is Press the (SOURCE) button. connected by wireless, you can play back a song (operation is controllable from the unit). Touch [BLUETOOTH-AUDIO] of Top banner. Display example for BLUETOOTH Audio main screen Touch [ ] or [ ] to select the desired track... -
Page 61: Random Play)
M.I.X. (Random Play) Available for AVRCP Ver. 1.3 and 1.4 only. Touch [ ] during playback. The M.I.X. mode switches every time [ ] is touched. (GROUP) (ALL) (OFF) • Operations may differ depending on the connected BLUETOOTH compatible device. Selecting Groups Available for AVRCP Ver. -
Page 62: Auxiliary Device (Optional)
Example for AUX1, AUX2, AUX3, DVD, Game mode display Operating Auxiliary Devices (Optional) To operate devices connected to the AUX terminals of IVE-W535ABT/ IVE-W535EBT, follow the procedure described below. • Set AUX In to “On.” Refer to “Setting the AUX Mode” (page 48). -
Page 63: About The Dvd Operation Screen
Menu operation mode screen display example About the DVD Operation Screen When the external DVD player playback screen is displayed, you can touch the screen to display the operation screen. For details on how to operate, refer to the Owner’s Manual of the connected DVD player. External DVD player display example [Key] The menu operation mode will be displayed. -
Page 64: About The Dvd Changer Operation Screen
About the DVD Changer Operation Screen About the DVB-T Operation Screen When the External DVD changer playback screen is displayed, you can When you touch the screen in the DVB-T mode, the operation screen is touch the screen to display the operation screen. For details on how to displayed. -
Page 65: About The Tv Operation Screen
About the TV Operation Screen When the TV playback screen is displayed, you can touch the screen to display the operation screen. For details on how to operate, refer to the Owner’s Manual of the connected TV. Touch [<<], [>>] ], [ Switches the Channel number / Preset channel / frequency down. -
Page 66: Camera Operation (Optional)
Camera Operation Switching the Image Pattern for the Rear Camera (Optional) If the camera has a view switch function, the Direct Change switch is displayed. When an optional camera is connected, the view video of camera can be Touch the screen when the image from the rear output to the monitor. -
Page 67: About The Rear Camera Guide
Distance guidance mark About the Rear Camera Guide The distance guides represent the ground level distance from the rear bumper. It is difficult to accurately estimate the distance to objects To display the guide, set “Guide Display ON/OFF Setting” (page 66) to above ground level. -
Page 68: Front Camera Operation
Error between the screen and the actual road surface When there is a steep downward slope behind the car (example) In the following conditions, errors are produced between the screen guidance and the actual road surface. (The illustrations represent a case <Screen>... -
Page 69: Switching The Image Pattern For The Front Camera
Switching the Image Pattern for the Front Camera Touch the screen when the image from the front camera is displayed. The operation screen is displayed on the screen. • After a 5-second time-out, the operation screen returns to the camera display screen. Touch [Panorama], [Corner] or [Top]. -
Page 70: Usb Memory (Optional)
Playback USB Memory (Optional) Press the (SOURCE) button. Touch [USB] of Top banner. The USB mode is activated and the display changes to the You can play back music files (MP3/WMA/AAC) and video files USB screen. ® (DivX ) stored in a USB memory device on the internal player of this system. -
Page 71: Random Play (M.i.x.)
Random Play (M.I.X.) Searching for a Desired Song Operation differs depending on whether the most recent song search IVE-W535ABT/IVE-W535EBT can carry out 2 kinds of searches. was a Tag Search or a Folder Search. Touch [ ] during playback. File/Folder Name Search The tracks (files) on the disc will be played back in a random sequence. -
Page 72: Direct Up/Down Function
Searching by artist name Select the Desired Folder (Folder up/ Touch [ (Search)] of Bottom banner during down) playback. Touch [Music]. This operation is available only if the most recent song search was a The search mode screen appears. Folder/File Search. If you listen to a file from a selected folder, the folder can be changed. -
Page 73: Ipod/Iphone (Optional)
461iV (sold separately). You can connect a video-capable iPod to enjoy video as well as music. When the IVE-W535ABT/IVE-W535EBT is connected by the above cable, the controls on the iPod are disabled. • Internet or telephone functions, etc., of the iPhone or iPod touch are not controllable from the unit, but these functions can be controlled using the iPhone or iPod touch itself. -
Page 74: Playback
All songs of the selected album are displayed. • If a song is playing on the iPod/iPhone when it is connected to the Touch the desired song’s name. IVE-W535ABT/IVE-W535EBT, it will continue playing after the The selected song is played back. connection. -
Page 75: Alphabet Skip Function
Alphabet Skip Function Search Position Memory The unit is provided with a alphabet skip function for effective During iPod/iPhone playback, you can quickly move back up the searching. When you use this function in the search mode, you can selected hierarchy, a level at time. quickly search an artist or a song, etc. -
Page 76: Product Software Update
* These functions differ from disc to disc. For details, refer to the disc’s This product use software that can be updated through a USB memory instructions. device. Download the software from the Alpine website and update the product using the USB memory device. Updating this product Check the Alpine website for details on updating. -
Page 77: List Of Language Codes
List of Language Codes (For details, see page 46.) Abbre viation Code Language Abbre viation Code Language Abbreviation Code Langua g e Af ar 7369 Inter lingue 8278 Kirundi 6565 6566 Abkhazian 7375 Inupiak 8279 Romanian 6570 Afr ikaans 7378 Indonesian 8285 Russian... -
Page 78: List Of Country Codes
List of Country Codes (For details, see page 47.) Country Abbreviation Code Country Abbreviation Code Country Abbreviation Code Andorra 6877 Dominica 7573 Kiribati 6568 6569 United Arab Emirates 6879 Dominican Republic 7577 Comoros 6570 Afghanistan 6890 Algeria 7578 Saint Kitts and Nevis 6571 Antigua and Barbuda 6967... - Page 79 Country Abbreviation Code Code Country Abbreviation Code Country Abbreviation 8069 Peru 8374 Svalbard and Jan Mayen 8487 Taiwan, Province of China 8070 French Polynesia 8375 Slovakia 8490 Tanzania, United Republic of 8071 Papua New Guinea 8376 Sierra Leone 8565 Ukraine 8072 Philippines 8377...
-
Page 80: In Case Of Difficulty
Otherwise, make sure the rest of your system is - Make sure the antenna is fully extended; if broken, replace the properly connected, or then consult your authorised Alpine dealer. antenna with a new one. -
Page 81: If This Message Appears
The system will reset. • The BLUETOOTH audio device was not connected correctly. • An access error to DVD drive occurred for some reasons. - Check the settings for IVE-W535ABT/IVE-W535EBT and the - The unit is rebooted automatically. BLUETOOTH audio device and reconnect. - Page 82 Unable to download phonebook. • Phonebook failed to read due to mobile phone disconnection, etc. - Check the mobile phone connection, and then conduct synchronising and adding again. (See page 58) • The connected mobile phone does not support synchronising of its phone book.
-
Page 83: Specifications
PICKUP Specifications Wave length DVD: 666 nm CD: 785 nm MONITOR SECTION Laser power CLASS II Screen Size 6.1" LCD Type Transparent type TN LCD BLUETOOTH SECTION Operation System TFT active matrix BLUETOOTH Specification Bluetooth V2.1+EDR Number of Picture Elements 1,152,000 pcs. (800 × 3 × 480) Output Power +4 dBm Max. -
Page 84: End User License Agreement (Microsoft)
INDEPENDENTLY DETERMINED HOW TO USE THE SOFTWARE terms are provided, then the terms of this EULA shall IN THE DEVICE, AND MS HAS RELIED UPON ALPINE TO apply, except that MS, Microsoft Corporation or affiliate CONDUCT SUFFICIENT TESTING TO DETERMINE THAT THE entity providing the Supplemental Component(s) shall be SOFTWARE IS SUITABLE FOR SUCH USE. - Page 85 DEVICE. Should you have any questions concerning this EULA, or if you desire to contact ALPINE for any other reason, please refer to the address provided in the documentation for the DEVICE.
-
Page 86: Installation And Connections
You may need an adaptor to connect other units. If VEHICLE OPERATION, SUCH AS THE STEERING WHEEL OR so, please contact your authorised Alpine dealer for assistance. SHIFT LEVER. • Be sure to connect the speaker (–) leads to the speaker (–) terminal. -
Page 87: Installation
(*1) already result in a loss of performance and possibly attached to the vehicle’s chassis. Connect all the damage. leads of the IVE-W535ABT/IVE-W535EBT according to details described in the CONNECTION section. Screw Hex Nut (M5) 0 -30°... - Page 88 Take the face plate off, and secure the ground lead of the unit to a clean metal spot using a screw (*) already attached to the car’s chassis. Attach the Original Mounting Bracket to each side of the IVE-W535ABT/IVE-W535EBT, using the screws supplied with IVE-W535ABT/IVE-W535EBT. Screws (M5 × 8) (Included) Ground Lead...
- Page 89 • The diagram and the fuse amperage shown above are in the case when IVE-W535ABT/IVE-W535EBT is used individually. • If the switched power (ignition) lead of the IVE-W535ABT/IVE-W535EBT is connected directly to the positive (+) post of the vehicle’s battery, the IVE-W535ABT/IVE-W535EBT draws some current (several hundred milliamperes) even when its switch is placed in the OFF position, and the battery may be discharged.
-
Page 90: Connections
Connections Antenna REMOTE OUT To remote input lead (Brown) REMOTE IN To remote output lead (Brown) (Green/White) SPEED SENSOR To the vehicle speed pause line CAMERA1 To Front/Rear camera CAMERA2 To Rear/Other camera CAMERA SW TOPVIEW Camera Switch connector* Microphone (Included) (Yellow) To Video Output terminal (Red) - Page 91 Connect to the plus side of the car’s reverse lamp. This Remote Control Input Lead (Brown) lamp illuminates when the transmission is shifted into Connect the external Alpine product to the remote control reverse (R). output lead. With this lead properly wired, the video picture...
- Page 92 System Example Connection of a USB Memory or NOKIA Phone Nokia Phone (Sold separately) USB connector Nokia Phone connection kit KCU-230NK (Sold separatery) USB extension cable USB Memory (Sold separately) (Included) • Do not leave USB memory, in a vehicle for a long time. Heat and humidity may damage the USB memory. Connection of an iPod/iPhone iPod/iPhone (Sold separately)
- Page 93 Connection of an External device Camera Connector AUX/PRE OUT Connector To Video Output terminal AUX/PRE OUT cable (Yellow) (Red) DVD Changer (Sold separately) (White) To Audio Output terminal To Video Input terminal (Yellow) (Red) Rear monitor (Sold separately) (White) To Audio Input terminal REMOTE IN REMOTE OUT (Brown)
- Page 94 Connection of a Mobile Digital TV Receiver/USB Player and DVD Changer To Video Output terminal DVD Player (sold separately) To Audio Output terminal DVE-5207, etc. Camera Connector iPod VIDEO input connector AUX/PRE OUT Connector AUX/PRE OUT cable To Video Output terminal To Video Input Terminal To Video Output terminal (Yellow)
- Page 95 Connection of an External Amplifier Power Supply Connector AUX/PRE OUT Connector AUX/PRE OUT cable Amplifier 4 ch (Sold separately) (Red) Input (White) Front speaker (Red) Input Rear speaker (White) Amplifier for subwoofer (Sold separately) (Red) Input Subwoofer (White) REMOTE TURN-ON REMOTE ON (Blue/White) (Blue/White)
- Page 96 Connection of cameras (Direct camera and AUX camera) Camera Connector CAMERA 1 Direct rearview camera (sold separately) HCE-C117D, etc. To Video Output terminal CAMERA 2 Camera with RCA video output (sold separately) Camera cable 1 Direct CAMERA Input Connector 3 CAMERA Input RCA Connector 2 Camera extension cable (Included with direct 4 RCA Extension Cable (sold separately) rearview camera)
- Page 97 Connection of cameras (HCE-C212F + HCE-C210RD or HCE-C200F + HCE-C200R) AUX/PRE OUT Connector AUX/PRE OUT Cable (Yellow) Control Unit (Red) To Video Output Terminal (White) REVERSE Camera Control Lead (Orange/White) (Orange/Black) To plus side of the back lamp signal lead of the car. 1 Video/Audio Input Connectors (AUX INPUT) 2 RCA Extension Cable (sold separately) •...
- Page 98 About the Rules of Bluetooth Electromagnetic Radiation Regulation Country Rules of Electromagnetic Radiation Regulation Thailand This telecommunication equipment conforms to NTC technical requirement.
Need help?
Do you have a question about the IVE-W535ABT and is the answer not in the manual?
Questions and answers