Table of Contents
Advertisement
Quick Links
IVA-C800E
Mobile Media Station
• OWNER'S MANUAL
Please read this manual to maximize your enjoy-
ment of the outstanding performance and feature
capabilities of the equipment, then retain the
manual for future reference.
• MODE D'EMPLOI
Veuillez lire ce mode d'emploi pour tirer pleinement
profit des excellentes performances et fonctions de
cet appareil, et le conservez-le pour toute référence
future.
•
!"
!"#$%&'()*+,-./"012
!"# $%&'(
!"
R
!"#$%&'
Advertisement
Table of Contents

Related Manuals for Alpine IVA-C800E


Summary of Contents for Alpine IVA-C800E
- Page 1 IVA-C800E Mobile Media Station • OWNER'S MANUAL Please read this manual to maximize your enjoy- ment of the outstanding performance and feature capabilities of the equipment, then retain the manual for future reference. • MODE D'EMPLOI Veuillez lire ce mode d'emploi pour tirer pleinement profit des excellentes performances et fonctions de cet appareil, et le conservez-le pour toute référence...
- Page 2 WARNING This symbol means important instruc- tions. Failure to heed them can result in serious injury or death. Ce symbole désigne des instructions importantes. Le non-respect de ces instructions peut entraîner de graves blessures, voire la mort. !"#$%&'()*+,-& !"#$%&'()*+, Precautions INSTALL THE PRODUCT CORRECTLY SO THAT THE DRIVER CANNOT WATCH TV/VIDEO UNLESS THE...
- Page 3 WARNING This symbol means important instruc- tions. Failure to heed them can result in serious injury or death. Ce symbole désigne des instructions importantes. Le non-respect de ces instructions peut entraîner de graves blessures, voire la mort. !"#$%&'()*+,-& !"#$%&'()*+, Precautions USE THIS PRODUCT FOR MOBILE 12V APPLICATIONS.
- Page 4 LEM APPEARS. Failure to do so may cause personal injury or damage to the product. Return it to your author- ized Alpine dealer or the nearest Alpine Service Centre for repairing. KEEP FINGERS AWAY WHILE THE MOTORIZED FRONT PANEL OR MOVING MONITOR IS IN MOTION.
- Page 5 This ensures the focus of the driver's attention will be on the road and not on the IVA-C800E. This has been done for the safety of the driver and passen- gers. Title Input and Audio Processor Adjustments cannot be made if the car is moving.
-
Page 6: Table Of Contents
Contents Page/ Page / 2/ 3 ... Precautions Basic Operation 20/ 21 ... Using Face Cover 20/ 21 ... Resetting the System 22/ 23 ... Raising the Monitor 24/ 25 ... Lowering the Monitor 26/ 27 ... Turning Power On or Off 28/ 29 ... - Page 7 Contents Cassette Player Operation (Optional) 82/ 83 ... Controlling Cassette Player 84/ 85 ... Fast Forward/Rewind/Reversing Tape 86/ 87 ... Programme Sensor 86/ 87 ... Repeat Play 88/ 89 ... Blank Skip DVD/Video CD/CD Player Operation (Optional) 90/ 91 ... Playing DVD/Video CD/CD 94/ 95 ...
-
Page 8: Fuse Replacement
Also have your vehicle's voltage regulator checked. Maintenance If you have problems, do not attempt to repair the unit yourself. Return it to your Alpine dealer or the nearest Alpine Service Station for servicing. Installation Location Make sure the IVA-C800E monitor/receiver will not be exposed to: •... -
Page 9: Basic Operation
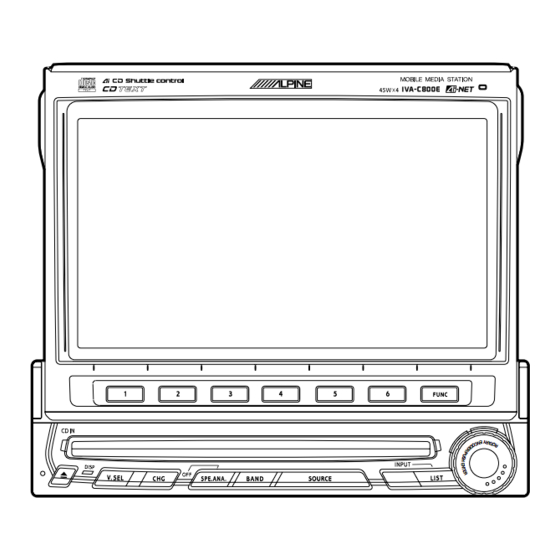
Radio Mode Screen/Ecran du mode radio/ Selected Source/ Source sélectionnée/ !"# Volume Level/ Niveau du volume/ The Function Guide displays the labels for each of the Function buttons. These labels will change depending upon the functions for the selected source./Le guide des fonctions indique les différentes fonctions des touches de fonction. -
Page 10: Raising The Monitor
Raising the Monitor Note: The IVA-C800E is a precision device. Press the OPEN/CLOSE button. The unit beeps 3 times and raises the monitor automatically. Notes: • In the monitor touches an obstacle Basic Operation With gentle handling, its unique capabili- ties can be enjoyed for a long time. -
Page 11: Lowering The Monitor
Basic Operation Lowering the Monitor Note: The IVA-C800E is a precision device. Press the OPEN/CLOSE button. The unit will beep 3 times and lower the monitor automatically. Note: If the monitor touches an obstacle while With gentle handling, its unique capabili- ties can be enjoyed for a long time. -
Page 12: Turning Power On Or Off
OPEN/CLOSE and buttons. Press the PWR (Power) button again to turn off the unit. Notes: • The IVA-C800E draws minimal current even when its power switch is turned off. If the switched power (ignition) lead of the IVA-C800E is connected directly to the positive (+) post of the vehicle's battery, the battery may be discharged. -
Page 13: Adjusting The Monitor Viewing Angle
Selecting the Monitor Opening Angle The monitor opening angle can be set in 2 positions. Press and hold the OPEN/CLOSE button for at least 2 seconds while the monitor is being raised. Each press changes the monitor angle back or forth. Adjusting the Monitor Viewing Angle Adjust the monitor's angle for better visibility. -
Page 14: Muting The Sound
Basic Operation Adjusting the Volume/ Bass/Treble/Balance/ Fader Press the rotary encoder repeatedly until the mode you wish to adjust is obtained. Each press changes the modes as follows: → BAS. → TRE. → BAL. → FAD. → VOL. The volume level can be adjusted at any time by just rotating the rotary encoder. - Page 15 Basic Operation Turning Loudness On or Loudness introduces a special low and high frequency emphasis at the lower volume settings. This compensates for the ear's decreased sensitivity to bass and treble sound at these low listening levels. Note: When an equalizer or digital sound processor is connected, this function is inoperative.
-
Page 16: Radio Operation
Manual Tuning Press the SOURCE button after turning on the power. The main menu screen appears. Rotate the rotary encoder to scroll the bottom menu and select "RADIO," then press the rotary encoder. The radio mode is activated and the display changes to the Radio Mode screen. -
Page 17: Automatic Seek Tuning
Automatic Seek Tuning There are two modes you can select for auto tuning, DX and Local: • DX (Distance) mode (with DX SEEK indicator • Local mode (with DX SEEK indicator OFF); The initial setting is DX. Press the BAND button repeatedly to select the desired radio band, FM or AM. -
Page 18: Manual Storing Of Station Presets
P.SET P.SET P.SET P.SET Manual Storing of Station Presets A total of 24 stations can be stored in the preset memory (6 stations for each band; FM1, FM2, AM or D.A.P.). Tune in a desired radio station you wish to store PAGE in the preset memory by manual or automatic seek tuning. - Page 19 Automatic Memory (A.MEMO) of Station Pre- sets The tuner can automatically seek and store 6 strong stations in the selected band in order of signal strength. Press the BAND button in the radio mode to select the desired radio band. Press the 6 (A.MEMO) button.
- Page 20 Storing into Direct Ac- cess Preset (D.A.P.) Band Any combination of AM and FM radio stations (up to 6 stations) can be manually preset onto the D.A.P. band. Press the 4 (D.A.P.) button in the radio mode D.A.P. to activate the D.A.P. mode. To memorize stations onto the D.A.P.
-
Page 21: Tuning To Preset Stations
P.SET P.SET Tuning to Preset Stations You can tune in the preset stations in memory on each band using the Function buttons. Press the BAND button in the radio mode to choose the desired radio band. Each press changes the radio bands. Note: To select the D.A.P. -
Page 22: Selecting Preset Stations
Radio Operation Selecting Preset Stations from List Displayed The desired preset station can be selected from the preset station list displayed. If stations have been titled (named), their titles will also be displayed. (For titling stations, see pages 156 and 158). Press the LIST button. - Page 23 T.R.V.S. Search for Local Stations Using the T.R.V.S. feature of this unit, you can automatically seek and memorize up to 12 local stations (max.) in a memory separate from your regular preset memory. This keeps the currently preset stations you normally listen to, intact. Press the BAND button and select the desired radio band.
-
Page 24: Playing Cd Player Or
CD Player/Changer (Optional) Operation Playing CD Player or Changer (Optional) IVA-C800E has a built-in CD player. When an optional Alpine CD player or CD changer is connected, you can control it from the IVA- C800E. This section describes operation assuming that an Alpine CD player is con- nected. - Page 25 CD Player/Changer (Optional) Operation Press the eject (c) button when you want to eject the CD. (If you use an optional CD player, press the eject button on the optional CD player.) Notes: • Three-inch (8cm) CD's can be used. •...
-
Page 26: Music Sensor Skip
CD Player/Changer (Optional) Operation Fast Forward and Backward Press and hold the 3 (f) or 1 (g) button to quickly move forward or backward respectively to reach the desired music section on the disc. Release the button when the desired section is reached. Music Sensor Skip This feature allows you to go to the beginning of a track. - Page 27 To cancel the repeat play, press the 4 (REPEAT) button until the REPEAT indication disappears. Note: Some Alpine CD changers have a REPEAT ALL function. With REPEAT ALL selected, all tracks on the selected disc will be played repeatedly.
-
Page 28: M.i.x. (Random) Play
CD Player/Changer (Optional) Operation M.I.X. (Random) Play In the M.I.X. mode, the tracks on the disc will be played back in a random sequence. Press the 5 (M.I.X.) button in the CD mode. M.I.X. All the tracks on the disc will be played back in a random sequence. -
Page 29: Displaying And Scrolling Cd Title/Text
CD Player/Changer (Optional) Operation Displaying and Scrolling CD Title/Text If titles have been memorized for CDs, the CD titles can be shown on the display (for titling CDs, see "Titling Radio Stations/CDs" on page 156). If a CD changer having the CD text feature is connected, the text for the CD titles/ tracks can be displayed and scrolled while you are playing a music CD with title/text. - Page 30 CD Player/Changer (Optional) Operation Displaying List of Track Titles/CD Titles If titles have been memorized for CDs, the CD title list can be displayed and CDs can be selected by their titles. (For memorizing titles, see pages 156 and 158.) Press the LIST button in the CD/CD changer mode.
- Page 31 CD Player/Changer (Optional) Operation Press the rotary encoder to execute the selection. The selected title plays, the title list screen closes, and the CD mode main screen or CD changer mode main screen appears. Notes: • If the disc is not titled, the display shows "NO TITLE."...
-
Page 32: Controlling Cd Changer
DISC DISC DISC Controlling CD Changer If an optional Alpine CD Changer (6-Disc or 12- Disc) is connected to the IVA-C800E, the CD Changer can be controlled from the IVA-C800E. You can directly select the CD Changer mode by pressing the CHG button on the IVA-C800E. - Page 33 When a 12-Disc CD Changer is connected PAGE You can select the disc numbers 1 to 6 in the same manner as for 6-disc Changer. Press the FUNC (PAGE 1/3) button twice to select the disc numbers 7 to 12. The Function Guide display changes and now the Function buttons 1-6 represent disc numbers 7-12.
-
Page 34: Multi-Changer Selection
CD Player/Changer (Optional) Operation Multi-Changer Selection Alpine's Ai-NET system will support up to 6 CD Changers. When operating two or more changers, the KCA-400C (Multi-Changer Switching device) must be used. If you use 1 Switching device, you can connect up to 4 CD Changers. -
Page 35: Playing Mini-Disc (Md)
MD Player Operation (Optional) Playing Mini-Disc (MD) When an optional Alpine MD player is con- nected to the IVA-C800E, you can control the player from the IVA-C800E. (When the MDA-5051 is connected, MDs can be played back only.) Press the SOURCE button. -
Page 36: Music Sensor (Skip)
Music Sensor (Skip) Momentarily press the 1 (g) button once to return to the beginning of the current track. If you wish to access a track further back, repeatedly press until you reach the desired track. Press the 3 (f) button once to advance to the beginning of the next track. -
Page 37: Repeat Play
MD Player Operation (Optional) Repeat Play Press the 4 (REPEAT) button to play back REPEAT repeatedly the track being played. The REPEAT indicator appears and the track plays repeatedly. Press the 4 (REPEAT) button repeatedly until the REPEAT indicator disappears to deactivate the repeat play. -
Page 38: Scrolling Displayed Titles
MD Player Operation (Optional) Scrolling Displayed Titles The MD player can scroll titles (disc or track names) having up to a maximum of 32 charac- ters. Press the 6 (SCROLL) button repeatedly while SCROLL an MD is being played. Each press toggles between the MD title scrolling and track title scrolling. -
Page 39: Displaying List For Md Titles
MD Player Operation (Optional) Displaying List for MD Titles Press the LIST button The list of the MD titles appears in the display. Rotate the rotary encoder to select the desired title by moving the cursor to that title. Press the rotary encoder to execute the selection. -
Page 40: Controlling Cassette Player
Operation (Optional) Controlling Cassette Player If an optional Alpine cassette player is con- nected to the IVA-C800E, it can be controlled from the IVA-C800E. Press the SOURCE button to display the main menu screen. Rotate the rotary encoder and select "TAPE"... - Page 41 Fast Forward/Rewind/ Reversing Tape Direction/Pause Press and hold the 3 (f) or 1 (g) button for at least 2 seconds to fast forward or fast rewind the tape respectively. When the tape reaches the desired portion, press and hold the 3 (f) or 1 (g) button again for at least 2 seconds, or press the 2 (:/J) button to resume tape play.
-
Page 42: Programme Sensor
REPEAT Cassette Player Operation (Optional) Programme Sensor Lightly press the 1 (g) button once during tape play to return to the beginning of the programme being currently played. If you wish to return to a programme further back, press repeatedly until the number of programmes you would like to skip is obtained. -
Page 43: Blank Skip
Blank Skip Press the 6 (B.SKIP) button during tape play B.SKIP to skip over blank portions of the tape lasting 15 seconds or longer. To deactivate the blank skip mode, press the 6 (B.SKIP) button for a second time. Cassette Player Operation (Optional) English... - Page 44 DVD/Video CD/ CD Player Operation (Optional) Playing DVD/Video CD/ If an optional Alpine DVD/video CD/CD player is connected to the IVA-C800E, you can control it from the IVA-C800E. WARNING It is dangerous (and illegal in many states) for the driver to watch the TV/Video while driving the vehicle.
- Page 45 DVD/Video CD/ CD Player Operation (Optional) Press the SOURCE button to display the main menu screen. Rotate the rotary encoder and select "DVD" from the menu. Then, press the rotary encoder to execute the selection. The display shows the DVD player mode screen.
- Page 46 DVD/Video CD/ CD Player Operation (Optional) Still/Pause Press the 2 (J/J:) button during DVD/video CD/CD play to freeze frame or pause. To resume normal play, press the 2 (J/J:) button for a second time. Chapter (DVD)/Track (Video CD) Sensor Lightly press the 1 (g) or 3 (f) button during DVD/video CD/CD play to return to the beginning of the chapter/track being currently played or advance to the beginning of the next...
-
Page 47: Fast Forward/Backward
REPEAT DVD/Video CD/ CD Player Operation (Optional) Fast Forward/Backward Press and hold the 1 (g) or 3 (f) button during play to fast backward or forward respectively. Release the button when you reach the desired portion you wish to play. Playback starts from that portion. - Page 48 DVD/Video CD/ CD Player Operation (Optional) Playing tracks in random order (M.I.X.)(Video CD/ You can play all the tracks in random order. You can use the M.I.X. function only on the connected DVD player equipped with the M.I.X. function. 1. Press the 5 (M.I.X.) button while playing the M.I.X.
-
Page 49: Operating Auxiliary Devices
The driver may be distracted from looking ahead and an accident could occur. Install the IVA-C800E correctly so that the driver cannot watch TV/Video unless the vehicle is stopped and the emergency brake is applied. If the IVA-C800E is not installed correctly, the... - Page 50 Audio Processor Operation (Optional) Selecting Factory (Maker's) Equalization Presets If an optional Alpine Equalizer is connected to the IVA-C800E, the Equalizer can be controlled from the IVA-C800E. Six equalization curves are preset on the Equalizer at the factory. Press the SOURCE button.
- Page 51 RETURN Audio Processor Operation (Optional) When you have selected your desired charac- teristic curve, press the FUNC (RETURN). The display returns to the Audio Processor List screen. Note: When the FUNC (RETURN) button is pressed, the display returns to the previous screen.
- Page 52 FLAT MALE RETURN RETURN Audio Processor Operation (Optional) Creating Personal Equal- izer Characteristic Curves You can create your own equalizer characteris- tic curves. The following is the procedure. Note: The Parking Brake must be engaged to Display the equalizer mode screen by pressing FEMALE POPS ROCK...
-
Page 53: Delay Time
STUDIUM LIVE RETURN RETURN Audio Processor Operation (Optional) Adjusting Surround Levels and Surround Delay Time If your equalizer connected is equipped with the surround level/time adjustment feature, you can adjust the surround sound levels and surround delay time to suit to your preference. Display the surround mode screen and press CHURCH DANCE... - Page 54 MODE 1 MODE 2 Enhances the rhythmic bass sound to make very harmonic bass sound. Beat MIX (MODE3) Balances the bass sound to make it brighter. Selecting DHE (Digital Harmonic Enhancer) Mode The DHE mode enhances the sound of musical instruments or vocals, while masking road noises of a moving vehicle.
- Page 55 RETURN Audio Processor Operation (Optional) When you have selected your desired DHE mode, press the FUNC (RETURN) button. The display returns to the Audio Processor List screen. Tip: When the FUNC (RETURN) button is pressed, the display returns to the previous screen.
- Page 56 MODE 1 MODE 2 RETURN Audio Processor Operation (Optional) Setting DHE Power or Fine Mode The DHE Power and Fine modes enhance the DHE effects. Power makes coarse adjustments to the overall balance whereas Fine will make more subtle changes. Listen how each mode affects the music and select the one most pleasing to your taste.
-
Page 57: Selecting Bbe Mode
A.PROC MODE 1 RETURN Audio Processor Operation (Optional) Selecting BBE Mode The BBE (Barcus Berry Electronics) Surround Processor is designed to return the natural balance of harmonic time alignment, which disappears when the sound signal is amplified and reproduced by loudspeakers. The result of this processing is crisp, clean sound with tighter transients and sharper imaging. - Page 58 MODE 1 RETURN RETURN Audio Processor Operation (Optional) Customizing BBE Mode This function is operative only when an audio processor equipped with the BBE level (Low and High) adjustment feature is connected. Activate the BBE mode, then press one of the MODE 2 MODE 3 Function buttons 2 (MODE1) through 4...
- Page 59 Selecting Listening Position You can select the listening position for optimum sound field depending on the number of passengers in the vehicle. Press the SOURCE button. The main menu screen appears on the display. Press the 4 (A.PROC) button. The Audio A.PROC Processor List screen appears.
- Page 60 Audio Processor Operation (Optional) Adjusting Listening Position Activate the L.P.S. mode and select the listening position you wish to adjust by referring to "Selecting Listening Position" section. Press and hold the FUNC (RETURN) button for RETURN at least 2 seconds. The display changes to the L.P.S.
- Page 61 Audio Processor Operation (Optional) Adjustment of Time Correction Value Press the SOURCE button. The main menu appears on the display. Press the 4 (A.PROC) button. A.PROC The Audio Processor List appears. Rotate the rotary encoder and select the "Time- Corr." (Time-Correction), then press the rotary encoder .
- Page 62 Audio Processor Operation (Optional) Rotate the rotary encoder clockwise or counterclockwise to increase or decrease the Time-Correction value respectively to your desired value. When adjustment has been completed, press RETURN the FUNC (RETURN) button. The display returns to the Time-Correction mode screen. Tip: When the FUNC (RETURN) button is pressed, the display returns to the previous screen.
- Page 63 Operation (Optional) Adjusting Cross-Over (X-Over) Point of 2-Way Divider If an optional Alpine Channel Divider PRA-H400 is connected, you can control the Divider from the IVA-C800E. Use this procedure when one or two 2-way- system or 3-way system channel dividers are connected.
- Page 64 Audio Processor Operation (Optional) Press the rotary encoder and select the channel that you wish to adjust. Each press changes the channel as follows. When only one 2-way divider is connected: When two 2-way dividers are connected: ↑ ↓ When only one 3-way divider is connected: →...
- Page 65 Audio Processor Operation (Optional) Adjusting Levels Press and hold the FUNC (RETURN) button for RETURN at least 2 seconds in the Divider mode. The mode changes to the Divider Adjustment mode. Press the 2 (LEVEL) button. The mode LEVEL changes to the Level Adjustment mode. Press the rotary encoder and select the channel you wish to adjust.
- Page 66 Audio Processor Operation (Optional) Rotate the rotary encoder clockwise or counterclockwise to adjust to your desired level upward or downward respectively. When adjustments have been completed, press RETURN the FUNC (RETURN) button. The display returns to the Divider mode. English...
- Page 67 Audio Processor Operation (Optional) Adjusting Time - Correction for 2-Way Speaker System Use this procedure to adjust the sound time difference between the speakers. Press and hold the FUNC (RETURN) button for RETURN at least 2 seconds in the Divider mode. The mode changes to the Divider Adjustment mode.
- Page 68 Audio Processor Operation (Optional) Rotate the rotary encoder clockwise or counterclockwise to adjust the time correction value upward or downward respectively. When adjustments have been completed, press RETURN the FUNC (RETURN) button. The display returns to the Divider mode screen. English...
- Page 69 P.SET P.SET Memorizing Divider Settings You can store your settings of the divider(s) in memory when you have adjusted them. After adjusting the divider(s), display the Divider P.SET P.SET P.SET mode screen. Press and hold any one of the Function buttons 1 (P.SET1) through 4 (P.SET4) for at least 2 seconds.
-
Page 70: Function Buttons
P.SET Recalling Memorized Divider Settings Using Function Buttons Display the Divider mode screen. P.SET P.SET P.SET Press the Function button 1 (P.SET1) through 4 (P.SET4) that has your desired divider settings. The divider setting stored at the Function button will be recalled. Tip: You can also recall your desired divider Audio Processor Operation (Optional) - Page 71 Audio Processor Operation (Optional) Recalling Divider Settings Memorized Using Optional Divider If an optional Alpine divider (such as PXA- H600/PXA-H510) is connected, you can recall the settings memorized using the optional divider. Press the SOURCE button. The main menu is displayed on the display.
- Page 72 P.SET P.SET P.SET P.SET Audio Processor Operation (Optional) Memorizing Characteris- tic Curves Equalization characteristic curves created by yourself or factory preset can be stored in memory. Select one of the factory preset characteristic curves or make your own (personal) character- istic curve.
- Page 73 P.SET P.SET Audio Processor Operation (Optional) Recalling Memorized Characteristic Curves Using Function Buttons Activate the desired mode, DHE, BBE, P.SET P.SET P.SET P.SET surround, time correction or equalizer, then press the Function button 1 (P.SET1) through 6 (P.SET6) that has your desired characteris- tic curve.
-
Page 74: Displaying Spectrum Analyzer
Other Useful Features Displaying Spectrum Analyzer When this unit is connected to an external audio processor and an external amplifier, or to an external audio processor without a spectrum analyzer function, this feature does not function. While the main screen for a music source is displayed, press the SPE.ANA. -
Page 75: Turning Defeat Mode On And Off
Other Useful Features Turning Defeat Mode On and Off When the defeat mode is on, the sound signals bypass the BBE and surround circuits and directly go to the line output. The equalizer curve, therefore, becomes flat. Press the SOURCE button. The main menu screen appears on the display. -
Page 76: Titling Radio Stations/Cds
Other Useful Features Titling Radio Stations/CDs You can title radio stations and CDs. This manual describes how to title radio stations. Immediately after inputting titles or changing the settings of Initialize Mode or Display Mode (while the system is inputting the titles or data automati- cally) do not turn the ignition key (engine key) to OFF. - Page 77 Other Useful Features When titling has been completed, press the 6 WRITE (WRITE) button to store the title in memory. The display changes to the Radio mode. To title other stations (or CDs), repeat this procedure. You can title up to 120 (max.) stations and CDs combined.
- Page 78 Other Useful Features Adjusting Subwoofer Level (when subwoofer is used with other speakers) Immediately after inputting titles or changing the settings of Initialize Mode or Display Mode (while the system is inputting the titles or data automatically) do not turn the ignition key (engine key) to OFF.
- Page 79 RETURN press the FUNC (RETURN) button. The display returns to the main menu. Notes: • For further information, please contact your Alpine dealer. • When you connect a subwoofer, you need an amplifier with built-in low- pass filter.* * The low-pass filter passes only the frequencies below the selected cut- off frequency.
-
Page 80: Switching Phase
Switching Phase Use the phase-switching function after connect- ing your audio-processor, amplifier and subwoofer to the IVA-C800E. Immediately after inputting titles or changing the settings of Initialize Mode or Display Mode (while the system is inputting the titles or data automatically) do not turn the ignition key (engine key) to OFF. - Page 81 Other Useful Features Setting the External De- vice Interrupt Mode If an Alpine Ai-NET Interrupt Box (NVE-K200) is connected to the IVA-C800E, an Auxiliary Source will be allowed to interrupt the current audio source. For example, use this function to have the sound of your TV interrupt CD or MD play when it occurs.
- Page 82 Other Useful Features Press the 1 (OFF) button to turn off the mute mode. In the mute OFF mode: Note: When the Mute On mode is selected, When your setting has been completed, press RETURN the FUNC (RETURN) button. The display returns to the main menu. Note: The Auxiliary device being connected, The volume level can be adjusted in the interrupt mode.
- Page 83 Other Useful Features Setting Interrupt Icon Display (IN-INT) The unit can display the icon of the external device such as a telephone whenever a phone call comes in to tell you there is a phone call. Immediately after inputting titles or changing the settings of Initialize Mode or Display Mode (while the system is inputting the titles or data automatically) do not turn the ignition key...
-
Page 84: Setting Bass Frequency
60Hz Setting Bass Frequency Immediately after inputting titles or changing the settings of Initialize Mode or Display Mode (while the system is inputting the titles or data automatically) do not turn the ignition key (engine key) to OFF. Otherwise, the title may not be written, or the settings may not be changed. -
Page 85: Setting Visual Modes
You can then display the screen of the preset item by just pressing the V. SEL button on the IVA-C800E. Immediately after inputting titles or changing the settings of Initialize Mode or Display Mode... -
Page 86: Selecting Rear Monitor
Selecting Rear Monitor If a rear-seat monitor is connected to the IVA- C800E, you can switch the picture/sound of the rear-seat monitor from the IVA-C800E. Immediately after inputting titles or changing the settings of Initialize Mode or Display Mode (while the system is inputting the titles or data automatically) do not turn the ignition key (engine key) to OFF. - Page 87 Other Useful Features • When the 1 (AUX1) button is pressed, the device connected to Terminal AUX 1 will be played on the rear-seat monitor and the monitor produces picture and sound. • When the 2 (AUX2) button is pressed, the device connected to Terminal AUX 2 will be played on the rear-seat monitor and the monitor produces picture and sound.
-
Page 88: Displaying Time
Other Useful Features Displaying Time Immediately after inputting titles or changing the settings of Initialize Mode or Display Mode (while the system is inputting the titles or data automatically) do not turn the ignition key (engine key) to OFF. Otherwise, the title may not be written, or the settings may not be changed. -
Page 89: Other Useful Features
Other Useful Features Resetting Clock Immediately after inputting titles or changing the settings of Initialize Mode or Display Mode (while the system is inputting the titles or data automatically) do not turn the ignition key (engine key) to OFF. Otherwise, the title may not be written, or the settings may not be changed. - Page 90 Other Useful Features Press the FUNC (RETURN) button after RETURN adjusting the clock. The display returns to the main menu screen. Note: To quickly set the time to the nearest hour, press the 5 (TIME RESET) button. If the displayed time is before the half hour, pressing the 5 (TIME RESET) button sets the clock back to the previous hour.
-
Page 91: Setting Daylight Saving Time
Other Useful Features Setting Daylight Saving Time Immediately after inputting titles or changing the settings of Initialize Mode or Display Mode (while the system is inputting the titles or data automatically) do not turn the ignition key (engine key) to OFF. Otherwise, the title may not be written, or the settings may not be changed. - Page 92 Other Useful Features Turning Sound Guide Function On or Off The Sound Guide function will give audible feedback with a beep sound when a button on the unit is pressed to acknowledge the receipt of the signal from the button. Immediately after inputting titles or changing the settings of Initialize Mode or Display Mode (while the system is inputting the titles or data...
- Page 93 Other Useful Features Demonstration In the Demonstration mode, the unit performs scanning of the basic operation of each source. Immediately after inputting titles or changing the settings of Initialize Mode or Display Mode (while the system is inputting the titles or data automatically) do not turn the ignition key (engine key) to OFF.
- Page 94 Other Useful Features Setting Automatic Open- ing/Closing of Monitor When the Automatic Opening/Closing mode is "ON," the monitor automatically opens when the ignition key is turned to the "ACC" or "ON" position. The monitor automatically closes when the ignition key is turned OFF. Immediately after inputting titles or changing the settings of Initialize Mode or Display Mode (while the system is inputting the titles or data...
- Page 95 DARK Other Useful Features Adjusting Brightness of Picture Immediately after inputting titles or changing the settings of Initialize Mode or Display Mode (while the system is inputting the titles or data automati- cally) do not turn the ignition key (engine key) to OFF.
-
Page 96: Adjusting Tint Of Picture
Other Useful Features Adjusting Tint of Picture Tint adjustment can be made only in the DVD, AUX1 and AUX2 modes. Immediately after inputting titles or changing the settings of Initialize Mode or Display Mode (while the system is inputting the titles or data automatically) do not turn the ignition key (engine key) to OFF. -
Page 97: Adjusting Colour Of Picture
THIN Other Useful Features Adjusting Colour of Picture Color adjustment can be made only in the DVD, AUX1 and AUX2 modes. Immediately after inputting titles or changing the settings of Initialize Mode or Display Mode (while the system is inputting the titles or data automatically) do not turn the ignition key (engine key) to OFF. -
Page 98: Illumination Control
Other Useful Features Illumination Control Setting the illumination control to AUTO, de- creases the illumination brightness of the IVA- C800E, whenever the parking lamps of the vehicle are ON. Use this function if you feel the unit’s illumination is too bright at night. Immediately after inputting titles or changing the settings of Initialize Mode or Display Mode (while the system is inputting the titles or data automatically) do... -
Page 99: Switching Background Textures/Colours
B.GND TEXTURE B.GND COLOR Other Useful Features Switching Background Textures/Colours You have a choice of 12 different background textures/colours preset at the factory. Select them following the procedure below. Immediately after inputting titles or changing the settings of Initialize Mode or Display Mode (while the system is inputting the titles or data automatically) do not turn the ignition key (engine key) to OFF. -
Page 100: Setting Automatic Background Texture
Other Useful Features Setting Automatic Background Texture/ Colour Scroll Turn on the Automatic Background Texture/ colour Scroll to automatically change back- ground texture/colours. The background texture/colour will change each time the ignition key is turned off and turned back on again (12 textures/colours). -
Page 101: Switching Display Modes
MODE1 MODE2 MODE3 MODE4 Other Useful Features Switching Display Modes Press and hold the DISP button for at least 2 seconds in the AUX mode. Each press changes the display modes as follows: → MODE 1 → MODE 2 → MODE 3 → MODE 4 (WIDE) (ZOOM) (CINEMA) (NORMAL) - Page 102 A.SEL Other Useful Features Playing 2 Sources Simultaneously You can listen to the audio portion of another source while watching the picture of current source, or you can watch the video portion of another source while listening to current source. Press the SOURCE button.
- Page 103 Other Useful Features Rotate the rotary encoder and select your desired audio source or video source, and press the rotary encoder to execute the selection. English...
- Page 104 Closing the cover Push the cover as illustrated until a click is heard. Remote Control (RUE-4185 supplied with IVA-C800E) the remote sensor on the IVA-C800E and use the remote control within 2 meters from the IVA-C800E. English...
- Page 105 5 Band/Programme Button 6 Volume Adjustment Buttons 7 8 Button Remote Control Operation (RUE-4185 supplied with IVA-C800E) Press the button to lower the volume by 20 dB instantly. Press the button again to cancel. Press the switch to turn the power on/off.
- Page 106 MUTE CD-CHG BAND PROG REMOTE CONTROL UNIT Remote Control (RUE-4185 supplied with IVA-C800E) 8 g Button VOLUME SOURCE A.PROC " RUE-4185 9 f Button ! 9 Button " Audio Processor Button # SOURCE Select Button Cassette Player Mode: Press this button to advance to the beginning of the next selection.
-
Page 107: In Case Of Difficulty
Symptom/Symptôme/ Screen not displayed./Aucun écran !" n'apparaît./ Movement of displayed picture is abnormal./ Le mouvement de l'image affichée n'est pas !"#$%&'( normal./ Unclear or noisy display./Affichage pas clair !"#$%& ou bruité./ Unclear picture display./Affichage pas clair !"#$ de l’image./ In Case of Difficulty Cause and Solution •... -
Page 108: Radio Mode
Symptom/Symptôme/ Unable to receive stations./Impossible de recevoir les stations./ Unable to tune stations in the seek mode./ Impossible d'accorder les stations en mode de recherche automatique./ Broadcast is noisy./Réception parasitée./ English/Français/ Radio Mode Cause and Solution • No antenna or open connection in cable. !"# •... - Page 109 Symptom/Symptôme/ CD playback sound is wavering./Le son de lecture de CD est déformé./`a= CD insertion not possible./Insertion de CD !=`a impossible./ Unable to fast forward or backward the CD./ Avance rapide ou inversion impossibles./`a !" # CD playback sound skips due to vibration./ Pertes de son dues à...
- Page 110 • No CD magazine is loaded into the CD Changer. — Insert a magazine. • Malfunction in the CD Changer. — Consult your Alpine dealer. Press the magazine eject button and pull out the magazine. Check the indication and insert the magazine again. If the magazine cannot be pulled out, consult your Alpine dealer.
- Page 111 • Aucun chargeur CD dans le changeur. — Insérez-en un. • Le changeur CD ne fonctionne pas. — Consultez votre revendeur Alpine. Appuyez sur la touche d'éjection du chargeur et sortez le chargeur. Vérifiez l'indication et insérez à nouveau le chargeur.
-
Page 112: Specifications
English/Français/ Screen Size/Taille de l'écran/ LCD Type/Type d'écran LCD/ Operation System/Système de fonctionnement/ Number of Picture Elements/Nombre d'éléments d'image/ Effective Number of Picture Elements/Nombre effectif d’éléments d’image/ Illumination System/Système d'éclairage/ Tuning Range/Plage d'accord/ Mono Usable Sensitivity/ Sensibilité utilisable mono/ 50 dB Quieting Sensitivity/Sensibilité à 50 dB/ !"... -
Page 113: Remote Control
English/Français/ Frequency Response/Réponse en fréquence/ Wow & Flutter (% WRMS)/Pleurage et scintillement (% efficace)/ =EBtojpF KKKKKKKKKKKKKKKKKKKKKKKKKKKKKKKKKKKKKKKKKKKKKKKKKKKKKKKKKKKKKKKKKKKKKKKKKKKKKKKKKKKKKKKKKKKKKKKK Below measurable limits Total Harmonic Distortion/Distorsion harmonique totale/ Dynamic Range/Plage dynamique/ Signal-to-Noise Ratio/Rapport signal sur bruit/ Channel Separation/Séparation de canaux/ Battery Type/Type de pile/ KKKKKKKKKKKKKKKKKKKKKKKKKKKKKKKKKKKKKKKKKKKKKKKKKKKKKKKKKKKKKKKKKKKKKKKKKKKKKKKKKKKKKKKKKKKKKKKKKKKKKKKKKKKKKKKKKK 56 mm (2-1/4") Width/Largeur/ KKKKKKKKKKKKKKKKKKKKKKKKKKKKKKKKKKKKKKKKKKKKKKKKKKKKKKKKKKKKKKKKKKKKKKKKKKKKKKKKKKKKKKKKKKKKKKKKKKKKKKKKKKKKKKKKK 14 mm (9/16") - Page 114 English/Français/ Width/Largeur/ KKKKKKKKKKKKKKKKKKKKKKKKKKKKKKKKKKKKKKKKKKKKKKKKKKKKKKKKKKKKKKKKKKKKKKKKKKKKKKKKKKKKKKKKKKKKKKKKKKKKKKKKKKKKKKKKKKKKKK 178 mm (7") Height/Hauteur/ KKKKKKKKKKKKKKKKKKKKKKKKKKKKKKKKKKKKKKKKKKKKKKKKKKKKKKKKKKKKKKKKKKKKKKKKKKKKKKKKKKKKKKKKKKKKKKKKKKKKKKKKKKKKKKKKKKKKKKK 50 mm (2") Depth/Profondeur/ KKKKKKKKKKKKKKKKKKKKKKKKKKKKKKKKKKKKKKKKKKKKKKKKKKKKKKKKKKKKKKKKKKKKKKKKKKKKKKKKKKKKKKKKKKKKKKKKKKKKKKKKKKK 259 mm (9-13/16") Width/Largeur/ Height/Hauteur/ KKKKKKKKKKKKKKKKKKKKKKKKKKKKKKKKKKKKKKKKKKKKKKKKKKKKKKKKKKKKKKKKKKKKKKKKKKKKKKKKKKKKKKKKKKKKKKKKKKKKKKKKKKKKK 37 mm (1-7/16") Depth/Profondeur/ CHASSIS SIZE (Monitor section) KKKKKKKKKKKKKKKKKKKKKKKKKKKKKKKKKKKKKKKKKKKKKKKKKKKKKKKKKKKKKKKKKKKKKKKKKKKKKKKKKKKKKKKKKKKKKKKKKKKKKKKK 156 mm (6-1/8") CHASSIS SIZE (Tuner section) KKKKKKKKKKKKKKKKKKKKKKKKKKKKKKKKKKKKKKKKKKKKKKKKKKKKKKKKKKKKKKKKKKKKKKKKKKKKKKKKKKKKKKKKKKKKKKKKK 177.5 mm (6-15/16") Notes: • Due to continuous product improve- * Under maximum operating voltage and input signal, into 4 ohms.
- Page 115 SERIAL NUMBER/NUMÉRO DE SÉRIE/ INSTALLATION DATE/DATE D'INSTALLATION/ INSTALLATION TECHNICIAN/INSTALLATEUR/ PLACE OF PURCHASE/LIEU D'ACHAT/ ALPINE ELECTRONICS OF AUSTRALIA PTY. LTD. Kreuzerkamp 7-11 40878 Ratingen, Germany Yamagata Printing Co., Ltd. 2-6-34, Takashima, Nishi-ku, Yokohama, Kanagawa, Japan !": ALPINE ELECTRONICS, INC. Tokyo office: 1-1-8 Nishi Gotanda, Shinagawa-ku, Tokyo 141-8501, Japan Tel.: (03) 3494-1101...
Need help?
Do you have a question about the IVA-C800E and is the answer not in the manual?
Questions and answers