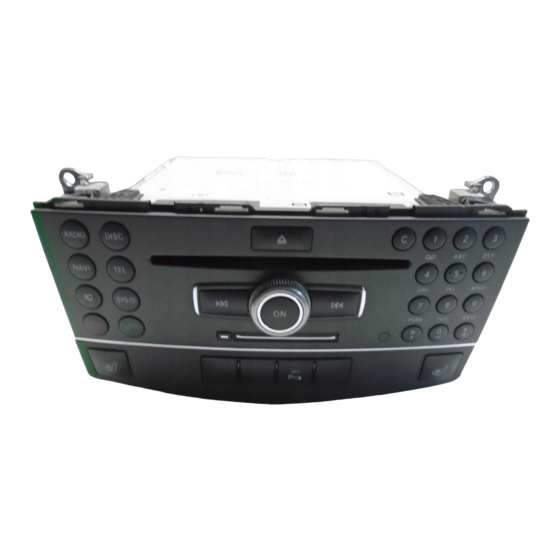
Mercedes-Benz COMAND control panel Operating Instructions Manual
Control panel
Hide thumbs
Also See for COMAND control panel:
- Operating instructions manual (298 pages) ,
- Operator's manual (271 pages) ,
- Supplement manual (190 pages)

Related Manuals for Mercedes-Benz COMAND control panel


Summary of Contents for Mercedes-Benz COMAND control panel
- Page 1 COMAND Operating Instructions É2045846482,ËÍ 2045846482 Order no. 6515 6923 13 Part no. 204 584 64 82 Edition A 2012...
- Page 2 Symbols Publication details Warning Internet Environmental note Further information on Mercedes-Benz Possible damage to the vehicle vehicles and Daimler AG can be found on the Internet at the following websites: Instruction http://www.mercedes-benz.com Continuation symbol http://www.daimler.com (Y page) Page reference Display...
- Page 3 Welcome to the world of Mercedes-Benz Before you drive off, familiarize yourself with your COMAND control panel and read this manual. This will help you to obtain the maximum use from your COMAND control panel and to avoid endangering yourself and others.
- Page 5 Contents Index ............4 At a glance ........... 13 Introduction ......... 10 System settings ........37 Navigation ........... 47 Telephone ..........97 Audio ..........117 Video ..........149 Rear Seat Entertainment ....157...
- Page 6 Index Devices ..........43 1, 2, 3 ... External authorization ....44, 101 911 emergency call ......99 General information ......42 Interface .......... 99 Revoking authorization ....44 Settings ........... 42 Active partition (USB devices only) Telephony ........99 Selecting ........
- Page 7 Components ........14 Selecting a track ......132 Switching on/off ......31 COMAND controller ......16 DVD menu ........154, 174 COMAND control panel ....... 15 DVD playback conditions ....151 COMAND display ......... 18 DVD-Video Cleaning instructions ....... 20 Picture settings ......
- Page 8 Index Showing geo-coordinates ....88 Showing road names ....... 88 Hands-free microphone Map information ........87 Switching on/off ......105 Map orientation ........86 ® ® Harman/kardon Logic 7 Map scale Surround Sound system ..... 33 Adjusting ......... 85 Home address ........80 Media Interface Entering and saving ......
- Page 9 Index MUSIC REGISTER Entering using the map ....65 Deleting all music files ....138 ® ZAGAT rating service ..... 64 Disk space information ....139 Point of interest icon Playback options ......139 Setting ..........87 Switching to ........137 Point of interest list ......
- Page 10 Index Route overview ........72 Sending DTMF tones ...... 105 Route type Single call ........105 Switching hands-free microphone Setting ..........50 on/off ..........105 Telephone basic menu ® Bluetooth interface ...... 103 Safety notes Telephone number Audio CD/DVD and MP3 Entering .........
- Page 11 Index Volume Adjusting ......... 31 Navigation announcements ..... 32 Phone calls ........32 Waveband Switching (radio) ......119 Yahoo Local Maps ® ......66 ® ZAGAT rating service ......64...
- Page 12 We recommend having any service work on cause undesired operation. electronic components carried out by an Any unauthorized modification to this authorized Mercedes-Benz Center. device could void the user's authority to operate the equipment. WARNING USA only: This device complies with Part In order to avoid distraction which could lead 15 of the FCC Rules.
- Page 13 Daimler recommends that you use an authorized Mercedes-Benz Center for this purpose. In particular, work relevant to safety or on safety-related systems must be carried out at a qualified specialist workshop.
-
Page 15: Table Of Contents
COMAND operating system ....14 Multifunction steering wheel ..... 21 Operating COMAND ......24 Basic functions of COMAND ....31 Rear view camera ....... 34... - Page 16 COMAND operating system COMAND operating system Components of COMAND COMAND consists of: Overview the COMAND display the COMAND control panel with DVD changer the COMAND controller with back and clear buttons You can use COMAND to operate the following main functions:...
- Page 17 COMAND operating system COMAND control panel Function Page Function Page Switches to radio mode Number keypad Switches wavebands • Selects stations via the station presets Switches on satellite radio mode • Stores stations manually • Telephone number entry Switches to audio CD/DVD •...
- Page 18 COMAND operating system Function Page Function Page Accepts a call Calls up the telephone basic menu (telephony via Dials a number ® Bluetooth interface) Redials Switches to navigation Rejects a call mode Ends an active call Shows the menu Calls up the system menu Mute Switches off navigation announcements...
- Page 19 COMAND operating system Back button Back button To exit the menu: press back button : briefly. COMAND changes to the next higher menu level in the current operating mode. You can also exit a menu by sliding the COMAND controller XVY or ZVÆ. To switch to the basic display: press and hold back button :.
- Page 20 COMAND operating system COMAND display Display overview The COMAND display shows the function currently selected and its associated menus. The COMAND display is divided into several areas. The radio display is shown in the example. Status bar To call up the audio menu Main function bar Display/selection window Radio menu bar...
-
Page 21: Comand Operating System
COMAND operating system Navi Audio Telephone Video System Map display FM/AM radio Telephone Video DVD Calls up the system menu Setting route SatRadio address book calculation mode Avoiding an area Disc Record route Memory card Traffic information on MUSIC REGISTER Information on map Media Interface... - Page 22 COMAND operating system Settings Language Resetting COMAND Delete your personal data using this function before selling your vehicle, for example. If the function is activated and COMAND is switched on, the image of the rear view camera is automatically shown in the COMAND display when reverse gear is engaged. Folding out the display Swiveling and folding in the COMAND display...
- Page 23 Multifunction steering wheel Multifunction steering wheel Function Page =; Calls up the menu bar in the multifunction display and selects menus 9: Selects submenus in the multifunction display or scrolls through lists a To confirm your selection Operating the multifunction display WARNING A driver's attention to the road must always Function...
- Page 24 Multifunction steering wheel To call up standard displays: repeatedly current street press the % button until the odometer the travel direction arrow and the trip meter appear in the display. If a change of direction is imminent, the display shows: Press and hold the % button until the the road you will be turning onto odometer and the trip meter appear in the...
-
Page 25: Multifunction Steering Wheel
Multifunction steering wheel Operating the telephone REGISTER page 137) or Media Int. page 141). Switch on COMAND ( page 31). In the multifunction display, select the Call up the telephone basic menu audio menu with the = or ; button. page 103). -
Page 26: Operating Comand
Operating COMAND The phone book entry appears in the Operating COMAND multifunction display when the call is Selecting a main function connected. Several phone numbers exist: press the Initial situation 6 or a button to display all the You would like to switch from navigation phone numbers for the selected entry. - Page 27 Operating COMAND Audio menu The # dot indicates the current audio mode. Calling up the menu of a main function Select another audio mode, e.g. Radio, by If one of the main navigation, audio, or turning cVd the COMAND controller and telephone functions is switched on, press W to confirm.
- Page 28 Operating COMAND Switching to radio mode Example of operation Option 1 Initial situation Press the ó function button. You would like to switch from the system The radio display appears. function to radio mode and set a station, for example. Repeatedly pressing this function button The operating example describes how to: switches between the FM, AM and WB...
- Page 29 Operating COMAND To set a station: turn cVd or slide XVY the COMAND controller while the display/ selection window is active. Entering characters in navigation mode (entering a city) General information Character entry is explained in the following sections using NEW YORK as an example for character entered by user...
- Page 30 Operating COMAND COMAND controller then press W and hold until the entire entry is deleted. Press and hold the 2 button next to the COMAND controller until the entire entry is deleted. To switch the character set: select B and press W to confirm. To cancel an entry: select the k symbol in the bottom left of the character Entering characters using the number...
- Page 31 Operating COMAND The example shows the selection list after the city NEW YORK has been entered. The entry is highlighted automatically. Phone book: input menu with data fields Selected data field with cursor Character bar Confirm NEW YORK with COMAND Creating a new entry in the address controller W.
- Page 32 Operating COMAND The character bar offers characters corresponding to the respective data field (letters or digits). Cursor in the next data field To store an entry 4 and 5 icons to select a data field To switch the character bar to upper- Option 2 case/lower-case letters Slide ZV the COMAND controller...
- Page 33 Basic functions of COMAND To reposition the cursor within the data source, or adjust the volume, sound field: select 2 or 3 and press W to automatically switches on again. confirm. You will still hear traffic announcements and navigation system announcements even if the sound is muted.
-
Page 34: Basic Functions Of Comand
Basic functions of COMAND Adjusting the volume for navigation Select Sound by sliding VÆ and turning announcements cVd the COMAND controller and press W to confirm. During a navigation announcement: You can now set the treble and bass or the Turn q the control knob. - Page 35 Basic functions of COMAND ® Logic7 function creates a surround sound experience for every passenger when playing, for example, stereo recordings. It enables optimum playback of music and films on CD, audio DVD or video DVD with multichannel audio formats, such as MLP, dts or Dolby Digital. This results in sound characteristics like those intended by the sound engineer when the original was recorded.
-
Page 36: Rear View Camera
Rear view camera Switching surround sound on/off the balance and fader settings should be set to the center of the vehicle interior. Example: switching on surround sound for You will achieve the best sound results by radio mode playing high-quality audio and video DVDs. Press the ó... - Page 37 Rear view camera Select Rear View Camera and press W to confirm. Select Activation by R gear and press W to confirm. The function is switched on O or off ª, depending on the previous status.
- Page 39 COMAND features ....... 38 Display settings ........38 Time settings ........38 Text reader settings ......40 Voice Control System settings ..40 ® Bluetooth settings ......42 Setting the system language ..... 45 Reset function ........45...
-
Page 40: Comand Features
Time settings night-time hours. You can customize the COMAND features design to suit your personal preferences by manually selecting day or night design or opt These Operating Instructions describe all for an automatic setting. standard and optional equipment available for your COMAND system at the time of Press the S button. - Page 41 Time settings Select Settings by turning cVd the If you set the time in 30-minute increments, any time zone settings and COMAND controller and press W to settings for changing between summer and confirm. standard time are lost ( page 39). Select Time by turning cVd the COMAND...
-
Page 42: Text Reader Settings
Voice Control System settings Time Off by turning cVd the COMAND controller and press W to confirm. The # dot indicates the current setting. Text reader settings Setting the read-aloud speed Press the S button. Select Settings by turning cVd the COMAND controller and press W to confirm. -
Page 43: Voice Control System Settings
Voice Control System settings Select Start New Individualization and press W to confirm. You see and hear a prompt asking whether you would like further information. Select and press W to confirm. If you select No, the first part of individualization begins. -
Page 44: Bluetooth ® Settings
® Bluetooth settings Activating/deactivating ® device has its own specific Bluetooth individualization name. ® Bluetooth must be activated in COMAND Press the S button. ® and on the respective Bluetooth device; Select Settings by turning cVd the see the separate operating instructions. COMAND controller and press W to the Bluetooth ®... - Page 45 ® Bluetooth settings www.mbusa-mobile.com. Or call the When subsequently called up again, the Mercedes-Benz Customer Assistance Center list may no longer show all devices, for at 1-800-FOR-MERCedes(1-800-367-6372) example because a device has been (for the USA) or Customer Relations at removed from the vehicle in the meantime.
- Page 46 The device is authorized. De-authorizing (de-registering) a ® Bluetooth device External authorization Mercedes-Benz USA, LLC recommends that If COMAND does not detect your you de-authorize devices, e.g. mobile phones, Bluetooth ® device, this may be due to both in COMAND and on the respective particular security settings on your ®...
-
Page 47: Setting The System Language
Reset function Select Reset and press W to confirm. Setting the system language A prompt appears asking whether you wish to reset. This function allows you to determine the language for the menu displays and the Select and press W to confirm. navigation announcements. - Page 49 COMAND features ....... 48 Introduction ......... 48 Basic settings ........50 Destination entry ........ 51 Entering a point of interest ....61 Search & Send ........66 Route guidance ........67 Traffic reports ........74 Destination memory ......80 Previous destinations ......83 Map operation and settings ....
-
Page 50: Comand Features
Introduction COMAND features regulations during your journey. Road and traffic rules and regulations always have These Operating Instructions describe all priority over the navigation commands standard and optional equipment available generated by the system. for your COMAND system at the time of purchase. - Page 51 Introduction fact that certain menu items are grayed out and cannot be selected. The following entries are not possible, for example: entering the destination city and street entering a destination via the map entering in the vicinity of a city or via a name search editing entries direct entry using the number keypad...
-
Page 52: Basic Settings
Basic settings Basic settings Route mode Setting route type and route options You can select the following route types: Short Route: COMAND calculates a route with the shortest possible (minimized) distance without taking traffic reports into consideration. Dynamic Route: same route type as Fast Route mode menu Route. - Page 53 Destination entry You can only enter those cities, streets, Destination entry zip codes etc. that are stored in the digital Introduction to destination entry map. This means that for some countries, you cannot enter zip codes, for example. WARNING For safety reasons, only enter a new Example: entering an address destination when the vehicle is stationary.
- Page 54 Destination entry Depending on the sequence in which you enter the address and on the data status of the digital map, some menu items may not be available at all or may not yet be available. Example: after you have entered the state/ province, the No., Center, Intersection, Save Start...
-
Page 55: Destination Entry
Destination entry Irrespective of the option, press W to confirm your selection. The address entry menu appears again. The street has now been entered. Entering the house number It is not possible to enter a house number until a street has been entered. Select in the address entry menu by turning cVd and sliding ZVÆ... - Page 56 Destination entry Option 1 – no route guidance active: route calculation starts. While route calculation is in progress, an arrow will indicate the direction to your destination. Below this, you will see a message, e.g. Calculating Fast Route..Once the route has been calculated, route guidance begins.
- Page 57 Destination entry cVd and sliding ZVÆ the COMAND controller and press W to confirm. Select Save as "My Address" and press W to confirm. COMAND stores your home address as Address in the destination memory. Option 2: proceed as described under "Option 1".
- Page 58 Destination entry address entry menu appears again. The ZIP code appears in place of the city's name. If COMAND cannot assign the ZIP code unambiguously to a specific address, the address entry menu also appears again. The ZIP code is automatically entered. You can now enter the street for a more precise location.
- Page 59 Destination entry guidance. This entry is always located at the top of the list in the destination memory. To switch on navigation mode: press the g function button. To show the menu: press W the COMAND controller. Select Destination in the navigation system menu bar by turning cVd the COMAND controller and pressing W to confirm.
- Page 60 Destination entry Character bar Currently selected character To cancel an entry Destination memory list Option 2: destination memory list as selection list "Last destinations" list Last destination Select the desired destination by turning cVd the COMAND controller and pressing W to confirm. The address entry menu appears again.
- Page 61 Destination entry Current vehicle position Select a destination by turning cVd the Crosshair COMAND controller and press W to confirm. Details of the crosshair position If the destination is within the limits of the Map scale selected digital map, COMAND attempts to assign Display = depends on the settings selected the destination to the map.
- Page 62 Destination entry recalculates the route to the main If COMAND does not find any destinations, destination. you will see a message to this effect. Confirm by pressing W. Entering predefined destinations Select a different category. To switch on navigation mode: press the Select the intermediate stop by turning g function button.
-
Page 63: Entering A Point Of Interest
Entering a point of interest Select Destination in the navigation Selection Step system menu bar by turning cVd the Select a From Last COMAND controller and press W to Destinations destination from confirm. the list of last Select From POIs and press W to confirm. - Page 64 Entering a point of interest Option 2 If you have entered only the state/province and the city, the system will return Enter an address in the address entry alphabetically sorted categories and points menu, e.g. a city, street and house number of interest within the city limits.
- Page 65 Entering a point of interest Option 2: select a category by turning cVd the COMAND controller. Irrespective of the option, press W to confirm your selection. The point of interest list appears. It contains the points of interest available in the sub-category that are within the search radius.
- Page 66 Entering a point of interest Point of interest Point of interest with address Compass heading to the point of interest To start route calculation Linear distance to the point of interest To store an address in the destination memory Selected category or sub-category To display details Depending on the point of interest To make a call (when available)
- Page 67 Entering a point of interest Point of interest list with character bar If you have selected "Entering a point of interest with name search" ( page 62), the list of all available points of interest on the digital map appears. If COMAND can assign the characters entered to one entry unambiguously, the address entry appears automatically.
-
Page 68: Search & Send
Search & Send Selecting and sending a destination address Observe the notes on entering and sending an address provided on the respective website. Each website operates in a different way and is subject to changes and amendments. Access the http://maps.google.com or http://maps.yahoo.com website and enter the destination address into the Point of interest on the map... - Page 69 The route guidance displays can only be seen sent. If you own several Mercedes-Benz if the display is switched to navigation mode. vehicles equipped with an mbrace If you do not follow the navigation...
- Page 70 Route guidance Announcement phase e.g. roads closed to through traffic and non- residents. COMAND announces the imminent change of roads that have time restrictions (e.g. direction. Based on the example display closed on Sundays and public holidays) are below, the change of direction is announced avoided for route guidance.
- Page 71 Route guidance right announcement is made 90 ft. before Lane recommendations the change of direction. The display is split Overview into two halves, as in the announcement phase. On multilane roads, COMAND can display lane recommendations for the next change of direction.
- Page 72 Route guidance Display and description of lane recommendations The colors used in the lane recommendation display vary depending on whether day or night design is switched on. Lane Day design Night design Recommended lane B Dark blue Light blue In this lane, you will be able to complete the next two changes of direction without changing lanes.
-
Page 73: Route Guidance
Route guidance Select Navi in the main function bar by Please always use this feature instead of sliding ZV and turning cVd the COMAND consulting the map display for directions. controller and press W to confirm. Consulting the symbols or map display for directions may cause you to divert your Select Audio Fadeout... - Page 74 Route guidance To delete the blocked section: select To switch on navigation mode: press the Delete while the message is shown and g function button. press W to confirm. To show the menu: press W the COMAND COMAND calculates the route without the controller.
- Page 75 Route guidance You have entered a destination ( page 51) various factors such as time of day, time of or a point of interest ( page 61) and possibly year and immediate weather conditions that an intermediate stop ( page 59). cannot be judged or taken into consideration by the COMAND system.
- Page 76 Traffic reports Off-road during route guidance announcement: "Please follow the arrow on the display". As the vehicle approaches the Due to roadworks, for example, there may be destination, the Area of destination differences between the data on the digital reached message appears.
- Page 77 Traffic reports To hide the menu: slide ZV the COMAND controller and, when the Full Screen menu item is shown, press W to confirm. The map can be seen in the full-screen display. Turn cVd the COMAND controller until the desired map scale is set.
- Page 78 Traffic reports Icon for real-time traffic reports Icon Description Traffic reports in the map display List of Traffic traffic reports reports Warning This appears at the beginning of the Entry type: Entry (red) affected route section if route warning type: guidance is active and the route leads warning through an affected area.
- Page 79 Traffic reports Icon Description Traffic reports in the map display List of Traffic traffic reports reports Green Unimpeded No delays (Not (Not line with traffic flow available) available) Only appears on the side of the road arrows (direction of travel) on which traffic flow is unimpeded Red line Warning...
- Page 80 Traffic reports Example: traffic report To show all reports: select Display All Messages by turning cVd the COMAND Depending on your selection: Read out controller and press W to confirm. all messages on route You see a list of all roads, areas and regions Messages for which traffic reports are available, even Report 8 of 16 for the road affected...
-
Page 81: Traffic Reports
Traffic reports Having traffic reports on the route read out Introduction The read-aloud function is only available while route guidance is active. It reads out traffic reports affecting the current route. You can set the language ( page 45) and the read- aloud speed ( page 40). - Page 82 Destination memory To show the menu: press W the COMAND page 51). Then, save the home address without starting route guidance controller. page 54). Select Navi by sliding ZV and turning cVd the COMAND controller and press Adopting an address book entry as a W to confirm.
-
Page 83: Destination Memory
Destination memory automatically highlighted in the selection My Address entry should be list. overwritten. If no home address has been stored yet, you Select and press W to confirm. can now assign an address book entry. If a If you select Yes, COMAND overwrites the home address already exists, it is displayed destination. - Page 84 Destination memory Select Dest. in the navigation system asking whether you wish to overwrite the menu bar by turning cVd the COMAND existing data. controller and pressing W to confirm. Select and press W to confirm. If you select Yes, the entry is overwritten. Select Save Destination and press W to...
-
Page 85: Previous Destinations
Previous destinations Select a category, e.g. Home, and press W Select Delete and press W to confirm. to confirm. A prompt appears asking whether you wish You will see the address book either with to delete the destination. the character bar or as a selection list. Select and press W to confirm. - Page 86 Map operation and settings Select Position in the navigation system Select Save Crosshair Position menu bar by turning cVd the COMAND press W to confirm. controller and press W to confirm. COMAND stores the crosshair position as a destination in the list of previous Select Save Vehicle Position and press...
-
Page 87: Map Operation And Settings
Map operation and settings Setting the map scale To hide the menu: slide ZV the COMAND controller and, when the Full Screen menu item is shown, press W. To call up the scale bar: as soon as you turn cVd the COMAND controller, scale bar = appears. - Page 88 Map operation and settings the COMAND controller and press W to Map display confirm. Setting the map orientation Select Vehicle Position Map and press W to confirm or, if the crosshair is shown, press the k back button. This hides the crosshair. Centering on the destination This function requires that a route to a Map orientation...
- Page 89 Map operation and settings Select Map Display and press W to Select Standard Symbols, Personal Symbols Symbols. confirm. If you select Personal Symbols, the list of A # dot indicates the current setting. points of interest appears. To switch the icon display on/off: select a point of interest by turning cVd the COMAND controller and press W to confirm.
- Page 90 Map operation and settings Road display Road display active Road names or numbers, e.g. for highways Select Arrival Time / Distance, Current Street, Geo-coordinates Geo-coordinate display None and press W to confirm. To exit the menu: slide XVY the COMAND controller.
- Page 91 Additional settings "None" menu option Road sections are illustrated with a yellow line and arrows =. Speed & Flow Road sections are illustrated with yellow or red car icons :. Yellow car icons: traffic jam, average speed 25 – 45 mph Red car icons: traffic jam, average speed 5 Display switched off –...
- Page 92 Additional settings To switch on navigation mode: press the To confirm the settings: press W. g function button. The list appears. The previously selected area to be avoided has been added and To show the menu: press W the COMAND activated.
-
Page 93: Additional Settings
Additional settings Select Display / Change and press W to Select Navi in the main function bar by sliding ZV and turning cVd the COMAND confirm. The area to be avoided is indicated in the controller and press W to confirm. map. - Page 94 Additional settings Select Off-road Route Memory Used Select Highway Information and press press W to confirm. W to confirm. The memory used is shown as a Depending on the previous state, switch percentage. The display closes the option on O or off ª. automatically after a few seconds.
- Page 95 Additional settings Select Position in the navigation system menu bar by sliding VÆ and turning cVd the COMAND controller and press W to confirm. Select Compass and press W to confirm. Provider's phone number (SIRIUS XM) Serial number of your service module for receiving traffic reports Registering for the SIRIUS XM traffic report service...
- Page 96 Mercedes-Benz Center. You can have the You cannot eject the DVD during the digital map updated at the center with a DVD, update. If you switch off COMAND during or you can update the map yourself.
-
Page 97: Problems With The Navigation System
Problems with the navigation system Problems with the navigation system Problem Possible causes/consequences and M Solutions COMAND is unable to Route guidance is canceled if you interrupt the journey for more continue route than two hours. guidance after the "Interrupting the journey" refers to stopping the vehicle and journey has been switching off COMAND. - Page 98 The navigation system will be operational again until it has to access the faulty area of the hard drive once more. The message will then reappear. Consult an authorized Mercedes-Benz Center. Problem Possible causes/consequences and M Solutions You see a message The DVD containing the digital map cannot be used for the update.
- Page 99 COMAND features ....... 98 General information ......98 Telephony via the Bluetooth ® inter- face ............99 Reception and transmission volume 103 Telephone operation ......104 Using the phone book ...... 106 Using call lists ........109 Using the address book ....112...
-
Page 100: Comand Features
-capable mobile A call may be disconnected if: phones to COMAND on the Internet http://www.mbusa-mobile.com. Or call there is insufficient network coverage in the Mercedes-Benz Customer Assistance certain areas. Center on you move from one transmitter/receiver 1-800-FOR-MERCedes(1-800-367-6372) for area (cell) into another and no channels are the USA or on 1-800-387-0100 for Canada. - Page 101 No Service message will appear phones with COMAND can be found on the for a short while. Internet at http://www.mbusa-mobile.com. Or call the Mercedes-Benz Customer Assistance 911 emergency call Center at 1-800-FOR-MERCedes(1-800-367-6372) WARNING (for the USA) or Customer Relations at The 911 emergency call system is a public 1-800-387-0100 (for Canada).
- Page 102 ® Telephony via the Bluetooth interface function (see the mobile phone operating COMAND controller and press W to instructions). confirm. ® Bluetooth device name Select Bluetooth Phones and press W to ® Every Bluetooth device has its own confirm. ® Bluetooth device name.
- Page 103 ® Telephony via the Bluetooth interface meantime. In this case, start a new search To confirm an entry in COMAND: press ® W the COMAND controller. to update the Bluetooth telephone list. Now enter the same passcode in the mobile Authorizing (registering) a mobile phone.
-
Page 104: Telephony Via The Bluetooth Face
De-registering (de-authorizing) a phones. mobile phone You can only switch to another authorized Mercedes-Benz USA, LLC recommends de- phone if you are not currently making a call. authorization on both COMAND and on the ® mobile phone. Subsequent authorization may Select the mobile phone in the Bluetooth otherwise fail. -
Page 105: Reception And Transmission Volume
Internet at Select or No. http://www.mbusa-mobile.com. Or call If you select Yes, the device will be deleted the Mercedes-Benz Customer Assistance ® from the Bluetooth telephones list. Center at If you select No, the process will be aborted. -
Page 106: Telephone Operation
Telephone operation Telephone operation Making a call Incoming call Entering a telephone number using the number keypad Rejecting or accepting a call Call up the telephone basic menu When there is an incoming call, you see a page 103). corresponding window in the display. Enter the digits using the number keypad. - Page 107 Telephone operation Connecting a call to an entry in a call list To switch off: select Mic Off and press or in the COMAND phone book W to confirm. If the microphone is switched off, the Open a call list and select an entry display shows the Q icon and the page 109).
- Page 108 Using the phone book characters in the character bar and press W to confirm. Press the corresponding key on the COMAND number keypad. Every character selected will be transmitted immediately. To send a phone book entry as a DTMF sequence: select Name by turning cVd the COMAND controller and press W to...
- Page 109 Using the phone book Changing the character set of the Select the characters of the entry you are character bar searching for one by one and press W to confirm. Select p and press W to confirm. When the selection is clear, COMAND The character set changes each time you switches automatically to the selection list.
-
Page 110: Using The Phone Book
Using the phone book To return to the phone book with Creating a new entry in the phone character bar: select Back in the list and book press W to confirm. Slide ZV the COMAND controller repeatedly in the phone book until the Press the k button. -
Page 111: Using Call Lists
Using call lists Select and press W to confirm. If you select Yes, a selection list will appear containing the five existing numbers. If you select No, the process will be aborted. Select the number to be overwritten by turning cVd the COMAND controller and press W to confirm. - Page 112 Using call lists Select Calls Received Calls Storing a new entry Dialed using cVd and press W to Introduction confirm. The corresponding list appears. For incoming calls from a person who is not in the address book, COMAND displays the phone number in the call list.
- Page 113 Using call lists Select Save and press W to confirm. Select Save. The search menu for address book entries An input menu with data fields is shown. appears. The data field for the telephone number is filled in automatically. Search for the desired entry. Proceed as described under "Searching for a phone book entry"...
-
Page 114: Using The Address Book
Using the address book Using the address book Introduction WARNING Please devote your attention first and foremost to the traffic situation you are in. Before your journey, please familiarize yourself with the address book functions. Only use the COMAND when road and traffic conditions permit you to do so. - Page 115 Using the address book Proceed as described under "Searching for Option 2: search for an address book entry a phone book entry" ( page 106). page 112). Select Options by sliding VY the COMAND controller, press W to confirm. Creating a new entry in the address Select Delete and press W to confirm.
- Page 116 Using the address book Option 2: call up the detailed view for an Calls up options address book entry ( page 113). · Icon for business details Select Options by sliding VY the Select a data field by turning cVd the COMAND controller and press W to COMAND controller.
- Page 117 Using the address book Option 1 Option 2 Display details for an address book entry Search for an address book entry page 113). page 112) with the ¤ symbol and select it from the list. Select the phone number data field by turning cVd the COMAND controller and Select Options...
- Page 118 Using the address book Deleting a voice tag Please bear the following in mind: ® Bluetooth must be activated. Search for an address book entry with a voice tag ( page 112). the external device must be able to send ®...
- Page 119 COMAND features ......118 Radio mode ........118 Satellite radio ........121 Audio CD/DVD and MP3 mode ..125 MUSIC REGISTER ......136 Media Interface mode ...... 140 Audio AUX mode ....... 146...
-
Page 120: Comand Features
Radio mode COMAND features These Operating Instructions describe all standard and optional equipment available for your COMAND system at the time of purchase. Country-specific deviations are possible. Please note that your COMAND system may not be equipped with all the features described. - Page 121 Radio mode turning cVd the COMAND controller and Switching wavebands press W to confirm. Option 1 You can switch the radio between the FM, AM Press W the COMAND controller when the and WB waveband. display/selection window is active. Press the ó function button repeatedly The station preset menu appears.
- Page 122 Radio mode manually in the preset memory will be lost. It Storing a station is possible that COMAND does not fill all Storing stations manually memory slots when storing. Option 1: press W the COMAND controller There are ten presets available for the FM and AM wavebands.
- Page 123 These reasons include environmental or topographical conditions as well as other issues beyond the control of Mercedes-Benz USA, LLC. Operation may also be impaired in certain locations (e.g. tunnels, parking garages as well as inside or next to buildings).
- Page 124 Satellite radio If the satellite receiver is not installed or is Registering satellite radio not installed correctly, the Device Switch on satellite radio mode Unavailable message will appear. page 122). The satellite radio main menu appears showing the weather channel. You cannot Switching on satellite radio mode select any other stations.
-
Page 125: Satellite Radio
Satellite radio Changing the category If the satellite receiver is not installed or is not installed correctly, the Device Satellite radio stations are sorted into various Unavailable message will appear. categories. You can choose between the different categories, such as news/talk shows, sports or country, if they are available. - Page 126 Satellite radio Memory functions Storing channels There are ten presets available. Press W the COMAND controller when the display/selection window is active. Select Presets in the submenu bar by turning cVd the COMAND controller and press W to confirm. In both cases, the channel presets appear. Entering channel numbers directly The R dot in front of a preset entry Option 1...
- Page 127 Audio CD/DVD and MP3 mode Displaying information Select Info in the submenu bar by turning cVd the COMAND controller and press W to confirm. Information on the currently received program is displayed. Provider's phone number (SIRIUS XM) or Call Service Provider SIRIUS ID of your satellite receiver To return to the satellite radio main menu: slide XVY the COMAND controller.
- Page 128 Audio CD/DVD and MP3 mode To insert a CD/DVD into the magazine all maintenance work must be carried out by tray: press the 8 load/eject button. qualified aftersales technicians. A menu shows the current load status of the magazine trays. The last tray selected WARNING is identified by a red digit.
- Page 129 Audio CD/DVD and MP3 mode The DVD changer loads the disc into the insert more than one disc into a magazine selected magazine tray. The message tray at a time. Loading Disc <x>... appears. Insert a disc into the disc slot with the printed side facing upwards.
- Page 130 Audio CD/DVD and MP3 mode Confirm Eject All by pressing W. Disc name (only if stored on the disc) The DVD changer ejects the last disc Current disc selected. The message Ejecting Disc Select a magazine tray containing a disc by <x>...
- Page 131 Audio CD/DVD and MP3 mode Inserting a PCMCIA memory card Activating audio CD/DVD or MP3 mode Option 1 Insert a CD/DVD ( page 126) or a PCMCIA memory card ( page 129). COMAND loads the medium inserted and starts to play it. Option 2 Press the e function button.
- Page 132 Audio CD/DVD and MP3 mode Example display: audio CD mode CD or DVD inserted Track name (only if stored on the disc as CD text) Track time Graphic time and track display Current playback settings (no symbol for "Normal track sequence") Sound settings Media selection Disc name (only if stored on the disc)
- Page 133 Audio CD/DVD and MP3 mode To stop playback: while playback is Pause function interrupted, select É again and press In audio CD/DVD and MP3 mode W to confirm. To pause playback: briefly press the B button. Select É and confirm by pressing W The , symbol appears at the top left in twice in rapid succession.
- Page 134 Audio CD/DVD and MP3 mode Selecting by track list Media list In audio CD/DVD mode, select Track Magazine trays, positions 1 to 6: readable List by sliding VÆ and turning cVd the data media are audio CDs, MP3 CDs or MP3 COMAND controller and press W to DVDs, audio DVDs and video DVDs.
- Page 135 Audio CD/DVD and MP3 mode Gracenote Media Database Introduction This function is only available in audio CD mode. There is a version of the software from ® Gracenote , Emeryville, California, USA on the hard disk. You will recognize this by the logo which can be seen in the bottom right- hand corner of certain audio displays.
- Page 136 Normal Track Sequence Information about new versions can be The tracks are played in the normal order obtained from an authorized Mercedes-Benz (e.g. track 1, 2, 3, etc.). Center. In MP3 mode, the track order is determined...
-
Page 137: Audio Cd/Dvd And Mp3 Mode
Audio CD/DVD and MP3 mode File structure of a data carrier To select options: switch on audio CD/ DVD or MP3 mode ( page 129). When you create a disc with compressed Select CD, DVD-A by sliding VÆ and music files, the tracks can be organized in turning cVd the COMAND controller and folders. - Page 138 CD standard and location. An error in COMAND might result therefore may not be able to be played by in the loss of the music files stored in the COMAND. MUSIC REGISTER. Mercedes-Benz is not liable for any loss of data.
-
Page 139: Music Register
MUSIC REGISTER Switching to MUSIC REGISTER Option 1 Press the e function button. This switches to the last disc mode selected (audio CD/DVD / video DVD/ MP3). COMAND will access all discs in the DVD changer, the memory card, the MUSIC REGISTER or the Media Interface. - Page 140 MUSIC REGISTER Step 3: Beginning the import Select Start by turning cVd the COMAND controller and press W to confirm. Information about the import source and target as well as the progress is displayed. To record all music files (standard) To record individual tracks O To confirm your selection If you do not select any tracks, every track on...
- Page 141 MUSIC REGISTER To switch to the superordinate folder: Calling up disk space information select the Ò icon and press W to Select Music Register by sliding VÆ and confirm. turning cVd the COMAND controller and The display changes to the next folder up. press W to confirm.
- Page 142 COMAND via the Media Interface: to direct sunlight or very low outside iPod ® temperatures (see the operating USB devices (USB sticks, USB hard drives) instructions of the respective device). Mercedes-Benz USA, LLC accepts no liability for damage to external devices.
-
Page 143: Media Interface Mode
COMAND controller and press power. W to confirm. the Media Interface connection is faulty. The audio menu appears. Consult an authorized Mercedes-Benz Select Media Interface and press W to Center if required. confirm. - Page 144 Media Interface mode Option 3 Selecting by skipping to a track Press number button E. To skip forwards or back to a track: turn cVd the COMAND controller when the This selects the connected external audio device directly. display/selection window is active. Press the E or F button.
- Page 145 Media Interface mode controller until the desired position has categories instead of Random folder as a been reached. playback option. For USB mass storage devices, you can choose to display the metadata contained in Press and hold the F or E button the tags of the encoded music data, or to until the desired position is reached.
- Page 146 Media Interface mode Select the category/folder by turning Playing back the content of a category cVd the COMAND controller and press or folder W to confirm. Select the category or folder by turning You will see the content of the selected cVd the COMAND controller.
- Page 147 Media Interface mode USB mass storage device Normal track sequence: you hear the tracks in their normal order (e.g. numerical This function is available for alphabetically or alphabetical). sorted directories. This function is not Random tracks available for albums or playlists, for example. All the tracks on the medium are played in In a directory, press the corresponding random order.
-
Page 148: Audio Aux Mode
Audio AUX mode shown in a separate category in addition to source is connected and playback the folders. Initialization of larger USB mass selected. storage devices containing a large number of files may take several minutes. DRM (Digital Rights Management) protected files are not supported by the Media Interface. - Page 149 Audio AUX mode Select Standard Boost and press W to confirm. Standard: the volume of the external audio source is adjusted to a standard value. Boost: the volume of the external audio source is raised by approximately 10 dB.
- Page 151 COMAND features ......150 General information ......150 Basic settings ........150 Video DVD mode ....... 150...
- Page 152 Video DVD mode Changing the picture format COMAND features Press W the COMAND controller to show These Operating Instructions describe all the menu. standard and optional equipment available Select DVD-V by sliding VÆ and turning for your COMAND system at the time of cVd the COMAND controller and press purchase.
- Page 153 Notes about discs factory. This setting can be changed at an Playback problems may occur when playing authorized Mercedes-Benz Center. This will copied discs. There are a large variety of allow you to play video DVDs with a discs, DVD authoring software, writing different region code, provided that they software and writers available.
- Page 154 Video DVD mode If not, you can switch on video DVD mode Showing/hiding the menu as follows: This function is not available while the DVD's Select Media by sliding VÆ and turning own menu ( page 154) is being displayed. cVd the COMAND controller and press To show: press W the COMAND W to confirm.
- Page 155 Video DVD mode Selecting a video DVD Stop function Press W the COMAND controller to show Press W the COMAND controller to show the menu. the menu. Select Media by sliding VÆ and turning To interrupt playback: select É by cVd the COMAND controller and press turning cVd the COMAND controller and press W to confirm.
- Page 156 Video DVD mode It may also be possible to select the scene/ DVD menu chapter from within the menu stored on the Calling up the DVD menu DVD. To skip forwards or back: turn cVd or The DVD menu is the menu stored on the DVD itself.
- Page 157 Video DVD mode Make a selection from the further options, Select the Back (to movie) menu item in if necessary. the menu and press W to confirm. COMAND then switches back to the DVD menu. Setting the language and audio Depending on the DVD, the menu items: format Back (to...
- Page 158 Video DVD mode Select DVD Functions and press W to confirm. Select Subtitles Camera Angle press W to confirm. In both cases, a menu appears. The # dot in front of an entry indicates the current setting. Select a setting by turning cVd the COMAND controller and press W to confirm.
- Page 159 COMAND features ......158 General information ......158 Basic functions ......... 164 System settings ........ 166 Audio CD/DVD and MP3 mode ..167 Video DVD mode ....... 172 AUX mode .......... 176...
-
Page 160: Comand Features
General information COMAND features WARNING Due to a potential choking hazard, wired These Operating Instructions describe all headset usage by children should only occur standard and optional equipment available with adult supervision. for your COMAND system at the time of purchase. - Page 161 General information Rear-compartment screens Socket for corded headphones AUX jacks Display Infrared receiver diodes...
- Page 162 General information Selecting the screen for the remote Remote control control Overview You can use the remote control to operate one of the two rear screens at a time. To do so, you must switch the remote control to the desired screen.
- Page 163 General information Switching the sound on/off (corded headphones only) Press button B on the remote control. The sound is switched on/off. Selecting a menu/menu item and confirming your selection Select a menu/menu item using the =;9: buttons and press the 9 button to confirm. CD/DVD drive and AUX jacks CD/DVD slot AUX, right-hand (R) jack for audio signal...
- Page 164 General information Cordless headphones Overview Volume control To select a screen for the headphones Battery compartment cover To switch the cordless headphones on/off Indicator lamp with various displays ( page 162) Open both sides of the headphones and adjust the fit of the headphones by pulling the headphone band in the direction of the arrow.
- Page 165 General information Changing batteries Display Status Batteries are required for the remote control Green The headphones are switched and for the two sets of cordless headphones. on and the batteries are fully charged. WARNING Keep the batteries out of the reach of The headphones are switched children.
-
Page 166: Basic Functions
Basic functions As you do so, hold the left-hand side of the Retaining lugs headphones as shown to prevent the Batteries batteries from falling out. The remote control contains 2 type AAA, Remove the discharged batteries from the 1.5 V batteries. tray. - Page 167 Basic functions To set using COMAND: press, for calling up the DVD menu and navigating example, the e function button to switch within it on an audio mode. setting the language, subtitles and camera angle Select Audio by sliding ZV the COMAND controller and press W to confirm.
-
Page 168: System Settings
System settings In both cases, select DVD-Video using the :=; buttons and press the 9 button to confirm. Select Brightness, Contrast Color using the 9: buttons and press the 9 button to confirm. An adjustment scale appears. Select a setting using the 9: buttons and press the 9 button to confirm. -
Page 169: Audio Cd/Dvd And Mp3 Mode
Audio CD/DVD and MP3 mode Setting the brightness General information You will find information on the following Select Settings using the : button topics in the Audio section: and press the 9 button to confirm. Select Brightness using the 9: notes on CDs/DVDs ( page 136) buttons and press the 9 button to confirm. - Page 170 Audio CD/DVD and MP3 mode The CD/DVD drive plays the disc: if it has been inserted correctly and is a permissible disc, and after you have switched on disc mode (audio CD/DVD/MP3 mode) Data on an MP3 CD first needs to be loaded by the drive.
- Page 171 Audio CD/DVD and MP3 mode Sets the treble Selecting a track Calls up the track list Selecting by skipping to a track Stop function To skip forwards or backwards to a Pause function track: press the = or ; button on Playback options the remote control.
- Page 172 Audio CD/DVD and MP3 mode Making a selection by entering the track number directly Press the h button on the remote control. The track entry display appears. Example: track 2 Press the · number button. Example: track 12 Press the corresponding number keys in Folder selection symbol rapid succession.
- Page 173 Audio CD/DVD and MP3 mode To pause playback: select Ë using Select an audio format using the 9: buttons and press the 9 button the :=; buttons on the remote to confirm. control and press the 9 button to confirm. The Ë...
- Page 174 Video DVD mode Select Display track information Switching to video DVD mode using the 9: buttons and press the Insert a video DVD. 9 button to confirm. The Rear Seat Entertainment System loads The function is switched on O or off ª, the disc.
-
Page 175: Video Dvd Mode
Video DVD mode Track time Pause function Shows the menu To show the menu: press the 9 button on the remote control. Showing/hiding the menu Select Menu while the navigation menu is To show: press the 9 button on the shown and press the 9 button to confirm. - Page 176 Video DVD mode Option 1 Selecting a scene/chapter Press the 9 button on the remote control Note and show the menu. Further information on this function is Select DVD-V and press the 9 button on available in the "Video" section the remote control to confirm.
- Page 177 Video DVD mode Stopping a film or skipping to the Select DVD functions and press the 9 beginning or end of a scene button to confirm. Select Menu and press the 9 button to Select any menu item from the DVD menu. confirm.
-
Page 178: Aux Mode
AUX mode possible that the settings may also be Interactive content accessed from the DVD menu. DVDs can also contain interactive content Press the 9 button on the remote control (e.g. a video game). In a video game, you may and show the menu. - Page 179 AUX mode Insert the video plug into the V jack. Select Source from the AUX menu and press the 9 button to confirm. Select Display Aux and press the 9 Activating AUX mode button to confirm. You will see and hear the content of the AUX drive video source if it is switched to playback.
- Page 180 AUX mode Select Brightness, Contrast Color and press the 9 button to confirm. An adjustment scale appears. Select a setting using the 9 or : button and press the 9 button to confirm. Changing the picture format Select Source in the AUX menu and press the 9 button on the remote control to In the status bar at the top, you will see the confirm.
Need help?
Do you have a question about the COMAND control panel and is the answer not in the manual?
Questions and answers