Table of Contents
Advertisement
Instruction booklet
GB
English
AQUALTIS
AQC9 4F7
!
This symbol reminds you to read this instruction manual.
!
Keep this instruction booklet on hand in order to refer to it when
necessary. Take it with you when you move, and, should you sell this
appliance or pass it on to another party, make sure that this booklet
is supplied along with the dryer so that the new owner may be infor-
med about warnings and suggestions on how the dryer works.
!
Read these instructions carefully; the following pages contain impor-
tant information on installation and suggestions on how the appliance
works
Contents
Installation, 4
Open the door
The Display, 6
Start and Programmes, 7-12
Table of Programmes
Laundry, 13-14
Special clothing items
Environment
Troubleshooting, 17
Service, 18
Disposal
TUMBLE DRYER
1
GB
Advertisement
Table of Contents

Related Manuals for Hotpoint AQUALTIS AQC9 4F7


Summary of Contents for Hotpoint AQUALTIS AQC9 4F7
-
Page 1: Table Of Contents
Troubleshooting, 17 Read these instructions carefully; the following pages contain impor- tant information on installation and suggestions on how the appliance Service, 18 works Spare parts Disposal Hotpoint Guarantee, 19 Hotpoint After Sales Service, 20... -
Page 2: Important Information
Important Information Failure to clean the filter after every drying cycle will For your Condenser dryer to operate efficiently, affect the drying performance of your machine – It you must follow the regular maintenance schedule will take longer to dry and as a result will use more shown below: electricity during drying. - Page 3 This is the test cycle in accordance with Regulation 392/2012. Assemble the two parts. See our website for all product fiche data: http://www.hotpoint.eu/hotpoint/. *Consumption per year is based on 160 drying cycles of the standard cotton programme at full and partial looad, and the consumption of the low-power modes.
-
Page 4: Installation
Installation Where to put your dryer The power cord must not be bent or squashed. • Place your dryer at a distance The power cord is supplied fitted with a BS1363 plug and with from gas ranges, stoves, heaters, a 13 amp BS1362 fuse. If it is necessary to fit a replacement or cooktops because flames can fuse, it must be a 13 Amp ASTA approved to BS1362 type. -
Page 5: Dryer Description
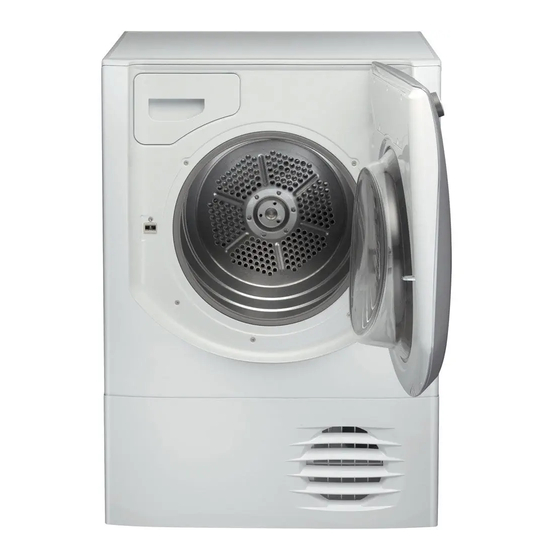
Dryer Description The Features To open door Rating Plate Model Pull on handle & Serial Numbers Water container Filter Heat Pump Filter Unit Air Intake (cover open) Grille Heat Pump Filter Unit cover handle (Pull here to open) Ajustable feet (to level dryer) Control Panel Start/Pause... -
Page 6: The Display
The Display The Display has three sections each with its corresponding button. Sensor Dry After selecting a programme that has a Sensor Dry Option, press and release the button until the required dryness sensing level is displayed. If the sensing option is not available the display will flash and the buzzer beeps three times. -
Page 7: Start And Programmes
Start and Programmes Choosing a Programme START in order to resume drying. If you open the door to check your laundry you will extend the 1. Plug the dryer into the electrical socket. drying time as the heat pump compressor will not start until 5 2. - Page 8 Special Programmes Shirts High Heat option • This is a programme for Shirts made from Cotton. • It can be used for load sizes up to 3 kg (approximately 12 shirts). • Loads dried using this programme are usually ready to wear; the edges or seams may be slightly damp. If this is found try turning the shirts inside out and running the programme again for a short period.
- Page 9 Refresh Thanks to a cool air flow, oxygen penetrates the fibers and transports unpleasant odors such as cigarette smoke, frying, smog out of the clothes. With this short program, you can easily refresh your garments in just 20 minutes. ! Airing is not a drying programme and should not be used for wet articles of clothing. •...
-
Page 10: Programmes Table
Programmes Table If the On/Off light is not lit; Press the On/Off Button and then select programme. Programme What it does How to set it Notes / Options available Brief programme (approxima- ! This is not a drying programme (see previous page). 1. - Page 11 Programme What it does How to set it Notes / Options available Dries your dark clothes. Sound . Delay Start 1. Position the PROGRAMME knob on Sensor Dry option, automatic drying: 2. Select any Options if required. Damp dry , Iron dry , Hanger Plus , Hanger 3.
-
Page 12: The Controls
The Controls • Empty Water Clean Filter Light “h2o” • Programme knob (If you have plumbed your dryer to a drain the light can be Warning, if after pressing the start button the programme ignored for the water bottle, as there is no need to empty the knob position is changed, the new position will NOT change water container). -
Page 13: Laundry
Laundry Sorting your laundry Wash care labels • Check symbols on clothing labels to make sure that the Look at the labels on your garments, especially when tumble articles can be tumble dried. drying for the first time. The following symbols are the most •... -
Page 14: Drying Times
Special clothing items • Dryness: if you are going to iron some of your clothes, they can be taken out while still a bit damp. Others can be left longer if you need them to be completely dry. Blankets and bedspreads: acrylic items (Acilian, Courtelle, Orion, Dralon) must be dried with special care on a low heat •... -
Page 15: Warnings And Suggestions
Warnings and Suggestions To minimise the risk of fire in your tumble dryer, the This appliance has been designed and built according to following should be observed: international safety standards. These warnings are given for safety reasons and must be followed carefully. •... -
Page 16: Maintenance And Care
Maintenance and Care Switching off the electricity Always check and empty the container before you start a new drying programme. Unplug the dryer when not using it, when cleaning it, and Cleaning the Heat Pump Filter Unit during maintenance activities. •... -
Page 17: Troubleshooting
Troubleshooting One day your dryer seems not to be working. Before you call your Service Centre (see Service), go through the following troublesho- oting suggestions. Problem: Possible causes / Solutions: The dryer won’t start. • The plug is not plugged into the socket, or not making contact. •... -
Page 18: Service
Service Heat Pump System What to tell the Service Centre: This dryer is fitted with a sealed heat pump system to dry • Name, address, and post code; your clothes. To operate, the heat pump contains fluorinated • telephone number; greenhouse gases ( F gases) which are covered by the Kyoto •... -
Page 19: Hotpoint Guarantee
Subjected to overuse - Excessive usage versus that expected of a domestically situated appliance. 5 Year Parts Guarantee Hotpoint also offers you a FREE 5 year parts guarantee. This additional guarantee is conditional on you registering your appliance with us and the parts being fitted by one of our authorised engineers. There will be a charge for our engineer’s time. -
Page 20: Hotpoint After Sales Service
Service Hotline on 08448 224 224 (Republic of Ireland 0818 313 413) for telephone assistance, or,where necessary, to arrange for an engineer to call. After Sales Service No one is better placed to care for your Hotpoint appliance during the course of its working life than us - the manufacturer. Essential Contact Information...
Need help?
Do you have a question about the AQUALTIS AQC9 4F7 and is the answer not in the manual?
Questions and answers