Table of Contents
Advertisement
Instruction manual
TUMBLE DRYER
EN
English,1
TCFS 83B
www.hotpoint.co.uk
!
This symbol reminds you to read this
instruction manual.
!
Keep this manual at hand for immediate reference whenever
necessary. Always store this manual close to the tumble dryer and
remember to pass it on to any new owners when selling or tran-
sferring the appliance, so they may familiarise with the warnings
and suggestions herein contained.
!
Read these instructions carefully: the following pages contain
important information on installation and useful suggestions for
operating the appliance.
To activate you free* 5 years parts guarantee
*Labour charges not included. Terms and conditions apply. Lines open 364 days a year.
Calls are free from a BT landline. Charges from other providers and mobiles may apply.
0800 519 2102
Call free on
Contents
Installation, 2
Warnings, 4
Saving energy and respecting the environment
Laundry, 14
Troubleshooting, 15
GB
1
Advertisement
Table of Contents

Related Manuals for Hotpoint TCFS 83B


Summary of Contents for Hotpoint TCFS 83B
-
Page 1: Table Of Contents
Cleaning the condenser unit Cleaning the tumble dryer Description of the tumble dryer, 8 Features Control panel TCFS 83B How to carry out a drying cycle, 10 Starting and selecting a programme Programmes and options, 11 Programme chart Special programmes... -
Page 2: Installation
Installation Where to install the tumble dryer • Install the dryer far from gas ranges, stoves, radiators or hobs, as flames may damage it. If the dryer is installed below a worktop, en- 15 mm 15 mm sure there are 10 mm between the upper panel of the dryer and Picture B... -
Page 3: Preliminary Information
Product Fiche - Regulation 392/2012. Brand Hotpoint Model TCFS 83B ! The power cord must be regularly checked. Rated capacity of cotton laundry for the "standard cotton If the supply cord is damaged, it must be re- programme" at full load - kg... -
Page 4: Warnings
Warnings ! This appliance has been designed and built temperatures. according to international safety standards. • Complete each programme with its Cool These warnings are given for safety reasons Tumble Phase. and must be followed carefully. • Do not turn off the dryer when there are still warm items inside. - Page 5 previously been cleaned in or washed in, • Always dry full loads - you save energy: single soaked in or soiled with petrol/gasoline, items or small loads take longer to dry. dry cleaning solvents or other flammable • Clean the filter after each use to contain energy or explosive substances.
-
Page 6: Care And Maintenance
Care and maintenance Disconnecting the power supply Emptying the water container after each cycle Disconnect the dryer when not in use or during cleaning maintenance operations. Remove the water container and empty it into a sink or other Cleaning the filter after each suitable drain outlet, then cycle replace it correctly. -
Page 7: Cleaning The Tumble Dryer
Quick Tips Cleaning the tumble dryer !Remember to clean your filter and • The external metal, plastic and rubber parts can be clea- ned with a damp cloth. condenser unit after each load. • Clean the front air intake grille regularly (every 6 months) ! Remember to empty your water with a vacuum cleaner to remove any lint, fluff or dust deposits. -
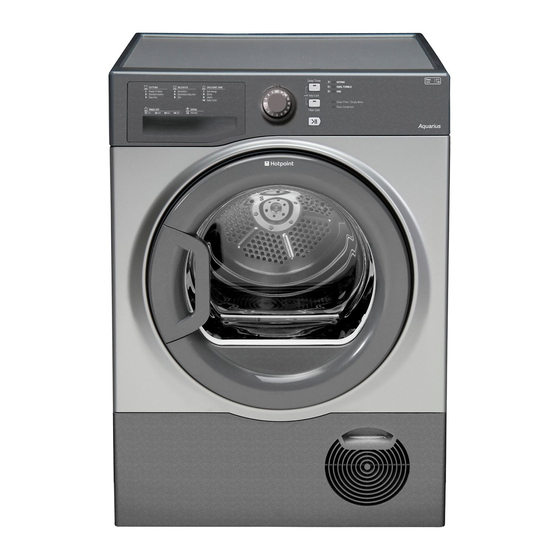
Page 8: Description Of The Tumble Dryer
Description of the tumble dryer Features Opening the door Rating plate Water container The door Model & Serial Filter Numbers Condenser unit (cover open) Condenser cover handle (pull to open) intake grille Control panel Options Drying phase buttons and or Delay indicator lights timer indicator... -
Page 9: Indicator Lights
Programme selection knob Allows for setting the programme: turn until the indicator points towards the desired programme. The OFF position switches off the dryer (see Starting and selecting a programme). Options buttons Allow for selecting the options available for the selected programme. The relative indicator lights turn on when the option has been selected (see Programmes and options). -
Page 10: How To Carry Out A Drying Cycle
How to carry out a drying cycle Starting and selecting a programme 1. Plug the dryer into the power supply socket. 2. Select the programme according to the type of laundry (see Laundry). 3. Open the door, ensure that the filter is clean and securely placed and that the water container is empty and correctly slotted (see Care and maintenance). -
Page 11: Programmes And Options
Programmes and options Programme chart Max. load Cycle Programme Compatible options (kg) duration* Cottons 1 Ready to Wear Delay timer 170' 2 Standard Cotton Delay timer - Fibre Care 150' 3 Easy Iron Delay timer - Fibre Care 120' Delicates 4 Synthetics Delay timer 100'... - Page 12 Shirts This is a programme for shirts made from cotton. It can be used for load sizes up to 3kg (approximately 10 shirts). Shirts and Fibre Care option This is a programme for shirts made from synthetic materials or a mixture of natural and synthetic materials, such as polyester and cotton.
-
Page 13: Options
Options The options allow for customising the selected programme according to one’s own needs. Delay timer The start of some programmes (see Programmes and options) may be delayed up to 9 hours. Press the button repeatedly to enter the desired delay time. Before setting a delayed start, make sure that the water container is empty and that the filter is clean.The drum will rotate occasionally before the drying programme starts to prevent the formation of creases. -
Page 14: Laundry
Laundry Sorting laundry Drying times • Check the symbols on the care labels of the various gar- Drying times are approximate and may vary depending on ments to verify whether the garments can be safely tumble the following: dried. • Sort laundry according to the type of fabric. •... -
Page 15: Troubleshooting
Troubleshooting If you feel that the dryer is not working properly, consult the following troubleshooting suggestions before contacting the Technical (see Assistance). Assistance Centre Possible causes / Solutions: Problem: • The plug has not been inserted far enough into the socket to make contact. The dryer does not start. -
Page 16: Assistance And Guarantee
‘Right first time’ – our engineers have the latest tools to help get your Hotpoint appliance back up and running the first time we visit. Experts in our field – all of our engineers are trained to the highest standard at our Hotpoint Training Centre of Excellence with unri- valled expertise and product knowledge.
Need help?
Do you have a question about the TCFS 83B and is the answer not in the manual?
Questions and answers
How to unlock door before cycle is complete
To unlock the door of a Hotpoint TCFS 83B before the cycle is complete, press the START/PAUSE button. This stops the dryer and allows the door to be opened.
This answer is automatically generated
I have to dry a mixed fibre waterproof mattress protector at 30degrees - what program should I use?
I have to dry at 30 degrees what programme should I use