
Related Manuals for Ranger BN058

Summary of Contents for Ranger BN058
- Page 1 RANGER 5MP Security Digital Trail Camera Instructions for use Model BN058 / BN059 / BN060...
-
Page 2: Table Of Contents
ndex Introduction..............3 Specifications ............4,5 Parts identification ............6 Package contents ............7 Battery and SD card installation ........8 Setting up your camera ..........9 6.1 Setup mode ............9 6.2 Basic settings ............11 6.2.1 Setting work mode and PIR sensitivity ..... 11 6.2.2 / 3 Setting the date & time ........12 6.2.4 Setting camera delay........13 6.2.5 Setting image resolution ........13 6.2.6 Set video clip length .........14 6.3 Advanced Settings..........15 6.3.1 Set camera duty time ........15 6.3.2 Set IR flash on and off ........16 6.3.3 Set movie frame rate ........17 6.3.4 Enable/Disable SD card overwrite....18 6.3.5 Image tag ............19 6.3.6 System password ..........20 6.3.7 Format SD card ..........21 6.3.8 Reset camera to factory default ....... -
Page 3: Introduction
1. I ntroductIon Trail cameras record the activity of wildlife unattended by taking still images or short videos of anything that intrudes the passive infrared (PIR) sensor coverage area. RANGER digital trail cameras BN058/59/60 are compact (130 x 100 x 50mm) and water resistant and may be mounted outdoors for long periods of time. The camera can take up to 15 photos a day and 15 photos a night for roughly six months on a single set of 8 AA batteries. - 3 -... -
Page 4: Specifications
2. S pecIfIcatIonS Product Name RANGER Trail Camera Model Number BN058 / BN059 / BN060 Image Sensor Type 1/2.5 Inch CMOS Effective Pixels 5.0-Megapixel Effective Focal Length 7.6 mm Lens Aperture f/3.0 Camera field of view 55 Degrees IR Filter Fully automatic Display 2 x 8 LCD display PIR sensor PIR distance adjustor Yes (2m ~ 20m) PIR sensor field of view 47 Degrees Trigger Speed ±1 second Multiple frames per PIR Yes. User selectable 1 frame, sensor trigger event 3 frames or video Video resolution 5 to 90 seconds AVI video 640 x 480 pixels @ 30 fps File formats JPEG for still images, AVI for videos Date & time imprint Moon phase imprint... - Page 5 Password protect Yes. Four digits 0000 to 9999 Menu language English TV output Yes. NTSC and PAL Power supply 8 x AA batteries Battery life 180 days assuming average 15 day & 15 night pictures per day DC-IN Yes. For security purposes Security metal cable Yes. For theft prevention compatible Tripod socket Water resistant - 5 -...
-
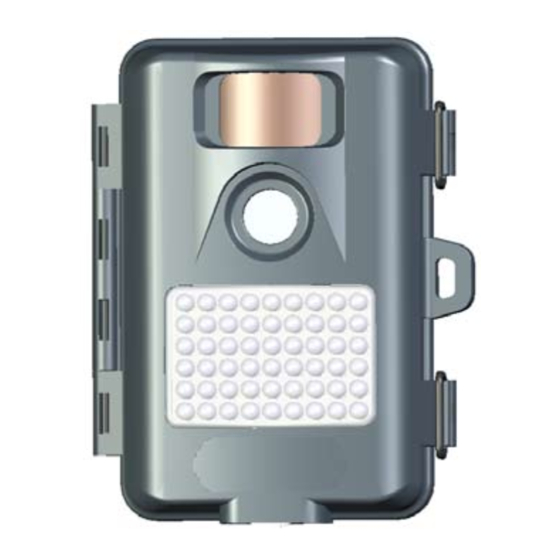
Page 6: Parts Identification
3. p artS dentIfIcatIon - 6 -... -
Page 7: Package Contents
4. p ackage ontentS 1 x Digital scouting camera 1 x User manual (this document) 1 x USB cable 1 x Mounting kit 1 x TV OUT cable - 7 -... -
Page 8: Battery And Sd Card Installation
5. B Sd c attery and nStallatIon NOTE: Make sure camera is OFF whenever installing or removing batteries. • Use 8 x AA Alkaline batteries. ▲ When replacing batteries please make sure the battery voltage and polarity (+/-) are correct. Incorrect voltage or polarity will damage the camera. eMory The expandable media card slot is capable of accepting SD cards with capacity up to 32GB (sold separately). nSertIng card NOTE: Make sure camera is OFF whenever installing or removing the memory card. •... -
Page 9: Setting Up Your Camera
6. S ettIng aMera 6.1 S etup Turn on the camera, “Power On” will show for two seconds: Then the remaining space on the SD card will display for two seconds: Finally, the number of images/videos stored on the SD card: Two seconds after this the camera will enter Sleep Mode to save power. Press the SETUP button to activate Setup Mode. The display will change to: NOTE: Pressing the OK key at each of the above screens will take you directly into Setup Mode. - 9 -... - Page 10 enu IteMS Basic Item Options Set Date MM/DD/YY Set Time HH:MM Delay MM:SS Img size 5.0MP, 3.0MP, 1.3MP Mov time 5 to 90 seconds Advanced Item Options Duty time Alltime, Day, Night, Customiz IR flash ON / OFF Mov FPS 30fps or 10fps Overwrte ON / OFF UserInfo 16 Characters Password 4 Digits Format SD card YES / NO Reset to default YES / NO - 10 -...
-
Page 11: Basic Settings
6.2 B aSIc ettIngS Use “BasicSet” if you wish to use your camera immediately. 6.2.1 S pIr S ode and enSItIvIty Sin: Take one picture for each PIR trigger event Mul: Take three pictures for each trigger event Mov: Take one video clip for each trigger event Select the sensitivity level for the PIR sensor. Set the switch to H for high sensitivity during high temperature seasons, M for medium sensitivity during moderate weather and L when the temperature is cold. - 11 -... -
Page 12: Setting The Date & Time
6.2.2 S Refer to section 6.1 to enter BasicSet setup. Press the UP or DOWN button until “SET DATE” is displayed Press OK to confirm. Press UP or DOWN to select month, day and year, and press OK to accept each value. Press SETUP to exit the settings menu, or press UP or DOWN for other menu options. 6.2.3 S Refer to section 6.1 to enter BasicSet setup. Press the UP or DOWN button until “SET TIME” is displayed Press OK to confirm. Press UP or DOWN to select hour and minutes, and press OK to accept each value. Press SETUP to exit the settings menu, or press UP or DOWN for other menu options. - 12 -... -
Page 13: Setting Camera Delay
6.2.4 S elay Minimum delay is the time in minutes and seconds for which the camera will pause after a trigger event. Press the UP or DOWN button until “SET DELAY” is displayed Press OK to confirm. Press UP or DOWN to select minutes and seconds and press OK to accept each value. Press SETUP to exit the settings menu, or press UP or DOWN for other menu options. 6.2.5 S hoto eSolutIon 5.0MP, 3.0MP and 1.3MP selectable. Lower resolution means less space is used on the SD card to store each image, but results in higher pixelated images. -
Page 14: Set Video Clip Length
6.2.6. S Ideo ength Video clips can be 5 seconds to 60 seconds long, Default is 15 seconds. Press the UP or DOWN button until “MOV TIME” is displayed Press OK to confirm. Press UP or DOWN to set the value in seconds and press OK to accept. Press SETUP to exit the settings menu, or press UP or DOWN for other menu options. - 14 -... -
Page 15: Advanced Settings
6.3 a dvanced ettIngS 6.3.1 S aMera Duty time is the time window each day during which the camera will become active. Default is 24 hours a day. Refer to 6.1 to enter “AdvanSet”. Press UP or DOWN to select DUTYTIME. Press OK. Press UP or DOWN to select “ALLTIME”, “DAY”, “NIGHT” or “CUSTOMIZ”: a. ALLTIME: 24 hours a day b. DAY: From 07h00 to 19h00 every day c. NIGHT: From 19h00 to 07h00 every day d. CUSTOMIZ: User selectable Press OK. If you select CUSTOMIZ the camera will activate every day at the top time and deactivate at the bottom time. -
Page 16: Set Ir Flash On And Off
6.3.2 S Ir f laSh n and Default is on. The IR flash will activate automatically when the environmental light drops below a certain level. IR illuminated photos and videos are black & white. You can use this option to turn off the IR flash and conserve battery power. -
Page 17: Set Movie Frame Rate
6.3.3 S ovIe raMe Default is 30fps. Select 10 or 30 frames per second (fps). 30fps video produces smooth motion video but takes more storage space on the SD card, 10fps produces choppy video but takes less storage space. 10fps is useful for security videos. Press the UP or DOWN button until “MOV FPS” is displayed Press OK to confirm. -
Page 18: Enable/Disable Sd Card Overwrite
6.3.4 e Sd c naBle or ISaBle verWrIte Default is OFF. Set the overwrite to OFF to stop taking pictures or videos when the SD card is full. Setting it to ON will overwrite the oldest image or video stored on the SD card with the most recent one. -
Page 19: Image Tag
6.3.5 I Mage Default is blank. Up to 16 characters can be stamped onto each image. Press the UP or DOWN button until “USERINFO” is displayed Press OK to confirm. Press UP or DOWN to select characters A-Z and 0-9 and press OK to move to the next space, and press OK to accept. Press SETUP to exit the settings menu, or press UP or DOWN for other menu options. - 19 -... -
Page 20: System Password
6.3.6 u aSSWord Default is OFF. Use this option to protect the camera from unauthorized use. Press the UP or DOWN button until “PASSWORD” is displayed Press OK to confirm. Press UP or DOWN to select ON or OFF. If you select ON, “1stInput” will display. Press UP and DOWN to change each number and OK to move to the next space. Press OK to accept. When the display shows “Repeat” enter the same four numbers as you did on the previous screen. Press SETUP to exit the settings menu, or press UP or DOWN for other menu options. - 20 -... -
Page 21: Format Sd Card
6.3.7 f Sd c orMat Press the UP or DOWN button until “FORMAT SD CARD” is displayed Press OK to confirm. Press UP or DOWN to select YES or NO and press OK to accept. Press SETUP to exit the settings menu, or press UP or DOWN for other menu options. 6.3.8 r eSet the aMera to actory efault Resets all setup options to factory defaults. Press the UP or DOWN button until “RESET TO DEFAULT” is displayed Press OK to confirm. Press UP or DOWN to select YES or NO and press OK to accept. Press SETUP to exit the settings menu, or press UP or DOWN for other menu options. - 21 -... -
Page 22: Using The Camera
7. u SIng the aMera 7.1 M ountIng the aMera Mount the camera 1.2 to 1.5 metres off the ground, pointing at a slight downward angle. Avoid mounting it facing east or west as the rising or setting sun could produce false triggers and overexposed images. Clear branches and other debris away from the area in front of the camera so as not to block the camera lens or PIR sensor. Insert the strap through the strap slots on the rear housing and wrap the strap around the mounting surface. Secure the strap and tighten the buckle in order to secure the camera. ▲ In order to obtain proper weather resistance, please make sure that both door latches are securely locked in place. - 22 -... -
Page 23: Switching On
7.2 S WItchIng When you turn on the camera it automatically enters Sleep Mode and will start taking photographs or video after the delay time (see 6.2.4 Setting Delay). 7.3 t eStIng the aMera overage After mounting the camera enter Setup Mode: open the front housing and slide the power switch to ON, press the OK button to enter General Mode and then close the front housing. A red indicator light on the front (the Working Indicator) will blink as you intrude the PIR coverage area. Adjust the camera position and PIR sensitivity as needed and repeat testing until you’re happy with the PIR coverage area. ▲ Press the SETUP button again when you’ve finished testing the PIR coverage area to enter Sleep Mode. The camera will now be ready to take photographs. - 23 -... -
Page 24: Securing The Camera
7.4 S ecurIng aMera A small padlock can be used to lock the camera cover. A cable can also be fitted to the camera and affixed to the mounting surface to prevent the camera from being stolen. - 24 -... -
Page 25: Battery Status
7.5 B attery tatuS Over 9v, normal operation: System voltage over 9v is required for normal operation. Over 7.5v, daylight use only: If the system voltage is between 9v and 7.5v the camera will operate only during daylight hours. In this case the battery indicator will flash twice when darkness falls to indicate the camera is entering hibernation. When daylight returns the camera will reactivate. Less than 7.5v, no operation: The battery indicator will flash ten times and the unit will switch off. Batteries must be replaced. 8. v IeWIng MageS and ovIeS 8.1 c onnect the caMera to a Slide the power switch to ON. Enter Setup Mode (see section 6). -
Page 26: Play Images And Video On A Tv
8.3 p Ideo and MageS on a You can connect the camera directly to a TV to preview images and videos. Slide the power switch to ON. Enter Setup Mode (see section 6). Connect the camera to the TV with the supplied cable. Press OK to enter TV playback mode. Press the UP or DOWN button to view images or videos stored on the SD card. If a video is selected press OK to play the clip. Press SETUP to exit. loSSary PIR: Passive Infrared Sensor. Senses motion like a typical security motion detector. Requires infrared energy (heat) in addition to motion to trip sensor to detect live animals. Camera Delay: Time elapsed between photos while events are sensed and recorded. This is user-set based on wildlife activity in area. Moon Phase: Imprints a moon phase stamp on each image. IR Flash: Also called IR LED Array. Infrared LED Night Vision feature. Emits a burst of infrared light which is invisible to the human eye. Especially useful for night photos when a visible flash is undesirable. - 26 -... - Page 27 Low Glow IR: Traditional IR LEDs are visible to the naked eye if you are looking directly at them when they illuminate. RANGER low glow models feature IR LEDs with drastically reduced glow, making them all but invisible. Battery Life: Time that camera will function in the field. Dependent on temperature, number of images and number of flashes during that time. When battery voltage is below 9v, the camera stops working in dark environments. When battery voltage is below 7.5v, the camera stops working entirely. SD Card: Third party memory card used to store images and videos. RANGER cameras can use SD cards up to 32GB capacity. Multiple: To set the number of pictures the camera will take per PIR trigger event 1P: Single image capturing per PIR trigger event. 3P: 3 images captured per PIR trigger event. FULL: When the SD card memory capacity is full the display shows “FULL”. - 27 -...
- Page 28 RANGER Digital Trail Cameras are sold with a one year warranty against original defects in material and/ or workmanship provided that they have not been abused, taken apart or tampered with in any way whatsoever. Should it become necessary to repair your camera, package the unit carefully and return it to your dealer, or post directly to: The Lynx Service Centre PO Box 98078 Sloane Park South Africa, 2152 Include this page or a copy of it, your name, address and telephone number, and a note with a full and accurate description of the problem. In the event that the repair is not covered by this warranty an estimate will be sent for your approval. Lynx shall not be held liable for any consequential, incidental or contingent damage whatsoever. Purchase date: ............Dealer name and signature or dealer stamp Distributed by Lynx Optics (Pty) Limited tel 011 792 6644 • email info@lynx.co.za...
Need help?
Do you have a question about the BN058 and is the answer not in the manual?
Questions and answers