Hilti TE 7-A Operating Instructions Manual
Cordless rotary hammer
Hide thumbs
Also See for TE 7-A:
- Operating instructions manual (20 pages) ,
- Operating instructions manual (20 pages) ,
- Operating instructions manual (60 pages)
Table of Contents
Advertisement
12
13
14
36 Volt Li-Ion
36 Volt Li-Ion
3.3 Ah
3.3 Ah
Hilti Corporation
LI-9494 Schaan
Tel.: +423 / 234 21 11
Fax: +423 / 234 29 65
www.hilti.com
202925 /A
Hilti = registered trademark of Hilti Corp., Schaan W 3091 0706 10-Pos. 1 1 Printed in Liechtenstein © 2006
Right of technical and programme changes reserved S. E. & O.
TE 7-A
Bedienungsanleitung
de
Operating instructions
en
Mode d'emploi
fr
Manual de instrucciones
es
Istruzioni d'uso
it
Gebruiksaanwijzing
nl
Brugsanvisning
da
Bruksanvisning
no
Bruksanvisning
sv
Käyttöohje
fi
Manual de instruções
pt
δηγιες ρησεως
el
Lietoßanas pamåcîba
lv
Instrukcija
lt
Kasutusjuhend
et
Advertisement
Table of Contents

Related Manuals for Hilti TE 7-A


Summary of Contents for Hilti TE 7-A
- Page 1 Manual de instruções δηγιες ρησεως Lietoßanas pamåcîba Instrukcija Kasutusjuhend 202925 /A Hilti = registered trademark of Hilti Corp., Schaan W 3091 0706 10-Pos. 1 1 Printed in Liechtenstein © 2006 Right of technical and programme changes reserved S. E. & O.
- Page 2 36 Volt 36 Volt Li-Ion 3.3 Ah...
-
Page 3: Table Of Contents
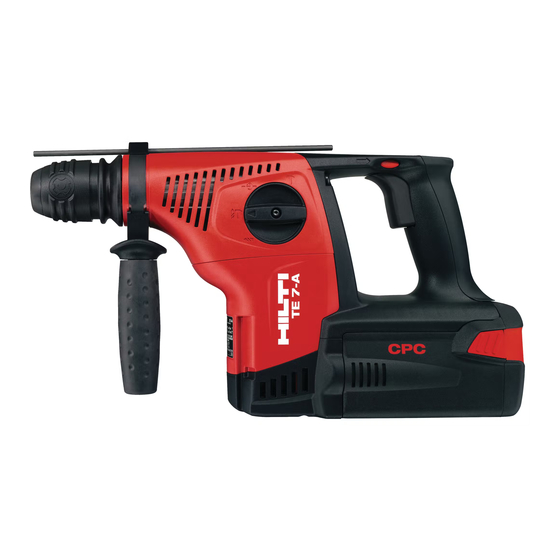
TE 7‑A cordless rotary hammer Operating controls and parts 1 It is essential that the operating instructions Chuck are read before the power tool is operated Function selector switch for the first time. Control switch Forward / reverse switch Always keep these operating instructions Side handle with depth gauge together with the power tool. -
Page 4: Description
Keep these pages open while studying Obligation signs the operating instructions. In these operating instructions, the designation “the power tool” always refers to the TE 7-A cordless rotary hammer. Wear eye Wear a hard Wear ear Wear... - Page 5 Do not use the battery as a power source for other unspecified power tools. To avoid the risk of injury, use only genuine Hilti accessories and insert tools. Observe the information printed in the operating instructions concerning operation, care and maintenance.
-
Page 6: Insert Tools, Accessories
NOTE Indication of the charge status is not possible while the power tool is in operation or immediately after operation. Indication is given (LED 1 blinks) only when the battery is fully discharged or when it is too hot (temperature >80°). 3. -
Page 7: Safety Rules
Noise and vibration information (measured in accordance with EN 60745): Typical A-weighted sound power level 99 dB (A) Typical A-weighted emission sound pressure level. 88 dB (A) Uncertainty for the given sound level 3 dB (A) Triaxial vibration value (vibration vector sum) with Measured in accordance with EN 60745‑2‑1 prAA: B36/2.4 NiCd 2005... - Page 8 c) Keep children and bystanders away while oper- f) Dress properly. Do not wear loose clothing or ating a power tool. Distractions can cause you to jewellery. Keep your hair, clothing and gloves lose control. away from moving parts. Loose clothes, jewellery or long hair can be caught in moving parts.
- Page 9 b) Recharge only with the charger specified by the g) Activate the safety lock (forward / reverse switch manufacturer. A charger that is suitable for one in the middle position) before storing or trans- type of battery pack may create a risk of fire when porting the power tool.
-
Page 10: Before Use
Charging progress is in- dicated by the LED display (see charger operating instructions). CAUTION Use only Hilti B 36/2.4 NiCd or B 36/3.3 Li-ion 6.3 Fitting the battery 2 batteries. CAUTION Before fitting the battery, check that the power tool 6.2.1 Charging a new battery for the first time... -
Page 11: Operation
Hilti batteries intended for use with this 2. Release the side handle clamping band by turning power tool. the handle counterclockwise. 3. Slide the side handle clamping band over the 1. Push the battery into the power tool from the rear chuck and onto the cylindrical section at the front until it is heard to engage with a double click. - Page 12 7.1.3 Removing the insert tool 7 CAUTION Working on the material may cause it to splinter. CAUTION Wear eye protection and protective gloves. Wear Wear protective gloves when changing insert tools as breathing protection if no dust removal system is the insert tool will get hot during use.
- Page 13 7.2.4.3 Chiseling 13 4. Position the power tool and drill bit at the point where the hole is to be drilled. 1. Fit the battery. 5. Press the control switch slowly (drill at a low NOTE Do not operate the function selector switch speed until the drill bit centers itself in the hole).
-
Page 14: Care And Maintenance
Hilti grease. It is essential that the dust shield life and increases the rate of self-discharge. is replaced if the sealing lip is found to be damaged. -
Page 15: Troubleshooting
The battery runs down more Battery condition is not optimal. Have the battery condition checked quickly than usual. by Hilti or replace the battery. The battery doesn’t engage The retaining lugs on the battery are Clean the retaining lugs and check with an audible double click. -
Page 16: Disposal
Dispose of the batteries in accordance with national regulations or return them to Hilti. Most of the materials from which Hilti tools or machines are manufactured can be recycled. The materials must be correctly separated before they can be recycled. In many countries, Hilti has already made arrangements for taking back your old tools for recycling. -
Page 17: Ec Declaration Of Conformity
Hilti is not obligated for direct, indirect, incidental For repair or replacement, send the tool or related or consequential damages, losses or expenses in parts immediately upon discovery of the defect to connection with, or by reason of, the use of, or the address of the local Hilti marketing organization inability to use the tool for any purpose.
Need help?
Do you have a question about the TE 7-A and is the answer not in the manual?
Questions and answers