Table of Contents
Advertisement
I
N
S
T
A
I
N
S
T
A
Single Station Thermal Printer
M
M
This printer has been manufactured and branded for ORIENT Technologies
B.V. by Shandong New Beiyang Information Technology Co., Ltd.
Design and specifications are subject to change without notice. Ask your
supplier for technical specifications before purchase and/or use.
Whenever in doubt about safety issues that might arise from using this product,
please contact the supplier immediately for assistance.
L
L
A
T
I
L
L
A
T
I
o
d
e
l
:
B
T
P
o
d
e
l
:
B
T
P
O
N
M
A
O
N
M
A
-
R
8
8
0
N
P
-
R
8
8
0
N
P
N
U
A
L
N
U
A
L
Advertisement
Table of Contents

Related Manuals for Orient BTP-R880NP


Summary of Contents for Orient BTP-R880NP
- Page 1 Single Station Thermal Printer This printer has been manufactured and branded for ORIENT Technologies B.V. by Shandong New Beiyang Information Technology Co., Ltd. Design and specifications are subject to change without notice. Ask your supplier for technical specifications before purchase and/or use.
- Page 2 2002/96/EC. All the customers and end-users can send the products that have reached the end of their lifes and are to be recycled, to ORIENT Technologies bv. ORIENT Technologies bv will take care of the recycling of these products in an environmentally responsible manner in accordance with WEEE directive.
-
Page 3: Table Of Contents
BTP-R880NP Installation manual CONTENT GENERAL SAFETY INFORMATION ........2 1 INTRODUCTION OF BTP-R880NP ........3 2 PARTS IDENTIFICATIONS ..........3 3 SETTING UP THE PRINTER ..........4 3.1 UNPACKING..................4 3.2CONNECTING THE CABLES ............. 4 3.2.1 INTERFACE CONNECTOR............5 3.2.2 CASH DRAWER CONNECTOR ..........7 3.3LOADING THE PAPER ROLL ............. -
Page 4: General Safety Information
BTP-R880NP Installation manual General Safety Information Before installing and using the printer, please read the following items carefully. Safety Labels Don’t touch the cutter and tear bar of printer. The print head is a thermal element and it is at high temperature during printing or just after operation, therefore please do not touch it and its peripherals for safety reasons. -
Page 5: Introduction Of Btp-R880Np
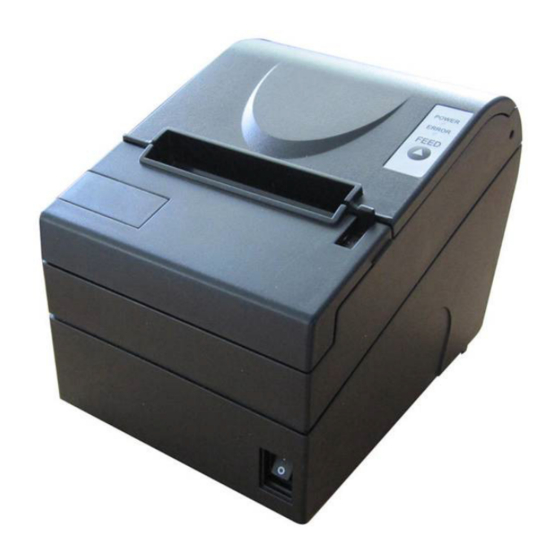
BTP-R880NP Installation manual 1 Introduction of BTP-R880NP BTP-R880NP is a high performance thermal printer, which can be widely used for real-time printing application, such as POS system, restaurant system, ATM, etc. BTP-R880NP can be connected with other devices via parallel interface, serial interface, USB, Ethernet or WIFI and is available for WINDOWS 2000/XP/Server 2003/VISTA/WIN7/ Server2008, Linux and MAC. -
Page 6: Setting Up The Printer
BTP-R880NP Installation manual Caution: The paper guides are indispensable parts of the printer and should be kept safely with the printer. 15— Paper-near-end sensor For continuous paper, this sensor is used to detect whether the paper roll has run out or near the end of the roll. -
Page 7: Interface Connector
BTP-R880NP Installation manual 3.2.1 Interface Connector RS-232 serial interface Signal Signal Function name direction — Frame ground Output Transmit data Input Receive data Output Same as DTR signal Input This signal indicates whether the host computer can receive data. SPACE indicates that the host computer can receive data, and MARK indicates that the host computer cannot receive data. -
Page 8: Parallel Interface
BTP-R880NP Installation manual transmits data after confirming this signal (except when transmitting data by DLE EOT, and GS a). When XON/XOFF control is selected, the printer does not check this signal. — Signal ground Output 1) When DTR/DSR control is selected, this signal indicates whether the printer is busy. -
Page 9: Usb Interface
BTP-R880NP Installation manual Ethernet Pin Number Signal Name Function Output Data+ Output Data - Input Data+ Input Data - USB interface Pin Number Signal Name Function VBUS DATA- Printer data transmit line minus DATA+ Printer data transmit line plus Ground 3.2.2 Cash Drawer Connector... -
Page 10: Loading The Paper Roll
BTP-R880NP Installation manual 3.3Loading the Paper Roll Note: Be sure to use paper rolls that meet the specifications. Do not use paper rolls that have the paper glued to the core because the printer cannot detect the paper end correctly. - Page 11 BTP-R880NP Installation manual sensitive side will turn black. The paper on the roll should be tightly wrapped when loading the roll in the printer. The paper roll should be loaded straight in the printer and not slanted. In this way the roll will not be obstructed from rolling during printing.
-
Page 12: Paper Near End Adjustment
3.4 Paper near end adjustment 3.4.1 Paper near end position adjustment BTP-R880NP supports printing when the printer is in a horizontal (e.g. placed on a table) or in a vertical position (e.g. mounted on a wall). User can detect the remained paper in the horizontal and vertical location by adjusting the paper near end sensor. -
Page 13: Remaining Paper Amount Adjustment
BTP-R880NP Installation manual 3.4.2 Remaining paper amount adjustment of Paper near end sensor Remaining paper amount can be adjusted by adjusting the position of paper near end sensor. The paper near end sensor has six levels and the red mark (actual color on printer is white) shows the current level and it can be adjusted to different position by moving the click wheel. - Page 14 BTP-R880NP Installation manual as long as the button is pressed. Print self-test page function When the FEED button is pressed while the printer is turned on, the printer will print out a self-test page. The page gives information about the printer and the settings.
-
Page 15: Led And Buzzers
BTP-R880NP Installation manual Ending hexadecimal dumping function Hexadecimal dump mode can be ended by turning off the power, or by pressing the FEED button three times. 4.3 LED and Buzzers 4.3.1 LED Status Description Printer is powered on Power Indicator (Green) -
Page 16: Auto Cutter Specifications
BTP-R880NP Installation manual Font B: 0.25 mm {0.01"} (2 dots) Kanji: 0.125 mm {0.005"} (1 dot) Programmable by command 7) Printing speed: 230 mm/s (Max) {9.05"/s} 54.3 LPS maximum (4.23 mm/feed) 5.2 Auto Cutter Specifications Item Parameter Remarks Cutter type... -
Page 17: Reliability
BTP-R880NP Installation manual Storage temperature and humidity:-40~55℃,≤93%RH (40 ) ℃ 5.6 Reliability 1) Life times: Thermal head: 100,000,000 pulses, 150 km Auto cutter: 1,800,000 cuts 2) MTBF: 360,000 hours 3) MCBF: 60,000,000 lines 5.7 Black Mark Specifications The printer can print on thermal paper that has black marks on the reverse side of the heat sensitive side of the paper. -
Page 18: Overall Dimension
BTP-R880NP Installation manual 5.8 Overall Dimension 6 Wall Mounting The printer can be mounted vertically on the wall according to below instructions: 1) Drill two holes (OD: 6mm, depth: 50mm, space of two hole: 75mm) on the wall as in below figure: 2) Insert the plastic plugs in the holes and make sure that the plugs are fully inside the holes and do not stick out. -
Page 19: Feed Button Configuration
BTP-R880NP Installation manual 4) Regulate the paper near end sensor (Please refer to 3.4.1), Mount the printer as figure. 7 Configuration setting function Parameter setting (configuring) by Feed button Hold the FEED button pressed while switching the printer on. After the printer has printed the configuration sheet, press and hold the FEED button to configure the printer. - Page 20 BTP-R880NP Installation manual PARAMETER SETTING BY FEED BUTTON MAIN MENU Exit ->1 Print Self Test ->2 Configuration ->3 CONFIGURATION Exit Without Save ->1 Exit With Save ->2 Communication ->3 Back To Last ->1 Menu USB Interface ->2 USB MODE:API MODE Back To Last ->1...
- Page 21 BTP-R880NP Installation manual 9600bps ->2 19200bps ->3 38400bps ->4 57600bps ->5 4800bps ->6 2400bps ->7 1200bps ->8 115200bps ->9 Parity ->3 PARITY:NONE Back To Last Menu ->1 None ->2 ->3 Even ->4 Data Bits ->4 DATA BITS : 8 Bits Back To Last Menu ->1...
- Page 22 BTP-R880NP Installation manual 2 Bits ->3 Handshaking ->6 HANDSHAKING:DTR/DSR Back To Last Menu ->1 DTR/DSR ->2 XON/XOFF ->3 Data Receive ->7 DATA ERROR SETTING:Ignored Error Back To Last Menu ->1 Ignored ->2 Print '?' ->3 Rx Buff Size ->4 RX BUFFER SIZE:4K...
- Page 23 BTP-R880NP Installation manual Mark Sensor ->2 MARK SENSOR: Disable Back To Last ->1 Menu Enable ->2 Disable ->3 Cutter ->3 CUTTER: Enable Back To Last ->1 Menu Enable ->2 Disable ->3 Buzzer ->4 BUZZER: Normal Volume Back To Last ->1...
- Page 24 BTP-R880NP Installation manual Back To Last ->1 Menu Normal ->2 Low Power Mode ->3 Print Settings ->5 PRINT SETTINGS Back To Last ->1 Menu Darkness ->2 DARKNESS SETTING: Settings Normal Back Last ->1 Menu ->2 Normal ->3 High ->4 Extra High ->5...
- Page 25 BTP-R880NP Installation manual 82.5mm ->6 Left Margin ->4 LEFT MARGIN:7mm Back To Last ->1 Menu ->2 ->3 ->4 ->5 ->6 ->7 Right Margin ->5 RIGHT MARGIN:9mm Back To Last ->1 Menu ->2 ->3 ->4 ->5 ->6 ->7 CR Command ->6...
- Page 26 BTP-R880NP Installation manual Enable ->2 Disable ->3 Code Page ->7 CODE PAGE SETTING Back To Last ->1 Menu Print all ->2 codepages Select a ->3 codepage Save Paper ->8 SAVE PAPER LEVEL Level Back To Last ->1 Menu Disable ->2 ->3...
- Page 27 BTP-R880NP Installation manual Max Two-color ->2 Two-color Power:Normal Power Back To Last Menu ->1 High ->2 Normal ->3 ->4 Disable ->5 Power Proportion ->3 Power Proportion:50% Back To Last Menu ->1 ->2 ->3 ->4 ->5 ->6 ->7 ->8 Gray Scale Mode ->10...
- Page 28 BTP-R880NP Installation manual Mode 1 ->3 Mode 2 ->4 Mode 3 ->5 Mode 4 ->6 Mode 5 ->7 Mode 6 ->8 Mode 7 ->9 Paper Sensor ->6 PAPER NEAR END Settings SETTINGS Back To Last ->1 Menu Paper Low Alarm ->2...
- Page 29 BTP-R880NP Installation manual Disable ->3 Paper Near End ->4 PAPER NEAR END Sensor SENSER: Enabled Back To Last ->1 Menu Enable ->2 Disable ->3 Set Default Config ->7 SET DEFAULT CONFIGURATION Back To Last ->1 Menu Set Printer To ->2...
- Page 30 BTP-R880NP Installation manual UDFONTB Beep settings ->9 Beep settings:Disabled Back To Last ->1 Menu Enable External ->2 Herald Enable Internal ->3 BEEP MODE buzzer Back To Last ->1 Menu Mode 1 ->2 Mode 2 ->3 Mode 3 ->4 Mode 4 ->5...
- Page 31 BTP-R880NP Installation manual Mode BTP-2002NP ->3 Mode Enter code,then hold Button Down at least 1 second to validate Cutter Test ->4 Sensor Test ->5 Sensor Test Mode: ERROR LED state will change according to sensor state To EXIT,hold button down...
- Page 32 BTP-R880NP Installation manual Exit With Save ->2 Saving config, please wait. Configurations have been saved, please repower the printer Reset JK-E04 ->3 Config Print Settings ->4 IP Address: MAC Address: SUBNET Mask: GATEWAY: Print Port: - 30 -...
Need help?
Do you have a question about the BTP-R880NP and is the answer not in the manual?
Questions and answers