
Related Manuals for Orient BTP-R880NP


Summary of Contents for Orient BTP-R880NP
-
Page 1: Receipt Printer
USER’S MANUAL Receipt Printer BTP-R880NP Shandong New Beiyang Information Technology Co., Ltd... - Page 2 BTP-R880NP User’s Manual Declaration Information in this document is subject to change without notice. SHANDONG NEW BEIYANG INFORMATION TECHNOLOGY CO., LTD. (hereinafter referred to as “SNBC”) reserves the right to improve products as new technology, components, software, and firmware become available. If users need further data about this product or have any doubt about safety issues that might arise from using it, please feel free to contact your local dealer.
-
Page 3: General Safety Information
BTP-R880NP User’s Manual General Safety Information Before installing and using the printer, please read the following items carefully. 1. Safety instructions Don’t touch the tear bar of printer. The print head is a thermal element and it is at high temperature during printing or just after operation, therefore please do not touch it and its peripherals for safety reasons. -
Page 4: Table Of Contents
BTP-R880NP User’s Manual Contents 1.INTRODUCTION ............................. 1 1.1 O ................................ 1 UTLINE 1.2 F ..............................1 EATURES 1.3 M ..........................1 ODEL LASSIFICATION 2.SPECIFICATIONS ............................2 2.1 M ............................2 AIN SPECIFICATION 2.2 C ..........................3 UTTER PECIFICATION 2.3 P ........................... - Page 5 BTP-R880NP User’s Manual 6.4 E ..........................16 THERNET INTERFACE 6.5 WLAN ............................17 INTERFACE 6.6 P ........................18 OWER INTERFACE DEFINITION 6.7 C ....................18 ASHDRAWER INTERFACE SIGNAL DEFINITION 7 TROUBLESHOOTING ............................. 19 7.1 P ’ ..........................19 RINTER DOESN T WORK 7.2 E...
-
Page 6: Introduction
1.Introduction 1.1 Outline BTP-R880NP is a high performance thermal printer, which can be widely used for real-time printing application, such as POS system, restaurant system, ATM, etc. BTP-R880NP can be connected with other devices via parallel interface, serial interface, USB, Ethernet or WIFI and is available for WINDOWS 2000/XP/Server 2003/VISTA/WIN7/ Server2008, Linux and MAC. -
Page 7: Specifications
BTP-R880NP User’s Manual 2.Specifications 2.1 Main specification Item Specification Color Black or Ivory Print Method Direct Thermal Resolution 203 × 180 DPI(standard) Paper width 57.5/69.5/76/80/82.5mm Print width Max. 80mm Standard: Max 230mm/s Printing Gray scale print speed:Max.150mm/s Print speed Two-color print speed: Max. 120mm/s... -
Page 8: Cutter Specification
BTP-R880NP User’s Manual Machine Button FEED button Interface POWER LED, ERROR LED Buzzer Built-inInternal Buzzer, the volume can be adjusted. Lifetime of print head 150 km(standard test condition) Lifetime of cutter 1,500,000 cuts(standard test condition) Reliability MCBF 60,000,000 lines MTBF... - Page 9 Don’t use or store paper under high temperature, high humidity and strong light conditions. 2.3.2 Mark paper In mark paper mode, BTP-R880NP determines the cut position and the initial printing position by referencing the position of the black mark. Black marked paper should meet the following requirement besides that of standard paper.
-
Page 10: Print And Tear Off Position
BTP-R880NP User’s Manual Caution: The printer will measure the marks during the printing or feeding process. If the lengths of the mark (L1) is larger than the default value (default: 13mm), the printer will give a paper-end alarm. 2.4 Print and tear off position 2.4.1 Print position... -
Page 11: Outline And Components
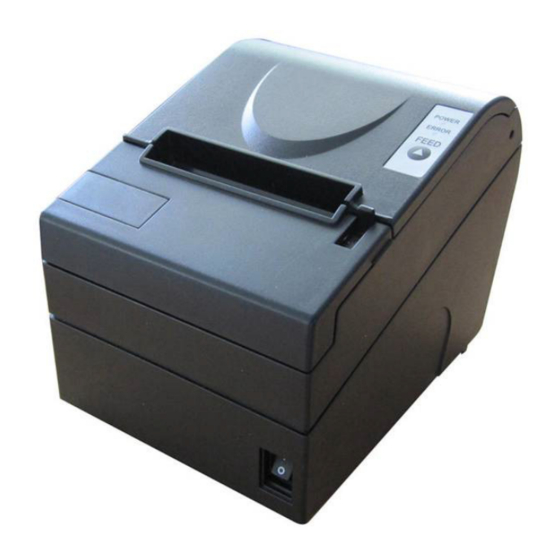
BTP-R880NP User’s Manual 3 Outline and components 3.1 Outline and Parts 1—Power LED 2—Error LED 3—Feed button 4—Tear bar 5—Top cover latch 6—Cutter cover 7—Middle cover 8—Power switch 9—Bottom cover 10—LOGO plate 11—Top cover 12—Top-cover-open sensor 13—Paper sensor 14—Paper guide 15—Paper near-end sensor... -
Page 12: Error Led And Buzzers
BTP-R880NP User’s Manual d- Power switch (8) “O” power is to turn off printer. “—” power is to turn on printer. e- Top cover uplifting alarm sensor Monitor top cover status: open/close. f- Paper end sensor To detect if paper is existing or not when using continuous paper; To detect the paper mark when using black mark paper. -
Page 13: Installation
4.2 Printer installation The BTP-R880NP can be installed in two positions: horizontally on a table or vertically on a wall. 1. Horizontally on a table 2. Vertically on a wall... -
Page 14: Connecting The Power Adapter
BTP-R880NP User’s Manual 4.3 Connecting the Power Adapter 1) Confirm the power switch is turned off. 2) Insert the power cord into the power socket on the back of the printer. Caution: Use only the manufacturers supplied power adapter or other equal model. - Page 15 BTP-R880NP User’s Manual 1) Turn off the printer. 2) Open the printer top cover, as in the following figure. 3) Drop in a paper roll in the paper house. 4) Pull the paper roll into the paper holder, and close the printer top cover.
-
Page 16: Paper Near End Adjustment
4.8 Paper near end adjustment 4.8.1 Paper near end position adjustment BTP-R880NP supports printing both in horizontal and vertical positions. Users can detect the remaining paper in the horizontal and vertical position by adjusting the paper near end sensor. The default printer setting is for horizontal printing and the paper near end sensor is at the bottom of the paper compartment. -
Page 17: Power On Printer And Print Self-Test Page
BTP-R880NP User’s Manual 4.8.2 Remaining paper amount adjustment of Paper near end sensor Remaining paper amount can be adjusted by adjusting the position of paper near end sensor Paper near end sensor has six levels, the red mark (actual color on printer is white) shows the current level and it can be adjusted to a different position by moving the click-wheel. -
Page 18: Printer Maintenance
BTP-R880NP User’s Manual 5 Printer maintenance Caution: Before starting routine maintenance, confirm that the printer power is turned off. Do not use solvents like gasoline or acetone. When cleaning sensors, the printer should not be switched on until the pure alcohol has totally ... - Page 19 BTP-R880NP User’s Manual Caution: The cutter sliding blade acts slowly during revolving the thumb wheel. Go on revolving and observe carefully; If the thumb wheel cannot be turned, do not force the wheel, instead turn it the opposite direction.
-
Page 20: Interface Signal
BTP-R880NP User’s Manual 6 Interface Signal 6.1Parallel interface Parallel interface can work in IEEE 1284 compatible mode or half-byte mode. The interface is 36PIN CENTRONICS. The Interface is defined as below: Source Function nStrobe Data 0 (Least Significant Bit) Data 1... -
Page 21: Rs-232 Serial Interface
BTP-R880NP User’s Manual 6.2 RS-232 serial interface The serial interface of the printer is compatible with RS-232, its connector is 25PIN female D type. PIN No. Signal definition PIN1 Frame Ground PIN2 PIN 3 PIN 4 PIN 5 Not connected... -
Page 22: Wlan Interface
BTP-R880NP User’s Manual Supports status back Supports parameter configuration Supports firmware update on-line Supports printer status query and interface module maintenance based on HTTP(JK-E02 interface supports, while JK-E04 interface does not support) Interface signal definition Interface adopts 10/100M BASE-T standard in accordance with IEEE802.3. The interface signal is... -
Page 23: Power Interface Definition
BTP-R880NP User’s Manual requested from the local distributor or manufacture. 6.6 Power interface definition Power supply interface signal definition Signal Name Power socket 24V power interface definition Signal Name +24V 6.7 Cashdrawer interface signal definition Electrical features Driving voltage: DC 24 V ... -
Page 24: Troubleshooting
BTP-R880NP User’s Manual 7 Troubleshooting In case of printer fault, consult this section for solutions and advice. If you do not find a solution in this section, please contact your local dealer for assistance. 7.1 Printer doesn’t work Problems Possible causes... -
Page 25: Accessories
BTP-R880NP User’s Manual 8. Accessories 8.1 Spill proof cover 8.2 HERALD – kitchen alarm system 8.3 Power Supply CASE This cover is used to install the AC power adapter under the printer; so that the power adapter would become an internal part of the printer (the power adapter will be inside of the printer). - Page 26 BTP-R880NP User’s Manual 2) Insert the plastic plugs in the holes and make sure that the plugs are fully inside the holes and do not stick out. 3) Screw the two screws in the plastic plugs and keep10mm space between the screw head and the wall surface.
-
Page 27: Cable For Poweredusb Connections
BTP-R880NP User’s Manual 8.5 Cable for PoweredUSB Connections - 22 -... -
Page 28: Power Management
Ready mode again after completing printing job. Relating Parameter of power management is as below: Maximum Default Delay Times < 5min Because the Maximum Default Delay Times is less than 5 minutes, BTP-R880NP does not open the port of changing this time to end user. -
Page 29: Appendix A: Configuration Setting Function
BTP-R880NP User’s Manual APPENDIX A: Configuration setting function Parameter setting (configuring) by Feed button Hold the FEED button pressed while switching the printer on. After the printer has printed the configuration sheet, press and hold the FEED button to configure the printer. - Page 30 BTP-R880NP User’s Manual PARAMETER SETTING BY FEED BUTTON MAIN MENU Exit ->1 Print Self Test ->2 Configuration ->3 CONFIGURATION Exit Without Save ->1 Exit With Save ->2 Communication ->3 Back To Last ->1 Menu USB Interface ->2 USB MODE:API MODE Back To Last ->1...
-
Page 31: Buzzer
BTP-R880NP User’s Manual Mechanism & ->4 HARDWARE SETTINGS Hardware Back To Last ->1 Menu Mark Sensor ->2 MARK SENSOR: Disable Back To Last ->1 Menu Enable ->2 Disable ->3 Cutter ->3 CUTTER: Back To Last ->1 Menu Cut Mode ->2... - Page 32 BTP-R880NP User’s Manual High ->4 Extra High ->5 Paper Roll Width ->3 PAPER ROLL WIDTH:80.0mm Back To Last ->1 Menu 57.5mm ->2 69.5mm ->3 76.5mm ->4 80.0mm ->5 82.5mm ->6 Left Margin ->4 LEFT MARGIN:7mm Back To Last ->1 Menu ->2...
- Page 33 BTP-R880NP User’s Manual Paper Low Alarm ->2 PAPER LOW ALARM: Enable Back To Last ->1 Menu Enable ->2 Disable ->3 Stop Print When ->3 STOP PRINT WHEN PAPER Low PAPER LOW: Disable Back To Last ->1 Menu Enable ->2 Disable ->3...
- Page 34 BTP-R880NP User’s Manual Enter code,then hold Button Down at least 1 second to validate Sensor Test ->4 Sensor Test Mode: ERROR LED state will change according to sensor state To EXIT,hold button down least 1 second Cutter Test ->5 Print Statistics ->6...
Need help?
Do you have a question about the BTP-R880NP and is the answer not in the manual?
Questions and answers