Advertisement
Table of Contents
- 1 Table of Contents
- 2 Table of Contents Product Registration
- 3 Important Safety Instructions
- 4 Important Electrical Information
- 5 Important Operation Instructions
- 6 Assembly Pack Check List
- 7 Assembly Instructions
- 8 Features
- 9 Operation of Your New Elliptical
- 10 Operation Instructions
- 11 Maintenance
- 12 Parts List and Explode Drawing
- 13 Manufacturer's Limited Warranty
- 14 Warranty Information
- Download this manual
Advertisement
Table of Contents

Subscribe to Our Youtube Channel
Related Manuals for Fuel Fitness AVENGER FUL0005


Summary of Contents for Fuel Fitness AVENGER FUL0005
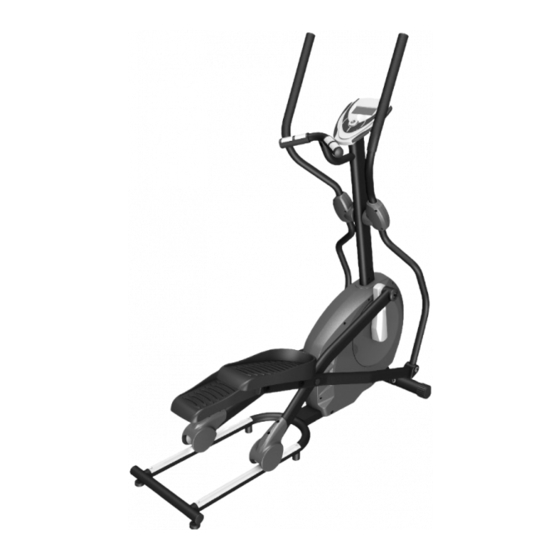
- Page 1 FUL0005 -2013- Z500 Z100 / Z300 Z700 AVENGER OWNER’S MANUAL PLEASE CAREFULLY READ THIS ENTIRE MANUAL BEFORE OPERATING YOUR NEW ELLIPTICAL!
-
Page 2: Table Of Contents
Table of Contents Product Registration…………………………………………………………………………..2 Important Safety Instructions………………………………………………………………… 3 Important Electrical Information……………………………………………………………… 4 Important Operation Instructions…………………………………………………………….. 4 Assembly Instructions………………………………………………………………………… 5 Features……………………………………………………………………………………….. 12 Operation of Your New Elliptical…………………………………………………………….. 13 Maintenance……………………...…………………………………………………………… 18 Parts List and Explode Drawing.……………………………………………………………. 19 Manufacturer’s Limited Warranty…………………………………………………………… 22 AVENGER Elliptical... -
Page 3: Table Of Contents Product Registration
CONGRATULATIONS ON YOUR NEW ELLIPTICAL AND WELCOME TO THE FUEL FAMILY! Thank you for your purchase of this quality elliptical trainer. Your new elliptical was manufactured by one of the leading fitness manufacturers in the world and is backed by one of the most comprehensive warranties available. -
Page 4: Important Safety Instructions
Important Safety Instructions WARNING - Read all instructions before using this appliance. ■ Do not operate elliptical on deeply padded, plush or shag carpet. Damage to both carpet and elliptical may result. ■ Keep children away from the elliptical. There are obvious pinch points and other caution areas that can cause harm. -
Page 5: Important Electrical Information
Important Electrical Information WARNING! NEVER remove any cover without first disconnecting AC power supply. If A.C. voltage varies by ten percent (10%) or more, the performance of your elliptical may be affected. Such conditions are not covered under your warranty. If you suspect the voltage is low, contact your local power company or a licensed electrician for proper testing. -
Page 6: Assembly Instructions
Assembly Instructions ASSEMBLY PACK CHECK LIST Step 1 #112. 3/8" × 23 × 1.5T #96. 3/8" Ø #104. 8.5× 26 × 2.0T Curved Washer (2pcs) Cap Nut (2pcs) Flat Washer (2pcs) #80. 5/16" × 15m/m #77. 3/8" × 3" Button Head Socket Bolt (2pcs) Carriage Bolt (2pcs) Step 2 #111. - Page 7 Step 3 #82. M5 × 15m/m Ø #74. 5/16" × 15m/m #104. 8.5× 26 × 2.0T Phillips Head Screw (4pcs) Hex Head Bolt (2pcs) Flat Washer (2pcs) Step 4 #91. 5/16" × 7T #113. 5/16" × 23 ×1.5T Nyloc Nut (6pcs) Curved Washer (4pcs) #87.
- Page 8 Tools #116. 12 mm Wrench (1pcs) #115. 13&14 mm Wrench (1pcs) #118. Combination M5 Allen Wrench & Phillips Head Screw Driver (1pcs) AVENGER Elliptical...
- Page 9 Step 1. Front Stabilizer and Connecting Arm Assembly 1. Install the Front Stabilizer (14) on the front stabilizer holding plate at the bottom of the main frame with the transportation wheels facing forward and secure them with 2pcs of 3/8" × 3" Carriage Bolts(77), 2pcs of 3/8"...
- Page 10 Step 2. Console Mast Assembly 1. Use cable tie to guide the 1150m/m Computer Cable (36) through Console Mast(11) and then pull out of the console holding plate, and Insert the console mast into main frame and secure with 6pcs of 5/16" × 15m/m Button Head Socket Bolts(80), 6pcs of 5/16" × 1.5T Split Washers(111), 4pcs of 5/16"...
- Page 11 Step 3. Handle Bar Assembly 1. Install the Lower Handle Bar (L) (9) in the left shaft of Console Mast(11) and the Lower Handle Bar (R) (10) in the right shaft of Console Mast(11), and secure them with 2pcs of 5/16"...
- Page 12 Step 4. Connecting Arm Assembly 1. Connect the Swing Arm (L) (15) to the left Lower Handle Bar and connect the Swing Arm (R) (16) to the right Lower Handle Bar, and secure them with 6pcs of 5/16" ×1-3/4" Hex Head Bolts (76),4pcs of 5/16"...
-
Page 13: Features
Features Correctly aligned orthopedic foot pads Through research performed with a leading sports scientist and physical rehabilitation expert, engineering has developed a breakthrough in pedal design. No other elliptical, at any price, offers these unique features. The history of elliptical use over the past few years tells us that many users suffer from numb toes while working out on elliptical trainers. -
Page 14: Operation Of Your New Elliptical
Operation of Your Elliptical Getting familiar with the control panel Console ■ Key Functions: ENTER: 1. Press this button to confirm the setting value of Year- Month- Date- Hour-Minute and alarm. 2. Press this button to select functions of Distance, Time, Calories, T.H.R, Gender, Age, Height, Weight and heart Rate% to be preset, the chosen function will be blinking. - Page 15 DOWN (Turn the knob to left) 1. Decrease the setting value during setting mode. (The monitor has to be in stop condition.) 2. Decrease the level of loading. 3. Select the program form Manual , Preset programs of P1~ P12, Body Fat program, Target Heart Rate program, Heart Rate Control program and 4 users programs of U1~U4 during stop condition.
-
Page 16: Operation Instructions
Operation Instructions: 1. The full LCD display will be shown with beep sound at the same time after the monitor is power on. After that the ODO and wheel size will be shown 2 seconds on the lower display. 2. Set up Calendar & Clock Turn the knob to right or left to set the value while the number of year, month, date and time is blinking then press Enter key to confirm each setting value. - Page 17 d. T.H.R. (Target Heart Rate) User can preset the target heart rate from 60 to 220. Place your palms on the both of the contact pads appropriately and the monitor will show up your heart rate in beat per minute on the lower LCD display. Once your heart rate reach your setting value (T.
- Page 18 * Target heart rate program Press ENTER key to enter setting mode to set up Distance, Time, Calories and T.H.R. Turn the knob to right or left to adjust the value and then press ENTER key to confirm each value. After pressing START key to exercise and place your palms on the both contact pads appropriately.
-
Page 19: Maintenance
Maintenance: 1. Wipe down all areas in the sweat path with a damp cloth after each workout. 2. If a squeak, thump, clicking or rough feeling develops the main cause is most likely one of two reasons: The hardware was not sufficiently tightened during assembly. All bolts that were installed during assembly need to be tightened as much as possible. -
Page 20: Parts List And Explode Drawing
AVENGER–FUL0005 Parts List DESCRIPTION O'TY Main Frame Crank Arm Assembly Pedal Arm Connecting Arm (L) Connecting Arm (R) Lower Handle Bar (L) Lower Handle Bar (R) Console Mast Idler Wheel Assembly Crank Axle Front Stabilizer Swing Arm (L) Swing Arm (R) Rod End Sleeve Rod End Shaft (Blackfast) Axle for Slide Wheel (Blackfast) - Page 21 DESCRIPTION O'TY Pedal (L) Pedal (R) Slide Wheel Cover Ø42 × Ø19 × 15L_Bushing Ø42 × Ø19 × 15L_Bushing Bolt Access Cap Front Handle Bar Cover (L) 69~1 Rear Handle Bar Cover (L) Front Handle Bar Cover (R) 70~1 Rear Handle Bar Cover (R) 1/4"...
- Page 22 AVENGER–FUL0005 Explode Drawing AVENGER Elliptical...
-
Page 23: Manufacturer's Limited Warranty
Warranty / Service IMPORTANT Please read and retain this manual as it will assist with identification for parts and service. LIMITED WARRANTY Frame Lifetime All Other parts 1 Year BOYLES FITNESS warrants its FUL0005- AVENGER Elliptical to be free from defects in material and workmanship under normal use and service conditions. -
Page 24: Warranty Information
WARRANTY INFORMATION FUL0005 Congratulations on your purchase! As of January 1 2012, new legislation under the Australian Consumer Law requires certain information to be included in any product warranty issued in Australia. This warranty compliments the warranty found in the manual and has been developed in line with the Australian Consumer Law. - Page 25 The service centre representative will assess the claim. If: 1) there is a minor fault, they can offer either a replacement spare part, replacement unit, repair or other suitable remedy; 2) there is a major fault, they can offer a replacement, repair or suggest you return to the store you purchased it from for a full refund.
Need help?
Do you have a question about the AVENGER FUL0005 and is the answer not in the manual?
Questions and answers