Table of Contents
Advertisement
Quick Links
Operation / Installation
Manual
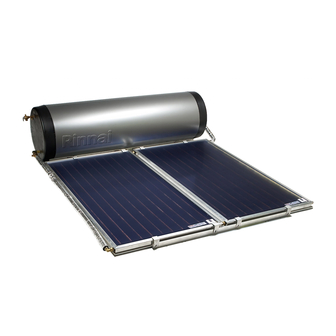
Rinnai Prestige
Close Coupled Systems
®
The appliance must be installed, commissioned and serviced by
an authorised person in accordance with all applicable local rules
NOTE
and regulations.
AS 2712
Lic No.1849
SAI Global
All Rinnai gas products
W169
are A.G.A. certified.
SAI Global
NOT SUITABLE AS A POOL OR SPA HEATER.
Advertisement
Table of Contents

Subscribe to Our Youtube Channel
Related Manuals for Rinnai Prestige Close Coupled Systems


Summary of Contents for Rinnai Prestige Close Coupled Systems
- Page 1 The appliance must be installed, commissioned and serviced by an authorised person in accordance with all applicable local rules NOTE and regulations. AS 2712 Lic No.1849 SAI Global All Rinnai gas products W169 are A.G.A. certified. SAI Global NOT SUITABLE AS A POOL OR SPA HEATER.
- Page 2 IMPORTANT INFORMATION...
-
Page 3: Table Of Contents
FILLING THE SYSTEM .............................. 41 PRE SOLAR HEATING CHECKS ..........................42 SOLAR HEATING................................ 42 FINISHING THE INSTALLATION ..........................42 DRAINING INSTRUCTIONS ............................42 CONTACT INFORMATION........................... 45 Rinnai Australia - i - Solar Close Coupled Operating / Installation Manual - Issue 7 - 16/9/10... -
Page 4: Important Information & Warnings
MUST BE replaced by an authorised person in order to avoid a hazard, using genuine replacement parts available from Rinnai. Take care not to touch the power plugs with wet hands. Care should be taken not to touch the pipe work as it may be HOT! The pipes between the solar collectors and storage cylinder MUST BE copper, or alternative material pipes that may be supplied by Rinnai. -
Page 5: Scalds Hazards
Leave a toddler in the care of another child. They may not understand the need to have the water temperature set at a safe level. Rinnai Australia - 3 - Solar Close Coupled Operating / Installation Manual Issue 7 - 16/9/10... -
Page 6: Operation Principle
Figure 1. Close Coupled Gas Boosted Solar Hot Water Systems STORAGE CYLINDER COLLECTORS COLD WATER HOT WATER SUPPLY DELIVERY Figure 2. Close Coupled Electric Boosted Solar Hot Water Systems Rinnai Australia - 4 - Solar Close Coupled Operating / Installation Manual Issue 7 - 16/9/10... -
Page 7: Safety Devices
If the valve leaks continuously, try easing the valve gear for a few seconds. This may dislodge any foreign matter and alleviate the problem. If this does not alleviate the problem contact Rinnai. Operate the easing gear regularly to remove any lime deposits and to verify that it is not blocked. -
Page 8: Water Temperature
DRAINING AND FILLING THE WATER HEATING SYSTEM • Draining or filling normally occur only during installation or servicing and must be carried out by an authorised person. Rinnai Australia - 6 - Solar Close Coupled Operating / Installation Manual Issue 7 - 16/9/10... -
Page 9: Maintenance And Regular Care
If the electric conduit, power supply cord or plug to the water heater is damaged, they must be replaced by an authorised person in order to avoid a hazard. The power supply cord and plug (if fitted) must be replaced by a genuine replacement part available from Rinnai. Rinnai Australia... -
Page 10: Save A Service Call
SAVE A SERVICE CALL SAVE A SERVICE CALL Before calling Rinnai for service, perform the fault finding steps in the Table 1. If the problem persists, contact Rinnai. Service calls attending to any condition or fault that is not related to the Rinnai product and components may be chargeable. - Page 11 The temperature of the water delivered should be at least 55° C (allowing for heat losses in pipe work). If this is not the case or the temperature needs to be increased contact Rinnai. The thermostat settings of the heating element thermostat can also be confirmed directly by a qualified person as described under 'hot water storage &...
-
Page 12: Specifications
Electric Element Power Rating for Electric Systems (kW) 24, or 3.6 standard 1.8 or 4.8 available separately Gas Booster S20, S26 or other Rinnai Infinity Models converted to Solar. * (Refer section on gas booster specification) Rinnai Australia - 10 -... - Page 13 Dimsensions shown for Enduro and Equinox collectors Dimensions in brackets “(__)” for 1940 (1965) Excelsior collectors 2535 (2560) Figure 3 - System Dimensions Rinnai Australia - 11 - Solar Close Coupled Operating / Installation Manual - Issue 7 - 16/9/10...
-
Page 14: Collector Specifications
60°C or 65°C will be marked as such. If there are no temperature markings on the water heater, on site conversion is required. Other models of Rinnai Infinity Water Heaters (including internal units) can be converted to solar gas boosters. Contact Rinnai for details. -
Page 15: Installation Information
The collector flow and return pipes must be a minimum of 1/2” copper tube or alternative material pipe supplied by Rinnai. Plastic pipe must not be used between collectors and cylinder or booster. Plastic pipe is not suited to the... -
Page 16: Water Supply
Figure 4 - Tempered Gas hot water systems LAUNDRY BATHROOM COLD WATER HEATED WATER SUPPLY FROM STORAGE KITCHEN ENSUITE CYLINDER TEMPERATURE LIMITING DEVICE Figure 5 - Tempered Electric hot water systems Rinnai Australia - 14 - Solar Close Coupled Operating / Installation Manual Issue 7 - 16/9/10... -
Page 17: Valves And Fittings
For gas boosted systems, elbow connections for the hot, cold and gas supply are fitted at the bottom of the gas booster. • Fittings as shown in Figures 24 to 27. Rinnai Australia - 15 - Solar Close Coupled Operating / Installation Manual Issue 7 - 16/9/10... -
Page 18: System Orientation And Inclination
24°S Canberra 35°S Mildura 34°S Rockhampton 24°S Brisbane 27°S Darwin 12°S Melbourne 38°S Sydney 34°S Broken Hill 31°S Geraldton 28°S Perth 32°S Townsville 19°S Issue 7 - 16/9/10 Rinnai Australia - 16 - Solar Close Coupled Operating / Installation Manual... -
Page 19: Roof Mounting Options
For roofs with a slope of 10° or less a flat roof frame must be used. Rinnai do not recommend installing Close Coupled systems on roofs with a pitch greater than 30°. An additional strap should be used to prevent the cylinder from tipping over if a system is installed in this manner. - Page 20 WASHER 17401072 strap to mounting rail) 16801062 Collector Retainer 26601706 BOLT 22601073 M6 Bolt, Washer and Nut WASHER 17401073 (used with collector retainers) 16801007 Issue 7 - 16/9/10 Rinnai Australia - 18 - Solar Close Coupled Operating / Installation Manual...
-
Page 21: Installation Of Solar Collectors & Cylinders
STANDARD INSTALLATION Cylinder Mounting Component Pre Assembly for a Standard Installation This installation is not suitable for use in cyclonic areas. For further details, please contact your local Rinnai Solar distributor. NOTE • Assemble the cylinder cradle components and the lower collector rail components as shown in Figure 10. - Page 22 INSTALLATION OF SOLAR COLLECTORS & CYLINDERS STANDARD INSTALLATION CONTINUED Fastening (Collectors to a Tiled Roof) This installation is not suitable for in cyclonic areas. For further details, please contact your local Rinnai Solar distributor. NOTE • Position the lower collector mounting rail...
- Page 23 INSTALLATION OF SOLAR COLLECTORS & CYLINDERS STANDARD INSTALLATION CONTINUED Fastening (Collectors to a Metal Roof) This installation is not suitable for use in cyclonic areas. For further details, please contact your local Rinnai Solar distributor. NOTE • Position the lower collector mounting rail...
-
Page 24: Attaching Mounting Rail To Cylinder
Once the rail is attached and suitably tightened, continue the cylinder installation as shown on the next page. Figure 20 - Cylinder with both rails Rinnai Australia - 22 - Solar Close Coupled Operating / Installation Manual Issue 7 - 16/9/10... -
Page 25: Standard Installation Continued
• Seal any holes in roof using a suitable sealant to ensure roof is water tight. Figure 23 - Cylinder Installation Metal Roof Rinnai Australia - 23 - Solar Close Coupled Operating / Installation Manual Issue 7 - 16/9/10... -
Page 26: Roof Pitch Greater Than 30
Securely fasten strap using a suitable fastener Rinnai Australia - 24 - Solar Close Coupled Operating / Installation Manual Issue 7 - 16/9/10... -
Page 27: Framed Installations - Flat, Reverse And Side Pitch
INSTALLATION OF SOLAR COLLECTORS & CYLINDERS FRAMED INSTALLATIONS - FLAT, REVERSE AND SIDE PITCH This installation is not suitable in cyclonic areas. For the correct frame for use in cyclone areas, contact your local Rinnai Solar distributor. NOTE Table 9 - Framed Installations •... - Page 28 INSTALLATION OF SOLAR COLLECTORS & CYLINDERS 180 Litre Cylinder with 1 Collector Figure 24 - 180 Litre Cylinder with 1 Collector Rinnai Australia - 26 - Solar Close Coupled Operating / Installation Manual Issue 7 - 16/9/10...
- Page 29 INSTALLATION OF SOLAR COLLECTORS & CYLINDERS Rinnai Australia - 27 - Solar Close Coupled Operating / Installation Manual Issue 7 - 16/9/10...
- Page 30 INSTALLATION OF SOLAR COLLECTORS & CYLINDERS 180 Litre Cylinder with 2 Collectors Figure 25 - 180 Litre Cylinder with 2 Collectors Rinnai Australia - 28 - Solar Close Coupled Operating / Installation Manual Issue 7 - 16/9/10...
- Page 31 INSTALLATION OF SOLAR COLLECTORS & CYLINDERS Rinnai Australia - 29 - Solar Close Coupled Operating / Installation Manual Issue 7 - 16/9/10...
- Page 32 INSTALLATION OF SOLAR COLLECTORS & CYLINDERS 330 Litre Cylinder with 2 Collectors Figure 26 - 330 Litre Cylinder with 2 Collectors Rinnai Australia - 30 - Solar Close Coupled Operating / Installation Manual Issue 7 - 16/9/10...
- Page 33 INSTALLATION OF SOLAR COLLECTORS & CYLINDERS Rinnai Australia - 31 - Solar Close Coupled Operating / Installation Manual Issue 7 - 16/9/10...
- Page 34 INSTALLATION OF SOLAR COLLECTORS & CYLINDERS 330 Litre Cylinder with 3 Collectors Figure 27 - 330 Litre Cylinder with 3 Collectors Rinnai Australia - 32 - Solar Close Coupled Operating / Installation Manual Issue 7 - 16/9/10...
- Page 35 INSTALLATION OF SOLAR COLLECTORS & CYLINDERS Rinnai Australia - 33 - Solar Close Coupled Operating / Installation Manual Issue 7 - 16/9/10...
-
Page 36: Installation & Maintenance - Gas Boosted Systems
SMARTSTART® Smartstart® Function The Smartstart® is a separate system that works in conjunction with the Rinnai solar hot water system. When activated by the manual activation switch, water in the pipework connected between the solar hot water system and the hot water outlets is warmed before any outlets are opened. - Page 37 INSTALLATION & MAINTENANCE - GAS BOOSTED SYSTEMS Figure 28 - Smartstart® Schematic Rinnai Australia - 35 - Solar Close Coupled Operating / Installation Manual Issue 7 - 16/9/10...
-
Page 38: Clearances
It is the installer’s responsibility to ensure current requirements are met. AS 5601 - Figure 5.3 ‘Clearances’ - Gas Booster Flue Terminal Rinnai Australia - 36 - Solar Close Coupled Operating / Installation Manual Issue 7 - 16/9/10... -
Page 39: Installation Procedure
• Connect a suitable gas supply and isolating valve to the gas booster. Follow instructions supplied with gas booster. Keep gas booster isolated at this stage. Rinnai Australia - 37 - Solar Close Coupled Operating / Installation Manual Issue 7 - 16/9/10... -
Page 40: Filling The System
Instructions for gas pressure setting are located in the pocket behind the front cover of the gas booster. Close the hot water taps including the shower. Rinnai Australia - 38 - Solar Close Coupled Operating / Installation Manual Issue 7 - 16/9/10... -
Page 41: Solar Heating
Remove any cardboard or tarp covers that may have been placed over the solar collectors to prevent them from heating water during installation and commissioning. Activate electrical power to the Rinnai gas booster. Solar heating of the water in the cylinder will now commence when sufficient solar radiation is available. -
Page 42: Installation & Maintenance - Electric Systems
Connect the hot water outlet of the storage cylinder to the pipe work supplying hot water to the premises. A temperature limiting device may be required as detailed in the section “HOT WATER DELIVERY TEMPERATURE”. WARNING 16/9/10 Rinnai Australia - 40 - Solar Close Coupled Operating / Installation Manual Issue 7 -... -
Page 43: Filling The System
If this is necessary, temporarily cover the solar collectors with WARNING packaging cardboard or a tarp to prevent them from heating which could result in steam or hot water being discharged from fittings. 16/9/10 Rinnai Australia - 41 - Solar Close Coupled Operating / Installation Manual Issue 7 -... -
Page 44: Pre Solar Heating Checks
4. Disconnect ‘cold water inlet’ connection to the T/A valve. 5. Remove the brass plug on the bottom right hand side of the collector bank. 6. The system will now drain all water. 16/9/10 Rinnai Australia - 42 - Solar Close Coupled Operating / Installation Manual Issue 7 -... - Page 45 16/9/10 Rinnai Australia - 43 - Solar Close Coupled Operating / Installation Manual Issue 7 -...
- Page 46 IMPORTANT INFORMATION...
-
Page 48: Contact Information
Fax: 1300 300 141* *Cost of a local call Higher from mobile or public phones. Rinnai has a Service and Spare Parts network with personnel who are fully trained and equipped to give the best service on your Rinnai appliance. If your appliance Hot Water Service Line requires a service, please call our National Help Line.
Need help?
Do you have a question about the Prestige Close Coupled Systems and is the answer not in the manual?
Questions and answers