
Subscribe to Our Youtube Channel
Related Manuals for ATD Tools ATD-10515


Summary of Contents for ATD Tools ATD-10515
- Page 1 ATD-10515 14" Cut-off Saw with Laser Guide Operation and Safety Instructions 07/12...
-
Page 2: Table Of Contents
Table of contents Technical data ............2 General safety rules . -
Page 3: General Safety Rules
II. General safety rules Safety is a combination of common sense, staying alert, and knowing how your cut-off saw works. WARNING: TO AVOID MISTAKES THAT COULD CAUSE SERIOUS INJURY, DO NOT PLUG IN THE CUT-OFF SAW UNTIL THE FOLLOWING STEPS HAVE BEEN READ AND UNDERSTOOD. - Page 4 II. General safety rules ... continued 17. CHECK FOR DAMAGED PARTS. Check moving parts for alignment, jamming, breakage, improper mounting, or any other conditions that may affect the tool's operation. Any part that is damaged should be properly repaired or replaced before use. 18.
-
Page 5: Specific Safety Rules For The Cut-Off Saw
III. Specific safety rules for the cut-off saw WARNING: DO NOT OPERATE YOUR CUT-OFF SAW UNTIL IT IS COMPLETELY ASSEMBLED AND INSTALLED ACCORDING TO THE INSTRUCTIONS. 1. If you are not thoroughly familiar with the operation of a cut-off saw, obtain advice from a supervisor, instructor, or other qualified person. -
Page 6: Electrical Information
IV. Electrical information GROUNDING INSTRUCTIONS IN THE EVENT OF A MALFUNCTION OR BREAKDOWN, grounding provides the path of least resistance for electric current to reduce the risk of electric shock. This tool is equipped with an electric cord that has an equipment grounding conductor and a grounding plug. The plug MUST be plugged into a matching outlet that is properly installed and grounded in accordance with ALL local codes and ordinances. - Page 7 IV. Electrical information ... continued GUIDELINES FOR USING EXTENSION CORDS Make sure your extension cord is in good condition. When using an extension cord, be sure to use one heavy enough to carry the current your product will draw. An undersized cord will cause a drop in line voltage resulting in loss of power and overheating.
-
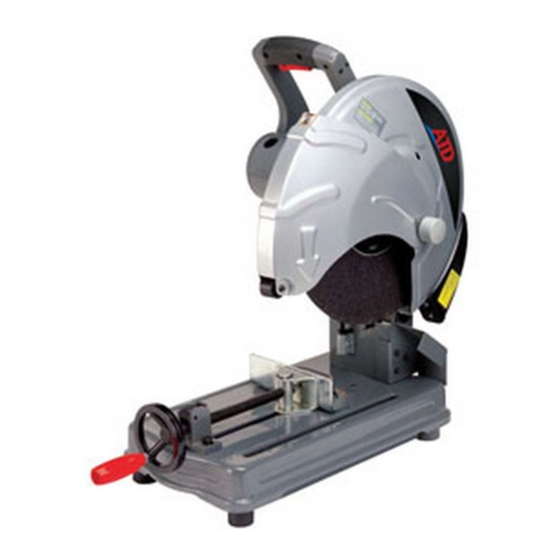
Page 8: Know Your Cut-Off Saw
V. Know your cut-off saw A D-handle K Vise handle B Trigger switch L Vise wheel C Reset switch M Saw table D Upper blade guard N Depth stop bolt E Arbor lock O Wheel lock lever F Lower blade guard P Carbon brush cap G 14"... -
Page 9: Assembly And Adjustments
VI. Assembly and adjustments Unpacking (Fig. 1) Fig. 1 1. Remove the cut-off saw (1) from the carton by lifting it by the carrying handle. 2. Place the cut-off saw on a secure surface and examine it carefully. Ensure that you have: •... -
Page 10: Operation
VII. Operation ON/OFF trigger switch (Fig. 4) Fig. 4 To start the cut-off saw, squeeze the trigger switch (1). To stop the cut-off saw, release the trigger switch. Reset switch (Fig. 4) If the cut-off saw does not start when the trigger switch is depressed, press the reset switch (2). - Page 11 VII. Operation ... continued Installation and removal of metal cutting disc (Fig. 8 and 9) Fig. 8 1. Unplug the cut-off saw. 2. Push the arbor lock lever (1) towards the metal cutting disc (2) and slowly turn the disc (either direction) until the disc locks.
- Page 12 VII. Operation ... continued Cutting workpiece (Fig. 11) Fig. 11 1. Set the angle plate (1) to the desired cutting angle. 2. Make sure the workpiece lies flat on the cut- off saw table. 3. Use the vise (2) to secure the workpiece to the table.
-
Page 13: Maintenance
USE OF ANY OTHER PARTS MAY CREATE A HAZARD OR CAUSE PRODUCT FAILURE. Lubrication ATD tools are properly lubricated at the factory and are ready to use. When necessary, lubricate only those parts that pivot or move with a dry silicone spray. Lubricating motor bearings and other internal parts should be done only by qualified service technicians. -
Page 14: Replacement Parts
IX. Replacement parts WARNING: ALL ELECTRICAL OR MECHANICAL REPAIRS SHOULD BE ATTEMPTED ONLY BY A QUALIFIED SERVICE TECHNICIAN. USE ONLY IDENTICAL REPLACEMENT PARTS. ANY OTHER PARTS MAY CREATE A HAZARD. - Page 15 IX. Replacement parts ... continued Part no. Part no. PRT10515-01 POWER CORD PRT10515-53 BEARING,6004 PRT10515-02 POWER CORD SHEATH PRT10515-54 C-RING PRT10515-03 SCREW PRT10515-55 GEAR BOX COVER PRT10515-04 CARRY HANDLE (L) PRT10515-56 INNER FLANGE PRT10515-05 SPRING WASHER PRT10515-57 BLADE SLEEVE PRT10515-06 CARRY HANDLE (R) PRT10515-58 SCREW...
- Page 16 IX. Replacement parts ... continued ATD-10515 14" Cut-off Saw with Laser Guide Part no. Part no. PRT10515-106 PIN 1 PRT10515-124 C-RING PRT10515-107 PIN 2 PRT10515-125 PRT10515-108 SCREW PRT10515-126 CLAMP PRT10515-109 PRT10515-127 LOCKNUT PRT10515-110 DEPTH STOP BASE PRT10515-128 SCREW PRT10515-111 BIG SPRING...
Need help?
Do you have a question about the ATD-10515 and is the answer not in the manual?
Questions and answers