Table of Contents
Advertisement
Quick Links
Advertisement
Table of Contents

Related Manuals for XPLORE TECHNOLOGIES XC6


Summary of Contents for XPLORE TECHNOLOGIES XC6
-
Page 3: Table Of Contents
Resuming operation ..........37 XC6 User’s Handbook... - Page 4 Displaying power options ........55 XC6 User’s Handbook...
- Page 5 Calibrating the digitizer..........77 Troubleshooting XC6 User’s Handbook...
- Page 6 Take back and recycling program ........104 Environmental and Sustainability Corporate Report ..... 105 Index XC6 User’s Handbook...
-
Page 7: Publication Information
Trademarks Xplore and the Xplore logo are registered trademarks of Xplore Technologies Corp.; iX104, XC6, XC6 Lite, and XC6 Dual Mode are trademarks of Xplore Technologies Corp. Kensington and MicroSaver are registered trademarks of the Kensington Technology Group. Microsoft is a registered trademark of Microsoft Corporation. -
Page 8: Declaration Of Conformity
Changes or modifications to this unit not expressly approved by the party responsible for compliance may void the user’s authority to operate this equipment. For more information about FCC rules and their applicability to the XC6, see Appendix E, “Agency Notices.”... -
Page 9: Important Safety Information
Important safety information Before you use the XC6 (referred to as the tablet), read these safety instructions and the operation instructions in this handbook. Failure to observe all these instructions voids the Limited Warranty and may lead to suspension or denial of services to the offender, or legal action, or both. - Page 10 Pay particular attention to cords at plugs and convenience receptacles, and at the point where cords exit from the tablet or its dock. Do not overload wall outlets, extension cords, or integral convenience receptacles because this can cause fire or electric shock. XC6 User’s Handbook...
- Page 11 (for example, if you rest the tablet on your lap for a long time), your skin may suffer low-heat injury. In addition, be careful when you remove a PC card that has been used for a long time, because the card may be hot. XC6 User’s Handbook...
- Page 12 XC6 User’s Handbook...
-
Page 13: Welcome
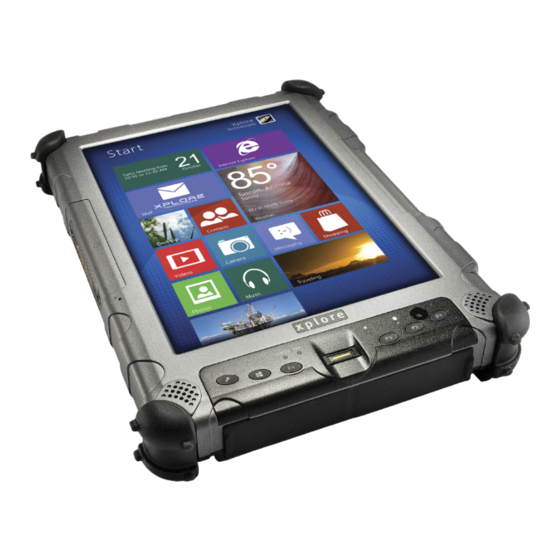
Based on years of experience in rugged mobile applications, the XC6 is designed to withstand the abuses of everyday wear and tear. -
Page 14: About Your Computer
Welcome About your computer The XC6 is a high-performance tablet PC that runs on Microsoft Windows 7 32-bit, Windows 7 64-bit, and Windows 8.1 64-bit operating systems. You can use any of the following methods to control the tablet: Special, enhanced pen (included with the tablet) ■... -
Page 15: Package Contents
■ AC adapter ■ Stylus pen (attached to tablet) ■ Stylus pen tether (attached to tablet) ■ XC6 tablet PC ■ Warranty information kit ■ Operating System Recovery Guide ■ Optional accessories Your package also includes any optional accessories you ordered. - Page 16 Extended life battery pack (80.75 watt hours) ■ Auto adapter (cigarette lighter adapter) ■ Additional accessories Top-mounted Fast-Lock GPS II Pro (submeter accuracy) ■ Non-rugged USB optical disk drive ■ USB rugged, backlit keyboard (83-key) ■ Replaceable drive cartridges ■ Active stylus ■ XC6 User’s Handbook...
-
Page 17: Contacting Xplore - Service And Questions
1-512-336-7791 Before you contact Xplore, have the following information ready so that the customer support representative can quickly provide a solution: Product name: XC6 Product serial number Purchase date Conditions under which the problem occurred Any error messages that were displayed Type of device connected, if any XC6 User’s Handbook... - Page 18 XC6 User’s Handbook...
-
Page 19: Getting Started
Enables you to input mono audio with noise cancellation. (See page 48.) Status indicator Indicates the computer status (on, off, etc.). (See page 26.) Speakers Enable you to listen to stereo audio files. Sealed to provide protection from the environment. XC6 User’s Handbook... - Page 20 Detects ambient light conditions. SSD indicator Indicates hard drive activity. (See page 26.) Digital camera 1-megapixel, auto-focus camera for taking color or black-and-white images or videos. Fingerprint scanner Enables you to use fingerprint verification features. (See page 42.) XC6 User’s Handbook...
-
Page 21: Back View
The main device you use to enter data and control applications (instead of a mouse or a keyboard). Also called the stylus. See “Using the pen” on page 38. Pen holder Provides a place to secure the pen when you are not using it. XC6 User’s Handbook... -
Page 22: Left Side View
Helps prevent the computer from overheating by forcing heat away from the computer. (Do not block the vents.) XPL side port Permits connection of special devices made expressly for the XC6. Kensington™ lock slot Connector for the optional Kensington MicroSaver™ or equivalent compatible security cable. -
Page 23: Right Side View
(LAN) card 9-pin serial connector Serial connector for connecting terminals or other devices that use the RS-232, RS-422, or RS-485 data transfer standard, or an optional connector for an external optional external monitor monitor or projection panel. connector XC6 User’s Handbook... -
Page 24: Bottom View
Docking connector Enables you to connect the optional xStand Desktop Docking Station or xDock Vehicle Docking Stations. Guide pin receptacles Help assure a secure connection of the optional xStand or xDock. Note: See “Optional accessories” on page 15. XC6 User’s Handbook... -
Page 25: Top View
Top view Top view XPL expansion port Bumpers XPL expansion port A port that permits connection of special devices made expressly for the XC6. Bumpers Fabricated from rugged material. Raised to help protect the computer from damage. XC6 User’s Handbook... -
Page 26: Led Indicators
On, Off, or Hibernating blinking fully charged slowly green/cyan, plugged in charging blinking slowly Sleep mode green, discharging breathing plugged in plugged in removed green, plugged in fully charged continuous removed plugged in discharging XC6 User’s Handbook... - Page 27 The tablet has encountered a fault and is not operating normally. Contact your computer support personnel, such as your help desk. amber, installed High temperature continuous conditions threshold has been exceeded. amber/green, installed Critical temperature blinking conditions threshold has been quickly exceeded. XC6 User’s Handbook...
-
Page 28: Quick-Start Guide
This section is a quick guide to using the main features of your tablet. (See Chapter 2 for detailed information.) Application, Windows, and hot keys Hot key 1 Secure Attention Sequence key Windows Start key Hot key 2 Function Hot key 3 Fingerprint scanner XC6 User’s Handbook... - Page 29 To perform this function Log on after resuming operation from power management, powering on, or locking. After logging on, launch Windows Task Manager. Display the Windows Start menu. Use in combination with another key to perform various functions. Fingerprint scanner. XC6 User’s Handbook...
- Page 30 Press these keys... To perform this function Open Charm bar. Transition between open apps. Change video output. To define a function, see [No pre-programmed function.] “Programming hot keys” on page 63. [No pre-programmed function.] Put computer in Sleep mode. XC6 User’s Handbook...
-
Page 31: Using The Tablet
Status LED is off. Make sure the battery is charged or that the computer is plugged in to an external power source. Press the button. Power On/Off, Backlight On/Off, Sleep/Resume Power On/Off, Backlight On/Off, Sleep/Resume button XC6 User’s Handbook... -
Page 32: Turning Off The Computer
Save your work and close all programs. From the Windows menu, click Start Turn Off Computer dialog box opens. Turn off computer Click or press the button continuously for more Turn Off Power than 4 seconds. XC6 User’s Handbook... -
Page 33: Using The Reset Switch
(Use the stylus or a similar computer by any other Reset means, because you may instrument to press the switch). lose unsaved data. Reset switch Note: If the computer does not reset after you press the Reset switch, try pressing it again. XC6 User’s Handbook... -
Page 34: Suspending And Resuming Operation
Off) / Sleep/ Resume button options” on page 58. In the default configuration, the P3 key puts the computer in Sleep mode and the Power button shuts down the computer. To change these settings, see “Programming hot keys to perform predefined functions” on page 68. XC6 User’s Handbook... -
Page 35: Suspending Operation
See “Selecting Power (On/Off) / Backlight (On/ Off) / Sleep/ Resume button options” on page 58. P3 key Method 2 Press the Windows button; then press the right arrow next to Start button. Shutdown Press Sleep XC6 User’s Handbook... - Page 36 Chapter 2. Using the Tablet Suspending and resuming operation When operation is suspended, the Status LED displays a breathing green light. Windows button Start Status LED XC6 User’s Handbook...
-
Page 37: Resuming Operation
Power On/Off, Backlight On/Off, Suspend/Resume Note: Press the button only once. Power On/Off, Backlight On/Off, Sleep/Resume button Approximately 20 seconds later, the computer resumes normal operation. When the Status LED displays a continuous green light, you can begin using the computer. XC6 User’s Handbook... -
Page 38: Using The Pen
Note: During the first use of the tablet, or if the action you are trying to perform does not occur when you use the pen or your finger to touch the screen, calibrate the digitizer as described in “Calibrating the digitizer” on page 77. XC6 User’s Handbook... -
Page 39: Using The Digitizer To Perform Mouse Functions
To change the speed, follow the instructions below. Click the Windows button. Start Click the option. Control Panel In the Control Panel window, select Hardware and Sound > Set up your Pen and Tablet. Drag the slider to a faster or slower speed. XC6 User’s Handbook... -
Page 40: Positioning The Pen And Pen Tether
Using the pen Positioning the pen and pen tether The pen tether helps prevent the loss of your pen. The following illustrations show how to position the pen and pen tether. Tether anchored at the bottom pen tether XC6 User’s Handbook... - Page 41 Chapter 2. Using the Tablet Using the pen Tether anchored on the side pen tether XC6 User’s Handbook...
-
Page 42: Using The Fingerprint Scanner
Store confidential information in an encrypted form in a ■ protected folder. To launch the Fingerprint application: Tap the icon located on the Windows Desktop. Follow the instructions that appear the first time you turn on the computer. XC6 User’s Handbook... -
Page 43: Changing The Screen Orientation
To rotate the screen orientation from portrait (vertical) to landscape (horizontal) mode or from landscape to portrait mode: If your tablet is using Windows 7 Press the Windows button. Start If your tablet is using Windows 8.1 Rotate the tablet. landscape mode portrait mode XC6 User’s Handbook... -
Page 44: Adjusting The Screen Brightness
Brightness brightness. Display brightness slider Method 2 In the Windows taskbar, click the power management icon; then select Adjust screen brightness Move the slider bar (located at the bottom of the window) to change the screen brightness. XC6 User’s Handbook... -
Page 45: Enabling Automatic Backlight Control
High Contrast White Click the Back button. Click Display Click to enlarge the icon size; then click Medium - 125% Apply Click . Make sure the screen resolution setting is Adjust Resolution pixels; then click 1024 by 768 XC6 User’s Handbook... -
Page 46: Docking The Tablet
Docking the tablet Docking the tablet If you have the optional xStand office dock or xDock vehicle dock, connect it to the tablet at the docking port. (See the iX104 Docking Stations Handbook.) Docking port Guide pin receptacles XC6 User’s Handbook... -
Page 47: Connecting Devices
Connect a local area network (LAN) cable’s RJ-45 connector to the internal LAN interface card. (See your network system administrator for more information.) LAN connector Connecting USB-compatible devices Connect any USB-compatible devices to the computer’s USB ports. USB ports XC6 User’s Handbook... -
Page 48: Connecting An External Microphone, Headphone, Or Speakers
Status area of the Windows taskbar. The volume control area opens. If the button indicates that sound is muted, click the button Mute to turn on the sound. Move the slider bar up or down to increase or decrease the volume. XC6 User’s Handbook... -
Page 49: Connecting A Monitor Or Projection Panel (Optional)
To change the video output to the monitor or projection panel: Press the key combination. To change the video output back to the computer: Press the key combination again. XC6 User’s Handbook... -
Page 50: Connecting A Device To The Serial Port (Standard)
If your tablet includes the standard serial port, you can connect a terminal or other device that uses the RS-232, RS-422, or RS-485 data transfer standard. 9-pin serial port Connecting an XPL expansion module XPL expansion port Tablet with optional GPS II XC6 User’s Handbook... -
Page 51: Using The Battery
Status LED flashes green. (If the battery charge is higher than 95%, the battery will not charge, preventing battery overcharge.) Check the level of charge. (See “Checking battery power status” on page 55.) The charging process continues until the battery charge reaches 100%. XC6 User’s Handbook... -
Page 52: If You Have An External Battery Charger
35 to suspend operation. If a charged battery is not available: Save your work and close all running programs; then shut down the computer or put the computer in Hibernation mode (see “Suspending operation” on page 35). XC6 User’s Handbook... - Page 53 Pull the battery away from the computer and remove it. Note: After removing the battery, you must replace the battery or connect the computer to an external power supply within or the computer completely loses power. 3 to 5 minutes XC6 User’s Handbook...
-
Page 54: Installing The Battery
Discarding batteries Dispose of batteries in accordance with your local government regulations. Under federal, state, or local law, it may be illegal to put batteries in the trash. Contact your system administrator, municipal waste disposal department/provider for information. XC6 User’s Handbook... -
Page 55: Using Power Options
On the Windows taskbar, click the battery icon; then select More . The Power Options window opens. power options Checking battery power status On the Windows taskbar, click the battery icon. The following window opens, displaying the percentage of power remaining in the battery: XC6 User’s Handbook... -
Page 56: Selecting A Power Plan
Select one of the following power plans: (select More power in necessary) options – Balance between computer performance and battery Balanced life. – Longer battery life and lower performance. Power Saver – Higher performance and shorter battery life. High performance XC6 User’s Handbook... -
Page 57: Selecting Power Options
Using power options Selecting power options On the Windows taskbar, right-click the battery icon. Select Power Options The following window opens. Under the selected power plan, press Change plan settings Select the power options you want to use. XC6 User’s Handbook... -
Page 58: Button Options
To change what happens when you press the button: On the Windows taskbar, right-click the battery icon. Select Power Options The following window opens. Press Choose what the power buttons do Select the options you want to use. XC6 User’s Handbook... -
Page 59: Tips For Conserving Battery Power
Adjust the display brightness to no brighter than necessary for ■ comfortable viewing. The display can consume a large portion of the computer’s power. (See page 44.) Set the LCD Brightness range to “Power Saving” in the BIOS ■ Setup Utility. (See page 81.) XC6 User’s Handbook... -
Page 60: Accessing The Solid State Drive (Ssd) Cartridge
WARNING Failure to follow this procedure can result in damage to the case and the cover, which is not covered under the Xplore Technologies warranty. Xplore recommends that you use an approved Xplore Technologies service center for this procedure. -
Page 61: Re-Installing The Drive Carrier
Insert the drive with smooth edge into the bay at a slight angle. Press down until the carrier clicks into place, while pinching the two center pins. If your unit had the screws in place, re-attach them. Do not use power tools. Note: XC6 User’s Handbook... -
Page 62: Accessing The Microsd And Sim Compartment
SIM cards. WARNING Failure to follow this procedure can result in damage to the case and the cover, which is not covered under the Xplore Technologies warranty. Xplore recommends that you use an approved Xplore Technologies service center for this procedure. -
Page 63: Programming Hot Keys
Programming hot keys to start applications, open documents, or go to a website In the Status area of the Windows taskbar, click the icon. XC6 Configuration The Launch Button QuickShow dialog box opens. Click the button. Configure XC6 User’s Handbook... - Page 64 Chapter 2. Using the Tablet Programming hot keys The Panel Control Center window opens. Click the button next to the key or key combination you Change want to program. The following options appear: XC6 User’s Handbook...
- Page 65 Chapter 2. Using the Tablet Programming hot keys Click Launch an Application, Document or Web site The following options appear: XC6 User’s Handbook...
- Page 66 Change To open a document: In the Click Open a Document Press to find the document you want the hot key or Browse Function mode hot key combination to open. (For example: spreadsheet.xls airports.doc wiringdiagram.jpg Click Change XC6 User’s Handbook...
- Page 67 URL of the Web page you want the Browse hot key or Function mode hot key combination to open. (For example: http://www.xploretech.com Click Change Program more hot keys, or click to close the Panel Control Close Center window. XC6 User’s Handbook...
-
Page 68: Programming Hot Keys To Perform Predefined Functions
In the Status area of the Windows taskbar, click the icon. XC6 Configuration The Launch Button QuickShow dialog box opens. Click the button. Configure The Panel Control Center window opens. Next to the key or key combination you want to program, click button. Change XC6 User’s Handbook... - Page 69 Chapter 2. Using the Tablet Programming hot keys The following options appear: Click Start a predefined function In the drop-down list, select an option. Function selection Program more hot keys, or click to close the Panel Control Close Center window. XC6 User’s Handbook...
-
Page 70: Programming Hot Keys To Perform Other Key Functions
In the Status area of the Windows taskbar, click the icon. XC6 Configuration The Launch Button QuickShow dialog box opens. Click the button. Configure The Panel Control Center window opens. Next to the key or key combination you want to program, click button. Change XC6 User’s Handbook... - Page 71 Chapter 2. Using the Tablet Programming hot keys The following options appear: Click Press a key or key combination The following options appear: XC6 User’s Handbook...
- Page 72 To cause the hot key to perform the paste function ( Ctrl-V) Check the check box; then click the key. Ctrl Program more hot keys, or click to close the Panel Control Close Center window. XC6 User’s Handbook...
-
Page 73: Maintaining The Tablet
Do not disassemble the computer. ■ Keep the computer at least 5 inches (13 centimeters) away from ■ any electrical appliance that generates a strong magnetic field, such as a motor, magnet, TV, refrigerator, or large audio speakers. XC6 User’s Handbook... -
Page 74: Preventing The Computer From Overheating
To prevent the computer from overheating, do not obstruct the computer’s air vents. air vent area air vents XC6 User’s Handbook... -
Page 75: Storing The Computer
To obtain additional screen protectors, check with your reseller, or go to the Xplore Web site at www.xploretech.com for ordering information. Additional information about installation is included with the screen protectors. XC6 User’s Handbook... -
Page 76: When To Replace The Pen
With use, the pen tip may become worn and can scratch the screen. If your pen exhibits one of the following problems, replace the pen: The pen does not move freely across the screen. ■ The pen does not perform as expected. ■ XC6 User’s Handbook... -
Page 77: Calibrating The Digitizer
The previous user of the computer writes with the opposite hand or ■ at a different pen angle. The computer has not been used for some time. ■ The computer has been serviced. ■ From the menu, select Start Control Panel The Control Panel opens. XC6 User’s Handbook... - Page 78 Hardware and Sound Hardware and Sound In the Tablet PC Settings area, select Calibrate the screen for pen ; then follow the instructions that appear on the or touch input screen.. Calibrate the screen for pen or touch input XC6 User’s Handbook...
-
Page 79: Troubleshooting
The Status LED is red, blinking. The computer is powered on, running under battery power, and the charge level in the battery is at a minimum warning level. Plug the computer into an AC/DC power source or install a charged battery. XC6 User’s Handbook... - Page 80 • Make sure the volume control in your audio software is set to an audible level. An external device is not working with The device may need to be enabled in the computer’s configuration the computer. program (BIOS Setup). Contact your local help desk or reseller. XC6 User’s Handbook...
-
Page 81: Using Bios And Aos Functions
• Press for less than one second for Release Press once to exit Shifted mode. F11 function. (Lock Fn) Function • Press longer to enable Shifted mode. Start Display Windows Start menu. None None Ctrl+Alt+Del Reboot. Enter Enter. XC6 User’s Handbook... -
Page 82: Disabling The Auto Power Feature
Follow these steps to enable automatic LCD backlight control: When the computer is booting, press the button to start the BIOS Setup Utility. Select the Main tab. In the drop-down list, select LCD Backlight Control Automatic Click XC6 User’s Handbook... -
Page 83: Glossary
Bits Per Second (BPS). In serial transmission, the instantaneous bit speed with which a device or channel transmits a character. Card. Synonym for board; see board. Compact Disk-Read Only Memory (CD-ROM). Stores data on metal-plated plastic discs. XC6 User’s Handbook... - Page 84 3. The point of contact between user, the computer, and the program (for example, the pen/stylus or a menu). JBOD. Two drives that appear in Window as two drives, Drive C and Drive D. XC6 User’s Handbook...
- Page 85 Program. A set of instructions a computer can execute to tell the system what to do and how to do it. RAID 0. Two drives appear in Windows as one larger drive (two 80GB drives appear as one 160GB drive). XC6 User’s Handbook...
- Page 86 Status Indicator (LED). a light above the LCD screen which indicates the current status of a particular device or hardware component. Stylus. A writing instrument. For pen computers, the stylus is used to interface with the LCD and digitizer. XC6 User’s Handbook...
- Page 87 A SIM can be moved from one device to another and/or different SIMS can be inserted into any GSM radio. Universal Serial Bus (USB). A serial interface that enables communication between devices and the computer. XC6 User’s Handbook...
- Page 88 XC6 User’s Handbook...
-
Page 89: Hardware Specifications
Graphics frequency 200 MHz - 1.1 GHz 200 MHz - 1.1 GHz 200 MHz - 1.0 GHz Number of displays supported Intel vPro technology Intel Hyper-Threading technology Trusted Execution technology * Varies according to your computer’s configuration. XC6 User’s Handbook... - Page 90 • 1300 nits max before touch (sunlight-readable) • 340 nits max before touch (indoor-readable) • Viewing angle: - Horizontal: 80 degrees (typical, contrast ratio > 10) - Vertical: 80 degrees (typical, contrast ratio > 10) • Contrast Ratio: Typ. 600:1, Min 400:1 XC6 User’s Handbook...
- Page 91 • Application buttons with primary and secondary functions • Power On/Off/Suspend/Resume button • Emergency Shutoff/Reset button Audio • Realtec ALC283 • On-board microphone with noise cancellation • On-board integrated stereo speakers (1W each) Status Indicators Power, Charge, DC-in, Warning, Camera Active XC6 User’s Handbook...
- Page 92 • Life: (with Suspend-to-RAM on bridge battery only): 3 to 5 minutes from full charge AC Adapter • Xplore part number 11-50048 • FSP part number FSP065-REB • Power adapter, 100-240V AC input (auto-sensing), 19V DC @ 3.42A output, ROHS, Energy Star, CE, UL, TUV XC6 User’s Handbook...
- Page 93 Appendix D. Hardware Specifications Environmental Temperature • Operating: to 140 F (-20 to 60 C) (XC6 minimum is -49 F,-45 • Storage: to 167 F (-40 to 75 Humidity 0% to 95% non-condensing Shock/Drop Four-foot drop to concrete, all surfaces, edges and corners Vibration 0.04g^2/Hz, 20 Hz - 1000 Hz...
- Page 94 • IEC600950-1 2nd Ed., EN60950-1 2nd Ed., UL60950-1 2nd Ed. • ETL Listed: ANSIISA-12.12.01-2007, C22.2 No. 213 • UL1604 Operating system Operating Systems • Microsoft Windows 7 Professional, 32-bit, English • Microsoft Windows 7 Professional, 64-bit, English • Microsoft Windows 8 Professional, 64-bit, English XC6 User’s Handbook...
-
Page 95: Agency Notices
(1) this device may not cause harmful interference, and (2) this device must accept any interference received, including interference that may cause undesired operation. Modifications not expressly approved by Xplore Technologies could void this user’s authority to operate the equipment. Note: This equipment has been tested and found to comply with the limits for a Class B digital device, pursuant to Part 15 of the FCC Rules. -
Page 96: Ic Radiation Exposure Statement
1~11 can be operated. Selection of other channels is not possible. IC radiation exposure statement This EUT is compliance with SAR for general population/uncontrolled exposure limits in IC RSS-102 and had been tested in accordance with the measurement methods and procedures specified in IEEE 1528. XC6 User’s Handbook... - Page 97 This device was evaluated and shown to comply with FCC SAR guidelines. Avoid covering or holding antennas when transmitting. Antenna locations are shown in the following figure. Antennas Bluetooth antenna XC6 User’s Handbook...
- Page 98 Notice to Users of Radio and Television This Class B digital apparatus meets all requirements of Canadian Interference-Causing Equipment Regulations per the ICES-003 CET appareil numérique de la class B respecte toutes les exigence du Réglement sur le matérial brouilleur du Canada. XC6 User’s Handbook...
- Page 99 Class 2 Adapters with an output rating of 19 VDC, with a current of 3.75 A. AC Adapter output polarity: For authorized repair technicians only WARNING For continued protection against risk of fire, replace only with the same type and rating fuse. XC6 User’s Handbook...
- Page 100 In the event of system disposal, be sure to follow local guidelines. Intel Dual Band Wireless-AC 7260 country-specific-compliance statements Hereby, Xplore Technologies, declares that the Intel Dual Band Wireless-AC 7260 complies with the essential requirements and other relevant provisions of Directive 1999/5/EC. This equipment is marked with the CE symbol and can be used throughout the European community.
- Page 101 Appendix E. Agency Notices Intel Dual Band Wireless-AC 7260 - Regulatory Europe XC6 User’s Handbook...
- Page 102 Appendix E. Agency Notices XC6 User’s Handbook...
-
Page 103: Environmental Policy And Recycling Program
Environmental Policy and Recycling Program Environmental policy Xplore Technologies is committed to managing health, safety and environmental (HS&E) matters as an integral part of our business. In particular, it is our policy to assure the HS&E integrity of our processes and facilities at all times and at all places. We will do so by... -
Page 104: Communication
Message I want to recycle my product 3. Click Submit An Xplore Technologies specialist will contact you with shipping instructions. Alternatively, you can leave your unwanted Xplore products at a local recycling center. For batteries, Xplore Technologies has partnered ®... -
Page 105: Environmental And Sustainability Corporate Report
Appendix F. Environmental Policy and Recycling Program Environmental and Sustainability Corporate Report If you prefer to have Xplore Technologies recycle your battery packs, submit a technical support request as described above. For the return of any Xplore product other than batteries, Xplore Technologies has partnered with R2 Solutions (http:// www.r2solutions.org/). - Page 106 We will also leverage our role as an industry leader and actively support international organizations and industry associations working to improve environmental conditions. The Xplore Technologies 2012 Environmental and Sustainability Corporate Report is located at http://www.xploretech.com/ environment. To obtain the report, click Environmental Sustainability .
-
Page 107: Index
Index air flow vents, location 22 Environmental and Sustainability Corporate Report 105 ambient light sensor location 19 Environmental policy 103 antenna covers, location 21 Auto Light sensor, disabling 45 GPS, toggle 30 Auto Power feature, disabling 82 headphone volume, adjusting 48 battery pack Hibernation mode charge time 52... - Page 108 Index programming hot keys 63 Power (On/Off)/Backlight (On/Off)/Sleep/ to perform other key functions 70 Resume key, location 58 to perform pre-defined functions 68 power connector, location 23 quick-start diagram 28 Power On/Off/ Suspend/Resume key Screen Rotation, location 28 location 22 power use, managing 55 projection panel LAN connector, location 23...
- Page 109 Sleep mode, hot keys 30 speaker volume, adjusting 48 XPL expansion module, connecting 50 speakers, location 19 XPL2 port 22 25 storing the computer 75 Xplore Technologies, contacting 17 support, contacting 17 suspending operation 35 tablet accessories 15 preventing overheating 74...
- Page 110 CX6 User’s Handbook...
Need help?
Do you have a question about the XC6 and is the answer not in the manual?
Questions and answers