Table of Contents
Advertisement
Quick Links
Advertisement
Table of Contents

Related Manuals for XPLORE TECHNOLOGIES iX104-TPC


Summary of Contents for XPLORE TECHNOLOGIES iX104-TPC
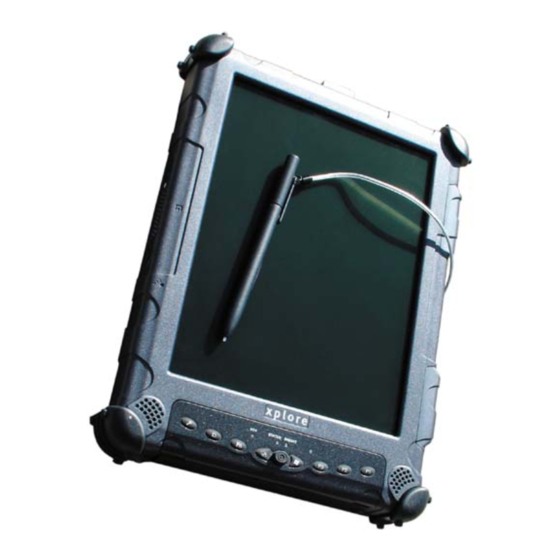
- Page 1 i x 10 4 U S E R ’ S H A N D B O O K...
- Page 3 iX104 USER'S HANDBOOK...
- Page 4 All other brands, product names, company names, trademarks and service marks used herein are property of their respective companies. Copyright © 2003 Xplore Technologies Corp. All rights reserved. No part of this publication may be copied, reproduced, or translated, without the prior written consent of Xplore Technologies.
- Page 5 For more information about FCC rules and their applicability to the iX104, see Appendix E, “Agency Notices.” Warranty Information The iX104 and iX104-TPC are backed by a standard 12-month International Limited Warranty. An extended International Limited Warranty is available. Check the service kit included with your computer for warranty terms and conditions.
- Page 6 Important safety information Before you use the iX104 or the iX104 dock, read these safety instructions and the operation instructions in this handbook. Failure to observe all these instructions voids the Limited Warranty and may lead to suspension or denial of services to the offender, or legal action, or both.
- Page 7 WARNING Use only battery types specified in this handbook. Using any other type of battery can be dangerous and can disable the iX104. WARNING Do not use any dock or any other accessory or attachment that is not manufactured or supplied by Xplore or an authorized Xplore accessories supplier.
- Page 8 iX104 User’s Handbook...
-
Page 9: Table Of Contents
Contents Welcome Who this handbook is for ......... . . 14 About your computer . - Page 10 Contents Using the iX104 Turning on the computer ..........33 Turning off the computer .
- Page 11 Contents Using the battery ..........53 Charging the battery pack .
- Page 12 Calibrating the pen for an iX104 touch screen ..... . . 78 Calibrating the pen for an iX104-TPC active screen ....79 When to replace the pen .
-
Page 13: Welcome
Welcome ® ™ Welcome to the Xplore Technologies iX104 , the rugged pen tablet designed, tested, and manufactured to meet the environmental and physical real-world challenges faced by today’s mobile workers. The iX104 not only works the way you do, but can also take the abuses of everyday wear and tear. -
Page 14: Who This Handbook Is For
Welcome Who this handbook is for This handbook provides instructions for using the Xplore Technologies iX104 Pen Tablet (iX104) and iX104 Pen Tablet PC (iX104-TPC). This handbook assumes that you have basic experience using ® ® computers and Microsoft Windows... -
Page 15: About Your Computer
The iX104 has a touch screen that you control by using your finger, the pen included with the iX104, or any suitable pointing device. The iX104-TPC has an active screen that you control by using the special, enhanced pen included with the iX104-TPC. -
Page 16: Package Contents
Check to make sure your iX104 package includes the following items: Quick Start Guide Battery pack Power cord AC adapter Pen tether iX104 pen tablet or iX104-TPC pen tablet PC Warranty information kit This handbook Optional accessories Your package also includes any optional accessories you ordered. Optional accessories Docking options •... - Page 17 • USB non-rugged mini keyboard (83-key) • USB rugged, backlit mini keyboard (83-key) • Screen protectors (2-pack) • Passive stylus (for use with the iX104) • Active stylus (for use with the iX104-TPC) • Pen tether • Hand straps iX104 User’s Handbook...
-
Page 18: Contacting Xplore
Welcome Contacting Xplore If you purchased your iX104 from an authorized Xplore dealer, contact the dealer for service and support. If you purchased your iX104 directly from Xplore, use any of the following methods to contact Xplore for service and support: Toll free 1-866-296-8541, extension 222 1-512-336-7791... -
Page 19: Getting Started
Getting Started This chapter gives you an overview of your iX104 and includes a quick-start guide to iX104 keys. Getting to know your iX104 This section shows the locations of some of your computer’s For more information important components. about each component, see Chapter 2. -
Page 20: Back View
Chapter 1. Getting Started Getting to know your iX104 Built-in microphone – Enables you to input mono audio. Includes noise cancellation. Reset switch – Enables you to turn off the computer when using the Power On/Off key is not effective. (See page 35.) Speakers –... - Page 21 Chapter 1. Getting Started Getting to know your iX104 Antenna covers – For optional wireless LAN and WAN models, protect and secure the radio antennas (accessible by authorized service personnel only). Pen – The main device you use to enter data and control applications (instead of a mouse or a keyboard).
-
Page 22: Top View
Chapter 1. Getting Started Getting to know your iX104 Top view Power On/Off/ Suspend/Resume Kensington lock slot air flow expansion port vents Power On/Off/Suspend/Resume key – Press the key to turn the computer on or off, or to suspend or resume operation. Air flow vents –... -
Page 23: Bottom View
Chapter 1. Getting Started Getting to know your iX104 Bottom view microphone port connector connector FireWire external monitor power (IEEE 1394) connector connector connector headphone connector The connectors on the bottom of the computer are located behind the outer doors. Power connector –... -
Page 24: Right Side View
Chapter 1. Getting Started Getting to know your iX104 Right side view XPL expansion port bumpers Bumpers – Fabricated from rugged material. Raised to help protect the computer from damage. XPL expansion port – A USB port (compliant with USB Standard Contact your reseller for Revision 1.1) that enables you to connect an XPL snap-on expansion information about the XPL... -
Page 25: Left Side View
Chapter 1. Getting Started Getting to know your iX104 Left side view docking connector for the optional Xplore Tablet Dock guide pin receptacles Docking connector – Enables you to connect the optional Xplore See “Optional Tablet Dock. accessories” on page 16. Guide pin receptacles –... -
Page 26: Led Indicators
Chapter 1. Getting Started Getting to know your iX104 LED indicators The LED indicator lights show the status of system functions such as power and battery levels. Status Brightness The following table defines the various LED states. Table 1 Status LED indicator Mode/State LED State Meaning... - Page 27 Chapter 1. Getting Started Getting to know your iX104 Table 1 Status LED indicator (continued) Mode/State LED State Meaning On state red, blinking The computer is powered on, running under battery power, and the charge level in the battery is at a minimum warning level. Plug the computer into an AC/DC power source or install a charged battery.
-
Page 28: Quick-Start Guide
Chapter 1. Getting Started Quick-start guide Quick-start guide This section is a quick guide to using the main features of your computer. (See Chapter 2 for detailed information.) Application, Windows, and hot keys Hot key 1 Ctrl-Alt-Delete (Secure Attention Sequence) key Screen Rotation Hot key 2 Function... - Page 29 Chapter 1. Getting Started Quick-start guide Table 3 Main keys Press this key... To perform this function • Log on after resuming operation from power management, powering on, or locking. • After logging on, launch Windows Task Manager. Rotate screen orientation between portrait (vertical) and landscape (horizontal).
- Page 30 Chapter 1. Getting Started Quick-start guide Table 4 Function mode keys Press these keys... To perform this function Dim the brightness of the LCD backlight. Increase the brightness of the LCD backlight. Send video display to a monitor or projection panel connected to the computer (and back to the computer again).
-
Page 31: Navigation Keys
Chapter 1. Getting Started Quick-start guide Navigation keys The following illustrations and tables provide a quick reference for using the navigation keys. Navigation controls with the tablet in portrait mode scroll up joystick scroll right scroll left scroll down and move the Press the joystick in this Function key... -
Page 32: Navigation Controls With The Tablet In Landscape Mode
Chapter 1. Getting Started Quick-start guide Navigation controls with the tablet in landscape mode scroll up joystick scroll right scroll left scroll down and move the Press the joystick in this Function key... direction... to perform this function Page Up Page Down Shift+Tab iX104 User’s Handbook... -
Page 33: Using The Ix104
Using the iX104 This chapter contains detailed instructions for using your computer. Turning on the computer 1. Make sure the computer is off. When the computer is off, the Status LED is off. 2. Make sure the battery is charged or that the computer is plugged in to an external power source. -
Page 34: Turning Off The Computer
Chapter 2. Using the iX104 Turning off the computer Turning off the computer 1. If the computer is in Suspend mode, press the Power On/Off/ When the computer is in button to resume operation. (See page 37 for Suspend/Resume Suspend mode, the Status information about Suspend mode.) LED is continuously yellow. -
Page 35: Using The Reset Switch
Chapter 2. Using the iX104 Turning off the computer Using the Reset switch If the computer does not seem to be accepting input and you cannot turn it off by using the method described in “Turning off the computer,” press the switch. -
Page 36: Suspending And Resuming Operation
Chapter 2. Using the iX104 Suspending and resuming operation Suspending and resuming operation To conserve battery power when you do not want to turn off the computer or when you need to install a charged battery pack, put the computer into Suspend mode. (You can suspend operation without closing any programs or Windows.) When you suspend operation: Programs that are running stop (but do not close). -
Page 37: Suspending Operation
Chapter 2. Using the iX104 Suspending and resuming operation Notes If you have set your computer to turn power off (in the Power Options utility in Windows Control Panel), you cannot suspend operation. To change power settings, see “Using power options” on page 58. -
Page 38: Resuming Operation
Chapter 2. Using the iX104 Suspending and resuming operation 3. Press Stand By When operation is suspended, the Status LED displays a continuous yellow light. Status LED Resuming operation To resume operation when the computer is in Suspend mode, press Power On/Off/Suspend/Resume button. -
Page 39: Using The Pen
Suspend-to-RAM mode. Using the pen You can use the pen to select items and to navigate through programs. If your computer is an iX104-TPC (active screen): Use the special multi-function pen provided with the computer. If your computer is an iX104 (touch screen): Use the pen provided with the computer, another similar pointing device, or your finger. -
Page 40: Using The Pen To Perform Mouse Functions
(touch screen): icon In the Windows taskbar, press the right-click icon; then click the object. If your computer is an iX104-TPC (active screen): Hold the pen directly on the object until the right-click icon appears. Press the right-click button on the pen while you click the object. -
Page 41: Changing The Pen Double-Click Speed
4. In the Control Panel window: If your computer is an iX104 (touch screen): Click the icon. Pointer Devices If your computer is an iX104-TPC (active screen): Click the icon. Tablet and Pen Settings 5. Click the Windows tab. 6. Follow the instructions that appear in the Windows tab. -
Page 42: Positioning The Pen And Pen Tether
Chapter 2. Using the iX104 Using the pen Positioning the pen and pen tether The pen tether helps prevent the loss of your pen. The following illustration shows how to position the pen and pen tether. pen tether iX104 User’s Handbook... -
Page 43: Using The Joystick (The Navigation Control Key)
Chapter 2. Using the iX104 Using the joystick (the navigation control key) Using the joystick (the navigation control key) joystick (navigation control key) Press the joystick to perform the same functions as pressing Enter a keyboard. Push the joystick up, down, left or right to move a highlighted item accordingly (the same as pressing the arrow keys on a keyboard). -
Page 44: Changing The Screen Orientation
Chapter 2. Using the iX104 Changing the screen orientation Changing the screen orientation To rotate the screen orientation from portrait (vertical) to landscape (horizontal) mode or from landscape to portrait mode, press the screen rotation key. iX104 User’s Handbook... -
Page 45: Adjusting The Screen Brightness
Chapter 2. Using the iX104 Adjusting the screen brightness Adjusting the screen brightness To dim the brightness of the LCD backlight: Press the key and the key. Function Windows toggle To increase the brightness of the LCD backlight: Press the key and the key. -
Page 46: Docking The Ix104
Chapter 2. Using the iX104 Docking the iX104 Docking the iX104 If you have the optional Xplore Tablet Dock (see “Optional accessories” on page 16), connect it to the iX104 at the docking port. docking port guide pin receptacles iX104 User’s Handbook... -
Page 47: Connecting Devices
Chapter 2. Using the iX104 Connecting devices Connecting devices Refer to the following subsections for information about connecting external devices to your computer. Note If the device you want to use does not appear to be working with your computer, the device may need to be enabled in the computer’s configuration program. -
Page 48: Connecting To A Local Area Network
Chapter 2. Using the iX104 Connecting devices Connecting to a local area network Connect a local area network (LAN) cable’s RJ-45 connector to the internal LAN interface card. (See your network system administrator for more information.) connector Connecting USB-compatible devices Connect any USB-compatible device to the computer’s USB port. -
Page 49: Connecting An External Microphone
Chapter 2. Using the iX104 Connecting devices Connecting an external microphone microphone connector Adjusting microphone volume If necessary, adjust the volume of the microphone as follows: 1. Press the Windows Start key. 2. Click the Control Panel option. 3. In the Control Panel window, double-click the Sounds and Audio Properties icon. -
Page 50: Connecting A Headphone Or Speakers
Chapter 2. Using the iX104 Connecting devices Connecting a headphone or speakers headphone/speakers connector Adjusting headphone or speaker volume 1. Click the audio icon in the Status area of the Windows taskbar. The volume control area opens. 2. If the Mute check box is checked, uncheck it. 3. -
Page 51: Connecting A Monitor Or Projection Panel
Chapter 2. Using the iX104 Connecting devices Connecting a monitor or projection panel Monitor/projection panel connector Activating the monitor or projection panel To change the video output to the monitor or projection panel: Press the key combination. To change the video output back to the computer screen: Press the key combination again. -
Page 52: Connecting An Xpl Snap-On Expansion Module
Chapter 2. Using the iX104 Connecting devices Connecting an XPL snap-on expansion module Top view XPL expansion port Side view iX104 User’s Handbook... -
Page 53: Using The Battery
Chapter 2. Using the iX104 Using the battery Using the battery You can recharge, remove, and replace the battery pack. Charging the battery pack If you do not have an external battery charger Follow these steps to charge the battery while it is installed in the computer: 1. -
Page 54: If You Have An External Battery Charger
Chapter 2. Using the iX104 Using the battery 2. Check the level of charge. (See “Checking battery power status” on page 59.) The charging process continues until the battery charge reaches 100%. Table 5 shows the approximate time required to charge the battery level to 100%. -
Page 55: Removing And Installing The Battery
Chapter 2. Using the iX104 Using the battery Removing and installing the battery You can remove the battery and use an (optional) external charger to charge it. Removing the battery To swap with a charged battery: Use one of the methods described in “Suspending operation” on page 37 to suspend operation. - Page 56 Chapter 2. Using the iX104 Using the battery 2. On the computer, slide the battery release latch in the direction indicated. removable battery battery release latch 3. Pull the battery away from the computer and remove it. Note After removing the battery, you must replace the battery or connect the computer to an external power supply within or the computer completely loses power.
-
Page 57: Installing The Battery
Chapter 2. Using the iX104 Using the battery Installing the battery 1. Orient the battery with the slides in the empty battery tray. 2. Slide the battery into the tray and press it firmly until it is seated. The battery release latch returns to its original position and locks the battery in place. -
Page 58: Using Power Options
Chapter 2. Using the iX104 Using the battery Using power options This section explains how to use the Power Options Properties window to manage the computer’s power use. On the Windows taskbar, click the battery icon. The Power Options Properties window opens. Changing the computer’s power schemes In the Power Options Properties window, select the Power Schemes... -
Page 59: Changing Battery Alarm Settings
Chapter 2. Using the iX104 Using the battery Changing battery alarm settings In the Power Options Properties window (page 58), select the Alarms tab; then use the slider bars to change the alarm settings. Checking battery power status In the Power Options Properties window (page 58), select the Power tab. -
Page 60: Selecting Power Settings
Chapter 2. Using the iX104 Using the battery Selecting power settings In the Power Options Properties window (page 58), select the Advanced tab; then select the power settings options you want to use. Enabling Hibernation mode In the Power Options Properties window (page 58), select the Hibernate tab;... -
Page 61: Tips For Conserving Battery Power
Chapter 2. Using the iX104 Using the battery Tips for conserving battery power The following tips help you extend the life of your battery by conserving battery power: Use an external power source such as the AC or auto adapter whenever available. -
Page 62: Programming Hot Keys
Chapter 2. Using the iX104 Programming hot keys Programming hot keys Xplore pre-programs the P1, P2, and P3 hot keys and Function mode hot key combinations to perform certain functions by default. However, you can program them to perform different functions, as described in this section. -
Page 63: Programming Hot Keys To Start Applications, Open Documents
Chapter 2. Using the iX104 Programming hot keys Programming hot keys to start applications, open documents, or go to a Web site 1. In the Status area of the Windows taskbar, click the iX104 icon. Configuration The Launch Button QuickShow dialog box opens. 2. - Page 64 Chapter 2. Using the iX104 Programming hot keys 3. Click the button next to the key or key combination you Change want to program. The following options appear: 4. Click Launch an Application, Document or Web site The following options appear: iX104 User’s Handbook...
- Page 65 Chapter 2. Using the iX104 Programming hot keys To start an application: a Click Launch an Application b In the text box, type the name of the application you want File the hot key or Function mode hot key combination to start. Note: Type the name of executable file that starts the application.
- Page 66 Chapter 2. Using the iX104 Programming hot keys To open a multimedia file: a Click Open a Multimedia file b In the text box, type the name of the multimedia file you File want the hot key or Function mode hot key combination to open.
-
Page 67: Programming Hot Keys To Perform Pre-Defined Functions
Chapter 2. Using the iX104 Programming hot keys Programming hot keys to perform pre-defined functions 1. In the Status area of the Windows taskbar, click the iX104 icon. Configuration The Launch Button QuickShow dialog box opens. 2. Click the button. Configure The Panel Control Center window opens. - Page 68 Chapter 2. Using the iX104 Programming hot keys The following options appear: 4. Click Start a pre-defined function 5. In the Function selection drop-down list, select an option. 6. Program more hot keys, or click to close the Panel Control Finish Center window.
-
Page 69: Programming Hot Keys To Perform Other Key Functions
Chapter 2. Using the iX104 Programming hot keys Programming hot keys to perform other key functions 1. In the Status area of the Windows taskbar, click the iX104 icon. Configuration The Launch Button QuickShow dialog box opens. 2. Click the button. - Page 70 Chapter 2. Using the iX104 Programming hot keys The following options appear: 4. Click Press a key or key combination The following options appear: iX104 User’s Handbook...
- Page 71 Chapter 2. Using the iX104 Programming hot keys If you want the hot key or hot key combination to perform the function of a single key: a If the , or boxes are checked, uncheck them. Ctrl Shift b Click the key you want the hot key or hot key combination to perform.
- Page 72 iX104 User’s Handbook...
-
Page 73: Maintaining The Ix104
Maintaining the iX104 This chapter provides instructions for maintaining your computer. Caring for the computer This section provides information about how to keep your computer in top working condition. Checking power cords and connectors Check AC and DC power cords and power connectors periodically for damage. -
Page 74: Preventing The Computer From Overheating
Chapter 3. Maintaining the iX104 Caring for the computer Preventing the computer from overheating The computer monitors its internal temperature. As the internal temperature approaches the tolerable limits of heat-sensitive components, system functions are automatically limited or turned off to prevent damage. To prevent the computer from overheating, do not obstruct the computer’s air vents. -
Page 75: Storing The Computer
Chapter 3. Maintaining the iX104 Caring for the computer Storing the computer You can store the computer in the Off state for about 30 days with a fully charged battery installed. After this period, recharge the battery or replace it with a charged battery. If you intend to store the computer for more than 30 days, remove the battery pack and keep it in a cool place. - Page 76 Chapter 3. Maintaining the iX104 Caring for the computer Removing the screen protector Slide your fingernail under the edge of the screen protector and pull the protector away from the screen. edge Installing a new screen protector Follow the instructions included with your screen protector replacement kit.
-
Page 77: Calibrating The Pen
Chapter 3. Maintaining the iX104 Calibrating the pen Calibrating the pen Calibrating the pen adjusts the cursor position on the screen relative to the position of the pen tip. Calibrate the pen to adjust the distance error between where the pen is actually touching the screen and where the computer is registering the pen touch. -
Page 78: Calibrating The Pen For An Ix104 Touch Screen
Chapter 3. Maintaining the iX104 Calibrating the pen Calibrating the pen for an iX104 touch screen 1. From the menu, select Start Control Panel The Control Panel opens. Pointer Devices icon 2. Click the icon. Pointer Devices The Pointer Device Properties window opens. iX104 User’s Handbook... -
Page 79: Calibrating The Pen For An Ix104-Tpc Active Screen
Calibrating the pen 3. Click Calibrate The Calibration program starts. 4. Follow the instructions that appear on the screen. 5. When you finish, click Calibrating the pen for an iX104-TPC active screen 1. From the menu, select Start Control Panel The Control Panel opens. -
Page 80: When To Replace The Pen
Chapter 3. Maintaining the iX104 When to replace the pen The Tablet and Pen Settings window opens. 3. In the area drop-down list, select the mode for which Calibration you want to calibrate the pen: ; then click Landscape Portrait Calibrate The Calibration program starts. -
Page 81: Troubleshooting
Troubleshooting Table 8 contains solutions to some problems. If you cannot solve the problem by taking the actions described, contact your local help desk or your reseller for further assistance. Table 8 Troubleshooting Problem Possible cause and solution Computer will not start. •... - Page 82 Appendix A. Troubleshooting Table 8 Troubleshooting (continued) Problem Possible cause and solution Display screen is blank or difficult • Confirm that the computer is on (the Power icon is displayed to read. continuously in the Status area). • The brightness may be set too low, causing the screen to appear too dark.
- Page 83 Appendix A. Troubleshooting Table 8 Troubleshooting (continued) Problem Possible cause and solution Headphone or speaker volume is • The volume may be in Mute mode or set too low. Follow the too low. instructions in “Adjusting headphone or speaker volume” on page 50.
- Page 84 iX104 User’s Handbook...
-
Page 85: Using Bios And Aos Functions
Using BIOS and AOS Functions This appendix explains how to use the application and navigation buttons with the Basic Input-Output System (BIOS) program and the Advanced Operating System (AOS) Options menu. Note These functions are typically for use only by your system administrator or by authorized service technicians. - Page 86 Appendix B. Using BIOS and AOS Functions Table 9 Using BIOS and AOS functions (continued) Use this button... To perform this function When the system is displaying a BIOS error (such as an invalid checksum), press the P1 button to bypass the error message and attempt a normal boot sequence (the same as the F1 key on a keyboard).
-
Page 87: Enabling Manual Lcd Backlight Control
Appendix B. Using BIOS and AOS Functions Enabling manual LCD backlight control Enabling manual LCD backlight control When the LCD backlight control is in manual mode, the ambient light sensor is disabled and the computer no longer automatically controls the screen brightness. Follow these steps to disable the sensor and enable manual LCD backlight control: 1. - Page 88 Appendix B. Using BIOS and AOS Functions Enabling manual LCD backlight control 2. Select the LCD tab. 3. In the drop-down list, select LCD Backlight Control Manual 4. Click iX104 User’s Handbook...
-
Page 89: Glossary
Glossary Adapter. A device that provides an interface between two dissimilar electronic devices. For example, the AC adapter modifies the power from a wall outlet for use by the computer. Advanced Power Management (APM). A facility consisting of one or more layers of software that support power management. The APM software interface enables applications, operating systems, device drivers, and the APM BIOS to work together to reduce power consumption. - Page 90 Appendix C. Glossary Compact Disk-Read Only Memory (CD-ROM). Stores data on metal-plated plastic discs. Compatibility. 1.The ability of one computer to accept and process data in the same method as another computer without modifying the data or the media upon which it is being transferred. 2.The ability of one device to connect or communicate with another system or component.
- Page 91 Appendix C. Glossary Interface. 1. Hardware and/or software components used specifically to connect one computer or device to another. 2. To physically connect one system or device to another to exchange information. 3. The point of contact between user, the computer, and the program (for example, the pen/stylus or a menu).
- Page 92 Appendix C. Glossary Port. The electrical connection through which the computer sends and receives data to and from devices or other computers. Program. A set of instructions a computer can execute to tell the system what to do and how to do it. Random Access Memory (RAM).
-
Page 93: Hardware Specifications
Hardware Specifications This appendix provides specifications for the iX104. Physical specifications Dimensions 11.20” x 8.25” x 1.6” (WxHxD) 283.9mm x 209.3mm x 40.8mm Weight 4.45 lbs. (2.02kg)* Processing specifications Pentium III with SpeedStep technology* Chip set 133MHz Processor speed 866 MHz* * Varies according to your computer’s configuration. - Page 94 Appendix D. Hardware Specifications Memory/storage specifications Main RAM • 256MB SDRAM (on-board/PC133) • 144-pin SODIMM modules 512MB module available. Special rugged memory modules: conformal coated and custom locking tabs to protect against moisture and vibration L1 Cache (CPU) 32KB on-die L2 Cache 512KB on-die BIOS ROM...
- Page 95 Appendix D. Hardware Specifications Display specifications Display • Color LCD • Active Digital Sensor and Pen • Passive Palm Rejection Touch Panel • 32-bit True color • 10.4” TFT XGA (1024x768), 16M colors • Brightness: 16 levels • Viewing Angle: •...
- Page 96 Appendix D. Hardware Specifications Interface specifications Wireless Radio Bays • One internal Type 1 or Type II PC Card slot (PCMCIA Cardbus version 3.0) • One Internal mini-PCI slot • One internal OEM radio bay for RIM 1902G and 1802G GSM/GPRS radios Integrated Interfaces •...
- Page 97 Appendix D. Hardware Specifications Power specifications Main Battery • 2 cell • Removable Lithium Ion Polymer • 10.8V @ 4500mAh • Warm-swappable • Recharge Time: • Suspend Life: Min. 5 days • Off State: Approximately 30 days Optional Spare Battery •...
- Page 98 Appendix D. Hardware Specifications Environmental specifications Temperature • Operating: to 140 F (-20 to 60 • Storage: to 167 F (-40 to 75 Humidity 0% to 95% non-condensing Shock/Drop Three-foot drop to concrete, all surfaces, edges and corners Vibration 0.04g^2/Hz, 20 Hz - 1000 Hz -6dB/octive 1000 Hz - 2000 Hz Enclosure Class Blowing rain:...
- Page 99 Appendix D. Hardware Specifications Agency approvals Emissions • EN55022 (CISPR22) Class B • FCC 15, Class B • DOC Class B • CE MARK Immunity • EN55024 • FCC 15, Class B • DOC Class B Safety • UL and cUL Listed, UL 1950, 3 Edition •...
- Page 100 iX104 User’s Handbook...
-
Page 101: Agency Notices
(1) this device may not cause harmful interference, and (2) this device must accept any interference received, including interference that may cause undesired operation. Modifications not expressly approved by Xplore Technologies could void this user’s authority to operate the equipment. Note... - Page 102 Appendix E. Agency Notices RF eposure Tests for SAR are conducted using standard operating positions specified by the FCC with the tablet PC transmitting at its highest certified power level in all tested frequency bands. Although the SAR is determined at the highest certified power level, the actual SAR level of the tablet PC while operating can be well below the maximum value.
- Page 103 Appendix E. Agency Notices For body worn operation, to maintain compliance with FCC RF exposure guidelines, use only Xplore approved accessories. When carrying the tablet PC while it is on, use the specific Xplore-supplied or approved carrying case, holster, or other body-worn accessory. Use of non-Xplore-approved accessories may violate FCC RF exposure guidelines and should be avoided.
- Page 104 Appendix E. Agency Notices Note In the U.S. and Canada, the SAR limit for mobile tablet PCs used by the public is 1.6 watts/kg (W/kg) averaged over one gram of tissue. The standard incorporates a substantial margin of safety to give additional protection for the public and to account for any variations in.
- Page 105 Appendix E. Agency Notices Repairs to telecommunication equipment should be made by a Canadian authorized maintenance facility. Any repairs or alterations not expressly approved by Xplore or any equipment failures may give the telecommunication company cause to request the user to disconnect the equipment from the telephone line.
- Page 106 Appendix E. Agency Notices For authorized repair technicians only WARNING For continued protection against risk of fire, replace only with the same type and rating fuse. WARNING Danger of explosion if Lithium (clock) battery is incorrectly replaced. Replace only with the same equivalent type recommended by the manufacturer.
-
Page 107: Index
Index docking 46 double-click, performing with pen 40 air flow vents, location 22 dragging and dropping, performing with pen 40 ambient light sensor DVD drive, connecting 47 disabling 45 location 19 antenna covers, location 20 email, starting 29 battery alarm settings, changing 59 Firewire (IEEE 1394) connector, location 23 battery pack Firewire devices, connecting 47... - Page 108 Index safety procedures 73 default function 62 storing 75 description 29 location 28 joystick default function 62 using 43 description 29 using in landscape mode 32 location 28 using in portrait mode 31 default function 62 description 29 Kensington lock slot, location 22 location 28 keys Power On/Off/Suspend/Resume...
- Page 109 Index LEDs 26 Page Up Brightness LED meanings 27 performing in landscape mode 32 Status LED meanings 26 performing in portrait mode 31 left button click, performing with pen 40 local area network (LAN), connecting to 48 calibrating 77 logging on 29 double-click speed, changing 41 dragging and dropping 40 holder, location 20...
- Page 110 Index serial number, location 20 quick-start guide 28 Shift+Tab performing in landscape mode 32 performing in portrait mode 31 Reset switch speaker volume, adjusting 50 location 19 speakers using 35 connecting 50 resuming operation 38 location 19 right-click, performing with pen 40 storing the computer 75 support, contacting 18 Suspend mode...
- Page 111 50 adjusting microphone 49 adjusting speaker 50 Windows Task Manager, launching 29 XPL expansion module, connecting 52 XPL expansion port, location 22 Xplore Tablet Dock docking connector location 25 using 46 Xplore Technologies, contacting 18 iX104 User’s Handbook...
- Page 112 iX104 User’s Handbook...
- Page 114 95-01016...
Need help?
Do you have a question about the iX104-TPC and is the answer not in the manual?
Questions and answers