Table of Contents
Advertisement
Quick Links
Advertisement
Table of Contents

Subscribe to Our Youtube Channel
Summary of Contents for Kolor PANOGEAR PACK
- Page 1 PANOGEAR PACK USER MANUAL User Manual version 1.1...
-
Page 2: Table Of Contents
Charger ............................18 Touch Control Panel ........................18 Bluetooth module ..........................18 Legal information, GPL license, warranty ..................19 Legal information and warranty ......................19 Papywizard GP license ........................19 Contact information, sales and service ..................... 19 Panogear Pack | User Manual... -
Page 3: Images
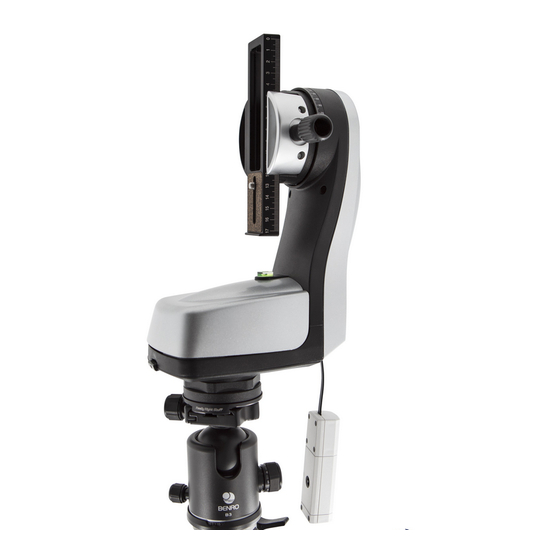
Images: Motorized Panoramic Head Simple Bracket L-Bracket Battery connecter/ Battery/ Charger Touch Control Panel Bluetooth Module Panogear Pack | User Manual... -
Page 4: General Description
The touch control panel permits independent and intuitive control of your motorized head. Containing a large internal memory, you are able to program sessions ahead of time on your computer and then launch them on the spot, or to store your Panogear Pack | User Manual... -
Page 5: Bluetooth Module
The CD contains documentation and software you will need: Papywizard for various platforms, USB drivers and the settings software for the touch control panel. The latest version of all these documents is also available online. Panogear Pack | User Manual... -
Page 6: Installation And Use
On the simple bracket 1. Fasten your camera to the bracket. 2. Insert the simple bracket into the crown of your motorized head and adjust it as shown in the adjacent image. On the L-bracket Panogear Pack | User Manual... -
Page 7: Installing Your Controller/Receptor
According to each version of Windows, the dialogue windows may differ slightly. You will need to reject the automatic driver search and manually choose the driver folder on the CD. Windows will then automatically install the driver and confirm that the controller has been detected. Panogear Pack | User Manual... -
Page 8: Installing The Software
Add : Add your created profile to the profile list Insert: Insert the profile to the indicated (highlighted) spot in the list. Read: Open the selected profile (highlighted). Remove: Delete the selected profile (highlighted). Panogear Pack | User Manual... -
Page 9: Using The Controller In Independent Mode With The Motorized Head
4. Horizon level Adjust the motorized head's horizontal position using the screen's up/down arrows. Click on the right arrow to access the next menu or on the left arrow to return to the previous menu. Panogear Pack | User Manual... -
Page 10: The Viewpoint: Spherical, Cylindrical, Mosaic
The XXX information (e.g.008) shows the number of sessions that will be saved as XML data. The touch "II" pauses. Press the right arrow to start the session again or press the left arrow to stop the session and return to the software's settings menu. Panogear Pack | User Manual... -
Page 11: Using Papywizard And Your Bluetooth Module
Bluetooth transmitter. (Papywizard will display "Connected" at the bottom of the window). Press one of the Papywizard arrows to begin moving the motorized head. If the head moves, everything is operational. Congratulations! Panogear Pack | User Manual... -
Page 12: Using Your Software
Validate the settings to go back to Papywizard's principal screen. (If you haven't already done it, attach your camera to the attachment zone and reconnect the trigger cable from your camera to the motorized head). Panogear Pack | User Manual... - Page 13 The bottom field indicates whether the motorized head is moving in the stabilization stage or trigger stage along with the time elapsed since the beginning of the sequence. Step-by-step: Move the system along step-by- step. Start: Launch the sequence. Panogear Pack | User Manual...
-
Page 14: Processing The Session Files (Xml) With Autopano Pro Or Giga
Once the shooting has been conducted, connect the controller to the computer with a USB cord. Wait until the controller has been detected then open the Panorama software control. Click on "Read Session." A window will appear; click yes. Panogear Pack | User Manual... - Page 15 An XML file will be created for each session in the computer. Select the name and desired location for the file then click save. Open Autopana Giga then click File/Import. Choose Papywizard then click next. Panogear Pack | User Manual...
- Page 16 XML file from the session. Click the bottom ellipsis then select your pictures. Define the desired options. Name your file then click finish. Autopano will automatically launch the stitching of your pictures. Panogear Pack | User Manual...
-
Page 17: Links, Resources
On Kolor's forum: http://www.autopano.net/forum/ On Kolor's website : http://www.autopano.net/fr 4. Papywizard To find more ample information, user advice or to enter your own comments on line: On Papywizard's website: http://www.papywizard.org/ On Autopano forum : http://www.autopano.net/forum/ Panogear Pack | User Manual... -
Page 18: Technical Features
Li-Ion SB-LSM 160 Amperage: 1600mAh Power: 7,4V. Weight : 89 grams Size : 53 x 30 x 31 mm Charge time : 4h-4h15 Autonomy : 10-11h/ 2500-3000 movements Panogear Pack | User Manual... -
Page 19: Charger
Module Class 2 Auto-powered through USB connector Windows, Linux & Mac OSX compatible (no driver needed) 8. Bluetooth module Module Class 1 Power supplied by motorized head Pairing code : 1234 Panogear Pack | User Manual... -
Page 20: Legal Information, Gpl License, Warranty
For all questions, please first contact your vendor, according to your place of purchase. In the case of failure, contact our customer support service at the following address : info@skivr.com Documentation is non-contractual and may be incomplete. Panogear Pack | User Manual...
Need help?
Do you have a question about the PANOGEAR PACK and is the answer not in the manual?
Questions and answers