
Related Manuals for Certa CTLWN4AMWRA


Summary of Contents for Certa CTLWN4AMWRA
- Page 2 Safety Notes............................2 Specifications............................3 Lawn Mower............................3 Battery Pack............................3 Battery Charger..........................3 Product Layout...........................4 Assembly...............................5 Fastening the push bars......................5 Securing Cable by using Cable Clips..................5 Mounting the Grass Collection Bag..................5 Adjusting the Cutting Height....................6 Operations............................6 Usage Tips............................6 Charging and Battery Care.......................7 Starting and Stopping........................9 Starting..............................9 Stopping............................9 Grass Collection Bag........................9...
- Page 3 It is important that you read, fully understand and obey the following safety precautions and warnings. Careless or improper use of the equipment may cause serious or fatal injuries. Never allow children or people unfamiliar with these instructions to use the lawnmower. •...
- Page 4 Store the battery only within a temperature range between –20°C and 40°C. As an • example, do not leave the battery in your car in the summer. Model: CTLWN4AMWRA Mains Power: 36V, 4Ah Charging Time: 3 – 5 hours Cutting Width: 370mm...
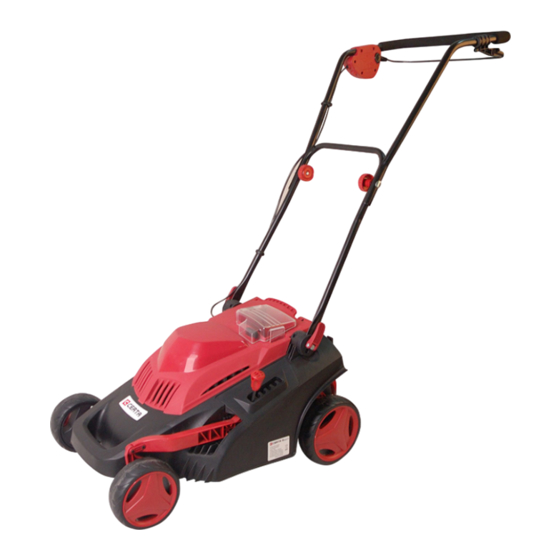
- Page 5 Safety Button 2. Switch Lever 3. Handle Knob 4. Cable Clip 5. Battery Cover 6. Height Adjustment Lever 7. Upper Push Bar 8. Grass Collection Indicator 9. Grass Collection Bag 10. Quick Fold Lever 11. Battery Pack 12. Safety Key 13.
- Page 6 The push bar is already assembled and only needs to be unfolded to the desired position. Firstly unfold the quick fold lever, then loosen the handle knob. Expand the handle, making sure that the upper and lower handle match up. Screw them tightly with the handle knob and swing nuts.
- Page 7 Note: Stop and release the switch lever, then wait for the motor to stop before adjusting height. The blades will continue to spin after the mower has been switched off, and these blades can still cause injury. For the first cutting of the season, a high cutting adjustment should be selected.
- Page 8 Mowing/walking speed: Walking speed influences the duration of mowing, and therefore the area that can be covered. We recommend mowing at a steady pace. To avoid damage and extend battery life, always mow at a speed which allows the motor to run smoothly. The mowing path should not be covered twice if possible, and the overlap of mowing tracks should be kept as minimal as possible.
- Page 9 Removing the battery: To take the battery out of the mower, open the transparent cover first, then pull the battery pack out of the mower. Charging the battery inside and outside the mower: You can either plug the battery directly into the power socket as shown to the left, or remove the battery from the mower and then connect it to the power socket as shown on the right.
- Page 10 When storing the battery after removing it from the Mower, follow the • storage guidelines in “Maintaining and Storing Your Mower.” If the motor will not run after you have fully charged the battery, consult • the techniques in “Troubleshooting Tips.” If you need further assistance, please contact the Kogan customer support team.
- Page 11 Warning: Risk of injury! Do not put your hand in the discharge opening! When the safety flap is released, this closes automatically and covers the discharge opening. For mulching purposes, install the mulching insert into the discharge opening and close the flap. This will secure the mulching adaptor into place, Grass will drop to back to the lawn - NO grass catcher required.
- Page 12 One green light - low battery capacity • Two green lights - mid battery capacity • Three green lights - full battery capacity • Red light - battery temperature is too high. Please wait until the red light • goes out before restarting the charging process. switch off the mower, remove safety key from it’s socket, and remove battery before performing any adjustments, maintenance, blade change, or repairs to your mower.
- Page 13 Tools and Supplies needed: 14 mm socket wrench (supplied with Mower) • Gloves or rag to protect your hands • Wear heavy gloves to protect your hands when holding, removing and attaching • blades. 1. Remove the safety key from it’s socket, and remove battery. If you are charging the battery, disconnect the charger from the electrical outlet.
- Page 14 Sharpening the Blade in a Vise 1. Remove safety key from it’s socket, and remove battery. 2. While holding the handlebars, turn the mower over on its right side to expose the blade. 3. Remove the blade. 4. Secure the blade in a sturdy vise. 5.
- Page 15 Most difficulties are easy to fix. Consult the troubleshooting table for common problems and their solutions. If you continue to experience problems or need repairs beyond these minor adjustments, contact your local licensed service center for assistance. ALWAYS switch off the mower, remove safety key from it’s socket, and remove battery before performing any adjustments, maintenance, blade change, or repairs to your mower.
- Page 16 The blade may be unbalanced, bent, or damaged Remove the safety key from the socket, and remove battery, turn the mower over on the right side, remove the blade, and check its condition. Replace with a new blade if necessary. Mower runs, but cutting The battery is not fully charged Charge the battery 5 hours to get a full charge...
Need help?
Do you have a question about the CTLWN4AMWRA and is the answer not in the manual?
Questions and answers
How can I get a replacement key for my mower?
Please see photo attached with parts that are not in the manual/diagram. Could you let me know what they are for? Thank you