Advertisement
Quick Links
Advertisement

Subscribe to Our Youtube Channel
Related Manuals for Certa CTMWR40V37A


Summary of Contents for Certa CTMWR40V37A
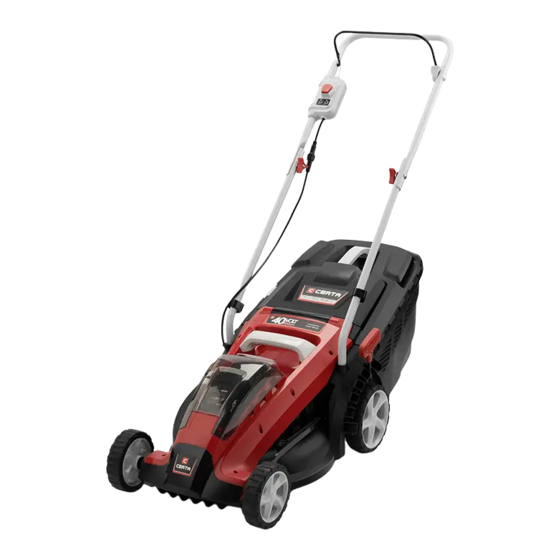
- Page 1 40V BATTERY POWERED 37CM HAND PROPELLED LAWN MOWER CTMWR40V37A...
-
Page 3: Safety And Warnings
SAFETY & WARNINGS Save all warnings and instructions for future reference. WARNING: Read all safety warnings and all instructions. Failure to follow the warnings and instructions may result in electric shock, fire and/or serious injury. Symbols on the lawn mower General safety warning! Before switching on the lawn mower, read the operating manual! Remove the safety key before carrying out any work on the unit and before... - Page 4 Symbols used in this user guide WARNING! Denotes impending danger. Non-observance of this warning may result in death or extremely severe injuries. CAUTION! Denotes a potentially dangerous situation. Non-observance of this warning may result in injury or damage to property. NOTE: Denotes application tips and important information.
- Page 5 General Power Tool Safety Warnings WARNING! Read all safety warnings and all instructions. Failure to follow the warnings and instructions may result in electric shock, fire and/or serious injury. Save all warnings and instructions for future reference. The term “power tool” in all of the warnings refers to your mains-operated (corded) power tool or battery-operated (cordless) power tool.
- Page 6 • Use personal protective equipment. Always wear eye protection. Protective equipment such as dust mask, non-skid safety shoes, hard hat, or hearing protection used for appropriate conditions will reduce personal injuries. • Prevent unintentional starting. Ensure the switch is in the off-position before connecting to power source and/or battery pack, picking up or carrying the tool.
- Page 7 Battery-powered tool use and care • Recharge only with the charger specified by the manufacturer. A charger that is suitable for one type of battery pack may create a risk of fire when used with another battery pack. • Use power tools only with specifically designated battery packs. Use of any other battery packs may create a risk of injury and fire.
- Page 8 Before starting the lawn mower: • Before starting, familiarise yourself with the lawn mower, its functions, and its controls. • Inspect the lawnmower before switching it on and check for signs of wear and damage. Never use the lawnmower with damaged or missing guards, e.g. dis- charge flap and/or grass catcher, housing, etc.
- Page 9 • Do not adjust the cutting height until the motor has been switched off and the cutter bar has come to a standstill. • Never open the discharge flap while the motor is running. • Before removing the grass catcher, switch the motor off and wait until the cutter bar has come to a standstill.
- Page 10 • Never use the charger if cable, plug or the unit itself has been damaged by external influences. Take the charger to the nearest service centre. • Never open the battery charger. If the battery charger is defective, take it to a service centre.
- Page 11 OVERVIEW Upper handle Switch interlock Handle knob and bolt Handrail Lower handle On/Off Lever 10. Lever nut Grass catcher Battery Safety key (beneath battery cover) Wheels...
- Page 12 INSTRUCTION Before initial operation Unpack the lawn mower and accessories and check that no parts are missing or damaged. Note: The batteries are not fully charged on delivery. Prior to initial operation, charge the batteries fully. Refer to user guide supplied with battery and charger. Safety key The lawn mower is equipped with a safety key, located under the battery cover.
- Page 13 ASSEMBLY WARNING! Ensure the safety key is removed while assembling / working on the Attaching the handlebar CAUTION! When collapsing or unfolding the handlebar, the cable may be damaged. Ensure that the cable is not kinked. Step 1: Unfold the upper handlebar upwards (1) and tighten the knobs between the upper and lower handlebars as shown below.
- Page 14 Step 2: Insert the lower handle into the slot (2). Align the holes on the handlebar and the machine. Insert the bolts through the holes and tighten up (3, 4). Step 3: Attach the cable with the two cable clamps.
- Page 15 Assembling the grass catcher Step 1: Insert the two lower parts together until it clicks into place (1). Fix the two screws to secure (2). Step 2: Place the upper part and press it together until it clicks into place (3).
- Page 16 Attaching the grass catcher Lift the discharge flap (1) Hook the grass catcher bag into the lawn- mower (2) Fold the discharge flap down again (3) Adjusting the cutting height The cutting height can be varied in 5 steps, from 25 mm (level 1) to 75 mm (level 5). To adjust the height: Pull the handle outwards slightly.
- Page 17 Inserting/replacing the battery Steps for charging the battery are covered in the charger’s supplied user guide. To fit or remove the battery, see below: • Open the battery cover (1) • Press the charged battery into the lawn mower until it clicks into place (2) •...
-
Page 18: Operation
OPERATION Switching power tool on • Press the switch interlock and hold down (1). • Pull back the on/off lever towards the handlebar (2): the motor will start. Switching power tool off • Release the On/Off lever: the motor will stop. WARNING: After releasing the on/off lever, the cutter bar will continue running briefly. - Page 19 Battery charge level Press the button to check the battery charge indicator LEDs. The indicator will go out after 3 seconds. If the LED flashes, this indicates the battery must be recharged. If the LED does not light up after the button is pressed and it has not run completely flat, the battery is faulty and must be replaced.
- Page 20 Working with the mulch plug When you need to mulch, simply detach the grass catcher and attach the mulch plug as illustrated. The grass will be discharged downwards. Tips on lawn care Here are some tips to help you keep your lawn looking healthy and ensure uniform growth: •...
-
Page 21: Cleaning And Care
CLEANING & CARE WARNING: Before performing any maintenance and cleaning work on the garden tool remove the battery. Sharp cutting tool! Wear protective gloves. Cleaning lawn mower: WARNING: Do not use water or liquid detergents. Whenever possible, always clean the unit directly after mowing. •... - Page 22 Repairs Check the unit for damage. Repairs may be carried out by an authorised customer service centre only. Storage Remove the safety key before storing. • Store the unit in a dry and frost-free place (10-25°C). • Store the battery and the unit separately. •...
-
Page 23: Specifications
SPECIFICATIONS Nominal voltage Battery type (EB20B) 2.0Ah Cutting width 370mm Cutting height 25-75mm Capacity grass catcher Idle speed 4000rpm Sound power level L 96dB(A) Weight (without battery) 14.5kg (according to “EPTA Procedure 01/2003”) Battery weight 0.7kg... - Page 24 Need more information? We hope that this user guide has given you the assistance needed for a simple set-up. For the most up-to-date guide for your product, as well as any additional assistance you may require, head online to help.kogan.com...
Need help?
Do you have a question about the CTMWR40V37A and is the answer not in the manual?
Questions and answers