Table of Contents
Advertisement
Quick Links
Advertisement
Table of Contents

Summary of Contents for Sharkoon SkillerPRO
- Page 1 Manual...
-
Page 2: Table Of Contents
9.3 WASD & Arrow keys Dear Customer, Congratulations and thank you for your purchase of this high-quality Sharkoon product. To ensure a long service life, and full functionality of the product, we recommend that you read this manual thoroughly. We hope you enjoy our product! SHARKOON Technologies ... -
Page 3: Features (Keyboard)
• SKILLER PRO • CD with software and PDF manual • 1 anti-slip pad Note: Should any of the above items be missing, please contact us immediately by E-mail or our customer service: support@sharkoon.com (Germany and Europe) support@sharkoon.com.tw (international) SKILLER PRO... -
Page 4: Keyboard Overview
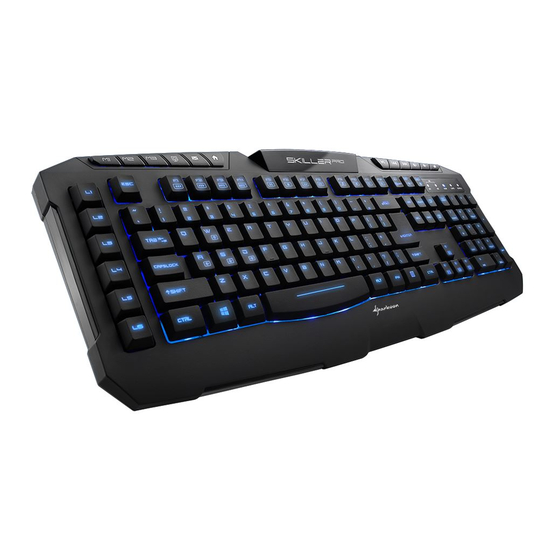
5. Keyboard Overview Multimedia keys US, UK, ES, CN or German layout Macro keys Palm rest Profile keys 5.1 Multimedia Keys Function key combinations Secondary Features FN+F1 Rewind FN+F2 Fast Forward FN+F3 Decrease report rate FN+F4 Increase report rate FN+F5 Play FN+F6 Stop... -
Page 5: Software Installation
2. Insert the provided Tools CD into your CD/DVD drive. 3. Open the CD/DVD drive (e.g. D:\) directory. 4. Open the folder “SHARKOON Skiller Pro”. 5. Start the “setup.exe” and follow the instructions on the installation agent until complete. ... - Page 6 SKILLER PRO...
-
Page 7: The Configurator
6. Once the installation is complete, the SKILLER PRO icon will appear on your Windows taskbar. 7. Congratulations, the software is successfully installed. 8. The Configurator 8.1 Starting the Configurator Start the application by double-clicking the SKILLER PRO icon in the icon taskbar. ... -
Page 8: Main Menu
8.2 Main Menu A -The SKILLER PRO offers three different profiles with the selection of tabs M1, M2, M3 ( see 8.3 ). B - Each key on the keyboard can be individually programmed (excluding multimedia keys) ( see 8.4 ). C - All profile settings reset the to default settings. -
Page 9: Profiles
8.3 Profiles The M1, M2 and M3 keys can be assigned different profiles. The profiles are independent from each other, therefore, each profile can be assigned different profiles. (If a profile is active, the Windows key is automatically disabled) 8.4 Key Programming Each key can be individually programmed, for this, proceed as follows: Choose the key you wish to program by selecting it in the configuration using the left-click on the mouse. -
Page 10: Macro Settings
8.5 Macro Settings E - Through the Macro Setting, various macros can be created in the Macro Manager. To edit, select one of the fields from L1 to L6 by using the left mouse button. The selection menu window opens. ... -
Page 11: Macro Assignments
Here you have possibility through the various options to assign your personal preferences. 8.5.1 Macro Assignments When selecting Macro Manager, the Record Options field will appear. Here you can summarize key tasks. SKILLER PRO... -
Page 12: Multimedia
8.5.2 Multimedia Each key can be assigned a media function within the configurator: Select a “media hotkey” via multimedia The choices (mute switch, volume loud/quiet) will be stored on the selected L-key after being saved. SKILLER PRO... -
Page 13: Windows Keys
8.5.3 Windows functions Each L-key can be assigned a Windows function in the configurator. Select from the menu the desired function (calculator, search function, email client, etc.) 8.5.4 Standard Here you can reset the keys back to their original functions. ... -
Page 14: Assign Shortcuts
8.5.5 Assign Shortcut Within this option you can assign a shortcut. 8.5.6 Key Off This key has no function. SKILLER PRO... -
Page 15: Advanced Settings
8.6 Advanced Settings F - Here the following adjustments can be made: • Polling Rate settings: 125Hz, 250Hz, 500Hz or 1000Hz • Turn Windows key on or off • Set Key Response time (1ms – 16ms) • Illuminating the keyboard (The Illumination can also be changed without the software by pressing the FN + Scroll keys.) ... -
Page 16: Functions Without The Software
9. Functions without the Software 9.1 Illuminate Key combination FN + Scroll will adjust the lighting. (10%-100%), Pulsate, Off 9.2 Standard Mode With the key combination FN + OFF key your keyboard will operate in standard mode. In this mode the Windows key is functional. The profiles M1, M2, M3 are disabled. 9.3 WASD &... -
Page 17: Legal Disclaimer
All named products and descriptions are trademarks and/or registered trademarks of the respective manufacturers and are accepted as protected. As a continuing policy of product improvement at SHARKOON, the design and specifications are subject to change without prior notice. National product specifications may vary.


Need help?
Do you have a question about the SkillerPRO and is the answer not in the manual?
Questions and answers