Table of Contents

Subscribe to Our Youtube Channel
Related Manuals for Sharkoon Skiller


Summary of Contents for Sharkoon Skiller
- Page 1 Manual...
-
Page 2: Table Of Contents
8.5 The profiles 8.6 The “Advanced“ menu Dear customer! Congratulations for purchasing one premium quality SHARKOON product. For a long life time and to take full advantage of this product we recommend that you read this manual completely. Have a good time with our product! SHARKOON Technologies ... -
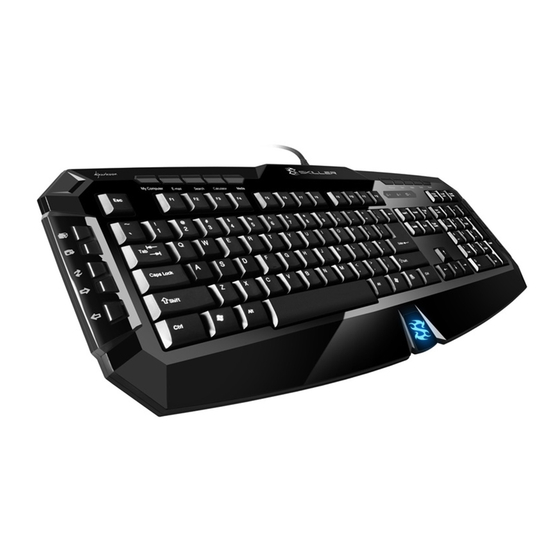
Page 3: Features (Keyboard)
Operating temperature 0°C ~ +50°C Storage temperature -22°C ~ +65°C 4. Package contents • “Skiller” Gaming and multimedia keyboard • 8 additional rubberized gaming keys • CD with customization software and PDF manual Note: If you are missing any of the items listed above, please contact our customer service immediately: support@sharkoon.com (Germany and Europe) -
Page 4: The Keyboard At A Glance
3. Open the CD/DVD drive’s folder (e.g. D:). 4. Open the folder “SHARKOON Skiller“. 5. Start “Skiller.exe“ and follow the instructions of the installation wizard. 6. After completing the installation process the following icon will appear on your desktop and in the task bar: 7. -
Page 5: The Configurator
C – Via this button the current layer can be reset to factory default. D – Profiles: The Skiller can be assigned up to ten different profiles. With every different program/ application an individual keyboard layout can be configured (see 8.5). -
Page 6: Programming The Keys
1. Select “Single key” from the dropdown menu (see 8.3). The following window will appear: 2. Press the key, which will then be assigned to the selected key. 3. Click “OK” to confirm your selection or “Cancel” to discard it. skiller... -
Page 7: Macro Manager
1. Select “Mouse Button” from the dropdown menu (see 8.3). The following window will appear: 2. Select the desired mouse button/function, which shall be assigned to the selected key. 3. Click “OK” to confirm your selection or “Cancel” to discard it. skiller... -
Page 8: Internet Functions
2. Select the desired Internet function. 8.3.5 Office functions Each key can be assigned an Office function using the configurator: 1. Select “Office Hot Keys” from the dropdown menu (see 8.3). The following window will appear: 2. Select the desired Office function. skiller... -
Page 9: Media Functions
2. Select the desired media function. 8.3.7 Additional commands Each key can be assigned an additional command using the configurator: 1. Select “Additional Commands” from the dropdown menu (see 8.3). The following window will appear: 2. Select the desired command. skiller... -
Page 10: Profile Switch
1. Select “Profile Switch” from the dropdown menu (see 8.3). The following window will appear: 2. Enter the program name under “Shortcut Name”. 3. “Browse” to select the desired, installed program. 4. Click “OK” to confirm your selection or “Cancel” to discard it. skiller... -
Page 11: The Layers
A – Selection of the key combination, which is used to toggle through the media players listed under B. B – List of media programs, the configurator supports (Windows Media Player, iTunes, Real Player, Winamp). C – Software update. skiller... -
Page 12: Legal Disclaimer
All named products and descriptions are trademarks and/or registered trademarks of the respective manufacturers and are accepted as protected. As a continuing policy of product improvement at SHARKOON, the design and specifications are subject to change without prior notice. National product specifications may vary.
Need help?
Do you have a question about the Skiller and is the answer not in the manual?
Questions and answers