Table of Contents
Advertisement
TR35 OWNER'S MANUAL CONTENTS
1. INTRODUCTION ................................................................................ 2
2. SAFETY PRECAUTIONS ..................................................................
3. LIST OF PARTS .................................................................................
4. ASSEMBLE THE PRODUCT .............................................................
STEP 1 Inspect the Walk Belt Position ..................................................
STEP 2 Install the Pedestals .................................................................
STEP 3 Install the Short Handrails ........................................................
STEP 4 Install the Display ..................................................................... 10
STEP 5 Move the Treadmill into Place for Use ..................................... 11
STEP 6 Level the Treadmill ................................................................... 11
STEP 7 Align the Walk Belt ................................................................... 12
STEP 8 Adjust the Walk Belt Tension .................................................... 12
STEP 9 Install the Power Cord ............................................................... 13
STEP 10 Safety Key Installation and Use .............................................. 13
5. UNDERSTAND THE TR35 DISPLAY ................................................ 14
DISPLAY Overview ................................................................................ 14
DISPLAY Windows ................................................................................. 14
DISPLAY Keys ....................................................................................... 15
6. OPERATE THE TR32 TREADMILL ................................................... 17
OPERATION QUICK START Mode ....................................................... 17
OPERATION START Mode .................................................................... 17
OPERATION Workout Mode .................................................................. 18
OPERATION Cool Down ........................................................................ 19
OPERATION Programs .......................................................................... 19
OPERATION Basic Settings .................................................................. 22
OPERATION Error Messages ................................................................ 22
7. ABOUT HEART RATE DETECTION .................................................. 23
HEART RATE Telemetry ........................................................................ 23
HEART RATE Contact ........................................................................... 23
8. GUIDELINES FOR EXERCISE ......................................................... 24
9. MAINTENANCE ...............................................................................
MAINTENANCE How to Replace a Fuse ............................................... 25
MAINTENANCE Walk Belt Lubrication .................................................. 26
MAINTENANCE Schedule ..................................................................... 29
MAINTENANCE Task List ..................................................................... 30
MAINTENANCE One-Year Maintenance Log ........................................ 31
MAINTENANCE Electronics Block Diagram .......................................... 32
10. CONSIGNES DE SÉCURITÉ IMPORTANTES ............................... 33
3
5
7
7
9
9
25
Advertisement
Table of Contents

Related Manuals for SportsArt Fitness TR35


Summary of Contents for SportsArt Fitness TR35
-
Page 1: Table Of Contents
STEP 8 Adjust the Walk Belt Tension ............ 12 STEP 9 Install the Power Cord ............... 13 STEP 10 Safety Key Installation and Use ..........13 5. UNDERSTAND THE TR35 DISPLAY ..........14 DISPLAY Overview ................14 DISPLAY Windows ................. 14 DISPLAY Keys .................. -
Page 2: Introduction
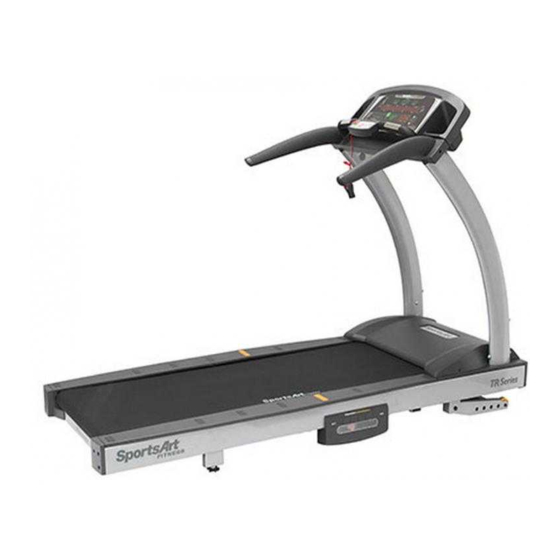
1. INTRODUCTION Congratulations on the purchase of a high quality SportsArt product, the TR35 treadmill. Constructed of high quality materials and designed for years of reliable performance, this product was made for home use. Before this product is assembled or operated, we recommend that you familiarize yourself with this manual. -
Page 3: Safety Precautions
2. SAFETY PRECAUTIONS This product was designed and built for optimum safety. However certain precau- tions apply during the use of this product. Please note the following safety precautions: • Please read the entire manual before assembly and operation. Make sure the product is installed and operated as instructed in this manual. - Page 4 2. SAFETY PRECAUTIONS (CONTINUED) Note: This equipment has been tested and found to comply with the limits for a Class B digital device, pursuant to part 15 of the FCC Rules. These limits are designed to provide reasonable protection against harmful interference in a residential instal- lation.
-
Page 5: List Of Parts
3. LIST OF PARTS Assembly Parts No. Name Qty. No. Name Qty. Display console Frame A1a Left short handrail Power cord A1b Right short handrail Hardware kit Left pedestal Lubrication kit Right pedestal HyperGlide™ Lubricant Components on the Product Name Specifi... - Page 6 Components in the Hardware Kit Name Qty. Specifi cation Notes Inner hex screw M8*L50 Spring washer M8*t2.0 Serrated washer D18*d8.5*t2.0*19T Safety key 15A-100V~110V Fuse 10A-200V-240V L-shaped Allen wrench L-shaped Allen wrench L-shaped Allen wrench T-shaped Allen wrench Screwdriver handle Green Screwdriver shank Phillips and fl...
-
Page 7: Assemble The Product
4. ASSEMBLE THE PRODUCT Follow instructions below to assemble this product. Note that in this manual the words “left” and “right” are used to refer to the product and its parts. As such, these designations correspond to the “left” and “right” sides of a person in position to exercise on this product. - Page 8 STEP 2 Install Pedestals Please install left and right pedestals by following instructions (a) through (e) in order. (a) Remove screws (41, 42) from the pedestal mount area. (b) Cut the zip tie that secures the data cable onto the right pedestal mount.
-
Page 9: Step 2 Install The Pedestals
STEP 2 Install Pedestals (Continued) (e) Once the data cable has been threaded through the right pedestal (A3), lift the pedestal and set it into place on the right pedestal mount. Avoid pinching the data cable. Loosely secure screws (41, 42) into the right pedestal mount. -
Page 10: Step 4 Install The Display
STEP 4 Install the Display Please follow instructions (a) through (c) to install the display console onto the pedestals. (a) First, re- move screws (41, 42) from underneath the display console (A1). (b) Connect the data cable on the right side as shown. -
Page 11: Step 5 Move The Treadmill Into Place For Use
STEP 5 Move the Treadmill into Place for Use Grip the bar in area A. Lift the back of the treadmill and push. Use the transport wheels to roll the treadmill into place. STEP 6 Level the Treadmill Press down on the treadmill as shown. Does the treadmill wobble? If so, level the treadmill as follows:... -
Page 12: Step 7 Align The Walk Belt
STEP 7 Align the Walk Belt There should be an equal amount of space on both sides of the walk belt. If there is more space on one side than the other, please align the walk belt as follows. On the side with less space be- tween the walk belt and the landing strip, turn the rear... -
Page 13: Step 9 Install The Power Cord
STEP 9 Install the Power Cord Install the power cord as follows: (a) Remove screws from the power cord connector on the product. (b) Insert the power cord into the connector. (c) Secure screws (44) through the metal bracket on the end of the power cord (A5). -
Page 14: Understand The Tr35 Display
5. UNDERSTAND THE TR35 DISPLAY DISPLAY Overview The TR35 display was designed to help people obtain their fitness goals simply and conveniently. Please familiarize yourself with the features of this display and thereby get optimum benefit and enjoyment from this product. -
Page 15: Display Keys
DISPLAY Windows (Continued) The dot matrix/workout illustration window shows workout illustrations and prompts. The exercise feedback window shows exercise information. Press the CHANGE DISPLAY key to toggle between upper and lower rows of workout information. The CardioAdvisor™ system features actual heart rate (center) and opti- mum target heart rates for weight loss (left) and cardio conditioning (right). - Page 16 DISPLAY Keys (Continued) RANDOM – Each time this key is pressed a different, randomly generated workout illustration will appear. HILL – Press this key to toggle between three hill workouts: HILL 1→ HILL 2→ HILL 3 → HILL 1→…. MANUAL – Press this key to manually control workout and speed settings. ZONE TRAINER –...
-
Page 17: Operate The Tr32 Treadmill
To activate the START mode, carry out the following steps. At the start- up screen, when “SPORTSART—TR35” appears on the display, press the START key. The previous user’s ID (USER 1, 2, 3 or 4) and accumulated val- ues for calorie, time, and distance will appear on the display. -
Page 18: Operation Workout Mode
OPERATION START Mode (Continued) To delete a user name, enter the revision process explained above and hold the CLEAR key for three seconds. The user name will be cleared from mem- ory, and the original user ID number will appear. Age setting After you establish the user ID number or name, “AGE-X”... -
Page 19: Operation Cool Down
OPERATION Cool Down After you obtain your workout goal (time or distance), the message “COOL DOWN” will appear on the exercise feedback window, and the treadmill will enter a cool down mode. Speed and incline will return to zero. When the cool down mode ends, “SELECT PROGRAM”... - Page 20 OPERATION Programs (Continued) After entering the rest segment incline setting, you are prompted to en- ter the rest segment speed setting. “ENTER REST SPEED”→”SPEED – xx.xMPH(KPH)” will appear on the display. Press the INCLINE▲/▼ key to select a rest segment speed value. Then press the ENTER key to confirm your choice.
- Page 21 OPERATION Programs (Continued) GLUTE GLUTE workouts exercise the glute muscles. Each time the GLUTE key is pressed, one of two glute workouts, GLUTE 30 and GLUTE 40, will appear. GLUTE 30 is a 30-minute workout. GLUTE 45 is a 45-minute workout. PERSONAL TRAINER The PERSONAL TRAINER program helps to plan and record workouts.
-
Page 22: Operation Basic Settings
Basic Settings Basic settings allow you to select distance and speed units of measurement. To change these settings, at startup, as “SPORTSART--TR35” appears on the display, press and hold the CHANGE key for three seconds. Then press INCLINE▲/▼ key to select either kph or mph. -
Page 23: About Heart Rate Detection
7. ABOUT HEART RATE DETECTION Heart rate detection functions are selected at the time of purchase. Not every product includes every type of heart rate detection. The following explains factors that infl uence the performance of two of the most common types of heart rate detection devices. -
Page 24: Guidelines For Exercise
CAUTION: Heart rate detection and transmission devices have been known to interfere with the operation of pacemakers, possibly endangering human life. If you have a pacemaker, exercise under your doctor’s supervision; take a test to ensure your safety during the simultaneous use of the pacemaker and heart rate detection devices. -
Page 25: Maintenance
9. MAINTENANCE Maintenance topics are presented below in the following order: fuse replacement, walk belt lubrication, maintenance schedule, maintenance task list, one-year maintenance log, and electronics block diagram. MAINTENANCE Replacing the Fuse When electrical current becomes excessive, the fuse will break to protect the product. -
Page 26: Maintenance Walk Belt Lubrication
MAINTENANCE Walk Belt Lubrication Periodic maintenance is crucial to the performance of fitness equipment, just like it is to the performance of an automobile. The better you maintain a product, the longer it will serve your needs. This treadmill requires periodic lubrication of the walk belt and has a built-in system to prevent overuse with- out maintenance. - Page 27 MAINTENANCE Walk Belt Lubrication (Continued) 4. Insert the applicator tube until the line on its side touches the side of the walk belt. 5. Apply 50 cc from the bottle of HyperGlide™ liquid lubricant. 6. To allow the lubricant to disperse, hold the bottle and the applicator tube in place while the walk belt rotates slowly for two or three minutes.
- Page 28 Lubricating When Not Prompted The physical task of lubricating the treadmill can be done at any time. When the startup banner, SPORTSART-TR35, is displayed, simultaneously press and hold INCLINE▲+ INCLINE▼+ 0 keys for two seconds. Once the treadmill enters lubrication mode, the motor will operate at low speed, allowing you to lubricate the walk belt.
-
Page 29: Maintenance Schedule
MAINTENANCE Schedule Area Week Month Quarter Year Notes Exterior Clean. Screws Inspect and secure loose parts. Walk belt Inspect alignment (centering) and look for wear. Walk deck Inspect for wear. Belt guides Inspect for normal rotation. Front roller Inspect for normal rotation. -
Page 30: Maintenance Task List
MAINTENANCE Task List Like cars, fitness products require maintenance. Regular maintenance ex- tends product life, and failure to maintain products can void the manufac- turer’s warranty. Copy the maintenance log sheet, and record maintenance work for each fitness product. Daily tasks 1. -
Page 31: Maintenance One-Year Maintenance Log
MAINTENANCE One-Year Maintenance Log Facility:_______________________ Supervisor:____________________ Product model number:__________ Serial number:_________________ Start date: ____________________ End date:_____________________ Daily Tasks Weeks 1-7 Weeks 8-14 Weeks 15-21 Week 22-28 Completed Daily Tasks Week 29-35 Week 36-42 Week 43-49 Week 50-52 Completed Weekly Tasks Weeks 1-7 Weeks 8-14 Weeks 15-21 Weeks 22-28... -
Page 32: Maintenance Electronics Block Diagram
Polar board CON3 CON4 CON1 CON5 TR33 CTL board TR33 keyboard HTR board CON4 CON2 CON3 CON5 CON7 TR35 DRV board Transformer Incline sensor CON1 Incline motor Cushion motor Contact heart rate CON6 CON8 Connector Converge L1 L2 Optic sensor... -
Page 33: Consignes De Sécurité Importantes
10. CONSIGNES DE SÉCURITÉ IMPORTANTES Votre tapis de course SportsArt a été conçu et fabriqué afin d’assurer une sécurité optimale. Cependant certaines précautions s’appliquent chaque fois que vous uti- lisez votre tapis de course. • Lisez entièrement le manuel avant l’assemblage et l’utilisation. Veuillez aussi noter les consignes de sécurité... - Page 34 • Pour éviter de vous blesser, restez sur les bandes de repos (barres latérales) avant de démarrer le tapis de course. • Ce tapis de course n’est pas destiné à être utilisé par des personnes (y com- pris des enfants) dont les capacités physiques, sensorielles ou mentales sont réduites ou qui ne disposent pas de l’expérience ou du savoir nécessaires, sauf si celles-ci ont au préalable été...
Need help?
Do you have a question about the TR35 and is the answer not in the manual?
Questions and answers