Table of Contents
Advertisement
Quick Links
Advertisement
Table of Contents

Summary of Contents for Polar Electro Loop
- Page 1 User Manual...
-
Page 2: Table Of Contents
Sync Your Data......................... 13 Follow Your Achievement....................13 5. POLAR FLOW MOBILE APP ....................... 15 Get the App and Pair Your Polar Loop ................... 15 Sync Your Data......................... 15 Know More About Your Activity .................... 15 Analyze Your Heart Rate Training ..................16 6. -
Page 3: Introduction
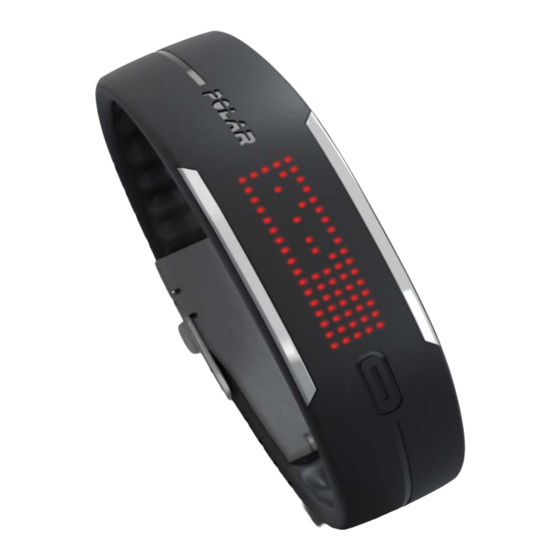
Overview Polar Loop keeps track of all your activity – every step and jump throughout the day - and shows how it's good for you. It'll reward you when you've done enough and help you move if there's still a bit missing from your daily activity goal. -
Page 4: What's In The Box
ENGLISH What's in the Box Box contents Polar Loop Buckle with spring bars (attached to Polar Loop) Buckle tool Extra spring bar Custom USB cable Getting started guide with measuring tool Introduction... -
Page 5: Get Started
Plug in Your Polar Loop Plug in your Polar Loop to your computer's USB port with the custom USB cable to wake it up. The Polar-branded magnetic end of the cable snaps into place when it's properly connected to your bracelet. -
Page 6: Customizing The Bracelet Size
Now, you can either charge your Polar Loop till it's full or unplug it and start customizing the bracelet size. You can also start using your Polar Loop right away if you want as long as you remember to charge it full later. - Page 7 ENGLISH Measure your wrist size. Separate the measuring tool from the getting started guide along the perforated line. Wrap it around your wrist snugly and take note of the numbers you get. There's one number for both ends. Each number represents the number of blocks between the grooves inside your bracelet you need to take off.
- Page 8 ENGLISH Put the buckle back on. Take one spring bar and place it inside the first hole at the end of the bracelet and put one end of the spring bar in the buckle’s spring bar hole. Use the tool to ease the other end of the spring bar inside the other spring bar hole in the buckle. Do the same on the other end of the band.
-
Page 9: Display
Wear Polar Loop on your wrist to make the touch button work properly. If you want to browse the display views without wearing the bracelet, touch the custom USB connector on the inside while tapping the touch button. - Page 10 Polar Loop displays the time remaining to reach your goal, if you do medium intensity activity. UP stands for low intensity activity up on your feet like cleaning, washing dishes, gardening, playing guitar, baking, playing pool, slow walk, playing darts or tai chi.
-
Page 11: Other Display Views
You can choose in which hand you want to wear your activity tracker either in the Polar Flow web service or the Polar Flow mobile app. The setting changes the orientation of the Polar Loop display accordingly. We recommend wearing the bracelet on your non-dominant hand to get the most accurate results. - Page 12 ENGLISH Go to Settings and Products. Choose your Polar Loop, Settings and change the handedness. The display orientation on your Polar Loop will change on the next synchronization. To change the display setting on the mobile app Go to Settings.
-
Page 13: Polar Flow Web Service
Polar Flow mobile app or via USB cable. Sync via Web Service Every time you plug in your Polar Loop with the Polar custom USB cable to your computer, the activity data is transferred to the web service via Polar FlowSync. - Page 14 ENGLISH Polar Flow diary view Polar Flow Web Service...
-
Page 15: Polar Flow Mobile App
(5th gen. or newer) with iOS 6 operating system and newer. Please note: to use Polar Loop with the Polar Flow mobile app, you need to set up the product with your computer. More information about the product setup see Get Started (page 5). -
Page 16: Analyze Your Heart Rate Training
ENGLISH Polar Flow app Analyze Your Heart Rate Training If you've used a heart rate sensor in your training sessions, you can also get a closer look at your training results on the go. Just select your training session you want to examine and you will see the heart rate curve with maximum and average heart rate, calories burned, as well as fat percentage of the calories burned. -
Page 17: Heart Rate Sensor
While you train with a heart rate sensor, you can't sync Polar Loop with the Polar Flow mobile app. You can sync your data after you've stopped the training session. -
Page 18: Stop The Training
ENGLISH In fat burn zone, training intensity is lower, and the source of energy is mainly fat. Therefore, fat burns efficiently and your metabolism, mainly fat oxidation, increases. FAT BURN In fitness zone, training intensity is higher and you are improving your cardiovascular fitness i.e. strengthening your heart and increasing blood circulation to muscles and lungs. -
Page 19: Important Information
Polar Loop has an internal, rechargable battery. Use the USB cable included in the product set to charge your Polar Loop via the USB connector on your computer. If you want to plug the USB connector to a wall outlet, use a USB power adapter (not included in the sales package). - Page 20 12 days of activity and 4 one hour training sessions 7 days of activity and 8 one hour training sessions. Communication Polar custom USB cable The Polar Loop end of the cable is magnetized: keep it away from credit cards and iron objects. Wireless Bluetooth Smart General Suitable for bathing and swimming.


Need help?
Do you have a question about the Loop and is the answer not in the manual?
Questions and answers